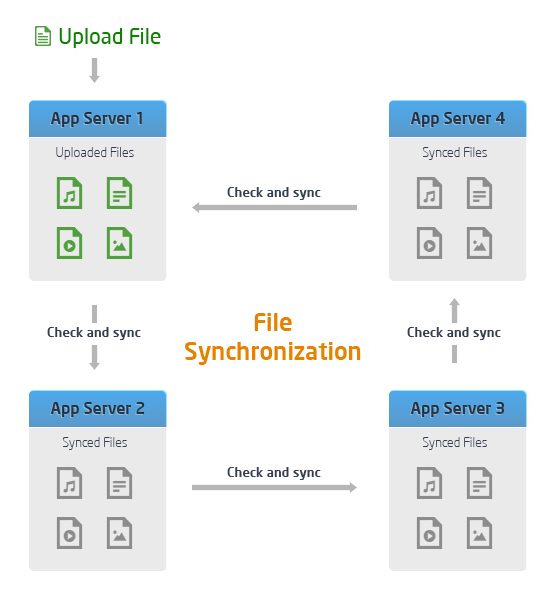
File synchronization between servers in a cluster
Hosting applications with high load and constantly growing traffic requires additional power and settings to handle a large flow of requests. The solution in this case can be the addition of servers to the environment to support the full functioning of the application.
As a result, you face another difficulty — a more complicated installation than using a single server. The main problem is that such applications as WordPress, Drupal, Joomla, Liferay, Redmine , etc. By default, all downloaded files are saved on one server only and do not synchronize them between servers in the cluster. In other words, only the server that processed the file download request will contain the new content.
Therefore, in today's article we will describe a possible solution to the problem of file synchronization , which is provided by the Jelastic platform.
')
At the moment, this is just a temporary solution that helps automate content synchronization across multiple application servers. In the future (after processing reviews) we are going to integrate this functionality into the core of the Jelastic system.
This solution is a combination of a bookmarklet and server side script. Basically, the server script is executed using a utility like lsyncd and crown.
Lsyncd is a lightweight solution for synchronizing application servers. In combination with inotify, lsyncd initiates file synchronization only when it detects actual changes in the system. As a result, you do not spend a lot of resources on synchronization and reduce the load on the CPU.
Using the bookmarklet, lsyncd is automatically installed on each application server in the environment. Before installation, the list of folders for synchronization is refined. As a result, any changes in the specified folders on one server will be automatically synchronized with the other servers.
Thus, this solution maximally simplifies the file synchronization system. Now let's take a look at how it works.
In our example, we will use WordPress deployed in a two-server environment. This instruction is also completely suitable for other PHP, Java or Ruby applications such as Drupal, Joomla, Liferay, Redmine and others.
1. Deploy the WordPress application manually or by using our JPS widget for installation in one click. The instructions and the widget can be found in the WordPress document .
2. Now let's create a cluster by increasing the number of servers in the environment.
Using the documentation, you can easily add additional application servers, enable high availability, or even configure a clustered solution:
In our case, we simply added another server to the environment. You can also use a more sophisticated cluster solution customization script for your WordPress application.
3. Click Open in browser in environment settings.

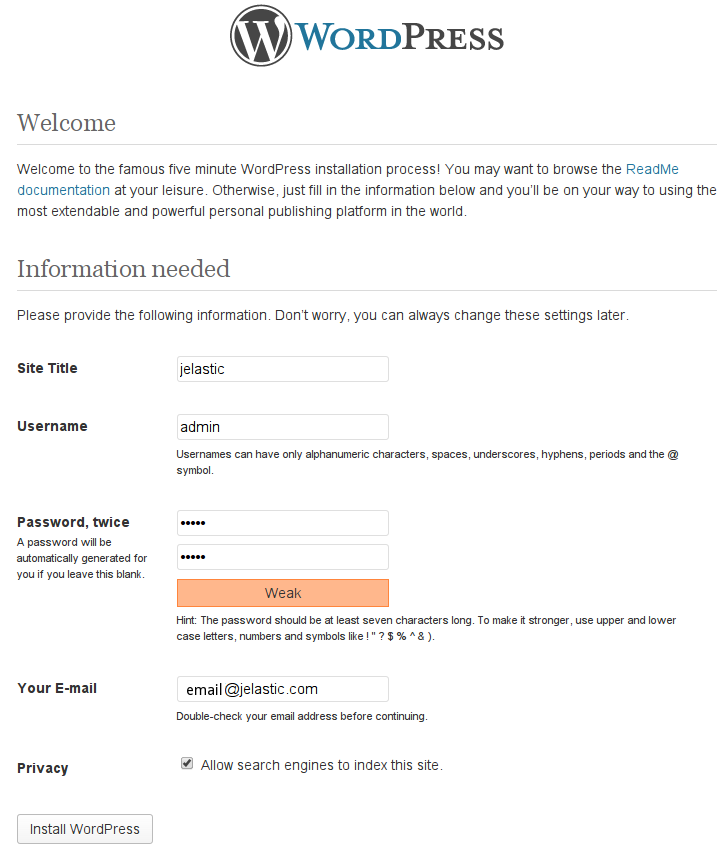
4. Enter the necessary information to complete the installation of WordPress .
Let's check the processing of downloaded files by the server without synchronization enabled.
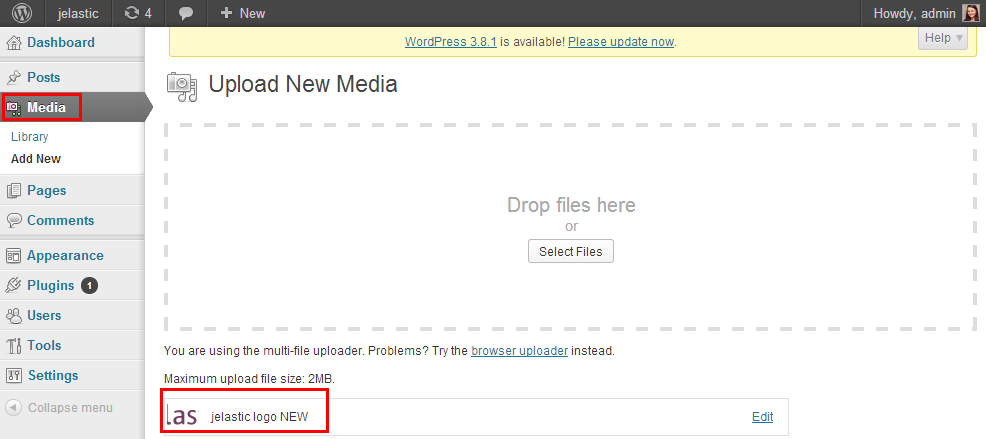
1. Go to the control panel and make changes: upload images or files, edit themes, etc. As an example, we uploaded one image to the Media section.
2. Return to the Jelastic control panel and click Configuration next to the server.

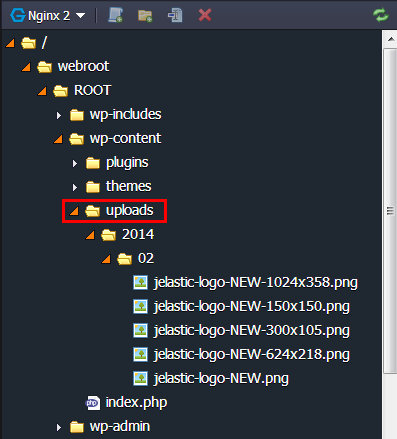
3. Navigate to the webroot> ROOT> wp-content folder.
There, on one of the application servers, a new uploads folder will appear, in which the added files are placed.
The folder for downloading files depends on the application that you host.
Below is a list of such folders for some popular applications:
WordPress : webroot / ROOT / wp-content
Drupal : webroot / ROOT / sites
Joomla : webroot / ROOT / images
Liferay : webroot / home / liferay / data
4. Please note that on the second server the uploads folder does not exist at all.
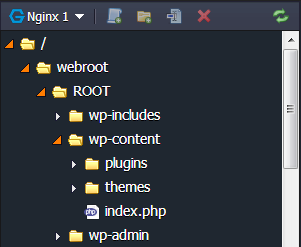
As we see, the added images are placed only on the server that performed the file download.
And now let's move on to solving the problem of file synchronization in a cluster.
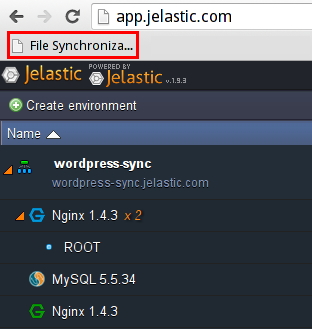
1. First of all, follow the link to our blog and drag the File synchronization bookmarklet to your browser's bookmarks bar as shown in the figure below (the bookmarklet is placed in the Apply File Synchronization paragraph).

2. Go to the Jelastic control panel and run the script by clicking File Synchronization on the bookmarks bar.
3. In the window that opens, select the environment with your application and select the folder (or several folders) that you want to synchronize. Click Install .
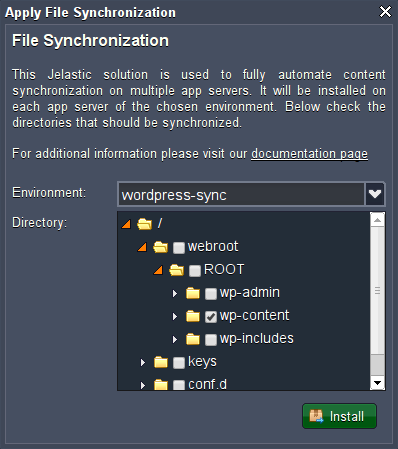
Do not select the entire webroot folder, in this case the synchronization will not work.
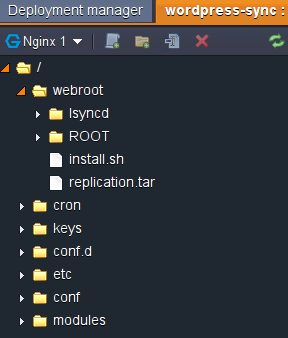
4. Wait a little (about 2 minutes) to apply the settings. First of all, the install.sh and replication.tar files and the lsyncd folder will appear on the servers.

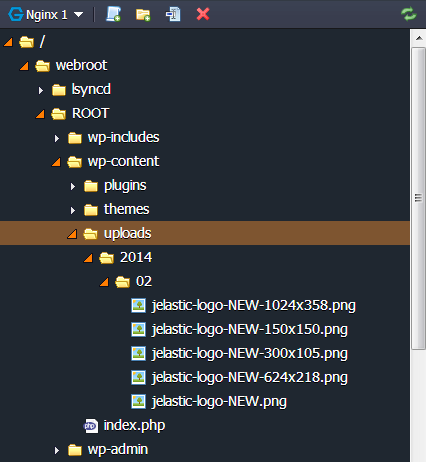
5. After that, check the webroot> ROOT> wp-content folder on all application servers.
As you can see, the previously uploaded image is located in the uploads folder on each node.
It's pretty simple. As a result, the synchronization will work automatically every time you add or change something in your WordPress (or any other) application.
If you change the environment topology by adding application servers, then you need to run the script again to provide synchronization for the new nodes.
1. Click Change Environment Topology .

2. Add additional servers and apply the changes.
3. Follow steps 2-4 in the Configure File Synchronization section to adjust the internal synchronization processes.
After the additional launch of the script, the previous settings will be reset and the new configurations selected this time will be applied.
The synchronization process can be monitored using logs.
1. Navigate to the webroot / lsyncd / var / log folder.
2. You can see the synchronization status in the lsyncd.log and lsyncd.status files .

We hope our decision will be useful. Feel free to download even more exciting content and attract more users!
Do you solve the synchronization problem differently? Please share your experiences in the comments below.
Lead Research Engineer,
Alexey Alexandrov
As a result, you face another difficulty — a more complicated installation than using a single server. The main problem is that such applications as WordPress, Drupal, Joomla, Liferay, Redmine , etc. By default, all downloaded files are saved on one server only and do not synchronize them between servers in the cluster. In other words, only the server that processed the file download request will contain the new content.
Therefore, in today's article we will describe a possible solution to the problem of file synchronization , which is provided by the Jelastic platform.
')
At the moment, this is just a temporary solution that helps automate content synchronization across multiple application servers. In the future (after processing reviews) we are going to integrate this functionality into the core of the Jelastic system.
This solution is a combination of a bookmarklet and server side script. Basically, the server script is executed using a utility like lsyncd and crown.
Lsyncd is a lightweight solution for synchronizing application servers. In combination with inotify, lsyncd initiates file synchronization only when it detects actual changes in the system. As a result, you do not spend a lot of resources on synchronization and reduce the load on the CPU.
Using the bookmarklet, lsyncd is automatically installed on each application server in the environment. Before installation, the list of folders for synchronization is refined. As a result, any changes in the specified folders on one server will be automatically synchronized with the other servers.
Thus, this solution maximally simplifies the file synchronization system. Now let's take a look at how it works.
In our example, we will use WordPress deployed in a two-server environment. This instruction is also completely suitable for other PHP, Java or Ruby applications such as Drupal, Joomla, Liferay, Redmine and others.
Application Installation
1. Deploy the WordPress application manually or by using our JPS widget for installation in one click. The instructions and the widget can be found in the WordPress document .
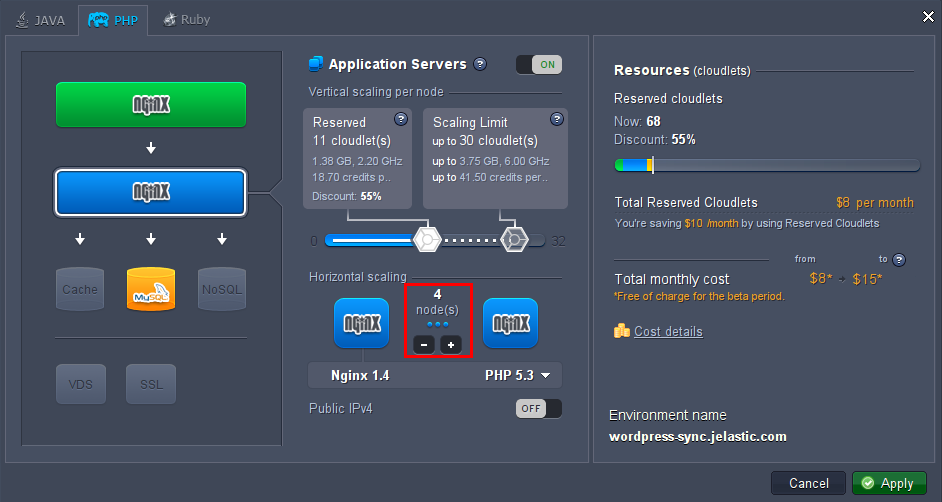
2. Now let's create a cluster by increasing the number of servers in the environment.
Using the documentation, you can easily add additional application servers, enable high availability, or even configure a clustered solution:
In our case, we simply added another server to the environment. You can also use a more sophisticated cluster solution customization script for your WordPress application.
3. Click Open in browser in environment settings.
4. Enter the necessary information to complete the installation of WordPress .
Testing file downloads without synchronization
Let's check the processing of downloaded files by the server without synchronization enabled.
1. Go to the control panel and make changes: upload images or files, edit themes, etc. As an example, we uploaded one image to the Media section.
2. Return to the Jelastic control panel and click Configuration next to the server.
3. Navigate to the webroot> ROOT> wp-content folder.
There, on one of the application servers, a new uploads folder will appear, in which the added files are placed.
The folder for downloading files depends on the application that you host.
Below is a list of such folders for some popular applications:
WordPress : webroot / ROOT / wp-content
Drupal : webroot / ROOT / sites
Joomla : webroot / ROOT / images
Liferay : webroot / home / liferay / data
4. Please note that on the second server the uploads folder does not exist at all.
As we see, the added images are placed only on the server that performed the file download.
File Sync Setup
And now let's move on to solving the problem of file synchronization in a cluster.
1. First of all, follow the link to our blog and drag the File synchronization bookmarklet to your browser's bookmarks bar as shown in the figure below (the bookmarklet is placed in the Apply File Synchronization paragraph).
2. Go to the Jelastic control panel and run the script by clicking File Synchronization on the bookmarks bar.
3. In the window that opens, select the environment with your application and select the folder (or several folders) that you want to synchronize. Click Install .
Do not select the entire webroot folder, in this case the synchronization will not work.
4. Wait a little (about 2 minutes) to apply the settings. First of all, the install.sh and replication.tar files and the lsyncd folder will appear on the servers.
5. After that, check the webroot> ROOT> wp-content folder on all application servers.
As you can see, the previously uploaded image is located in the uploads folder on each node.
It's pretty simple. As a result, the synchronization will work automatically every time you add or change something in your WordPress (or any other) application.
Saving synchronization when changing topology
If you change the environment topology by adding application servers, then you need to run the script again to provide synchronization for the new nodes.
1. Click Change Environment Topology .
2. Add additional servers and apply the changes.
3. Follow steps 2-4 in the Configure File Synchronization section to adjust the internal synchronization processes.
After the additional launch of the script, the previous settings will be reset and the new configurations selected this time will be applied.
Check logs
The synchronization process can be monitored using logs.
1. Navigate to the webroot / lsyncd / var / log folder.
2. You can see the synchronization status in the lsyncd.log and lsyncd.status files .
We hope our decision will be useful. Feel free to download even more exciting content and attract more users!
Do you solve the synchronization problem differently? Please share your experiences in the comments below.
Lead Research Engineer,
Alexey Alexandrov
Source: https://habr.com/ru/post/213001/
All Articles