Player from Playboy magazine (continuation of the epic)

Good day! I will begin with the fact that once a long time ago, namely in 2011, I acquired Playboy magazine, which included a page with video ads. I just want to make a reservation that this “project” was made only from sports interest and because of the free time in the evenings (the total traffic of the article is slightly less than 2Mb).

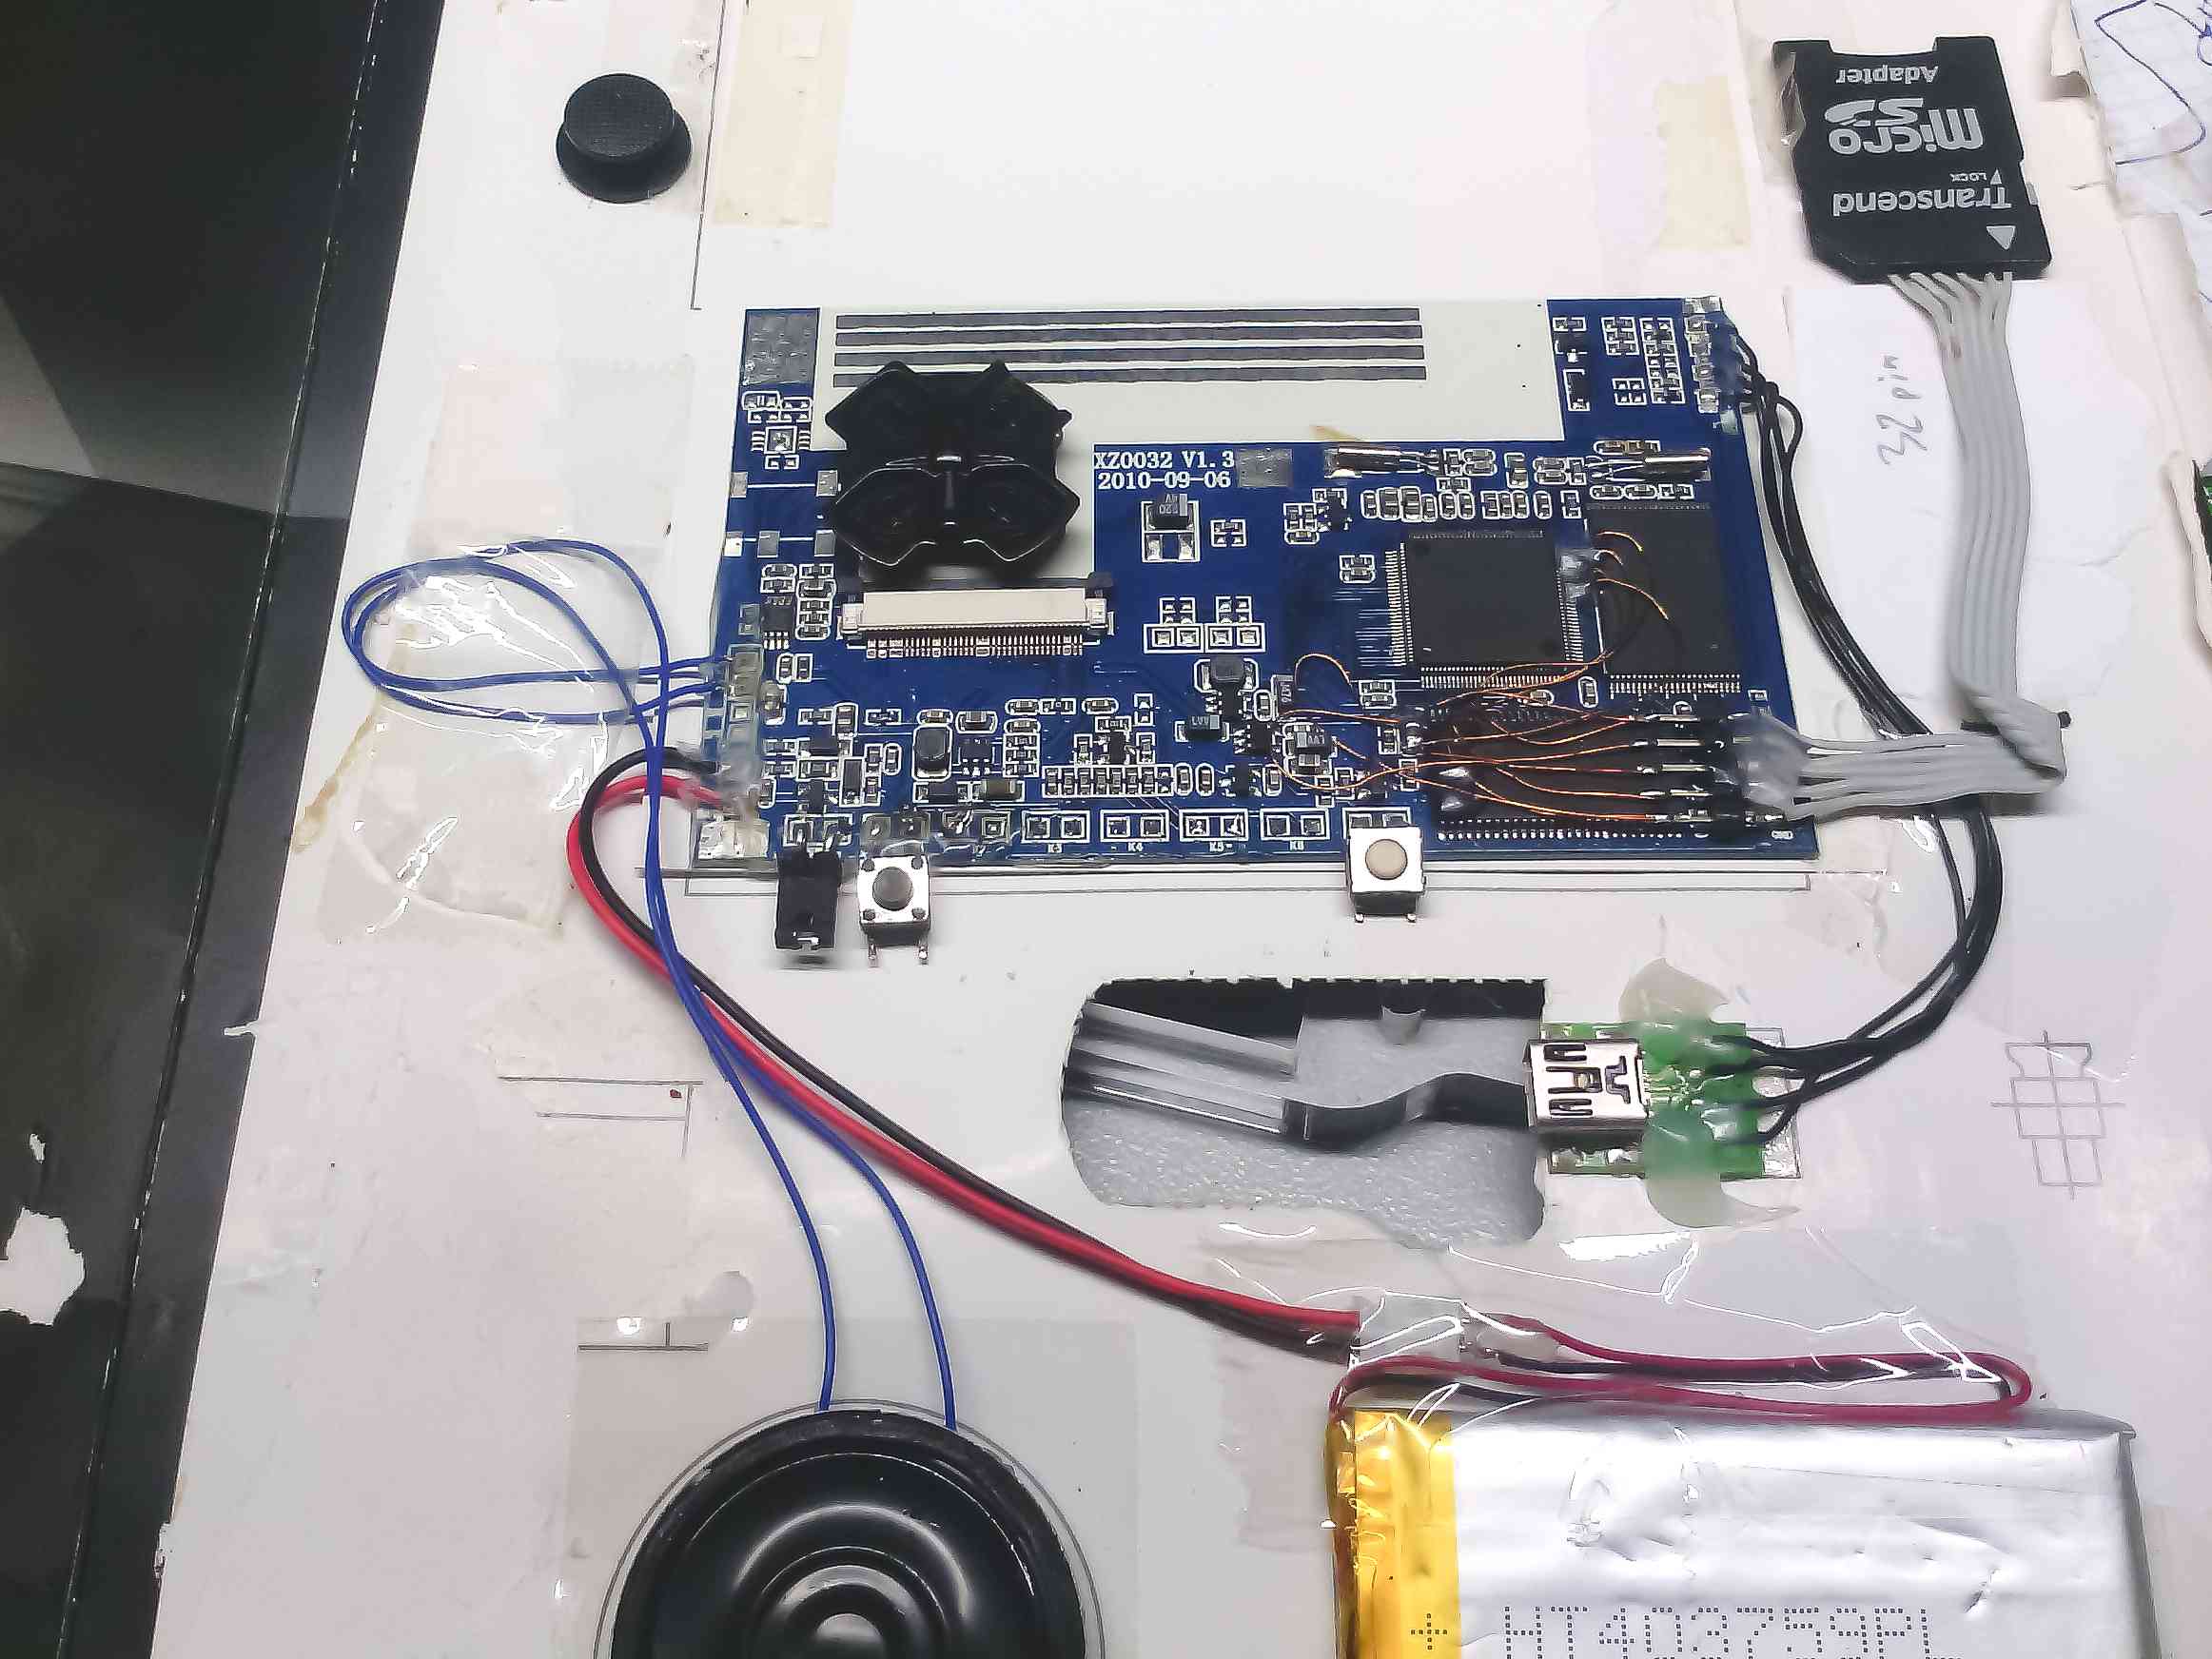
I will not dwell here in detail, this issue of the magazine is devoted not to one article on habr ( habrahabr.ru/post/119722 , habrahabr.ru/post/120156 ). After the onset of the new 2014, it was decided to do something with this device. Over the past few years, I only had enough time to flash my ready miniOS (minios-1.0.37-tronix from www.vogeeky.org ) into it, solder and reassign buttons — that was enough to play enough tanchiki (there are NES emulator). It was also ordered on ebay two cases for the PSP (according to the size of the board and the screen exactly entered into it).

Due to some design features of the “original” case for the PSP (too many internal partitions and stiffeners), it was decided to use only the front panel from it. The back cover came from the second Chinese copy. All the "guts" of the player continued to be glued to the page of the magazine, which was already quite frayed in connection with shifting from place to place.
The first thing I did was ordering 8 mm thick transparent plexiglass with the middle part of the body (we have enough plexiglass companies for laser cutting), putting all three parts together turned out pretty good and it was decided to continue.

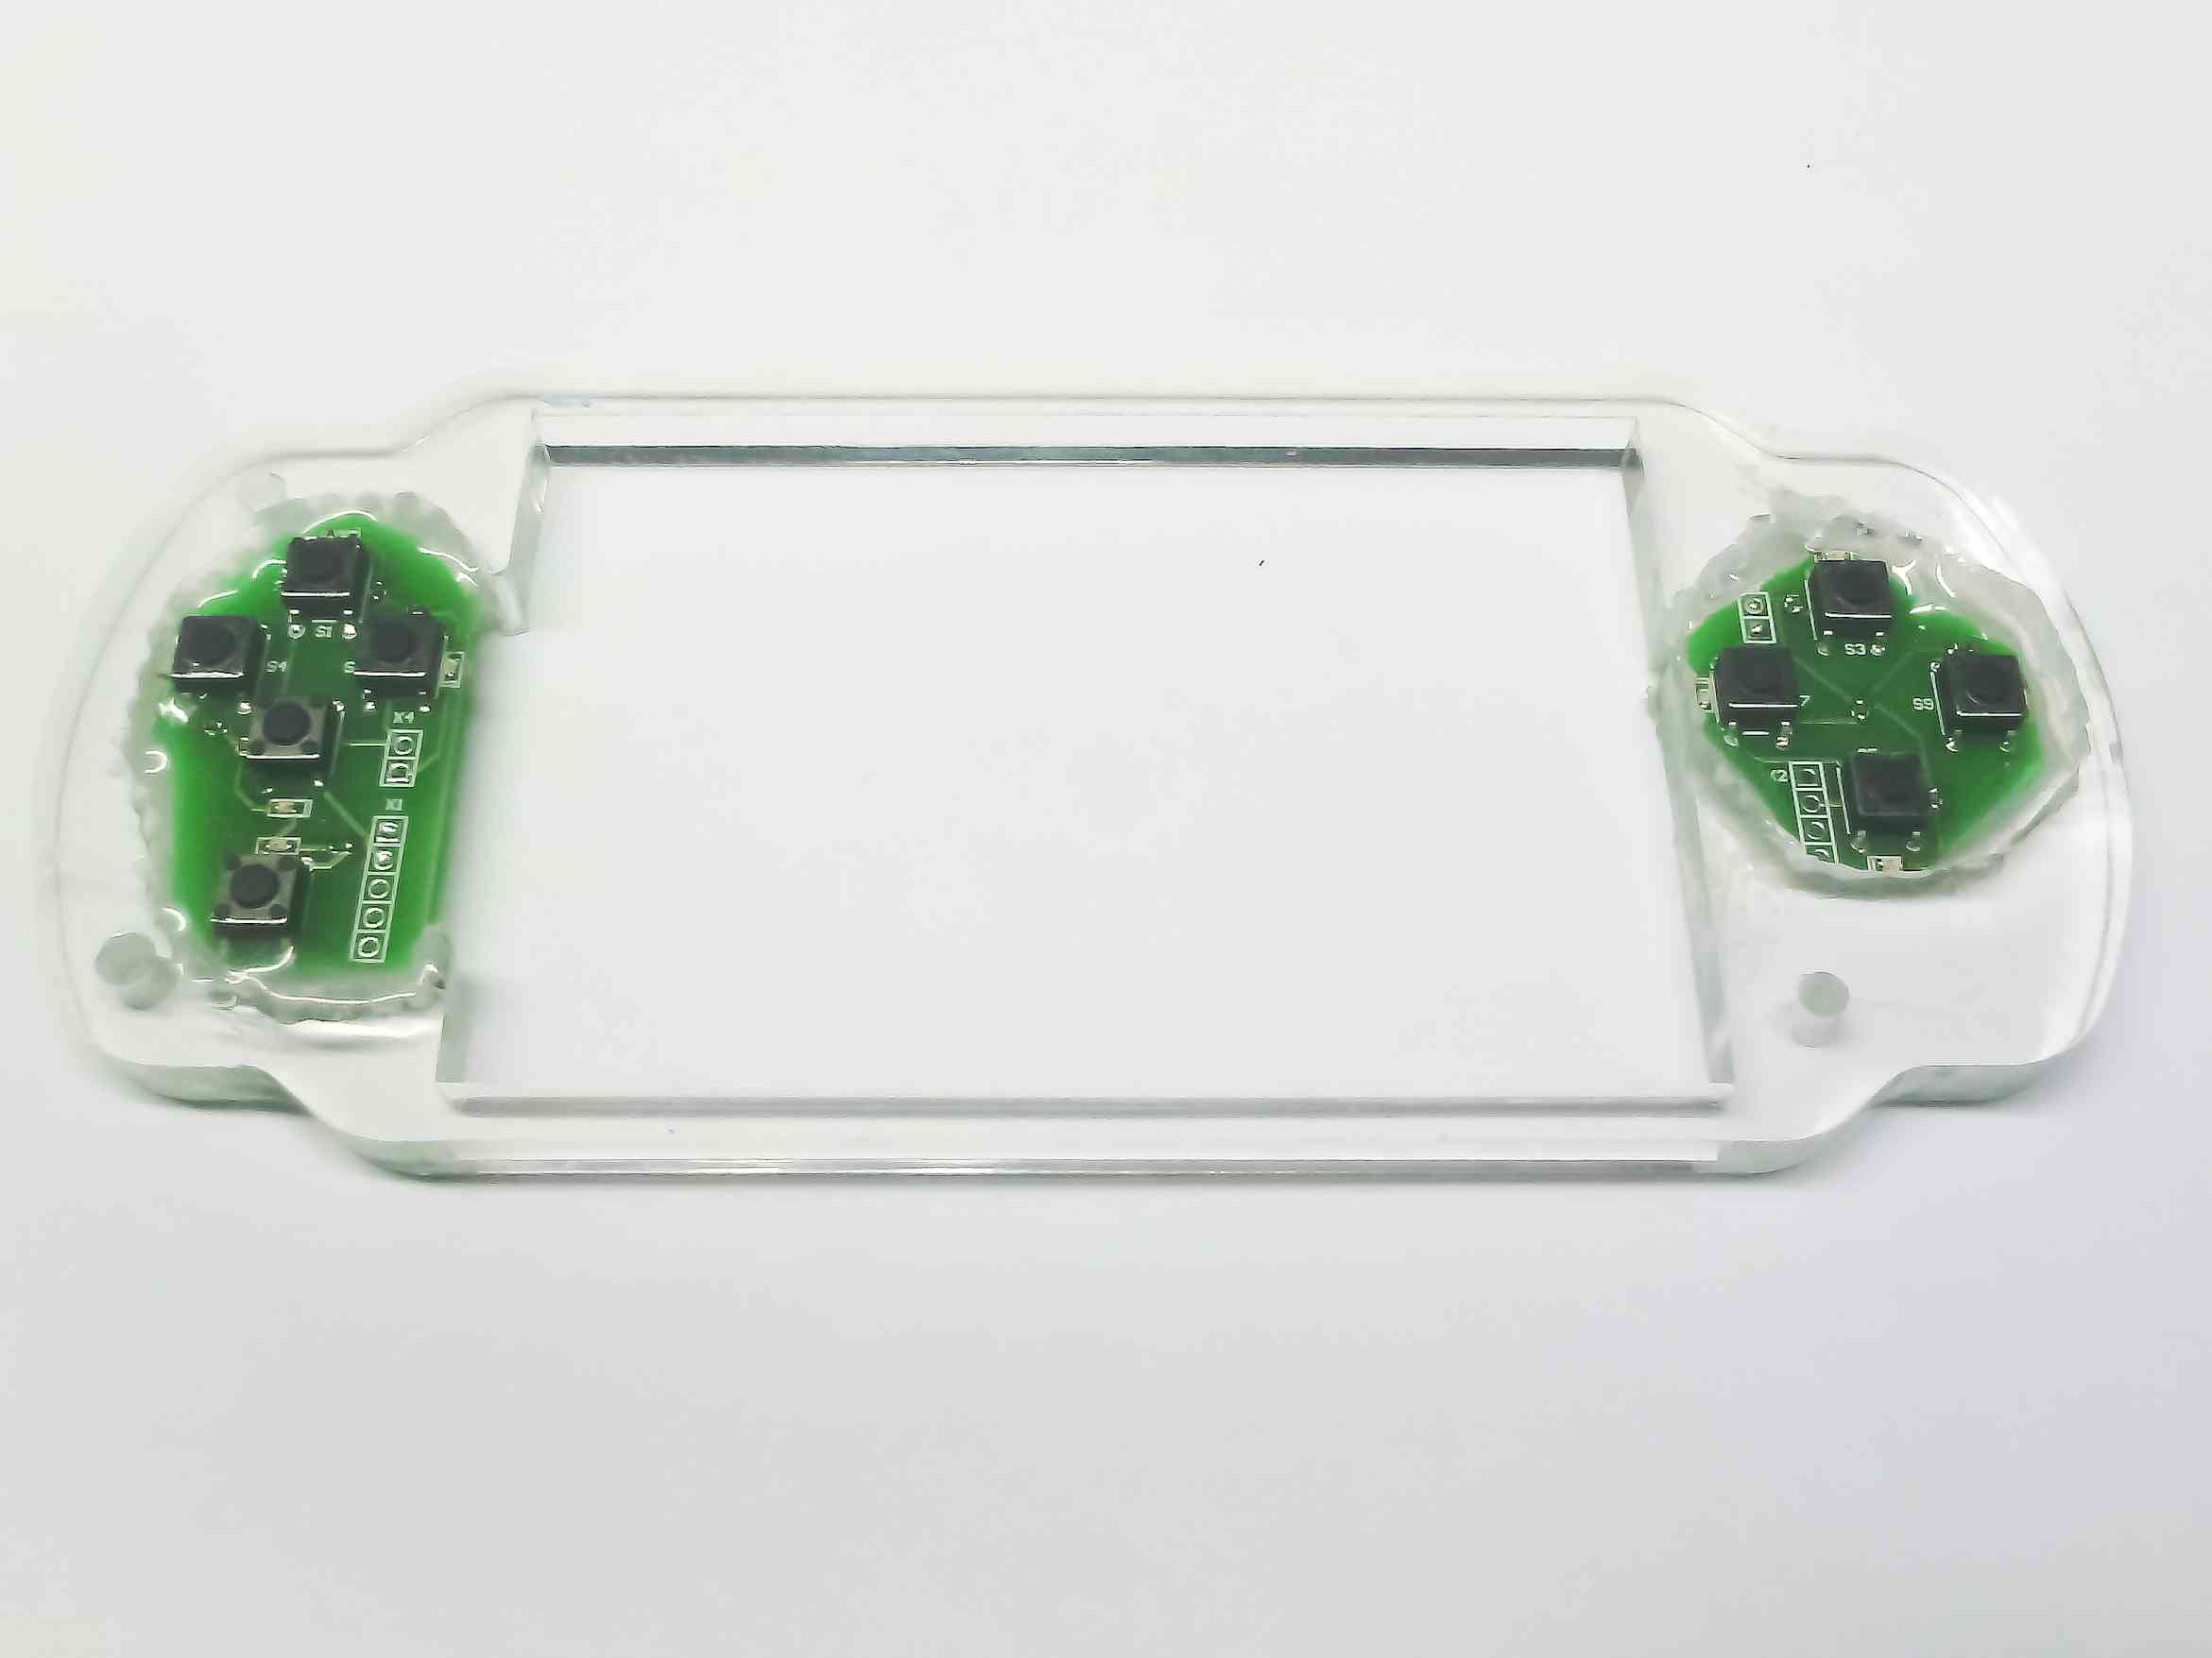
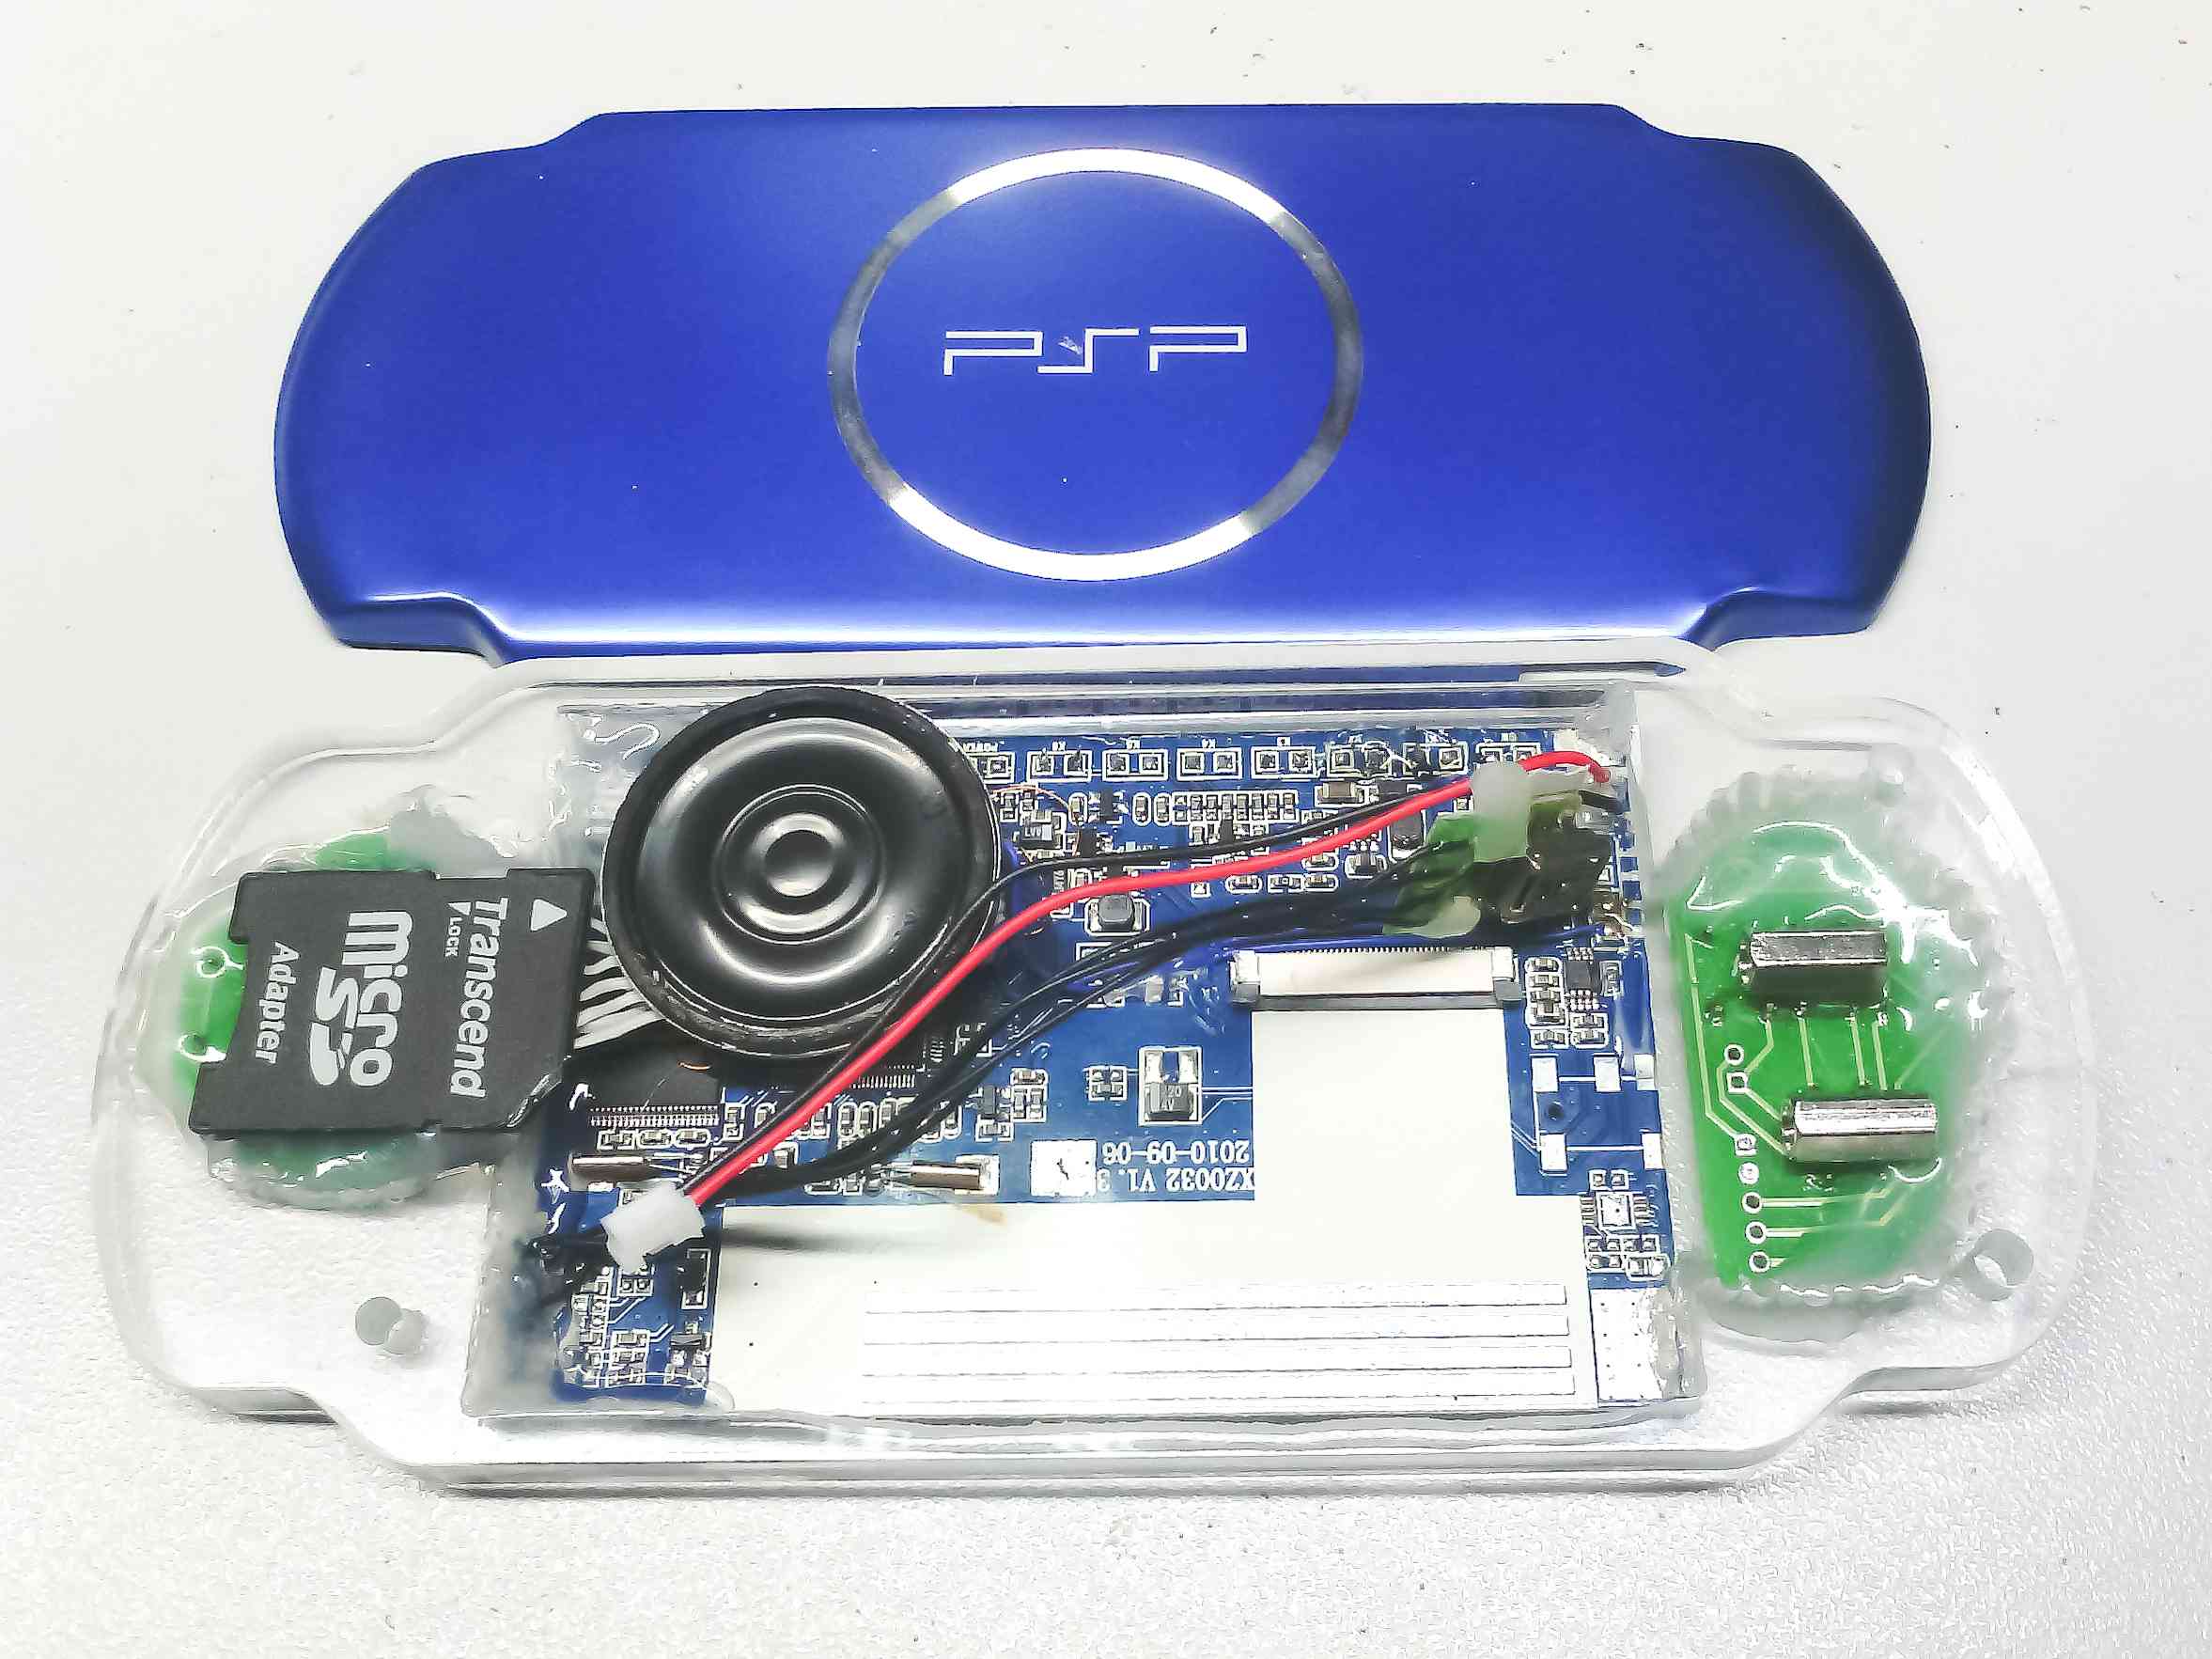
Boards of buttons were made in haste (they had to be “nibbled” with nippers, because they occupied too much space, you could immediately foresee the necessary configuration of the boards, but at that moment did not have enough). Boards pasted on hot melt, besides the latter did not regret and poured them all that is possible around the buttons. The holes of irregular shape were pre-drilled with a thin drill, then just broken. One button turned out to be unused (the biggest one), I hung on it the illumination of all the buttons (this had to be foreseen when setting up the boards - the LED next to each button).
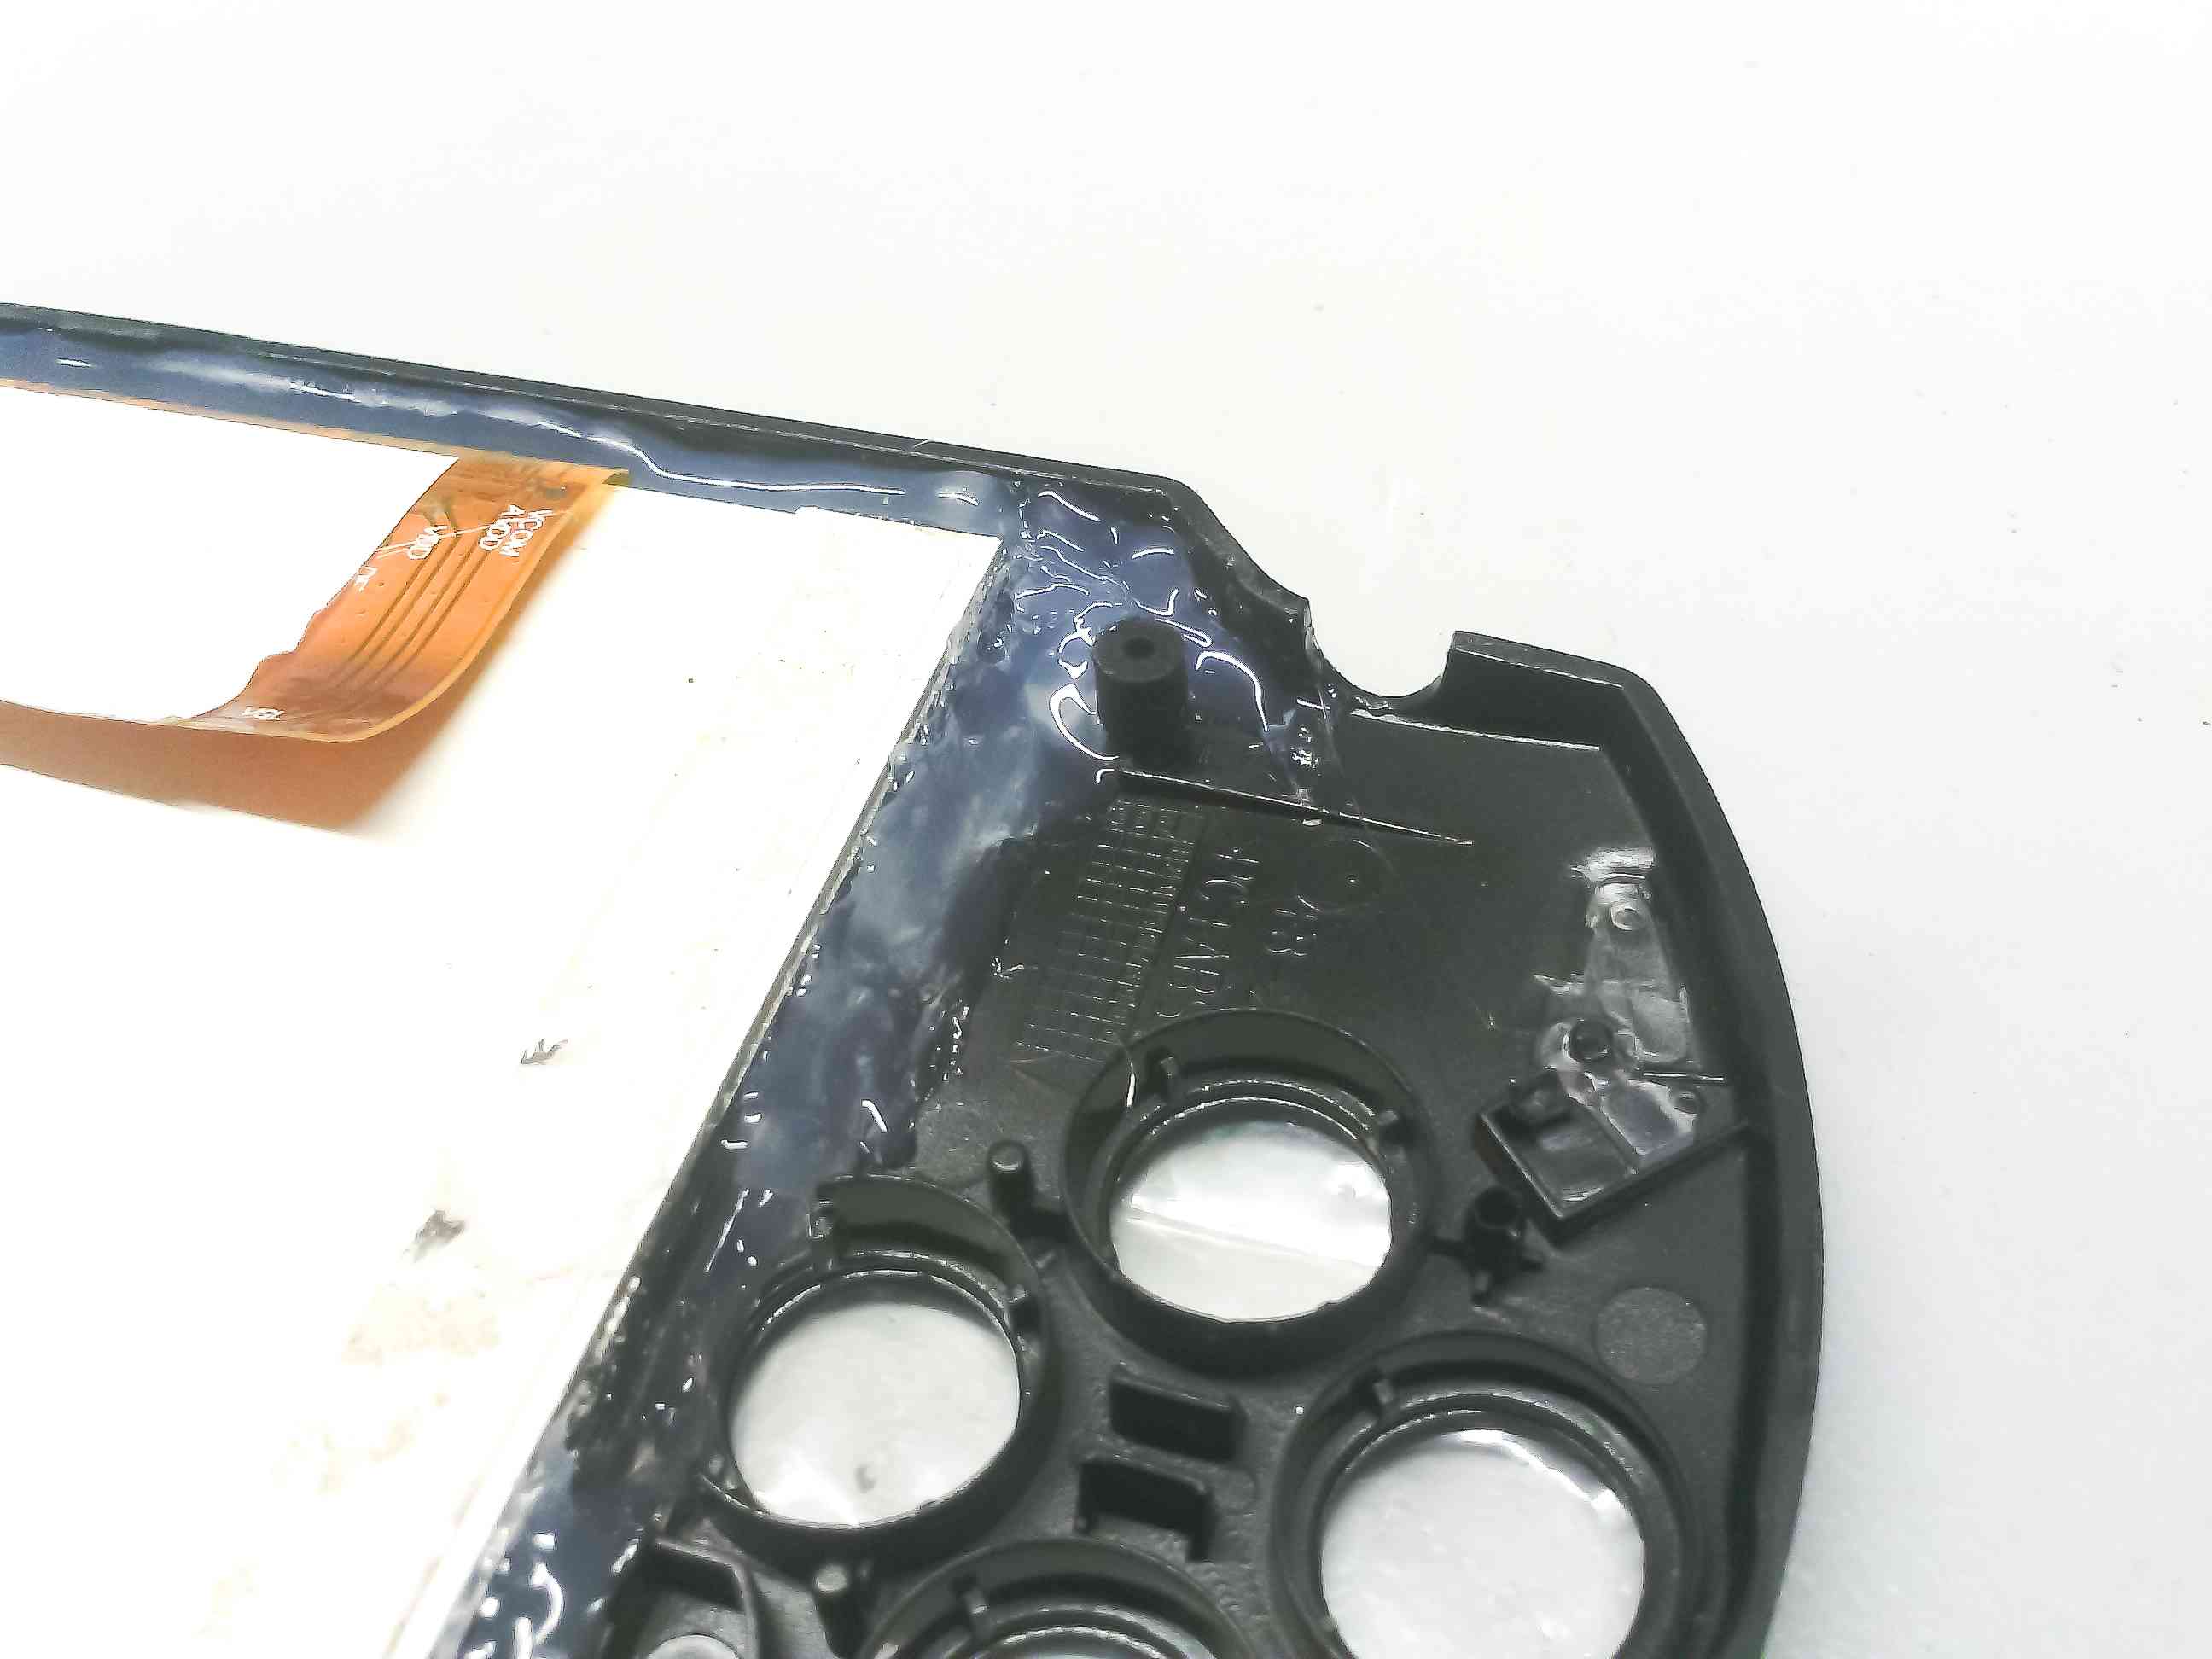
The matrix was glued to the front panel of the PSP in the same way (on the “original” case there is glass, in contrast to the Chinese one, which just had a rectangular cutout).
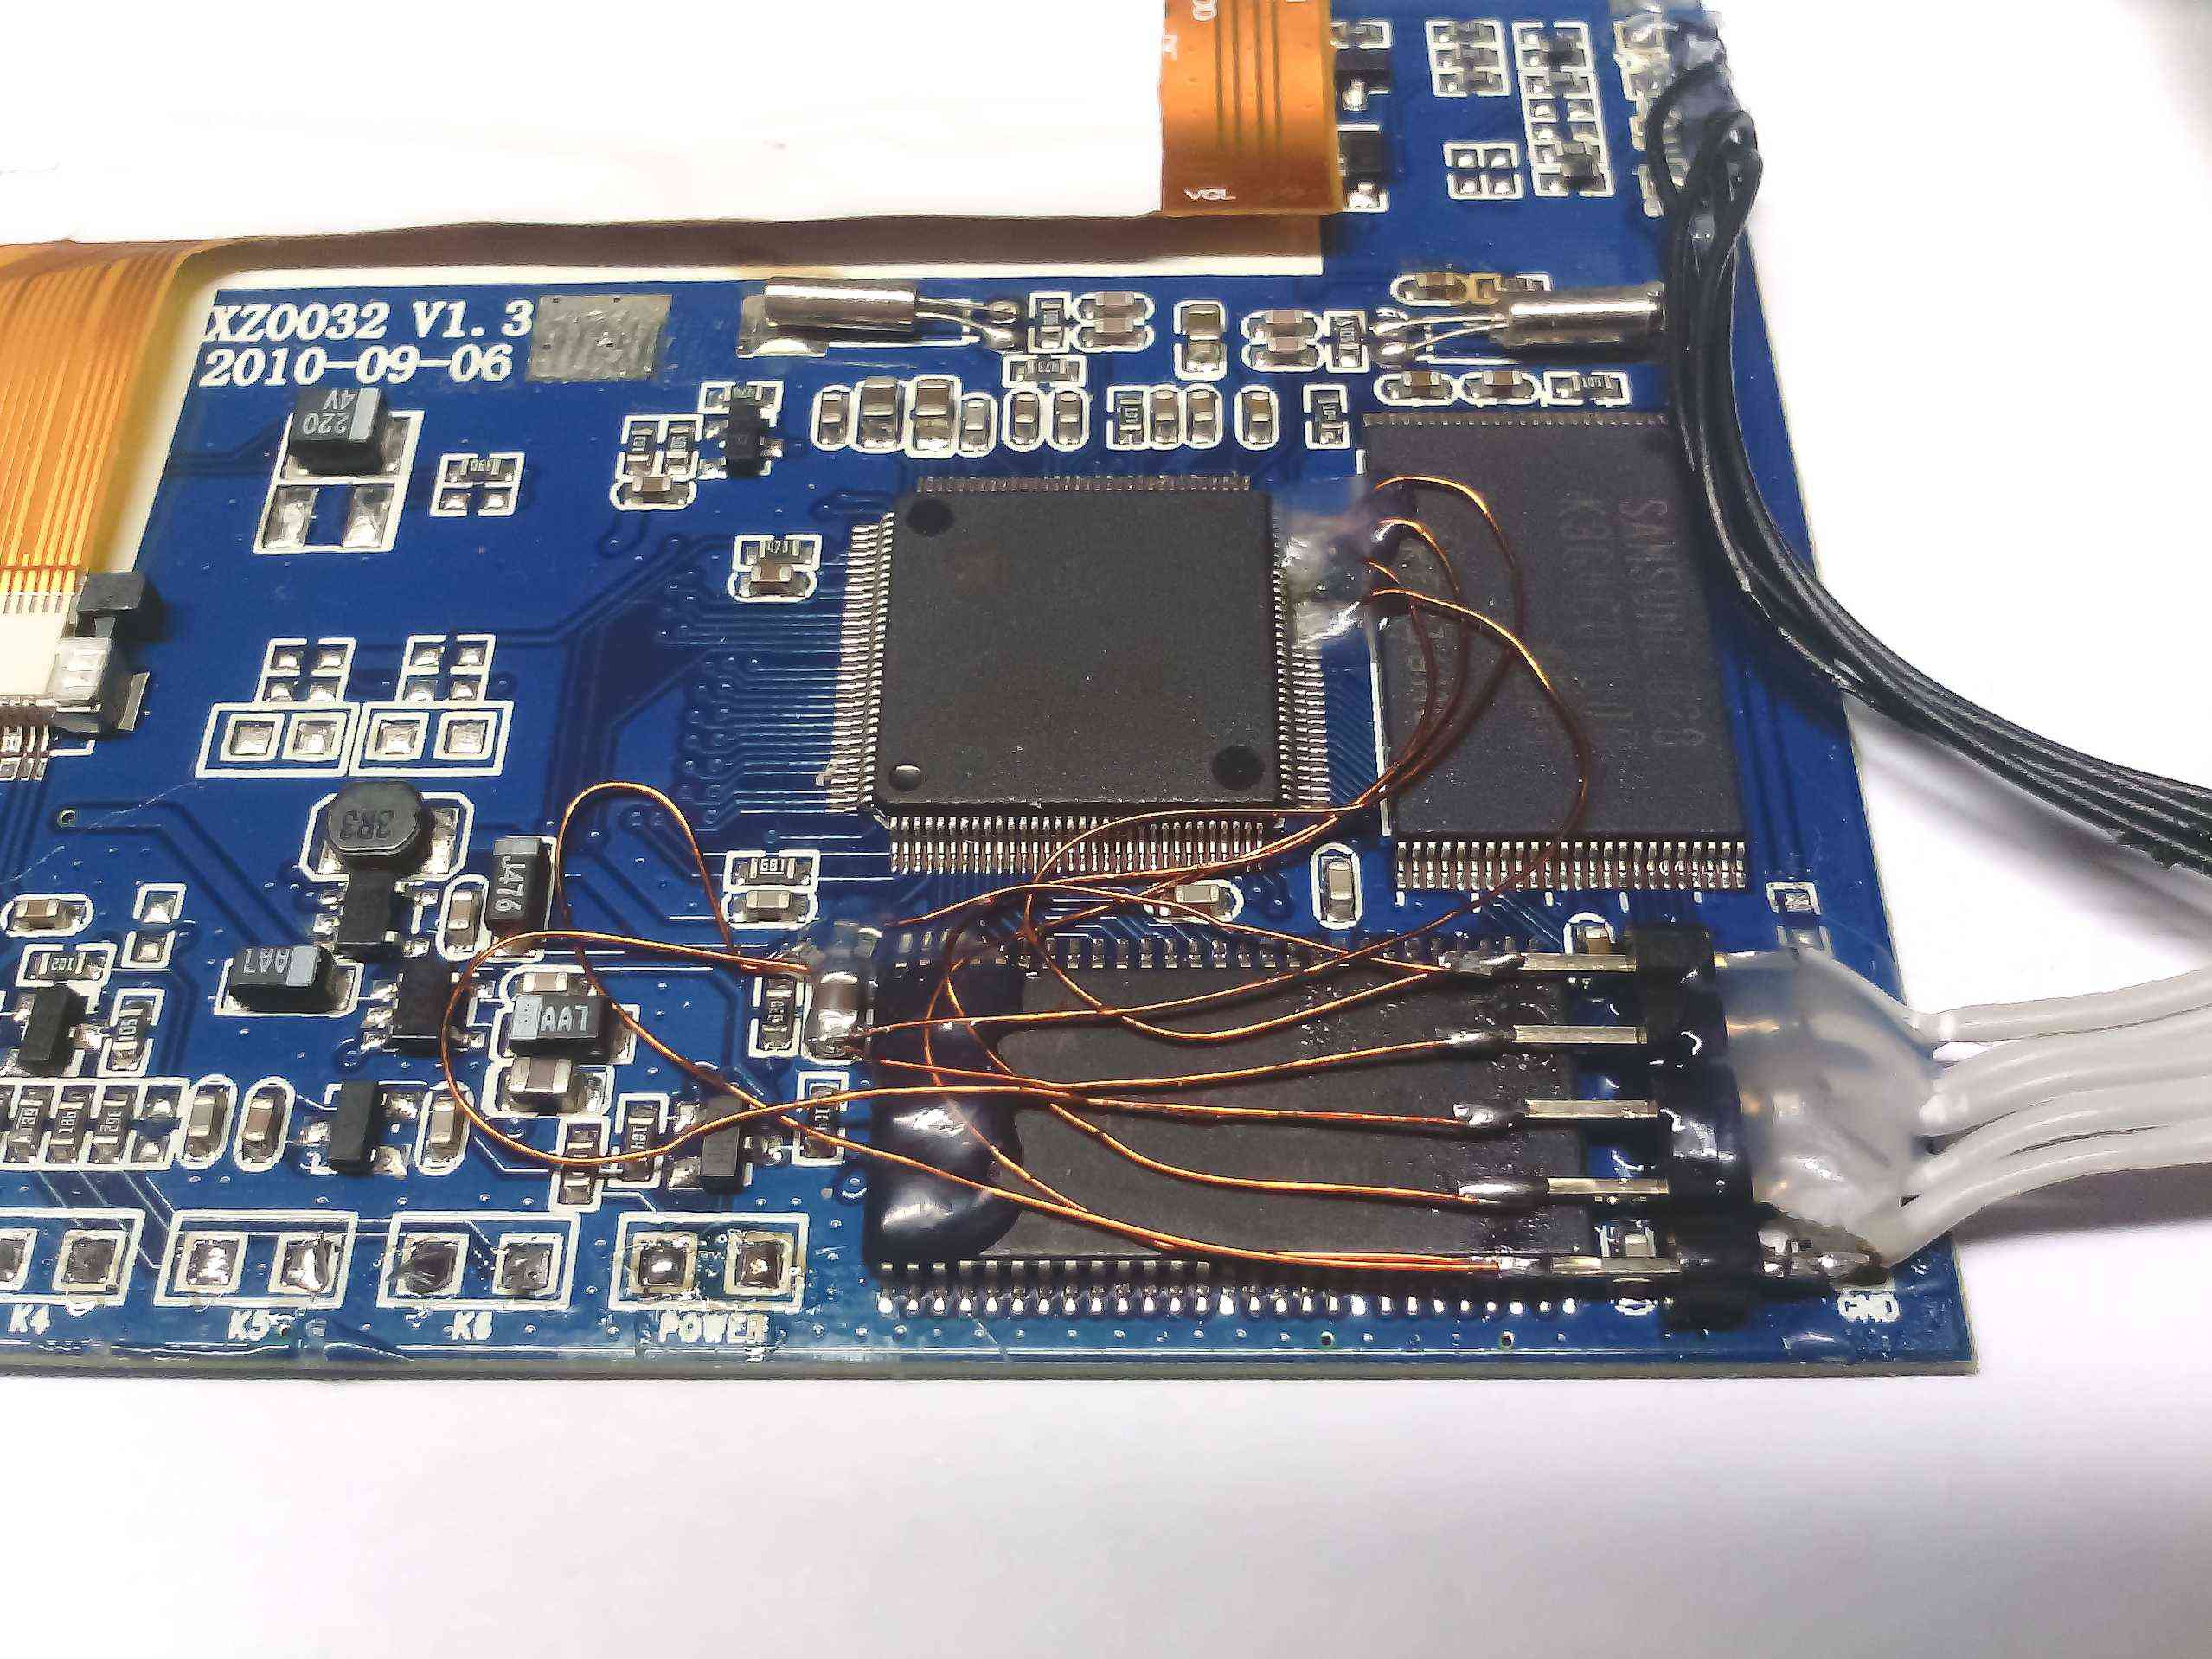
The chip has a built-in SD card interface, so nothing prevented soldering several wires and bringing it outside ( www.vogeeky.org/hardware/sd-mmc ). The SD-microSD adapter was very convenient for this. Since the files on the card can be uploaded via miniUSB, I decided to make the card inaccessible without removing the back cover.
All that could be glued was glued. The board neatly fell into place (so that the front panel could be removed, a cutout was made for the cable in the middle part of the case), it was decided to replace the battery with a more powerful one (2.3A). The miniUSB connector was bolted onto small screws and filled with glue.

I think there will certainly be those who will calculate the cost of the “project”, so I will immediately quote the whole alignment (from memory):
Magazine - 150r;
PSP "original" case - 300r;
Housing PSP China - 140r;
Plexiglass cutting - 200r;
Battery - 300r;
The total time is two weeks, one hour a day in the evening;
Total: 1090r.
Be creative!
')
Source: https://habr.com/ru/post/212099/
All Articles