Automatic light and music ASIM-AU-2-6
For a loud name - automatic light switch for the bathroom. And at first everything was insanely simple. The wireless sensor on the door signaled the opening of the central controller, and he switched the light and simultaneously switched the music. I note that the controller did not know the current state of light and music, so for the correct switching it was necessary each time to completely open and close the door. And, of course, do not go once again, if there is already someone inside.
But it fit well into the scheme of natural behavior at home. Those. we close the bathroom door behind us and try not to interfere with each other. In addition, the bathroom is not so big, and together there objectively quite closely. What did not fit into the scheme was guests. They pressed the usual switch, even if several times say that the light is automatic. They did not close the door and climbed to each other.
We had to do something about it.
')
From the abbreviation ASIM-AU-2-6, it is easy to understand that this is the Autonomous Light and Music Autonomous Controlled, the second hardware version and the sixth software version. The basis of the device is an Arduino Pro Mini board, executive devices are Livolo light switches, a radio relay with a protocol implemented in the RC-Switch library for Arduino.
ASIM-AU-2-6 is designed to automatically turn on and off lights and music in a controlled room.
In the current configuration, the device is designed to work together with the Controller central home omnipotent (KCDV), which performs switching of Avtosvet and Automusic (i.e., allows or denies).
However, the absence of CCVD does not affect the main functionality - automatic control of light and music. Well, except that the auto functions will work all the time, and not, say, on schedule.
Those. In general, ASIM-AU-2-6 is an autonomous product, with a few exceptions. The exception is that the automaton is capable of controlling peripherals that use the Livolo light switch and / or similar protocols implemented in the RC-Switch library. If there is no such periphery, then the machine gun is useless.
To be honest, I really did not want to use a separate controller in the bathroom, but these are some of my troubles. For some reason, I am terribly sorry to use such a thing to solve any one particular task. Although, for example, PERCo does not care at all. In short, in the end I accepted it, because I still did not see any special options. Those. Yes, one could try to portray something from a combination of a wireless door sensor and a wireless motion sensor inside the bathroom.
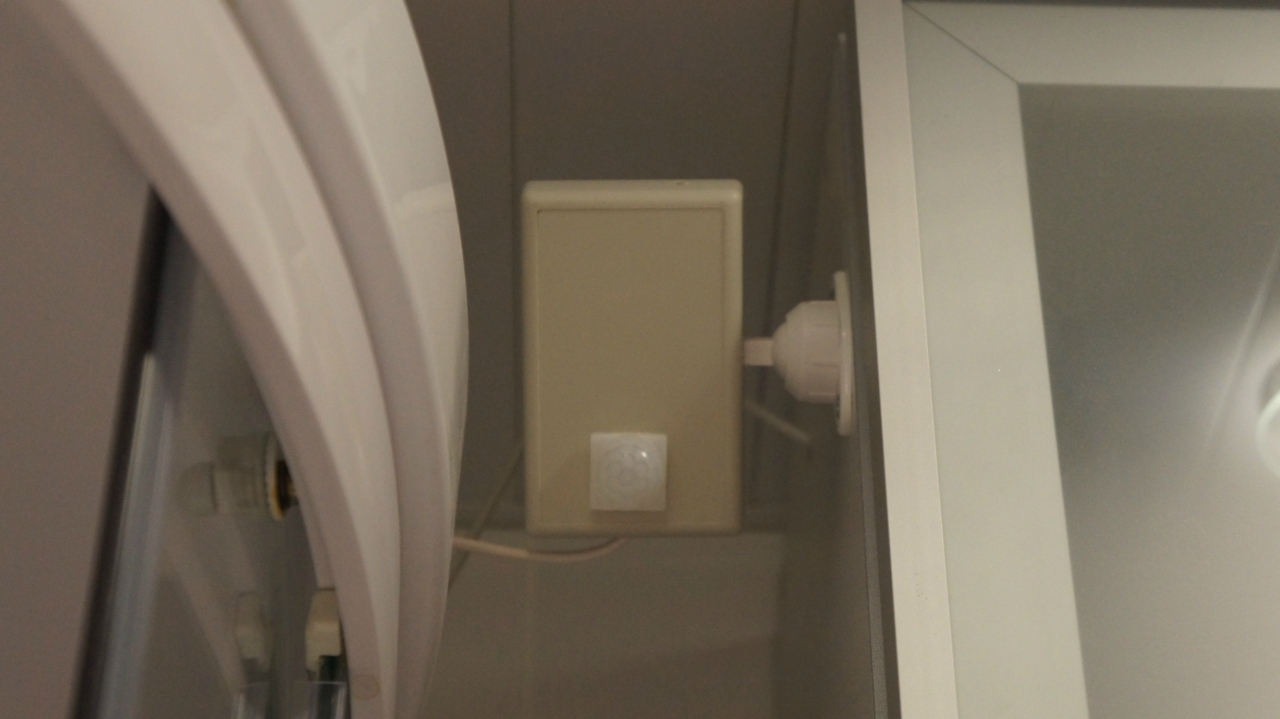
. That's how it looks from afar

I even thought about it. For example: if after opening the door a motion sensor captures this movement, then the light must be turned on. This is already better than just a door sensor, but if someone is inside, the motion sensor will signal with every rustle. And since I have all control over the radio channel, and the command buffer and conflict resolution are not provided for by the protocol, this, you know, is not the best option. Only one motion sensor will put the whole "comfortable home" on a one-two.
So, I needed something like this: to turn on the light only if it was turned off before, to play music simultaneously with the light, and so that manual control of the light (through the switch) did not affect the operation of the automation. As you can see, I have rather modest desires.
The last Arduino Pro Mini controller, a stack of receivers / transmitters (AM, 433 MHz) and several HC-SR501 motion sensors remained in stock. A simple analysis of the situation showed that, given the switches without feedback from the sensors, I would also need a light sensor to know what was in the bathroom with light. Then I thought about the shower. After all, everyone knows that the glass for the motion sensor is like a wall. Consequently, even if I placed him in front of the cabin doors, he would not fix the movement inside. But I did not plan the opposite of the door.
Hence the third sensor - the sensor of the closed doors of the shower cabin.
For now let us put aside the problems of choosing sensors and surrender to the will of fantasy. My, of course, so do not relax. So, the basic algorithm is that the controller seeks to turn off the light after a specified time interval, provided that nothing prevents it from doing so. But it can either be prevented by movement detected by a motion sensor, or by closed doors of a shower cabin.
Motion Sensor. When triggered, it turns on the light, if it was turned off or resets the light off timer, if the light is already turned on (that is, someone in the bathroom is still moving).
Light sensor. If he sees that the light is on (by automatics or by someone who has entered the bathroom), he turns on the music (if it is enabled) and starts the timer to turn off the light with the appropriate flag to prevent the timer from running repeatedly. If the light sensor sees that the music is on, and the light is off (someone came out and turned on the light behind them), then it turns off the music.
Off If the motion sensor is “silent” until the timer turns off the light, the light is turned off, provided that the doors of the shower stall are open. Otherwise, the algorithm is restarted in the "someone turned on the light."
There are also a couple of additional functions: prohibition / permission for automatic control of light and / or music in the bathroom from the central controller. This, for example, allows you to schedule the shutdown of musical accompaniment at night.
Literate people use an ordinary photoresistor as a light sensor. And they probably have a pack of these photoresistors under their hands. Of course, I did not have them. But there was the Internet, which said that an ordinary LED could be used as a light sensor : they say what comes out, then come in.
The theory was simple: connect the diode to the analog input of the Arduino, and read the values. The idea is that the values in the dark and in the light are different enough to make this possible in practice. I quickly assembled a test stand from the first LED (from a radio call) and the Arduino Mega 2560, I downloaded a simple sketch and I realized that yes, everything works.
So I picked up a soldering iron and assembled the first version of the light controller for the bathroom. The launch on the table showed that everything is working as expected again. But it was enough to hang the controller in place, as some sort of nonsense began to happen. Music (which is just tied to the light) was turned on and off in a completely chaotic manner.
Confused, it was very confusing that when connected to a laptop (to find out what was going on there at all) everything suddenly came back to normal.
So I went crazy for a few days - sent the LED in different directions, changed the LEDs, hung ferrite rings on the power cable. All to no avail, and I gave up.
You probably think I bought a photoresistor. And no. I did not want to wait for a month from China. Pay here 250 rubles for shipping too. I just remembered that there were several solar-powered garden lanterns on the balcony. Not to say that there was a special breakthrough - before there was the idea to use them as light sensors (they are cheap, as I don’t know what), but there was no particular need, and I forgot.
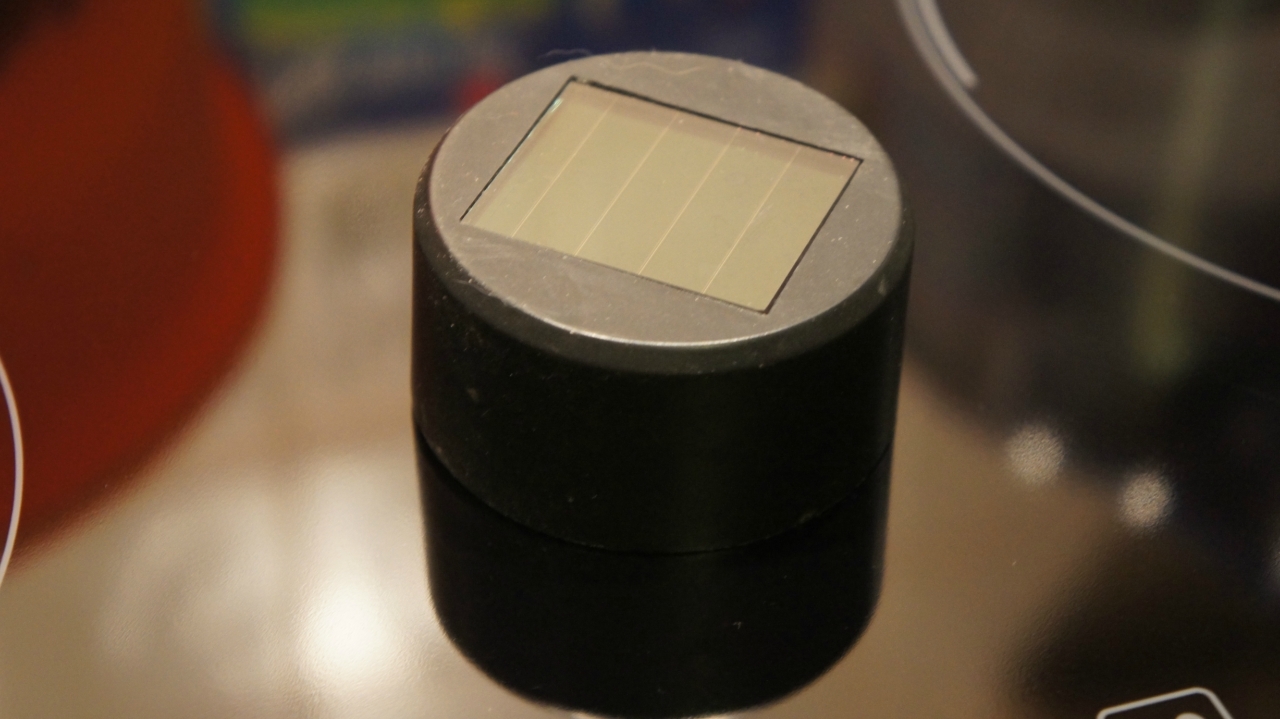
. such a flashlight, this is without a diffuser and a support pin
In general, he opened the flashlight, soldered his circuit from the solar battery, and connected the solar battery to the controller. At this my torture ended, because this “sensor” turned out to be much more stable, and it was not difficult to choose the threshold of reaction to light.
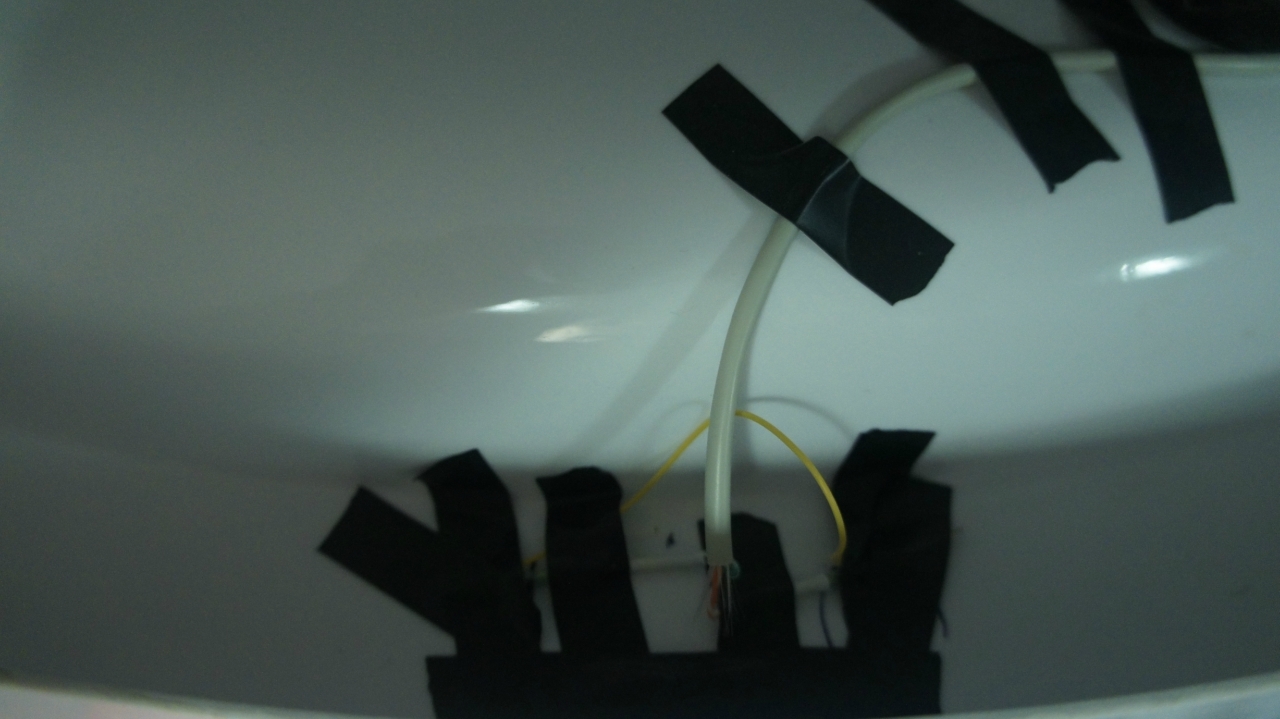
. black and white wires are relevant, the rest can be easily torn off

The only detail: the threshold was selected taking into account the fact that the sensor did not react to illumination from the corridor with the bathroom door open.
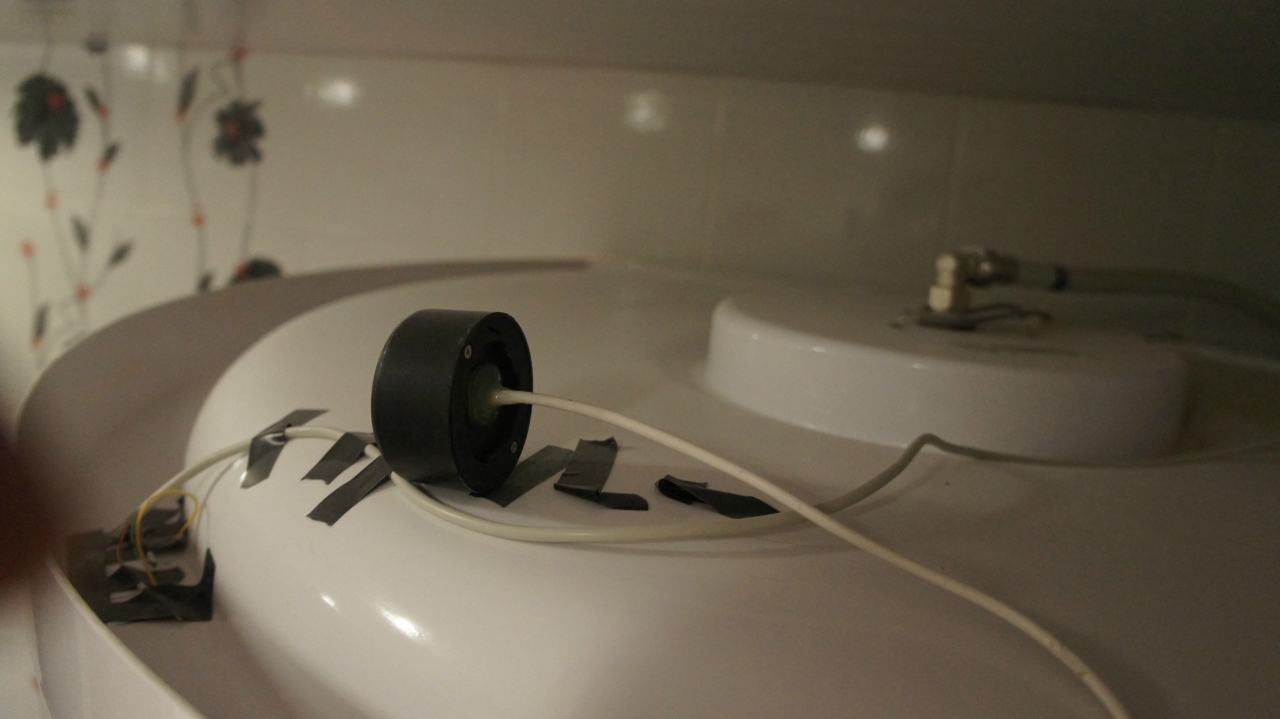
. approximately in this section. When I stop being lazy, I will fly up with a proud eagle with a glue gun in its beak. And liquidate all this pornography with electrical tape. But maybe not liquidating. Or maybe not an eagle.
The second pig I put a motion sensor HC-SR501. Fortunately (which was the result of suffering with the central controller), I was ready for this, so I almost immediately understood what was the matter.
Practice has shown that the sensor is quite sensitive to electromagnetic interference. And, for example, it responds to a working radio transmitter located nearby. Or, excuse me, maybe I don’t understand what I’m talking about - at some kind of tip through the pins of the controller. In my case it looked like instant light switching on immediately after it was turned off.
Those. The transmitter's signal to turn off the light provoked the response of the motion sensor, and this, in turn, led to the switching on of the light. Such is the algorithm.
To smash the motion sensor and transmitter, as in the case of the central controller, I could not - there was not enough space in the case. So I acted faintly: put a delay of 3 seconds after any command of the transmitter. I remind you that this is due to the specificity of the motion sensor: “out of the box” the minimum activation time (i.e., a high level at the sensor output) after triggering is 2.5 seconds.
Thus, a pause of 3 seconds ensures that the sensor comes to life after a “false” response. It also means that the sensor (and the controller as a whole) do not react at all for 3 seconds after turning the light on or off. I considered this uncritical, but practice confirmed that no inconvenience arises.
The sensitivity of the sensor is set to 3/4 of the maximum. But in general, the recommendation is a maximum without false alarms with the door slightly open. Or to taste.
As I mentioned, the motion sensor does not allow to determine the movement behind the glass. How, then, to find out if there is anyone in the house? In the comments to the text about the Convenient Home I was offered several options: a thermal imager from some camera, an additional water meter in the shower, a sound meter.
But pride was stronger, and I remained firm in my decision. Obviously, when it comes to monitoring the status of the door, the first thing that comes to mind is the reed switches. In the case of extremely wet rooms, this is also good because it does not require placing the sensors directly in an aggressive (conditionally, of course) environment.
Result: the reed switches are placed on the “roof” of the shower cabin, and the magnets are glued to the upper ends of the doors - there is usually quite enough for this place. The placement of elements is chosen in such a way that the reed switches are securely closed with the doors closed.
I used two reed switches connected in series to control the simultaneous closing of both doors. Of course, it would be possible to manage with one, but I wanted to exclude, albeit a rare, but possible situation, when the shower cabin is not used, but the “control” door is accidentally closed.
. so it looks under the tape. What I think about it - above, where about the light sensor.
So, I repeat, the sensor for closing the doors of the shower stall physically consists of two successively connected reed switches mounted on the roof of the shower stall and two magnets glued to the upper ends of the doors. The advantages of the design are exceptional simplicity and reliability. Cons - now you can not hide something from the cats behind the closed doors of the shower cabin without disrupting the automation.
Despite the fact that this thing is assembled, hung and works in my bathroom, I still wonder how such a simple function, as Avtosvet, requires so much of any peripherals.
So, the composition of the controller of light and music (links - for example):
1) Arduino Pro Mini , ATmega328p, 16 MHz, 5V.
2) A 433 MHz receiver and transmitter kit with amplitude modulation (I remind you again - if you buy without antennas, do not forget that they are still needed). The receiver is not required if you do not plan to use the remote controller.
3) Motion Sensor HC-SR501
4) Solar panel, for example, from a garden lantern
5) Reed switches to control the shower door
6) Body to taste
7) Sensor, Power, and Connectors / Breadboard Connectors
8) Power supply
For the music module you also need:
1) Any MP3 player with a speaker that is not a pity (I picked up a Chinese mini speaker) and that automatically starts playback when turned on and remembers the track when it is turned off
2) Radio relay
The assembly principle of ASIM-AU-2-6, as usual, is obvious from the code. Connecting the power of the periphery to the Arduino pins is due to the fact that I in the process experimented with turning off / on the transmitter and the motion sensor.
Build in current configuration:
1) Motion sensor
DATA - Digital Pin 10 Arduino
VCC - digital pin 11 Arduino (can be to the plus power)
GND - to the common ground
2) Light sensor
Solar Panel Plus - A1 Arduino Pin
Minus solar panel - to common ground
3) Door sensor
Two reed switches are connected in series with a wire of sufficient length to place the reed switches in the necessary places of the shower cabin.
We connect the free outputs: one to the digital pin 6 Arduino, the second to the common ground.
4) Transmitter
DATA - Digital Pin 8 Arduino
VCC - digital pin 9 Arduino (can be to the plus power)
GND - to the common ground
5) Receiver
DATA - Digital Pin 2 Arduino
VCC - Power Plus
GND - to the common ground
The code turned out not very elegant (as usual), but quite working (also as usual). I remind you that the most important thing in the switchTX procedure is a pause of 3 seconds, during which the motion sensor, triggered by interference from the transmitter, will have time to return to its original state.
A note on the future: it may also make sense to change the response to the sensor door shower. Now closed doors block the command to turn off the light. But it seems more logical to reset the timer to turn off the light as long as the doors are closed. Otherwise, it turns out that some people manage to open the shower door literally a second before the timer, which entails asurprise-surprise turning off the light and then waving their hands in front of the sensor.
Compiling the code will require the following additional libraries:
1) RC-Switch for controlling sockets, radio relay and exchange with meteorological and service sensors.
2) Livolo to control light switches of the same name.
3) SimpleTimer for counting time intervals.
In conclusion, a few words about the music module, which I first wanted to call the Music Digital Passive Controlled Device (AMC-PU), but changed my mind.
I owe the idea of AMC-PU to my wife. She, having once againtwirled her finger at her temple, looking at all this automation, suggested that if something was missing, it was music in, so to speak, WC. Well, as in these of your malls. The idea took possession of the mind, and hereinafter.
. we work with such material
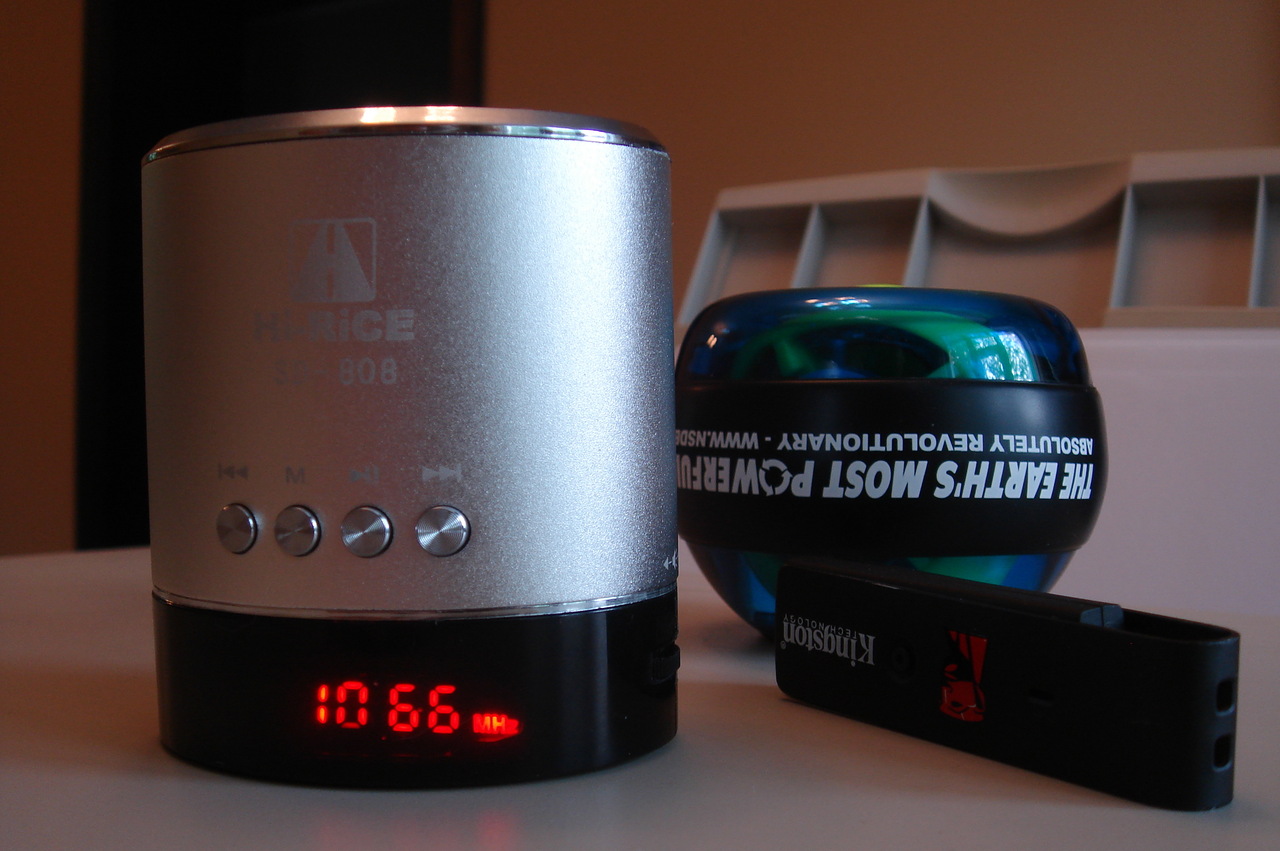
In turn, the design of the AMC-PU was depending on my reluctance to use controllers for such trivial tasks. I thought that it was logical to control the music from the central controller, and simply equip the column itself with a radio relay to remotely turn it on. Here the feature of the column itself helped me a lot: if there is a memory card or a USB stick with music in the slot or USB connector, playback starts automatically. Moreover, the column remembers the last played track, so there is no risk to listen to the same thing all the time.
Hence the elementary principle of work: at the command of the controller, the relay switches the column on or off. And that's all.
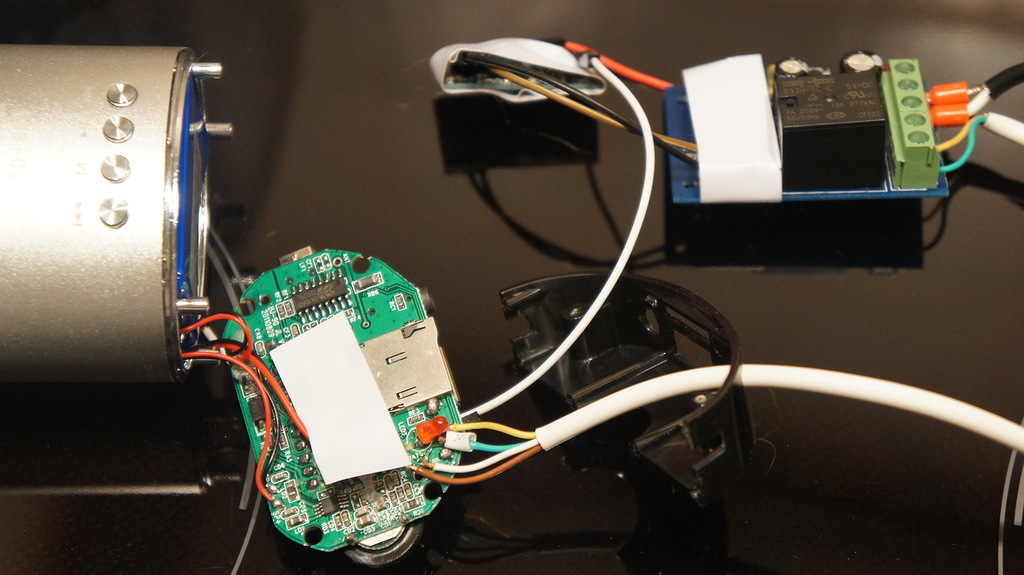
. open the column and connect to it external power and relay contacts. Cable KSPV with four wires just enough. So difficult because I wanted to keep the speaker switch working. Otherwise, two wires are enough. The built-in battery is disabled - to avoid.

When modernizing the light control in the bathroom, I decided not to change anything in the column, but simply transferred control from the central controller to the controller in the bathroom. Why do I need extra wires if everything works fine?
.
As a result, according to the AMC-PU concept, the Cat feeding device is controlled, passive AKK-PU-1 , i.e. This is a ready-made device (player-column), supplemented by a radio relay. In this regard, I do not see the point of describing the same construction twice, and just showing photos.
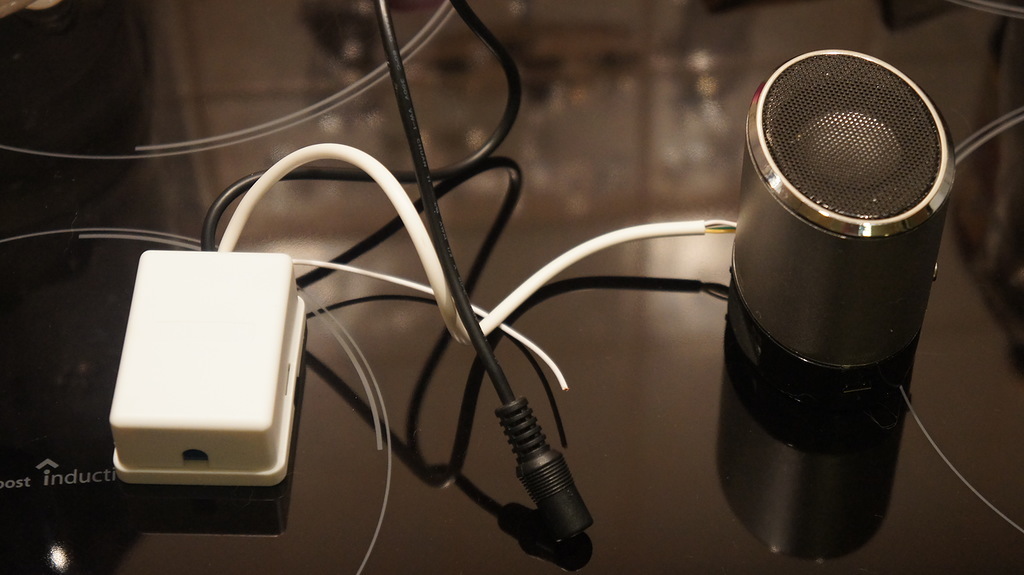
. and close everything
As for hardware, you have already guessed that any Chinese speaker-player will do, which automatically starts playing music from a carrier connected to it and remembers the track being played when turned off. Or, of course, any analog.
But it fit well into the scheme of natural behavior at home. Those. we close the bathroom door behind us and try not to interfere with each other. In addition, the bathroom is not so big, and together there objectively quite closely. What did not fit into the scheme was guests. They pressed the usual switch, even if several times say that the light is automatic. They did not close the door and climbed to each other.
We had to do something about it.
')
Other devices and devices of the series
From the abbreviation ASIM-AU-2-6, it is easy to understand that this is the Autonomous Light and Music Autonomous Controlled, the second hardware version and the sixth software version. The basis of the device is an Arduino Pro Mini board, executive devices are Livolo light switches, a radio relay with a protocol implemented in the RC-Switch library for Arduino.
ASIM-AU-2-6 is designed to automatically turn on and off lights and music in a controlled room.
In the current configuration, the device is designed to work together with the Controller central home omnipotent (KCDV), which performs switching of Avtosvet and Automusic (i.e., allows or denies).
However, the absence of CCVD does not affect the main functionality - automatic control of light and music. Well, except that the auto functions will work all the time, and not, say, on schedule.
Those. In general, ASIM-AU-2-6 is an autonomous product, with a few exceptions. The exception is that the automaton is capable of controlling peripherals that use the Livolo light switch and / or similar protocols implemented in the RC-Switch library. If there is no such periphery, then the machine gun is useless.
Prehistory
To be honest, I really did not want to use a separate controller in the bathroom, but these are some of my troubles. For some reason, I am terribly sorry to use such a thing to solve any one particular task. Although, for example, PERCo does not care at all. In short, in the end I accepted it, because I still did not see any special options. Those. Yes, one could try to portray something from a combination of a wireless door sensor and a wireless motion sensor inside the bathroom.
. That's how it looks from afar
I even thought about it. For example: if after opening the door a motion sensor captures this movement, then the light must be turned on. This is already better than just a door sensor, but if someone is inside, the motion sensor will signal with every rustle. And since I have all control over the radio channel, and the command buffer and conflict resolution are not provided for by the protocol, this, you know, is not the best option. Only one motion sensor will put the whole "comfortable home" on a one-two.
So, I needed something like this: to turn on the light only if it was turned off before, to play music simultaneously with the light, and so that manual control of the light (through the switch) did not affect the operation of the automation. As you can see, I have rather modest desires.
The last Arduino Pro Mini controller, a stack of receivers / transmitters (AM, 433 MHz) and several HC-SR501 motion sensors remained in stock. A simple analysis of the situation showed that, given the switches without feedback from the sensors, I would also need a light sensor to know what was in the bathroom with light. Then I thought about the shower. After all, everyone knows that the glass for the motion sensor is like a wall. Consequently, even if I placed him in front of the cabin doors, he would not fix the movement inside. But I did not plan the opposite of the door.
Hence the third sensor - the sensor of the closed doors of the shower cabin.
Work algorithm
For now let us put aside the problems of choosing sensors and surrender to the will of fantasy. My, of course, so do not relax. So, the basic algorithm is that the controller seeks to turn off the light after a specified time interval, provided that nothing prevents it from doing so. But it can either be prevented by movement detected by a motion sensor, or by closed doors of a shower cabin.
Motion Sensor. When triggered, it turns on the light, if it was turned off or resets the light off timer, if the light is already turned on (that is, someone in the bathroom is still moving).
Light sensor. If he sees that the light is on (by automatics or by someone who has entered the bathroom), he turns on the music (if it is enabled) and starts the timer to turn off the light with the appropriate flag to prevent the timer from running repeatedly. If the light sensor sees that the music is on, and the light is off (someone came out and turned on the light behind them), then it turns off the music.
Off If the motion sensor is “silent” until the timer turns off the light, the light is turned off, provided that the doors of the shower stall are open. Otherwise, the algorithm is restarted in the "someone turned on the light."
There are also a couple of additional functions: prohibition / permission for automatic control of light and / or music in the bathroom from the central controller. This, for example, allows you to schedule the shutdown of musical accompaniment at night.
How not to make a light sensor from the LED
Literate people use an ordinary photoresistor as a light sensor. And they probably have a pack of these photoresistors under their hands. Of course, I did not have them. But there was the Internet, which said that an ordinary LED could be used as a light sensor : they say what comes out, then come in.
The theory was simple: connect the diode to the analog input of the Arduino, and read the values. The idea is that the values in the dark and in the light are different enough to make this possible in practice. I quickly assembled a test stand from the first LED (from a radio call) and the Arduino Mega 2560, I downloaded a simple sketch and I realized that yes, everything works.
So I picked up a soldering iron and assembled the first version of the light controller for the bathroom. The launch on the table showed that everything is working as expected again. But it was enough to hang the controller in place, as some sort of nonsense began to happen. Music (which is just tied to the light) was turned on and off in a completely chaotic manner.
Confused, it was very confusing that when connected to a laptop (to find out what was going on there at all) everything suddenly came back to normal.
So I went crazy for a few days - sent the LED in different directions, changed the LEDs, hung ferrite rings on the power cable. All to no avail, and I gave up.
You probably think I bought a photoresistor. And no. I did not want to wait for a month from China. Pay here 250 rubles for shipping too. I just remembered that there were several solar-powered garden lanterns on the balcony. Not to say that there was a special breakthrough - before there was the idea to use them as light sensors (they are cheap, as I don’t know what), but there was no particular need, and I forgot.
. such a flashlight, this is without a diffuser and a support pin
In general, he opened the flashlight, soldered his circuit from the solar battery, and connected the solar battery to the controller. At this my torture ended, because this “sensor” turned out to be much more stable, and it was not difficult to choose the threshold of reaction to light.
. black and white wires are relevant, the rest can be easily torn off
The only detail: the threshold was selected taking into account the fact that the sensor did not react to illumination from the corridor with the bathroom door open.
. approximately in this section. When I stop being lazy, I will fly up with a proud eagle with a glue gun in its beak. And liquidate all this pornography with electrical tape. But maybe not liquidating. Or maybe not an eagle.
What not to do with the motion sensor
The second pig I put a motion sensor HC-SR501. Fortunately (which was the result of suffering with the central controller), I was ready for this, so I almost immediately understood what was the matter.
Practice has shown that the sensor is quite sensitive to electromagnetic interference. And, for example, it responds to a working radio transmitter located nearby. Or, excuse me, maybe I don’t understand what I’m talking about - at some kind of tip through the pins of the controller. In my case it looked like instant light switching on immediately after it was turned off.
Those. The transmitter's signal to turn off the light provoked the response of the motion sensor, and this, in turn, led to the switching on of the light. Such is the algorithm.
To smash the motion sensor and transmitter, as in the case of the central controller, I could not - there was not enough space in the case. So I acted faintly: put a delay of 3 seconds after any command of the transmitter. I remind you that this is due to the specificity of the motion sensor: “out of the box” the minimum activation time (i.e., a high level at the sensor output) after triggering is 2.5 seconds.
Thus, a pause of 3 seconds ensures that the sensor comes to life after a “false” response. It also means that the sensor (and the controller as a whole) do not react at all for 3 seconds after turning the light on or off. I considered this uncritical, but practice confirmed that no inconvenience arises.
The sensitivity of the sensor is set to 3/4 of the maximum. But in general, the recommendation is a maximum without false alarms with the door slightly open. Or to taste.
The problem of a spherical horse in the shower
As I mentioned, the motion sensor does not allow to determine the movement behind the glass. How, then, to find out if there is anyone in the house? In the comments to the text about the Convenient Home I was offered several options: a thermal imager from some camera, an additional water meter in the shower, a sound meter.
But pride was stronger, and I remained firm in my decision. Obviously, when it comes to monitoring the status of the door, the first thing that comes to mind is the reed switches. In the case of extremely wet rooms, this is also good because it does not require placing the sensors directly in an aggressive (conditionally, of course) environment.
Result: the reed switches are placed on the “roof” of the shower cabin, and the magnets are glued to the upper ends of the doors - there is usually quite enough for this place. The placement of elements is chosen in such a way that the reed switches are securely closed with the doors closed.
I used two reed switches connected in series to control the simultaneous closing of both doors. Of course, it would be possible to manage with one, but I wanted to exclude, albeit a rare, but possible situation, when the shower cabin is not used, but the “control” door is accidentally closed.
. so it looks under the tape. What I think about it - above, where about the light sensor.
So, I repeat, the sensor for closing the doors of the shower stall physically consists of two successively connected reed switches mounted on the roof of the shower stall and two magnets glued to the upper ends of the doors. The advantages of the design are exceptional simplicity and reliability. Cons - now you can not hide something from the cats behind the closed doors of the shower cabin without disrupting the automation.
Iron
Despite the fact that this thing is assembled, hung and works in my bathroom, I still wonder how such a simple function, as Avtosvet, requires so much of any peripherals.
So, the composition of the controller of light and music (links - for example):
1) Arduino Pro Mini , ATmega328p, 16 MHz, 5V.
2) A 433 MHz receiver and transmitter kit with amplitude modulation (I remind you again - if you buy without antennas, do not forget that they are still needed). The receiver is not required if you do not plan to use the remote controller.
3) Motion Sensor HC-SR501
4) Solar panel, for example, from a garden lantern
5) Reed switches to control the shower door
6) Body to taste
7) Sensor, Power, and Connectors / Breadboard Connectors
8) Power supply
For the music module you also need:
1) Any MP3 player with a speaker that is not a pity (I picked up a Chinese mini speaker) and that automatically starts playback when turned on and remembers the track when it is turned off
2) Radio relay
The assembly principle of ASIM-AU-2-6, as usual, is obvious from the code. Connecting the power of the periphery to the Arduino pins is due to the fact that I in the process experimented with turning off / on the transmitter and the motion sensor.
Build in current configuration:
1) Motion sensor
DATA - Digital Pin 10 Arduino
VCC - digital pin 11 Arduino (can be to the plus power)
GND - to the common ground
2) Light sensor
Solar Panel Plus - A1 Arduino Pin
Minus solar panel - to common ground
3) Door sensor
Two reed switches are connected in series with a wire of sufficient length to place the reed switches in the necessary places of the shower cabin.
We connect the free outputs: one to the digital pin 6 Arduino, the second to the common ground.
4) Transmitter
DATA - Digital Pin 8 Arduino
VCC - digital pin 9 Arduino (can be to the plus power)
GND - to the common ground
5) Receiver
DATA - Digital Pin 2 Arduino
VCC - Power Plus
GND - to the common ground
Soft
The code turned out not very elegant (as usual), but quite working (also as usual). I remind you that the most important thing in the switchTX procedure is a pause of 3 seconds, during which the motion sensor, triggered by interference from the transmitter, will have time to return to its original state.
A note on the future: it may also make sense to change the response to the sensor door shower. Now closed doors block the command to turn off the light. But it seems more logical to reset the timer to turn off the light as long as the doors are closed. Otherwise, it turns out that some people manage to open the shower door literally a second before the timer, which entails a
Compiling the code will require the following additional libraries:
1) RC-Switch for controlling sockets, radio relay and exchange with meteorological and service sensors.
2) Livolo to control light switches of the same name.
3) SimpleTimer for counting time intervals.
And the sketch itself is here. Presale preparation included cleaning off extra diagnostic lines, so if I cut out too much somewhere else, write
// 14.01.2014 - . - // 17.01.2014 - , . - . // 20.01.2014 - , . // . . // 26.01.2014 - . automusic, // , , . // 27.01.2014 - - prevlight #include <livolo.h> #include <RCSwitch.h> #include <SimpleTimer.h> int lightLevel; // #define sensorPin 7 // 1 #define PIRPin 10 // #define PIRPowerPin 11 // #define lightTreshold 55 // #define txPin 8 // #define txPowerPin 9 // #define doorPin 6 // . ! boolean musicOn=false; // boolean autoLight = true; // boolean autoMusic = true; // int bathLightID; // boolean timerSet = false; // SimpleTimer myTime; // Livolo livolo(8); // Livolo RCSwitch mySwitch; // RC-Switch void setup() { mySwitch.enableTransmit(txPin); // RCSwitch mySwitch.enableReceive(0); // RCSwitch pinMode(PIRPin, INPUT); // pinMode(txPowerPin, OUTPUT); // digitalWrite(txPowerPin, LOW); // - pinMode(PIRPowerPin, OUTPUT); // digitalWrite(PIRPowerPin, HIGH); // pinMode(doorPin, INPUT); // digitalWrite(doorPin, HIGH); // , . - 1, - 0, "" pinMode(sensorPin, INPUT); // delay(3000); // , } void loop() { if (mySwitch.available()) { // int value = mySwitch.getReceivedValue(); if (value != 0) { switch (mySwitch.getReceivedValue()) { case 1486220: // autoLight = false; // if (timerSet == true) { // , () myTime.deleteTimer(bathLightID); } break; case 1486221: // autoLight = true; // break; case 1486230: // autoMusic = false; // switchTX(1); // - mySwitch.send(386100, 24); // switchTX(0); // musicOn = false; break; case 1486231: // autoMusic = true; // break; } } mySwitch.resetAvailable(); } if (autoLight == true) { // myTime.run(); // delay(50); lightLevel=analogRead(sensorPin); // , if (lightLevel > lightTreshold) { // - if (musicOn == false) { // - if (autoMusic == true) { switchTX(1); mySwitch.send(386101, 24); switchTX(0); musicOn = true; // } } if (timerSet == false) { // , bathLightID = myTime.setTimeout(180000, turnOff); // 3 timerSet = true; } } // , ( ?) if (lightLevel < lightTreshold && musicOn == true) { // - ( ) - switchTX(1); mySwitch.send(386100, 24); musicOn = false; // switchTX(0); if (timerSet == true) { myTime.deleteTimer(bathLightID); timerSet = false; } } // if (digitalRead(PIRPin) == 1) { // if (lightLevel < lightTreshold) { // - switchTX(1); livolo.sendButton(8500, 108); // switchTX(0); } else { if (timerSet == true) { myTime.restartTimer(bathLightID);} } } } } // , void turnOff() { if (lightLevel > lightTreshold) { // - if (digitalRead(doorPin) == 1) { // switchTX(1); livolo.sendButton(6400, 108); // switchTX(0); } } timerSet = false; } // void switchTX(byte OnOff) { if (OnOff == 1) { mySwitch.disableReceive(); digitalWrite(txPowerPin, HIGH); delay(50); } if (OnOff == 0) { digitalWrite(txPowerPin, LOW); delay(3000); mySwitch.enableReceive(0); } } Music module
In conclusion, a few words about the music module, which I first wanted to call the Music Digital Passive Controlled Device (AMC-PU), but changed my mind.
I owe the idea of AMC-PU to my wife. She, having once again
. we work with such material
In turn, the design of the AMC-PU was depending on my reluctance to use controllers for such trivial tasks. I thought that it was logical to control the music from the central controller, and simply equip the column itself with a radio relay to remotely turn it on. Here the feature of the column itself helped me a lot: if there is a memory card or a USB stick with music in the slot or USB connector, playback starts automatically. Moreover, the column remembers the last played track, so there is no risk to listen to the same thing all the time.
Hence the elementary principle of work: at the command of the controller, the relay switches the column on or off. And that's all.
. open the column and connect to it external power and relay contacts. Cable KSPV with four wires just enough. So difficult because I wanted to keep the speaker switch working. Otherwise, two wires are enough. The built-in battery is disabled - to avoid.
When modernizing the light control in the bathroom, I decided not to change anything in the column, but simply transferred control from the central controller to the controller in the bathroom. Why do I need extra wires if everything works fine?
.
As a result, according to the AMC-PU concept, the Cat feeding device is controlled, passive AKK-PU-1 , i.e. This is a ready-made device (player-column), supplemented by a radio relay. In this regard, I do not see the point of describing the same construction twice, and just showing photos.
. and close everything
As for hardware, you have already guessed that any Chinese speaker-player will do, which automatically starts playing music from a carrier connected to it and remembers the track being played when turned off. Or, of course, any analog.
Source: https://habr.com/ru/post/212093/
All Articles