The wxWidgets tool library. Assembly
In continuation of the post (news) wxWidgets. Trifle, but nice , catch a cookie.

The picture is taken from a resource: ru.wikipedia.org , author: Bryan Petty.
Attention! Under the cut traffic!
Three years ago, I became interested in cross-platform programming using the above-named library. Every time when building this library, a lot of problems arose. The problems were not related to the fact that the library had some significant bugs, but were related to the fact that when using such tools requiring compilation (assembly), you must carefully consider the accompanying literature.
Speaking in an understandable language, it is necessary to carefully read manuals,
Although there are enough articles on building and using
And so, let's go.
We will build the library in the
')
As an IDE (code editor and build automation), we will use Code :: Blocks . I think many have already heard about him, so we will not go into details. I will only mention that
1) Install the compiler, debugging tools and pre-configuration:
Debugging tools, usually installed by default along with the compiler, in the case of
Go to the official website of the
Next, the standard procedure: run the installation wizard, and install the compiler with the default options.
Setting the compiler is to add to the system environment variable Path, the path to the binary compiler builds, if this is not done by the default installation wizard. This is usually:

2) Loading, unpacking and building the
Go to the official website of the library
Next, the standard procedure: run the unpacking wizard, and unpack the library with the default options.
The

Actually proceed to the assembly. We start the command line (
Usually the number of build options does not exceed the specified.
Let us consider the purpose of these options:
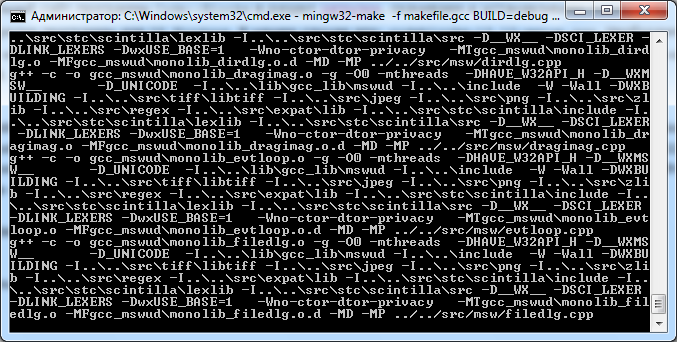
The build process will be similar to this screenshot:
3) Download, install and configure
Go to the official website of the
Next, the standard procedure, run the installation wizard, and install the program with default options.
Development environment settings are reduced to the default compiler settings. Usually, when you first run
4) Creating a test project using
Run
Global project variables should be configured as follows (
Project settings should look something like this (

Window
Window
Next, save the settings by clicking the [
Compile (assemble) our application (

Upd1: probably in the latest MinGW releases, bugs were fixed, now you can safely compile using the specified compiler, observing the same (described) rules.
p / s.
The post is focused primarily on the novice audience of programmers, and in no case does not claim to be the ultimate truth.
In the following posts I will describe how to "correctly" build the library of computer vision OpenCV .
Thanks for attention.
The picture is taken from a resource: ru.wikipedia.org , author: Bryan Petty.
Excerpt from the Wiki: wxWidgets is an open source cross-platform tool library for developing cross-platform, source-level applications, in particular for building a graphical user interface (GUI).
The library has a set of classes for working with graphic images, HTML, XML documents, archives, file systems, processes, printing subsystems, multimedia, networks, classes for organizing multithreading, debugging, sending dumps and many other tools.
Attention! Under the cut traffic!
Three years ago, I became interested in cross-platform programming using the above-named library. Every time when building this library, a lot of problems arose. The problems were not related to the fact that the library had some significant bugs, but were related to the fact that when using such tools requiring compilation (assembly), you must carefully consider the accompanying literature.
Speaking in an understandable language, it is necessary to carefully read manuals,
readme- , FAQ , etc ...Although there are enough articles on building and using
wxWidgets on the network, I still consider it necessary to share my experience, I will try to explain the steps that lead to a positive result, and describe what it is so that developers who are just starting to use wxWidgets in their projects, less attacked the rake, and immediately turned to the use of all the functionality of this library.And so, let's go.
We will build the library in the
Windows 7 Professional x32 SP1 operating system. As for the other OS , I can safely say that the build of wxWidgets under Ubuntu Desktop 12.04 does not cause any special difficulties, everything is going perfectly. To build under GNU / Linux, you can use this manual.')
As an IDE (code editor and build automation), we will use Code :: Blocks . I think many have already heard about him, so we will not go into details. I will only mention that
C::B is quite a powerful tool for writing large applications, and is directly “sharpened” by using the wxWidgets tool wxWidgets , since itself compiled using this library.1) Install the compiler, debugging tools and pre-configuration:
Debugging tools, usually installed by default along with the compiler, in the case of
GCC and some others, is a file with a modest name GDB .FAQ: The first rake faced by novice developers is the wrong installation of the compiler used to build the library. Most installMinGWinstead ofTDM-GCC, on whichwxWidgetsforWindowsis actually developed.Link :TDM-GCCis an alpha build of newgccreleases compiled formingw
The current official release ofmingwincludesgcc 3and newer versions ofgccPreviously, the developers ofmingwdid not give all the best. Therefore, one of the developers began to collect newgccand lay out packages designed to replacegccin the installedmingw. Nowgcc 4.5is also available atmingwhttp://sourceforge.net/downloads/mingw/MinGW/BaseSystem/GCC/Version4/ xs how do they differ ...
It is worth noting that when installingMinGW, the library can get together, but with a very small probability, most likely at the end of the build, after a few minutes wait, you will receive an error message like this:if not exist ..\..\lib\gcc_lib\mswud mkdir ..\..\lib\gcc_lib\mswud
g++ -c -o gcc_mswud\monolib_treectrl.o -g -O0 -mthreads -DHAVE_W32API_H -D__WXMSW__ -D_UNICODE -I..\..\lib\gcc_lib\mswud -I..\..\include -W -Wall -DWXBUILDING -I..\..\src\tiff\libtiff -I..\..\src\jpeg -I..\..\src\png -I..\..\src\zlib -I..\..\src\regex -I..\..\src\expat\lib -I..\..\src\stc\scintilla\include -I..\..\src\stc\scintilla\lexlib -I..\..\src\stc\scintilla\src -D__WX__ -DSCI_LEXER -DLINK_LEXERS -DwxUSE_BASE=1 -Wno-ctor-dtor-privacy -MTgcc_mswud\monolib_treectrl.o -MFgcc_mswud\monolib_treectrl.od -MD -MP ../../src/msw/treectrl.cpp
makefile.gcc:9395: recipe for target 'gcc_mswud\monolib_treectrl.o' failed
Go to the official website of the
TDM-GCC in the download section, download and install the latest stable version of the corresponding bitness of our operating system ( x32 or x64 ). In our case this is: tdm-gcc-4.8.1-3.exe .Next, the standard procedure: run the installation wizard, and install the compiler with the default options.
Tip: When installing any programs, libraries, unpacking packages, etc., it is best to use the default settings (options) in the program installation wizard. Believe me, this will cause much less worries, and fewer tambourine dances around libraries and programs. This applies to libraries, programs, and all sorts of compilers.
Setting the compiler is to add to the system environment variable Path, the path to the binary compiler builds, if this is not done by the default installation wizard. This is usually:
C:\TDM-GCC-32\bin (if the installation directory (unpacking) selected the root directory of the drive C:\ );Verification: The health check will consist in the following actions: run the command line (CMD), and just execute the command:mingw32-make -vrespectively, we see the version of the make assembly — the linker. Something like this should appear:

2) Loading, unpacking and building the
wxWidgets :Go to the official website of the library
wxWidgets in the download section, download and unpack the latest stable version of the library for OS Windows . In our case it is: wxMSW-Setup-3.0.0.exe ( Windows Installer ).Next, the standard procedure: run the unpacking wizard, and unpack the library with the default options.
The
WXWIN setup is to add the WXWIN system environment WXWIN , which will contain the path to the root directory of the library. Usually it is: C:\wxWidgets-3.0.0 (if the installation directory (unpacking) selected the root directory of the drive C:\ );Actually proceed to the assembly. We start the command line (
CMD ), and execute the following commands in order (waiting for the completion of each execution):cd %WXWIN%\build\mswmingw32-make -f makefile.gcc cleanmingw32-make -f makefile.gcc BUILD=debug SHARED=0 MONOLITHIC=0 UNICODE=1 WXUNIV=0mingw32-make -f makefile.gcc BUILD=release SHARED=0 MONOLITHIC=0 UNICODE=1 WXUNIV=0
Usually the number of build options does not exceed the specified.
Let us consider the purpose of these options:
BUILD- build the library in the mode:debug(debug) orrelease(release version of the application);SHARED- library build type: 0 -staticstatic build, 1 -dynamicdynamic build, respectively;MONOLITHIC— collect all the libraries into “one”: 1 — yes, 0 — no, convenient at the first stages of acquaintance with the library;UNICODE- Unicode support: 1 - yes, 0 - no;WXUNIV- to collect interface elements common to anyOS: 1 - yes, 0 - no. (or build your own controls for operating systems where these elements are missing).
The build process will be similar to this screenshot:
3) Download, install and configure
IDE Code::Blocks :Go to the official website of the
Code::Blocks program in the download section, download and install the latest stable binary release of the program for OS Windows . In our case it is: codeblocks-13.12-setup.exe . You need to download a version without a compiler, because we installed the compiler earlier, and most likely it is a “fresh” compiler that comes with C::BFAQ, Note: The codeblocks-13.12mingw-setup.exe file includes the TDCC-GCC compiler and debugger from TDM-GCC (version 4.7.1, 32 bit). The codeblocks-13.12mingw-setup-TDM-GCC-481.exe file includes the TDM-GCC compiler, version 4.8.1, 32 bit. While v4.7.1 is a rock-solid (c :: B), v4.8.1 is a rock-solid comp.
IF UNSURE, USE "codeblocks-13.12mingw-setup.exe"!
Note: Total compilation time takes on average about 30-40 minutes. Yes, yes, the library is not so small, it has a bunch of classes.
Next, the standard procedure, run the installation wizard, and install the program with default options.
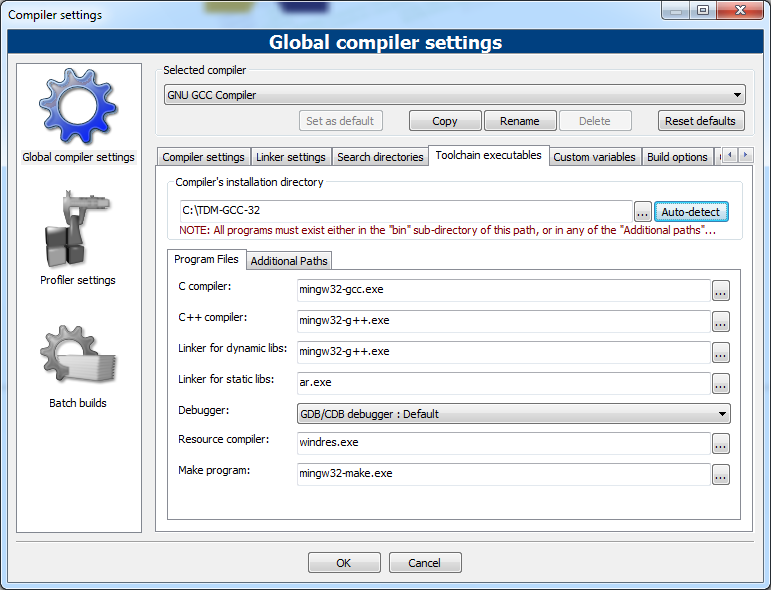
Development environment settings are reduced to the default compiler settings. Usually, when you first run
C::B it will itself display a dialog to select the main compiler from all found (select TDM-GCC ), but sometimes this dialog may not appear. Then run C::B and go through the main menu items to the compiler settings: Settings-->Compiler : Toolchain executables and on the anology with a screenshot set C::BVerification: To test the development environment and verify that the compilers are properly configured, you need to create a test console project inC::B, as follows:
1) RunC::B(if it is not started earlier);
2) Go to the menu items:File-->New-->Projectin the opened dialog (Project) select theConsole applicationand click the [Go] button;
3) Follow the prompts of the project pre-configuration dialog, set the project parameters (name, location, etc.), click the [Next] button and then [Finish];
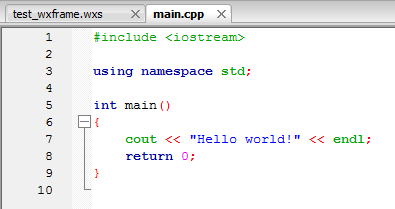
The project code editor has opened. If not, select the main menu items:View-->Manager,View-->Toolbars-->Compiler. Open the source code in themain.cppmanager tree,there should be such code:
edit if necessary.
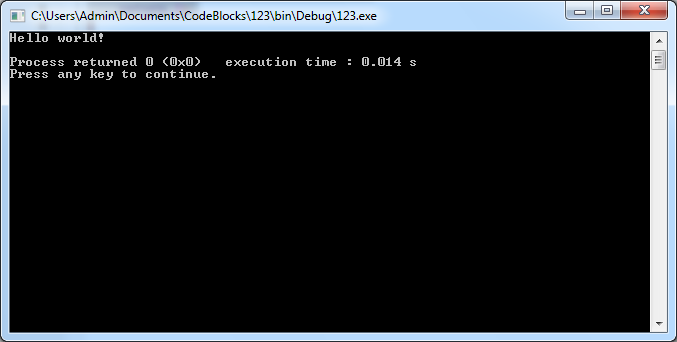
4) Select the main menu item:Build-->Build and Run, and observe our compiled application:
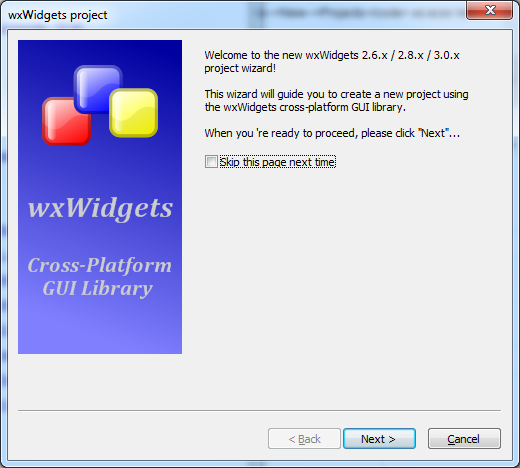
4) Creating a test project using
wxWidgets :Run
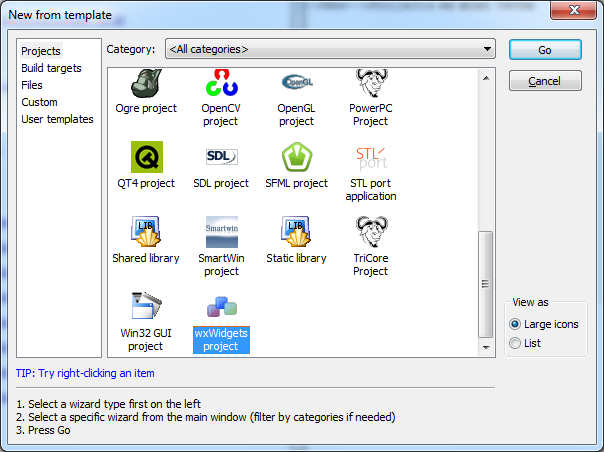
C::B if it was not launched, and go through the main menu items: File-->New-->Projects from all types of the created project, select the wxWidgets project , click the [ Go ] button.In the pre-project setup window that appears, follow the prompts, namely:
1) Press the [Next] button;
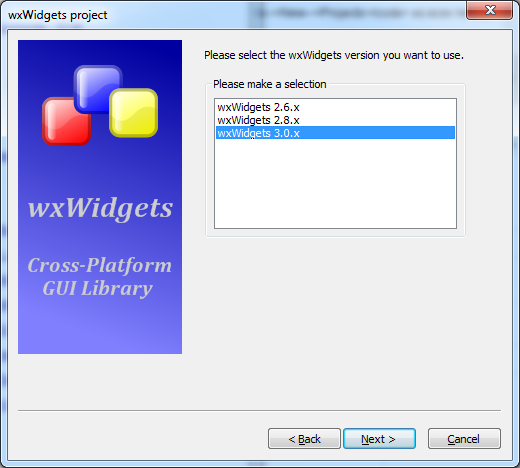
2) Select the type of library usedwxWidgets 3.0.x, click the [Next] button;
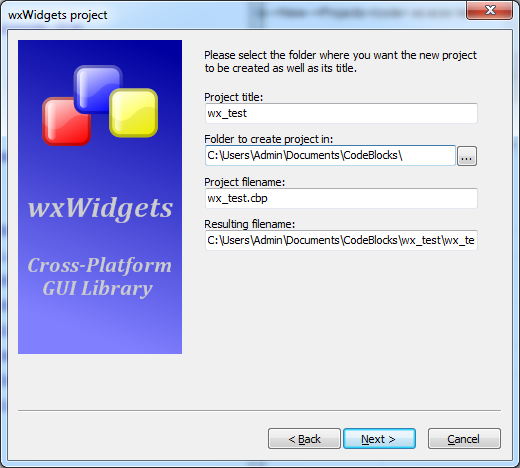
3) Set the project parameters name, source path, etc., click the [Next] button;
4) Set the authors of the project (you can skip this), click the [Next] button;
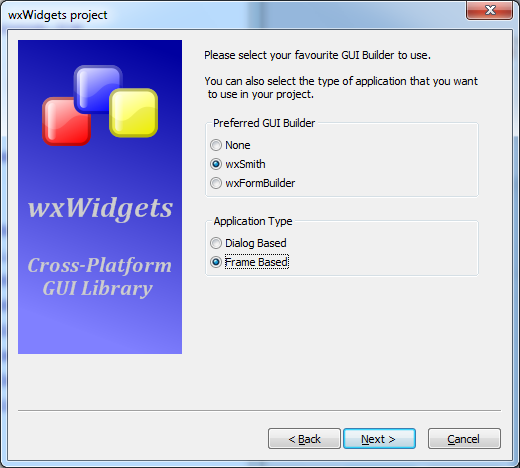
5) Select thewxSmithformwxSmith(sincewxFormBuilderis not pre-installed), also select the type ofFrame Basedapplication to be created, click the [Next] button;
6) We will carefully consider the local variable, and instead of$(wx)we will$(WXWIN), press the [Next] button;
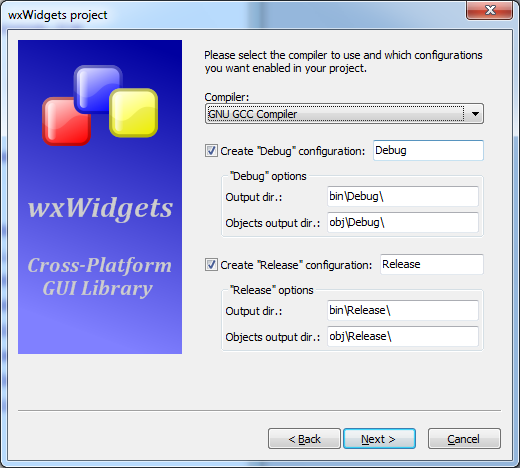
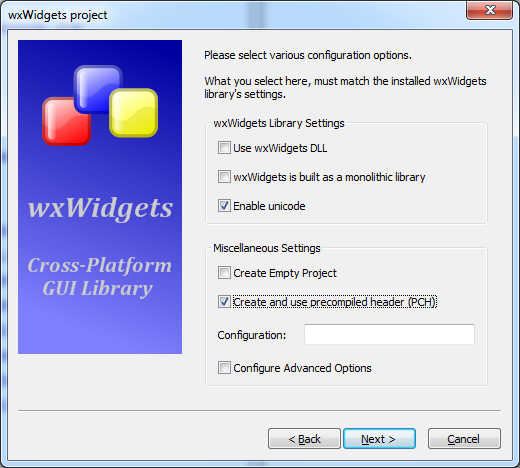
7) select the compiler (usually by default) press the [Next] button;
8) in the case of our assembly (static-non-monolithic), the parameters of the next window should be as follows:
Click the [Next] button and agree with the dialogues.
9) Choose the classes we need with which we want to work.
Depending on the build method, static-dynamic, monolithic and whether there is no next window may not be.
press the [Finish] button;

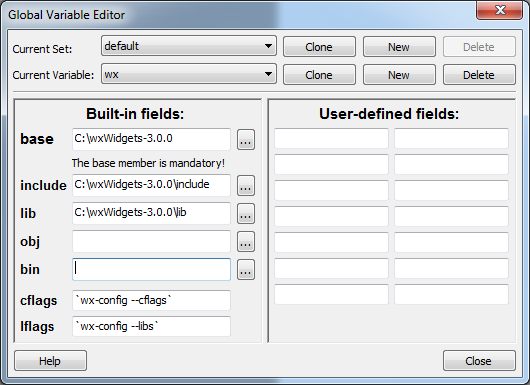
Global project variables should be configured as follows (
Settings-->Global variables ):Project settings should look something like this (
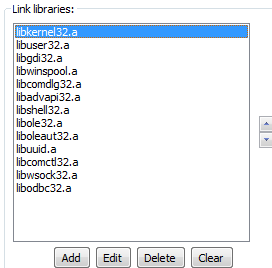
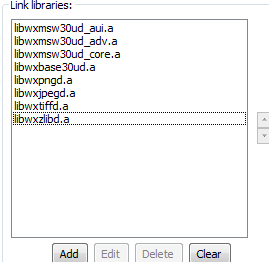
Project-->Build options ):Project build options window ( wx_test ) [ Compiler settings - Other options tab Compiler settings - Other options ]:-pipe
-mthreads
-Winvalid-pch
-include wx_pch.hProject build options window ( wx_test ) [ Compiler settings - Other options tab Compiler settings - Other options ]:__GNUWIN32__
__WXMSW__
wxUSE_UNICODE
WX_PRECOMPProject build options ( wx_test ) [ Linker settings tab]:Project build options ( wx_test ) [ Search directories - Compiler Resource compiler tabs Search directories - Compiler Resource compiler ]:$(WXWIN)\includeProject build options ( Debug ) [ Linker settings tab]:Project build options ( Debug ) window [ Search directories - Compiler Resource compiler tabs Search directories - Compiler Resource compiler ]:$(WXWIN)\lib\gcc_lib\mswudProject build options ( Debug ) [ Search directories - Linker ]:$(WXWIN)\lib\gcc_libProject build options ( Release ) [ Linker settings tab]:Window
Project build options ( Release ) [ Search directories - Compiler Resource compiler tabs Search directories - Compiler Resource compiler ]:$(WXWIN)\lib\gcc_lib\mswuWindow
Project build options ( Release ) [ Search directories - Linker ]:$(WXWIN)\lib\gcc_libNext, save the settings by clicking the [
Project build options configuration form of the project Project build options .Compile (assemble) our application (
Build --> Build and run ):FAQ
FAQ:Question / Problem:
Set system path!
Answer / Solution:
set PATH (WXWIN):
C: \ wxWidgets-2.9.4Question / Problem:
if not exist gcc_mswud mkdir gcc_mswud
process_begin: CreateProcess (NULL, -c "if not exist gcc_mswud mkdir gcc_mswud", ...) failed.
make (e = 2): = x for ershchshch arches.
mingw32-make: [gcc_mswud] Error 2 (ignored)
if not exist .. \ .. \ lib \ gcc_lib mkdir .. \ .. \ lib \ gcc_lib
process_begin: CreateProcess (NULL, -c "if not exist .. \ .. \ lib \ gcc_lib mkdir .. \ .. \ lib \ gcc_
lib ", ...) failed.
make (e = 2): = x for ershchshch arches.
mingw32-make: *** [.. \ .. \ lib \ gcc_lib] Error 2
Answer / Solution:
Run to cmd: set PATH = c: \ mingw \ binQuestion / Problem:
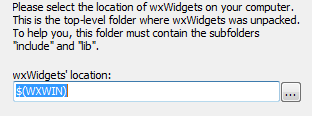
CodeBlocks wxWidgets' location:
Answer / Solution:
$ (# wx) to $ (WXWIN)Question / Problem:
Global Variable Edition
Settings -> Compiler and Debugger -> Compiler Settings tab -> Compiler Options
Answer / Solution:
base: C: \ wxWidgets-2.9.4
include: C: \ wxWidgets-2.9.4 \ include
lib: C: \ wxWidgets-2.9.4 \ lib
cflags: `wx-config --cflags`
lflags: `wx-config --libs`
Other options:
`wx-config --cxxflags`
`wx-config --cflags`
`wx-config --libs`
as for the ways. in general, if you create a wxWidgets project in Code :: Blocks, you will see that in the settings, instead of listing the headers and libraries, it indicates the commands:
`wx-config --cflags` - in compiler settings
`wx-config --libs` - in the linker settings
So: wx-config is a script. if you type these commands in a regular console, you will see that they generate a whole sequence of flags and files. wx-config has help: wx-config --help. All variations of this script call are described there. pay attention to the static option.For errors of the genus C: \ wxWidgets-3.0.0 \ include \ wx \ platform.h | 189 | fatal error: wx / setup.h: No such file or directory |
The solution is:
Projects -> Build options ...
Debug (Search directories)
$ (WXWIN) \ lib \ gcc_lib \ mswud <-> $ (WXWIN) \ lib \ gcc_dll \ mswudThere are also troubles. For example, the line may produce the following error:
rem gcc_mswudll \ monodll_xh_combo.o: file not recognized: Memory exhausted
rem collect2.exe: error: ld returned 1 exit status
rem mingw32-make.exe: *** [.. \ .. \ lib \ gcc_dll \ wxmsw28u_gcc.dll] Error 1
Manifested on some 32 bit platforms when building a monolithic dynamic library due to lack of memory. Due to the fact that the linker compiled for the x86 architecture cannot use addresses above 2GB, even on the x86_64 architecture. Therefore, a compiler change usually does not help, MinGW4.4.1TDM, the whole MinGW4.6.x family, as well as MinGW4.7.0 have been tried, although there is information on the network that is collected under TDM-GCC 4.5.2 sjlj.
To compile in this case, you must specify the -fno-keep-inline-dllexport compiler option:
mingw32-make -f makefile.gcc CXXFLAGS = "- fno-keep-inline-dllexport" BUILD = release SHARED = 1 MONOLITHIC = 1 UNICODE = 1
You can also use the --large-address-aware option for the linker (it is also possible for the compiler), but you need to configure the OS.
You can also get around the problem without using a monolithic assembly, or by refusing to create dynamic libraries for a monolithic assembly, static builds without this error.
Upd:
Errors of the type: This file requires compiler and ISO C ++
2011 standart. This support is currently experimental, and the --std = c ++ 11 or -std = gnu ++ 11 compiler options.
This file includes compiler and library support for the ...
They are solved by explicitly specifying the standard when building the library (adding an option):
CXXFLAGS = "- std = gnu ++ 11"
Upd1: probably in the latest MinGW releases, bugs were fixed, now you can safely compile using the specified compiler, observing the same (described) rules.
p / s.
The post is focused primarily on the novice audience of programmers, and in no case does not claim to be the ultimate truth.
In the following posts I will describe how to "correctly" build the library of computer vision OpenCV .
Thanks for attention.
Source: https://habr.com/ru/post/212027/
All Articles