Replication of data from MySQL to MongoDB

There are cases when you need to change the architecture of the system on the go. You may have found a bottleneck in your project or decided that with the current growth rate, problems with scaling or fault tolerance may soon arise. Just for such cases there Tungsten Replicator.
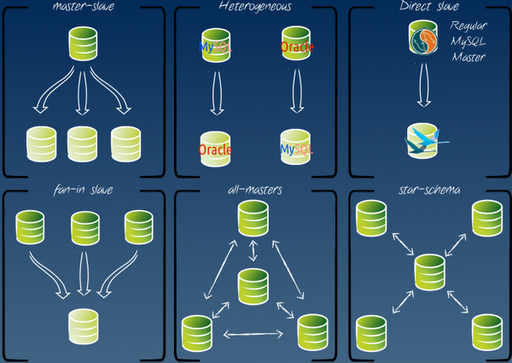
Tungsten Replicator is a free, open source, Java-based application that extends the replication functionality of MySQL. Tungsten has a wide range of capabilities, including multi-master replication, parallel replication, heterogeneous data replication between MySQL and Oracle, PostgreSQL, MongoDB. This article will discuss heterogeneous replication of the MySQL wizard with a slave MongoDB server, CentOS 6.5 will act as the OS.
Dependency installation
Since Tungsten Replicator is written by java, you at least need to install OpenJDK 1.6 or Oracle Java 6. Also, some of the scripts are written in ruby, so you will need to install it too (versions => 1.8) if you don’t have it yet:
# yum install java-1.6.0-openjdk rubyMySQL installation
')
If you already have a MySQL Server installed, you will only need to correct its configuration, as described below, and have a user to replicate.
If MySQL is not installed yet, click here.
Connect the necessary repositories:
Install MySQL Server 5.5:
Adjust MySQL configuration for replication needs:
We activate the automatic start of MySQL when the system boots and start the service:
Run the initial MySQL installation script and set the password for root.
For replication, it is desirable to have a separate user:
# rpm -Uvh download.fedoraproject.org/pub/epel/6/x86_64/epel-release-6-8.noarch.rpm# rpm -Uvh rpms.famillecollet.com/enterprise/remi-release-6.rpmInstall MySQL Server 5.5:
# yum --enablerepo=remi install mysql mysql-serverAdjust MySQL configuration for replication needs:
# vim /etc/my.cnf … # “” server-id = 1 # log_bin = /var/log/mysql/mysql-bin.log expire_logs_days = 10 # MongoDB “ROW” binlog_format = ROW # max_binlog_size = 256M # sync_binlog = 1 ... We activate the automatic start of MySQL when the system boots and start the service:
# chkconfig --level 35 mysqld on# service mysqld startRun the initial MySQL installation script and set the password for root.
# mysql_secure_installation Enter current password for root (enter for none): Change the root password? [Y/n] y New password: SomeSecretPasswD Re-enter new password: SomeSecretPasswD Remove anonymous users? [Y/n] y Disallow root login remotely? [Y/n] y Remove test database and access to it? [Y/n] y Reload privilege tables now? [Y/n] y For replication, it is desirable to have a separate user:
# mysql -u root -p# mysql > grant all on *.* to tungsten identified by 'password' with grant option;Query OK, 0 rows affected (0.01 sec)Install MongoDB
If you already have MongoDB, you can proceed to the next item.
If not, Mongo installation instructions are here.
Let's connect the MongoDB repository:
And install the MongoDB Server 2.4 packages:
Activate the automatic launch of MongoDB when the system boots and start the service:
To check the serviceability of the service, see the list of databases:
By default, authorization is not required.
# vim /etc/yum.repos.d/mongodb.repo [mongodb] name=MongoDB Repository baseurl=http://downloads-distro.mongodb.org/repo/redhat/os/x86_64/ gpgcheck=0 enabled=1 And install the MongoDB Server 2.4 packages:
# yum install mongo-10gen mongo-10gen-serverActivate the automatic launch of MongoDB when the system boots and start the service:
# chkconfig --level 35 mongodb on# service mongodb startTo check the serviceability of the service, see the list of databases:
# mongoMongoDB shell version: 2.4.3connecting to: test> show dbslocal 0.078125GBBy default, authorization is not required.
Installing the master replicator for MySQL
The current, at the time of this writing, the version of the replicator is on this link.
To begin with, we will make several directories for our replicator, for example in / opt:
# cd /opt# mkdir replicator# cd replicator# mkdir mysql # -# mkdir mongodb #Download the archive with the replicator in the current directory:
# wget tungsten-replicator.googlecode.com/files/tungsten-replicator-2.2.0-292.tar.gz# tar -xzf tungsten-replicator-2.2.0-292.tar.gz# mv tungsten-replicator-2.2.0-292/ tungsten-replicator/Now, we will prepare an installation script for the master replicator:
# vim master-installer.sh cd /opt/replicator/tungsten-replicator ./tools/tungsten-installer --master-slave -a \ --datasource-type=mysql \ --master-host=127.0.0.1 \ --datasource-user=tungsten \ --datasource-password=password \ --datasource-mysql-conf=/etc/my.cnf --datasource-log-directory=/var/log/mysql/ --datasource-port=3306 \ --service-name=mongodb \ --home-directory=/opt/replicator/mysql \ --cluster-hosts=127.0.0.1 \ --thl-port=10001 \ --rmi-port=11001 \ --java-file-encoding=UTF8 \ --mysql-use-bytes-for-string=false \ --mysql-enable-enumtostring=true \ --mysql-enable-settostring=true \ --svc-extractor-filters=colnames,pkey \ --svc-parallelization-type=none --start-and-report In this configuration, everything will be replicated, i.e. each base along with all the tables.
If you need to replicate strictly defined tables, you can immediately identify the filter by replacing the penultimate line (svc-extractor-filters) in the script with:
--svc-extractor-filters=replicate \ "--property=replicator.filter.replicate.do=db1.table1,db2.table2,dbN.tableN" \ Accordingly, instead of db1.table1, etc., specify your bases and tables, which you will need to replicate.For the master everything is ready, we can run the installation script:
# sh master-installer.shINFO >> 127_0_0_1 >> Getting services listThe wizard is ready, now you can connect one or several slaves to it - MySQL or PostgreSQL for example. But our goal is replication with MongoDB, let's move on to it.
INFO >> 127_0_0_1 >> ...
Processing services command ...
NAME VALUE
- - appliedLastSeqno: 0
appliedLatency: 1.218
role: master
serviceName: mongodb
serviceType: local
started: true
state: ONLINE
Finished services command ...
Installing a slave replicator for MongoDB
Prepare a script for the installation of a slave replicator, which will pump up data in MongoDB.
# vim slave-installer.sh cd /opt/replicator/tungsten-replicator tools/tungsten-installer --master-slave -a \ --datasource-type=mongodb \ --master-host=127.0.0.1 \ --service-name=mongodb \ --home-directory=/opt/replicator/mongodb \ --cluster-hosts=127.0.0.1 \ --datasource-port=27017 \ --master-thl-port=10001 \ --thl-port=10002 \ --rmi-port=11002 \ --java-file-encoding=UTF8 \ --skip-validation-check=InstallerMasterSlaveCheck \ --svc-parallelization-type=none --start-and-report Note that I am replicating on one host, if you need to replicate to another host, do not forget to specify the correct host address on which you have a master and open the corresponding ports in the firewall (thl-port, rmi-port).If all conditions are met, you can run the installation script.
# sh slave-installer.shWARN >> 127.0.0.1 >> Currently she is in mongodbIf you see the status “ONLINE” in the “state” line, then the installation was successful and you can try to check if the replication is working.
INFO >> 127_0_0_1 >> Getting services list
INFO >> 127_0_0_1 >> Processing services command ...
NAME VALUE
- - appliedLastSeqno: 0
appliedLatency: 0.5
role: slave
serviceName: mongodb
serviceType: local
started: true
state: ONLINE
Finished services command ...
Replication check
Before proceeding with the verification, you need to understand how you can transfer data from a relational database to a non-relational database, such as MongoDB. Indeed, in contrast to traditional DBMS such as MySQL, Oracle and others that store data in tables, in Mongo the data is stored in a simplified form - “key - value”. Therefore, the data from MySQL tables need to be translated into MongoDB “collections”. In this case, only the operations of “inserting”, “updating” and “deleting” tables can replicate; the other operations (CREATE / DROP / ALTER) will be ignored by the replicator.
Check how the inserts will be replicated. To do this, we make a test scheme and a table:
mysql> create schema testdb;mysql> use testdb;mysql> create table testrepl (id int not null primary key, name char(20), date date);Query OK, 0 rows affected (0.00 sec)We make two arbitrary inserts:
mysql> insert into testrepl values (1, 'Vasya', '1965-01-01');Query OK, 1 row affected (0.00 sec)mysql> insert into testrepl values (2, 'Petya', '1991-02-02');Query OK, 1 row affected (0.00 sec)
Now let's see what the replicator generated on the slave side:
> show dbslocal 0.078125GBtestdb 0.203125GBtungsten_mongodb 0.203125GB> use testdbswitched to db testdb> show collectionstestreplsystem.indexes> db.testdb.find(){ "_id" : “01”, "id" : "1", "name" : "Vasya", "date" : "1965-01-01" }{ "_id" : “02”, "id" : "2", "name" : "Petya", "date" : "1991-02-02" }Check how updates are replicated:
mysql> update testrepl set name = 'Vasya P' where id =1;Query OK, 1 row affected (0.01 sec)Rows matched: 1 Changed: 1 Warnings: 0Result in Mongo:
> db.testrepl.find(){ "_id" : “01”, "id" : "1", "name" : "Vasya P", "d" : "1965-01-01" }{ "_id" : “02”, "id" : "2", "name" : "Petya", "date" : "1991-02-02" }The replicator also handles removal:
mysql> delete from testrepl where id =2;Query OK, 1 row affected (0.00 sec)Record on the receiver also retired:
> db.myfirst.find(){ "_id" : “01”, "id" : "1", "name" : "Vasya P", "d" : "1965-01-01" }We looked at several examples showing how replication works. To finally make sure that the replicator does its job, you can try to upload some big dump, and then count the number of tables and collections in MySQL and MongoDB, respectively.
You can check the status of replication, restart the replicator, or stop replication with the trepctl command from the corresponding service directory:
# cd /opt/replicator/For a slave (MongoDB):
# ./mongodb/tungsten/tungsten-replicator/bin/trepctl statusAnd for the wizard (MySQL):
# ./mysql/tungsten/tungsten-replicator/bin/trepctl statusDetails on how to manage the replication service will tell you the option “help”.
What for?
The logical question is, why might replication be needed with MongoDB or some other DBMS? There may be several scenarios. For example, the developer’s desire to experience the benefits of a non-relational DBMS. Or maybe use the data to create a new application designed for use with MongoDB.
In conclusion, it is worth noting that Tungsten Replicator may be for you the same useful tool for various MySQL replication options as it has become for us . Its functionality is wide and the description may take more than one article. However, the official site has enough detailed documentation. Some may be interested in a paid enterprise version from Continuent. In the enterprise edition, in addition to the benefits of the community version, it is claimed: automatic recovery, fault tolerance, upgrade without downtime, and other goodies, but for a lot of money.
Tungsten Replicator Documentation:
Heterogeneous Replication
MySQL to MongoDB Replication
Administration
Useful articles:
Installing and Administering Tungsten Replicator
Getting started with replication from MySQL to MongoDB
MongoDB Manual
Source: https://habr.com/ru/post/211218/
All Articles