Creating programs for Mac OS X. Part 2: development tools and creating a simple application
In this part, I’ll tell you about Mac OS X Leopard application development tools. I have to say that I will consider only those provided by Apple itself. Other IDEs exist, but they are usually cross-platform (for example, Code :: Blocks), so it’s better not to talk about them in this article.
So, on the CD with Leo comes the Mac OS X developer toolkit - a set of necessary programs and frameworks for creating applications. The whole thing is installed (applications, documentation, a bunch of examples, various useful utilities, etc.) in the / Developer folder.
After installation it has 4 main development applications:
1. Xcode - the main IDE
2. Interface Builder is a program for creating program interfaces, although its capabilities are much wider.
3. Instruments - tool tracking tool.
4. Dashcode - a program for creating widgets for Dashboard
And now about these applications in more detail:
/ * many pictures are clickable * /
')
Xcode - the main development environment, is everything that is necessary for the IDE. Paint all the functions does not make much sense, because it is not much different from Visual Studio or KDevelop. But about innovations in version 3.0 worth mentioning:
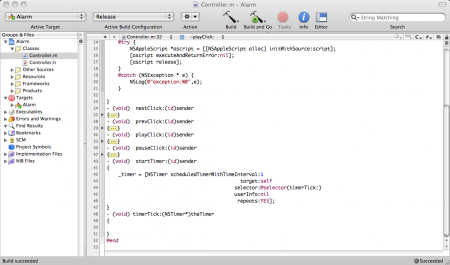
1. Illumination code blocks:
2. folding (folding) code blocks (finally)
3. improved (in the direction of speed) code editor
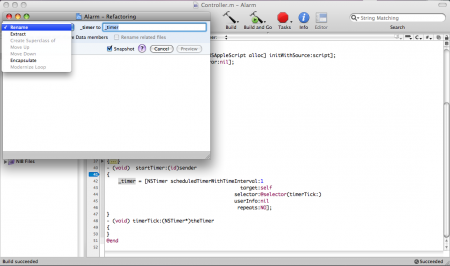
4. refractoring code
5. support for Objective-C 2.0
6. Research Assistant - an assistant who, on the basis of the selected text, tries to find a suitable article in Help and displays it in its window.

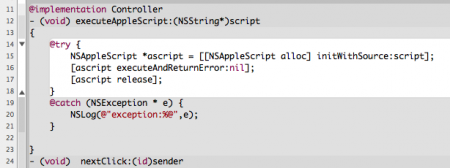
7. showing errors, warnings, etc directly in the code:

8. snapshots of the project. A very handy thing, by pressing Ctrl + Command + S, the current proc is saved in a separate place, and then it will be possible to return to it, if something is clever, and for each file the difference between what it was and what it became is shown:

9. Organizer. As I understand it, this tool for managing multiple projects also allows you to use Xcode to write programs in unknown languages for it. I myself still did not understand what it was, but I found an article that tells about the organizer in more detail.

I will not hide and I will say at once that IB is the best tool for creating interfaces from those I have tested. And not only because it is easy to create simple and clear interfaces in it, but because IB is more than an interface editor, you can get rid of writing many parts of the code related to the interface part. It certainly sounds unclear, but the example will be much clearer (examples will be at the end).
What is IB used for in the program creation process? Only for scrolling buttons on the form - no. One of the main tasks of IB is to link objects with each other, with variables in a class, with different events, etc.

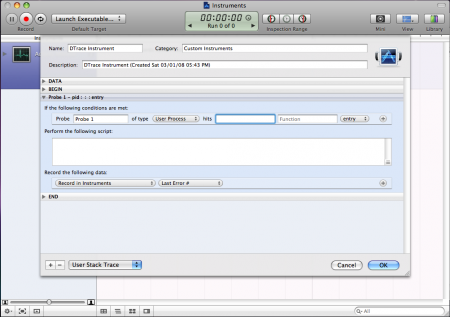
Instruments - a tool for tracking applications. Built on a port under the Mac OS X "DTrace tracing framework" from the OpenSolaris. Self tracking takes place with the help of separate tools that are stored in the library and, if necessary, dragged into the main window. Initially, there are already many tools, for example, a tool for monitoring network activity, CPU usage, and read-write to disk. If the necessary tool is not enough, you can create it yourself:
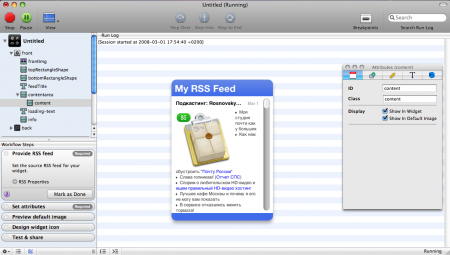
I think the name makes it clear what this program is for, namely the creation of widgets for Dashboard. I complained about the program not for long, the process of creating a widget recalled working in Macromedia Flash. Here I made a widget for reading rss habr for seconds 10:
As I promised, we will now create a simple application. What will it do? After entering the text in the edit field and pressing Enter, print the entered text on the label field. I will warn you that I will not tell you in detail why something needs to be done that way, the hardware will go on later, for now - just creating an application without any questions.
So, let's begin:
open Xcode and select File => New Project in the menu that appears in the window that appears and check “Cocoa Application” and click Next:

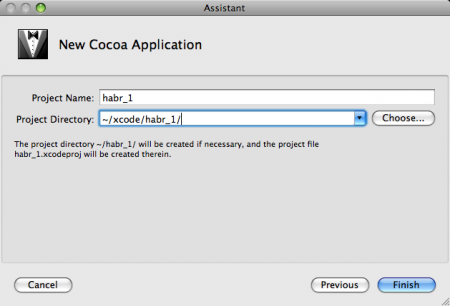
Next, set the project name - habr_1 and where it will be stored (I have ~ / xcode / habr_1 /):
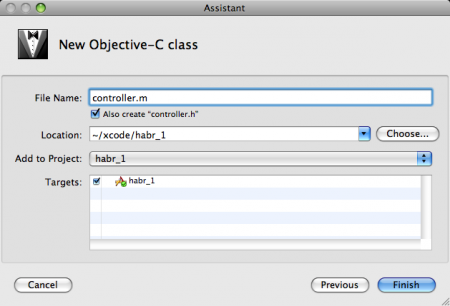
after that click Finish and get the project. Now we need to add a class that will implement what we need. To do this, go to the menu File => New File ... and select the Objective-C class and click Next. In the next window, we will be asked to set the file name, so we write “controller”:
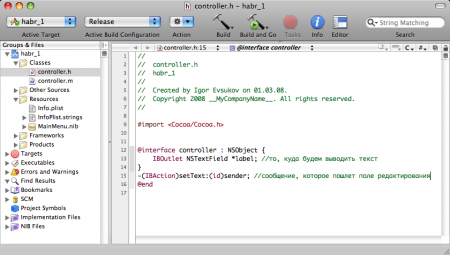
Now in the project window on the left, two files appeared in the Classes folder: controller.h and controller.m. Open controller.h and write the same as in the picture:
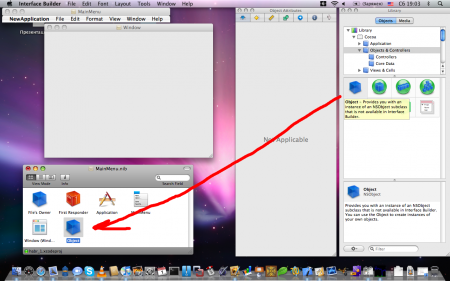
Now double-click on the MainMenu.nib file, Interface Builder opens and becomes active. What we see: the blank under the window, the main menu and the window indicating that we have opened MainMenu.nib. Click on the Tools => Library menu to open the library with objects and Tools => Inspector to see the properties of these very objects. Now we need to add to MainMenu.nib an object that will represent the class “controller” that we created, so we find an NSObject object in the library (a blue translucent cube) and drag it into the window with the inscription MainMenu.nib:
Rename “Object” to “controller” for clarity. Now we need to explain to this cube that it represents the class we need. To do this, leaving it active go to the tab "Identity" (echoing to the right) in the inspector and in the drop-down list opposite the label "Class" choose our "controller":

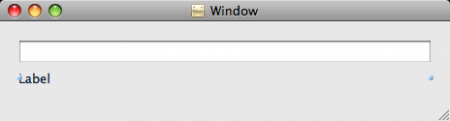
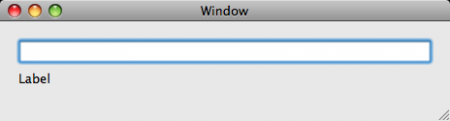
Now we will add an edit field and a label to the form from the Library. For the edit field in the “Attributes” tab (the first on the left) in the drop-down list opposite the “action” label, select “Sent On Enter Only”. You should get something like this:
And now the fun part begins, we have to bind the “label” variable from the class to the label and set “setText:” as the message that the text field sends when it is finished editing. Let's link a label with a variable label: let's make our “controller” object active, hold down Ctrl and the left mouse button over the blue cube and move the cursor to our label, see the following picture:

after releasing the lcm, this window appears (it will contain all class variables that coincide in type with what we are trying to link to):

select the only label entry in it. That's it, now we have linked the class label variable and our label on the form. The linking of the edit field with the message sent to it passes as well, you just need to drag not from the cube to the field, but vice versa - from the edit field to the controller object.
That's it, save MainMenu.nib (File => Save) and return to Xcode.
In Xcode, open the controller.m file and describe the message implementation:

Save the project, click Build and Go and get the finished application:
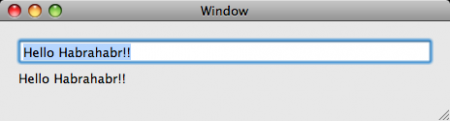
Enter something in the edit field and press Enter, here’s the result:
And now I will show you how IB can simplify life and the amount of code. Let's create an application almost (almost because compiling into a full application). What will it do? Display the status of the slider in the edit field and have a button to close.
So, let's begin. Open Interface Builder, File => New, select “Window” and click “Choose”, get “Untitled” window, denoting our window and window blank, throw a horizontal slider, edit box and button on it, and call it “Close” in the properties. ":
Now we are doing the communication _from the slider_to_pol_Editing_, after releasing the LMC in the drop-down list, select “takeDoubleValueFrom:”:

Similarly, we associate a button with the terminate event: the “First Responder” object from the “Untitled” window (the red cube with the edinic).
Now File => Simulate Interface, we get a prototype of a working application: when you change the position of the slider, the number in the edit field changes, when you click Close, the application closes.
So just you can save yourself from writing many lines of code.
And if someone has not yet seen this, then watch this video. In it, OH himself (not, not RMS) tells and shows all the power of Interface Builder (though before that 30 minutes of PR NextSTEP PR):
PS: thank you for your attention
So, on the CD with Leo comes the Mac OS X developer toolkit - a set of necessary programs and frameworks for creating applications. The whole thing is installed (applications, documentation, a bunch of examples, various useful utilities, etc.) in the / Developer folder.
After installation it has 4 main development applications:
1. Xcode - the main IDE
2. Interface Builder is a program for creating program interfaces, although its capabilities are much wider.
3. Instruments - tool tracking tool.
4. Dashcode - a program for creating widgets for Dashboard
And now about these applications in more detail:
/ * many pictures are clickable * /
Xcode

')
Xcode - the main development environment, is everything that is necessary for the IDE. Paint all the functions does not make much sense, because it is not much different from Visual Studio or KDevelop. But about innovations in version 3.0 worth mentioning:
1. Illumination code blocks:
2. folding (folding) code blocks (finally)
3. improved (in the direction of speed) code editor
4. refractoring code

5. support for Objective-C 2.0
6. Research Assistant - an assistant who, on the basis of the selected text, tries to find a suitable article in Help and displays it in its window.

7. showing errors, warnings, etc directly in the code:
8. snapshots of the project. A very handy thing, by pressing Ctrl + Command + S, the current proc is saved in a separate place, and then it will be possible to return to it, if something is clever, and for each file the difference between what it was and what it became is shown:

9. Organizer. As I understand it, this tool for managing multiple projects also allows you to use Xcode to write programs in unknown languages for it. I myself still did not understand what it was, but I found an article that tells about the organizer in more detail.
Interface builder

I will not hide and I will say at once that IB is the best tool for creating interfaces from those I have tested. And not only because it is easy to create simple and clear interfaces in it, but because IB is more than an interface editor, you can get rid of writing many parts of the code related to the interface part. It certainly sounds unclear, but the example will be much clearer (examples will be at the end).
What is IB used for in the program creation process? Only for scrolling buttons on the form - no. One of the main tasks of IB is to link objects with each other, with variables in a class, with different events, etc.
Instruments

Instruments - a tool for tracking applications. Built on a port under the Mac OS X "DTrace tracing framework" from the OpenSolaris. Self tracking takes place with the help of separate tools that are stored in the library and, if necessary, dragged into the main window. Initially, there are already many tools, for example, a tool for monitoring network activity, CPU usage, and read-write to disk. If the necessary tool is not enough, you can create it yourself:

Dashcode
I think the name makes it clear what this program is for, namely the creation of widgets for Dashboard. I complained about the program not for long, the process of creating a widget recalled working in Macromedia Flash. Here I made a widget for reading rss habr for seconds 10:

Creating a simple application with Xcode and Interface Builder
As I promised, we will now create a simple application. What will it do? After entering the text in the edit field and pressing Enter, print the entered text on the label field. I will warn you that I will not tell you in detail why something needs to be done that way, the hardware will go on later, for now - just creating an application without any questions.
So, let's begin:
open Xcode and select File => New Project in the menu that appears in the window that appears and check “Cocoa Application” and click Next:

Next, set the project name - habr_1 and where it will be stored (I have ~ / xcode / habr_1 /):

after that click Finish and get the project. Now we need to add a class that will implement what we need. To do this, go to the menu File => New File ... and select the Objective-C class and click Next. In the next window, we will be asked to set the file name, so we write “controller”:

Now in the project window on the left, two files appeared in the Classes folder: controller.h and controller.m. Open controller.h and write the same as in the picture:

Now double-click on the MainMenu.nib file, Interface Builder opens and becomes active. What we see: the blank under the window, the main menu and the window indicating that we have opened MainMenu.nib. Click on the Tools => Library menu to open the library with objects and Tools => Inspector to see the properties of these very objects. Now we need to add to MainMenu.nib an object that will represent the class “controller” that we created, so we find an NSObject object in the library (a blue translucent cube) and drag it into the window with the inscription MainMenu.nib:

Rename “Object” to “controller” for clarity. Now we need to explain to this cube that it represents the class we need. To do this, leaving it active go to the tab "Identity" (echoing to the right) in the inspector and in the drop-down list opposite the label "Class" choose our "controller":

Now we will add an edit field and a label to the form from the Library. For the edit field in the “Attributes” tab (the first on the left) in the drop-down list opposite the “action” label, select “Sent On Enter Only”. You should get something like this:
And now the fun part begins, we have to bind the “label” variable from the class to the label and set “setText:” as the message that the text field sends when it is finished editing. Let's link a label with a variable label: let's make our “controller” object active, hold down Ctrl and the left mouse button over the blue cube and move the cursor to our label, see the following picture:

after releasing the lcm, this window appears (it will contain all class variables that coincide in type with what we are trying to link to):
select the only label entry in it. That's it, now we have linked the class label variable and our label on the form. The linking of the edit field with the message sent to it passes as well, you just need to drag not from the cube to the field, but vice versa - from the edit field to the controller object.
That's it, save MainMenu.nib (File => Save) and return to Xcode.
In Xcode, open the controller.m file and describe the message implementation:

Save the project, click Build and Go and get the finished application:
Enter something in the edit field and press Enter, here’s the result:
The power of interface builder
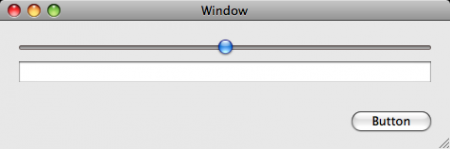
And now I will show you how IB can simplify life and the amount of code. Let's create an application almost (almost because compiling into a full application). What will it do? Display the status of the slider in the edit field and have a button to close.
So, let's begin. Open Interface Builder, File => New, select “Window” and click “Choose”, get “Untitled” window, denoting our window and window blank, throw a horizontal slider, edit box and button on it, and call it “Close” in the properties. ":
Now we are doing the communication _from the slider_to_pol_Editing_, after releasing the LMC in the drop-down list, select “takeDoubleValueFrom:”:
Similarly, we associate a button with the terminate event: the “First Responder” object from the “Untitled” window (the red cube with the edinic).
Now File => Simulate Interface, we get a prototype of a working application: when you change the position of the slider, the number in the edit field changes, when you click Close, the application closes.
So just you can save yourself from writing many lines of code.
And if someone has not yet seen this, then watch this video. In it, OH himself (not, not RMS) tells and shows all the power of Interface Builder (though before that 30 minutes of PR NextSTEP PR):
PS: thank you for your attention
Source: https://habr.com/ru/post/21064/
All Articles