We try Audio API on an example of writing a visualizer
Web Audio API for me is one of those new products that browsers are now crammed with and with which I wanted to make friends closer and at least somehow get into what can be done with this. To penetrate, I decided to write a simple audio visualizer.
But before we start to deal directly with the Audio API, we need to sketch the layout of our visualizer and we will do it with the help of canvas.
Creating a blank
If you are not interested in this part, you can simply skip it.
Creating a blank
So create a canvas:
Well, we have a canvas and then we need to create elements that will be responsible for rendering the audio signal. In our case, these will be normal circles:
')
The draw function, which will draw our circles, looks like this:
Actually, our preparation is almost ready, only the Particle Particle Designer remains.
var canva = document.createElement('canvas'); var ctx = canva.getContext('2d'); // canva.width = window.innerWidth; canva.height = window.innerHeight; // document.body.appendChild(canvas); Well, we have a canvas and then we need to create elements that will be responsible for rendering the audio signal. In our case, these will be normal circles:
')
var particles = [];// var createParticles = function () { var particle = null; for (var i = 0; i < 50; i++) { particle = new Particle(); particles.push(particle); } // - setInterval(draw,33); } The draw function, which will draw our circles, looks like this:
var draw = function () { // ctx.clearRect(0, 0, canva.width, canva.height); for (var i = 0; i < 50; i++) { var loc = particles[i]; loc.draw(); } } Actually, our preparation is almost ready, only the Particle Particle Designer remains.
var Particle = function () { this.init(); }; Particle.prototype = { init: function () { this.x = random(canva.width); this.y = random(canva.height); this.level = 1 * random(4); this.speed = random(0.2, 1); this.radius = random(10, 70); // this.color = random(['#69D2E7', '#A7DBD8', '#E0E4CC', '#F38630', '#FA6900', '#FF4E50', '#F9D423']); // this.opacity = random(0.2, 1); this.band = Math.floor(random(128)); }, draw: function () { var pulsar, scale; pulsar = Math.exp(this.pulse); scale = pulsar * this.radius || this.radius; ctx.save(); ctx.beginPath(); // ctx.arc(this.x, this.y, scale, 0, Math.PI * 2); ctx.fillStyle = this.color; // ctx.globalAlpha = this.opacity / this.level; // ctx.closePath(); ctx.fill(); ctx.strokeStyle = this.color; // ctx.stroke(); ctx.restore(); this.move(); }, move: function () { this.y -= this.speed * this.level; // if (this.y < -100) { this.y = canva.height; } } } // - var random: function( min, max ) { if (this.isArray( min )) { return min[ ~~( Math.random() * min.length ) ]; } if (!this.isNumber(max)) { max = min || 1, min = 0; } return min + Math.random() * ( max - min ); }, // var isArray: function(object) { return Object.prototype.toString.call( object ) == '[object Array]'; }, // var isNumber: function(object) { return typeof object == 'number'; } We create an analyzer
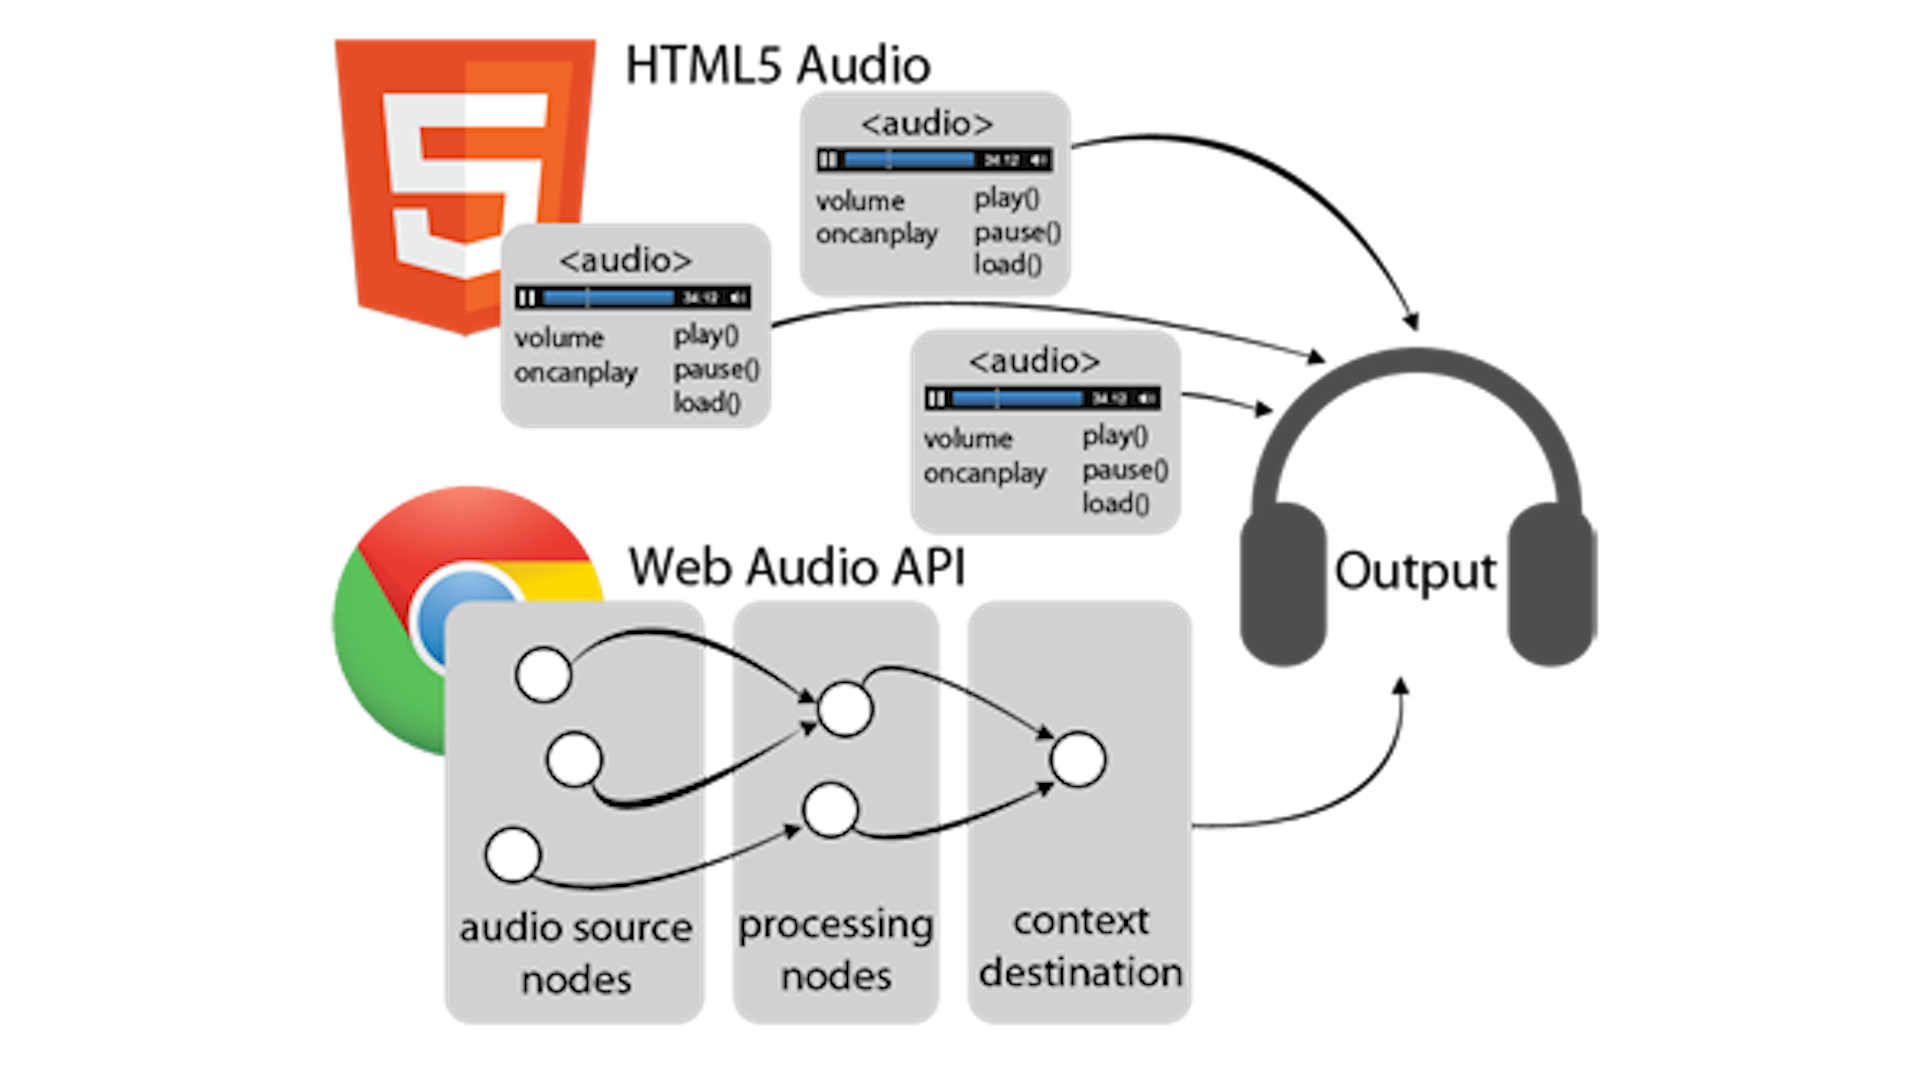
So, we have everything to start writing a visualizer. The main role will play the concept of AudioContext. One page can have only one context, but this is quite enough to implement everything your heart desires. Virtually all methods for creating modules are AudioContext methods. Full list of them can be found here . Since the AudioContext specification is not yet fully endorsed, we will create it this way:
var AudioContext = w.AudioContext || w.webkitAudioContext; var context = new AudioContext (); This is enough to create AudioContext in Opera, Chrome and Firefox. From the context we created, we need the following methods:
- createScriptProcessor (Former createJavaScriptNode) - This method allows you to create an interface for collecting, processing or analyzing audio data using js. This interface has its own event handler and we will be interested in the onaudioprocess event, which occurs when new data is passed to the input.
When called, the method takes three arguments bufferSize - Buffer size, numInputChannels - the number of input channels in the stream, numOutputChannels - the number of output channels. - createMediaElementSource - Creates an interface that represents the source of the sound from an audio or video element. After calling this method, the audio stream from the audio element will be redirected to processing in AudioContext.
- createAnalyser - This method allows you to get information about the frequency and time parameters of the signal as an array of data. We will need to connect our analyzer to the audio source and to the sound receiver.
So, using what we found out about the AudioContext, we outline the constructor of our analyzer:
var Analyze = function () { var AudioContext = w.AudioContext || w.webkitAudioContext; this.context = new AudioContext(); this.node = this.context.createScriptProcessor(2048, 1, 1); this.analyser = this.context.createAnalyser(); this.analyser.smoothingTimeConstant = 0.3; this.analyser.fftSize = 512; this.bands = new Uint8Array(this.analyser.frequencyBinCount); } This function, when called, will create for us an audio context and an interface for data analysis. Here you can see that when creating the analyzer, we set the values for the smoothingTimeConstant parameters — the polling frequency with which the analyzer will require data and fftSize — the dimension of the Fourier transform (roughly speaking, this parameter indicates how much data we want to get as a result of frequency analysis of the signal in will be equal to fftSize / 2). We use the Uint8Array function to create an array with a clear indication of the boundaries, in our case its length will be equal to 256.
[0, 0, 0, 0, 0, 0, 0, 0, 0, 0, 0, 0, 0, 0, 0, …] While in the array we have the ball downhill, but this is not surprising, because there is no signal source to be analyzed. Let's add the creation of an audio element to our constructor, and at the same time subscribe to the canplay event for it, which occurs when the browser thinks it has received enough data to start playback. With this in mind, our designer will take the form:
var Analyze = function () { var AudioContext = w.AudioContext || w.webkitAudioContext; // this.audio = new Audio(); this.audio.src = "test1.ogg"; this.controls = true; // - this.context = new AudioContext(); this.node = this.context.createScriptProcessor(2048, 1, 1); // this.analyser = this.context.createAnalyser(); this.analyser.smoothingTimeConstant = 0.3; this.analyser.fftSize = 512; this.bands = new Uint8Array(this.analyser.frequencyBinCount); // this.audio.addEventListener("canplay", function () {}); } It remains for us to send our created audio stream to AudioContext and link the analyzer to the source and receiver. It’s pretty easy to do, because the smart people who created the Web Audio API took care of it and thanks to them every audio module has a connect method that accepts the value to be joined to as a parameter. Total, the final form will be:
var Analyse = function () { var an= this, AudioContext = w.AudioContext || w.webkitAudioContext; // this.audio = new Audio(); this.audio.src = "test1.ogg"; this.controls = true; // - this.context = new AudioContext(); this.node = this.context.createScriptProcessor(2048, 1, 1); // this.analyser = this.context.createAnalyser(); this.analyser.smoothingTimeConstant = 0.3; this.analyser.fftSize = 512; this.bands = new Uint8Array(this.analyser.frequencyBinCount); // this.audio.addEventListener('canplay', function () { // AudioContext an.source = an.context.createMediaElementSource(an.audio); // an.source.connect(an.analyser); // , an.analyser.connect(an.node); // an.node.connect(an.context.destination); an.source.connect(an.context.destination); // an.node.onaudioprocess = function () { an.analyser.getByteFrequencyData(an.bands); if (!an.audio.paused) { if (typeof an.update === "function") { return an.update(an.bands); } else { return 0; } } }; }); return this; }; Here it is worth mentioning AudioContext.destination - this is the system audio output by default (usually columns). Method getByteFrequencyData - this method receives data from the analyzer and copies it into the passed array, which we eventually return, thanks to the great magic of the closures.
Let's add the creation of the analyzer to our createParticles function, as a result we get:
var createParticles = function () { var particle = null, audio = null; for (var i = 0; i < 50; i++) { particle = new Particle(); particles.push(particle); } // elem = new Analyse(); // audio document.body.appendChild(elem.audio); // audio.update = function (bands) { var ln = 50; while (ln--) { var loc = particles[ln]; loc.pulse = bands[loc.band] / 256; } }; // setInterval(draw,33); } That's all, we got our simple visualizer and slightly lifted the veil over the Web Audio API. All this beauty will work in Chrome, Opera, Firefox. IE, as always, remains overboard.
A bit more sophisticated demo in which this code was used: demo
Demo code on github: Analyzer
Code on codepen: Analyzer
Of course, this is only a small part of the capabilities that the Audio API is capable of, but you have to start somewhere. You can already use the Audio API for:
- Surround sound for games
- Sound processing applications
- Audio synthesis
and for many more.
Useful Fiction:
- developer.mozilla.org/en-US/docs/Web/API/AudioContext
- www.html5rocks.com/en/tutorials/webaudio/intro
- creativejs.com/resources/web-audio-api-getting-started
- blogs.msdn.com/b/ie/archive/2011/05/13/unlocking-the-power-of-html5-lt-audio-gt.aspx
- updates.html5rocks.com/2012/02/HTML5-audio-and-the-Web-Audio-API-are-BFFs
- css.dzone.com/articles/exploring-html5-web-audio
Source: https://habr.com/ru/post/210422/
All Articles