What does a robot need to build a card?
Once again, Tod's blog is with you, and today we will continue our acquaintance with the navigation stack of the operating system for ROS robots. Recall that in the previous article a general description of the navigation stack was given, the necessary requirements for its use on the robot were outlined, the tasks of controlling the movement of the robot, and obtaining sensory odometer and sonar data were considered. In this article we will talk about the most "tasty" possibilities of the navigation stack: building a map and planning a trajectory of movement, taking into account the obstacles encountered on the way of the robot. Under the cut, among other things, you will find a video with navigation of the robot Tod in the apartment.
Kinect
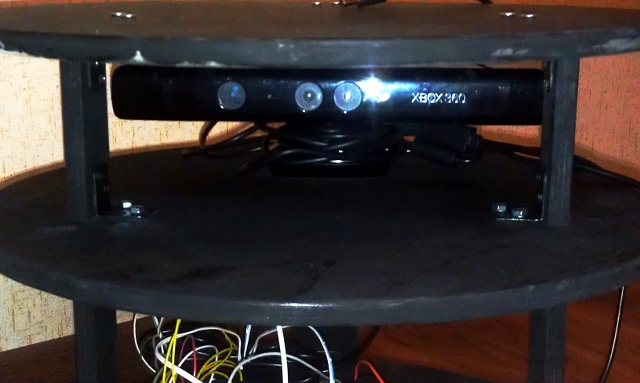
To build a map with a robot, you can use both a professional laser rangefinder and a less expensive depth camera: Kinect or ASUS Xtion. Perhaps each of you knows about Kinect as a game controller for the Xbox 360 console, expanding its interactive capabilities, but not everyone knows that it is thanks to Kinect that professional robotics has become much more accessible. While the price of an initial level laser rangefinder is about $ 1000, buying a Kinect will cost you $ 150-200.

As can be seen from the picture above, Kinect is equipped with several types of sensors, which are useful for solving several tasks in the field of robotics at once:
- A VGA camera with a resolution of up to 1280x1024 can be used in the system of telepresence, indoor navigation and video calls.
- Based on the data obtained from the depth sensor, 2-D and 3-D maps are built and other tasks of autonomous navigation are performed, and if the robot has a manipulator, it searches for and captures objects.
- An array of 4 microphones - for localizing sound sources (this is an interesting topic for a separate article).
In ROS, Kinect communicates through the openni_launch package node by posting several types of messages to the appropriate topics. First of all, you should pay attention to the following topics:
- / camera / rgb / image_color — RGB camera data as an image;
- / camera / depth / image — depth sensor data as an image;
- / camera / depth / points - depth sensor data in the form of a three-dimensional point cloud.
Using Kinect in the navigation stack requires converting the point cloud data into a fake laser 2-D rangefinder data, which means getting a horizontal cut of the original point cloud. To solve this problem, we used the pointcloud_to_laserscan package from the stack of the Turtlebot robot. This is what the Kinect sensor data slice looks like in the message format sensor_msgs / LaserScan.

Kinect compared to expensive laser range finders, however, has certain disadvantages. They should be considered, first of all, when deciding on the location of Kinect on the robot. One of the main drawbacks is the large blind area (about 50 cm). After the ambikontur user comment in the previous article about this problem and some discussions, we decided to place Kinect closer to the back of the robot. This allowed us to “hide” most of the dead zone inside the case.
Thus, at this stage, the Tod robot can already perform the following tasks related to navigation:
- obtain odometry data to track the trajectory of movement;
- receive commands to move the robot in the format of linear and angular velocity;
- receive sensory sonar data in a point cloud format;
- Receive Kinect sensory data in a 2-D laser rangefinder format.
On the basis of such a system, it is possible to solve navigation problems of a higher level. First of all, these tasks include SLAM (Simultaneous localization and mapping). SLAM solves the “chicken and egg” problem: on the one hand, a reliable estimate of the location of the robot in space requires an accurately constructed map, on the other hand, the process of building a map requires a more accurate assessment of the location of the robot. Another equally important navigation task is the planning of the trajectory of movement.
The ROS navigation stack provides 3 basic packages designed to solve high-level navigation tasks:
- gmapping creates a room map based on the SLAM algorithm, laser rangefinder and odometer data;
- amcl locates the robot already on the existing map;
- move_base allows you to move the robot to any point on the map, taking into account obstacles.
Now let's take a closer look at the capabilities of each package.
gmapping
First, it should be said that the map in ROS is a regular image file in PGM format, where each pixel can be:
- white space is free;
- black space is occupied by an obstacle;
- gray - the space has not yet been investigated by the robot.

The slam_gmapping node in the gmapping package is intended for building a map. The SLAM algorithm used in the package, based on the collected sensory data, forms a grid map in which each cell is defined by a certain probability of finding an obstacle in it. The probability of each cell is adjusted as new sensory data is received, and as a result we get the most reliable representation of the map. As a sensory data, gmapping uses data from a laser rangefinder, the source of which in the Tod robot is Kinect, and odometer data.
To create a map, you need to control the robot from the keyboard or the joystick, go around the room and save the resulting map to a file. It is better not to go around the premises very quickly, while taking into account the particularities of the rangefinder used. For example, Kinect has a blind zone in front, so when building a map you should not drive too close to the walls.
We experienced the gmapping package and the robot Tod at home combat, and this is what came of it.
amcl
The amcl (Adaptive Monte Carlo Localization) node algorithm works with a ready-made map, for example, created using the gmapping package. This algorithm is designed for probabilistic determination of the location of the robot based on the Monte Carlo method and the particle filter.
Tod's robot as the source data in the amcl node uses sensory data from a laser rangefinder and odometry. After the start, the node waits for setting the initial position of the robot. This is convenient, for example, when the robot starts from the docking station. However, if the initial position is not specified, then it is assigned a point at the beginning of the coordinate system of the map.
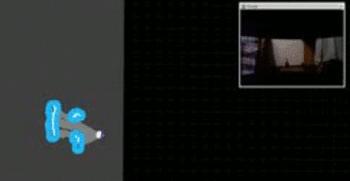
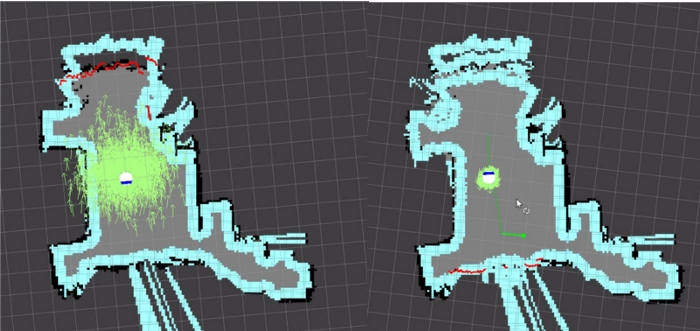
As can be seen in the picture below, the map displays the current data of the laser range finder as red dots on the walls and obstacles, and the robot itself is in a cloud of green arrows. These arrows indicate the array of possible positions of the robot at the current time, formed by the amcl node. As the robot moves around the map and new sensory data is received, the uncertainty of the robot's position decreases, and this cloud becomes smaller.
In the amcl node, you can set many parameters of the algorithm. For example, increasing the maximum number of particles (particle) improves the accuracy of determining the position of the robot, but it also increases the load on the CPU.
')
move_base
You can move the robot around the map, controlling it from the keyboard, but the move_base package in the ROS navigation stack also allows its autonomous movement. It is enough to set a point on the map, and the robot will independently create the best route to the target. During the assignment, the robot will report its current location, and if the target is unavailable for some reason, it will cancel it without disrupting the operation of the system.
The global route is built immediately after setting the target, taking into account the currently known obstacles. During the movement to the target, the global route is divided into segments - local routes. Each local route is constructed taking into account the incoming sensory data by setting the appropriate linear and angular velocity of the robot.
The nature of the route of movement of the robot to the target is determined by two components:
- global cost map (global cost map) - to build a global route;
- local cost map (local cost map) - to build the nearest local traffic route.
Cost maps provide the navigation information needed to successfully complete the current route. In the configuration files of the cost cards, the robot sizes, its speed along the route, the length of the segments, the frequency of the route update, and much more are set.
And this is where we end up with the ROS navigation stack. In the next post, we will teach Tod to understand Russian. Subscribe to our blog - stay up to date.
Source: https://habr.com/ru/post/210252/
All Articles