JUCE - Cross-platform C ++ framework for developing applications with a user interface

Greetings habrosoobschestvo!
Probably everyone who professionally develops software or just enjoys programming, sooner or later came to the need to create a user interface for their program. And if you don’t consider native platform environments and languages such as C # for Windows or Objective-C for Mac OS X that initially contain tools for visualizing the interface, the choice is not very rich, especially if we are not eager to pay money for GUI development tools or wish to achieve cross-platform.
In my first post on Habré, I would like to talk about such a framework as JUCE. Search on Habra issued only 2 articles where this framework is only mentioned, but no detailed information is given. I think that for those who are just starting to master cross-platform GUI applications in C ++, it will be interesting to learn about alternatives to such monsters as Qt or to old people like GTK +
What is JUCE
')
Official site developers: juce.com .
JUCE (Jules' Utility Class Extensions) is a comprehensive C ++ class library for developing cross-platform software.
It contains almost everything that you may need to create most applications, especially well suited for building complex GUI, graphics and audio processing.
Wikipedia:
Juce is an open cross-platform software development toolkit (framework) for the C ++ language used for developing GUI applications and plug-ins.
JUCE supports the following platforms and features:
- Mac OS X Applications and VST / AudioUnit / RTAS / NPAPI plugins are compiled using Xcode. (on 10.7.5 & Xcode 4.6.3 everything works without problems)
- Windows Applications and VST / AudioUnit / RTAS / NPAPI / ActiveX plugins are built using MS Visual Studio. Results are fully compatible with Windows XP, Vista and Win7 / 8.
- Linux Applications and plug-ins can be built for any kernel version 2.6 and older.
- iOS Native iPhone and iPad apps are built using Xcode
- Android Android applications are built using Ant or Eclipse using the Android NDK.
JUCE was developed by one person and from a set of classes for personal use it grew into a full-fledged framework.
The OpenSource license appeared in 2003, and since 2005 the framework has acquired its paid version for proprietary software.
Most of the framework modules have an open license GPLv2, v3 and AGPLv3 , Core module is licensed ISC
If you do not want to publish the source code of your program, then you can purchase a commercial license at the following rates:
- License for one product - 399 British Pounds
- License for unlimited number of products - 699 pounds
- Upgrade from first to second - 349 pounds
- Upgrade old versions - up to a full 349 Pounds to a single product license 199 Pounds
Framework composition and getting started
JUCE itself is quite lightweight, just over 28 MB. The docs folder contains detailed documentation on installing and connecting the framework in various operating systems and development environments.
Regarding the installation, it is worth noting that JUCE is not a set of libraries in the usual sense or a set of source codes from which you need to build libraries for static or dynamic linking, but a set of header files and source code files containing all the classes provided by the framework. This approach not only simplifies the migration from one platform to another, eliminating the need to include the framework libraries in the distribution kits or require their presence on the user's computer, but also solves the problem of the bitness of the libraries on which the framework depends. Since the standard libraries or the standard environment of modern OS which is used in JUCE projects (all of them are described in the documentation supplied with the framework) are usually compiled with support for both 32 and 64 bit. So you should keep track of the bits of only those libraries that you additionally use in your project.
All framework modules are in the modules folder. All source code is well structured and commented, so that problems with understanding do not arise.
In the extras folder you can find examples of using the framework. Among other things, there you will find two utilities that will help you in the development. For these utilities, and for all the examples, there are already ready projects for various platforms and IDEs, all you have to do is open the project and compile an example or utility.
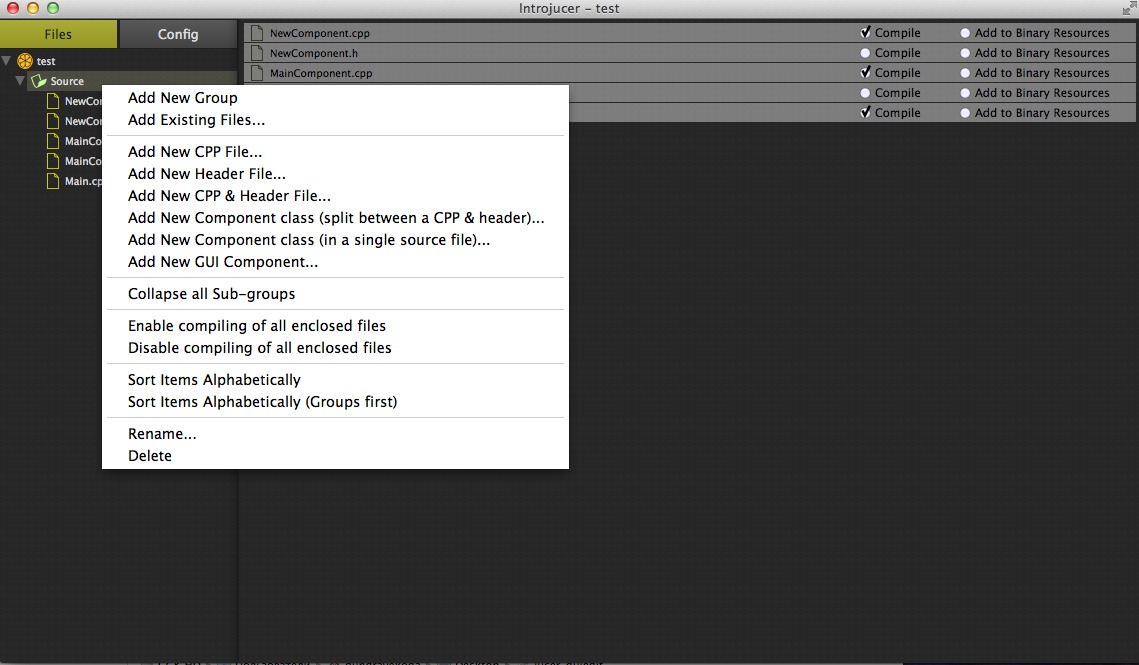
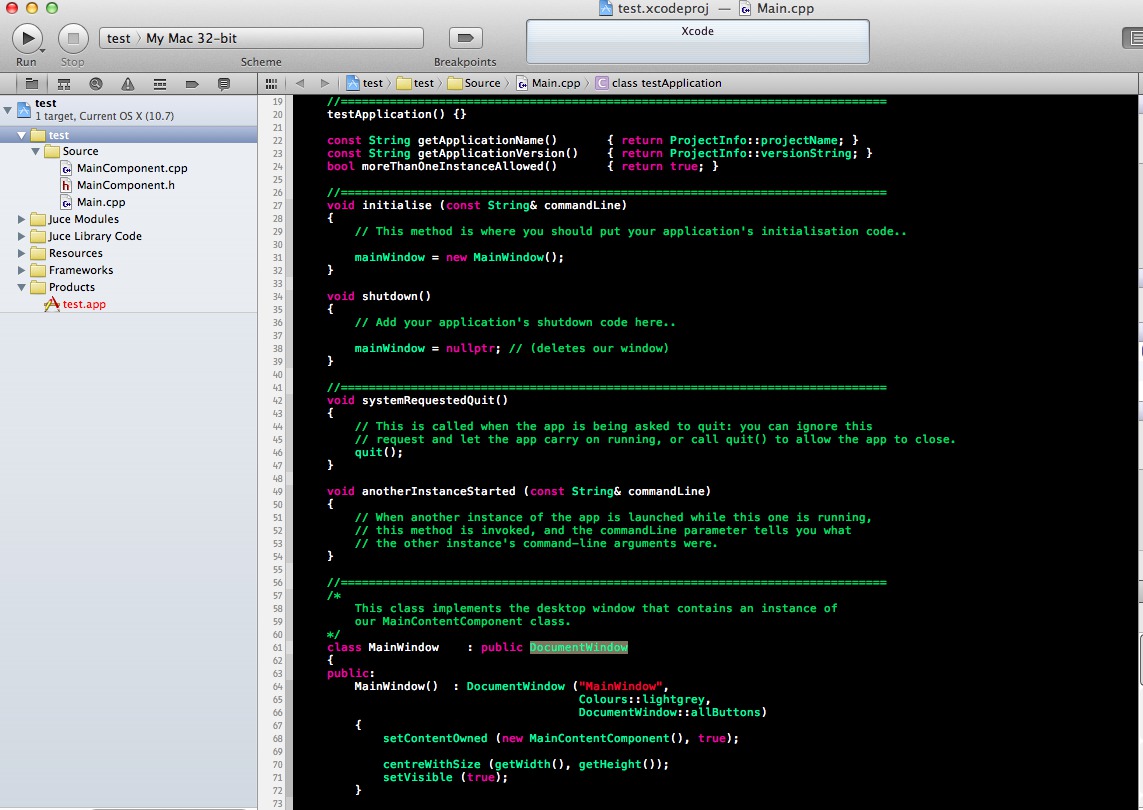
The first utility is Introjucer , a rather ascetic program for the automatic generation of projects, written using JUCE itself and is a vivid example of the framework's capabilities. Included is a project creation wizard, a source code wizard for creating templates and a very powerful addition — a visual GUI editor that simply generates C ++ code into your corresponding source code file (which was previously created using the template wizard) based on your manipulations. ), code editor, localization wizard and a number of other quite useful tools.
Some pictures for clarity
Project configuration

Code editor

GUI Editor

Adding sourcecode files
Code editor
GUI Editor
Adding sourcecode files
A nice feature in Introjucer is having your own project file configured for all IDE and platforms supported by the framework. To transfer the code from the developer, nothing is needed except the availability of the Introjucer utility on the target system. Each project generated by the utility can be opened in the target IDE that you use for your OS.
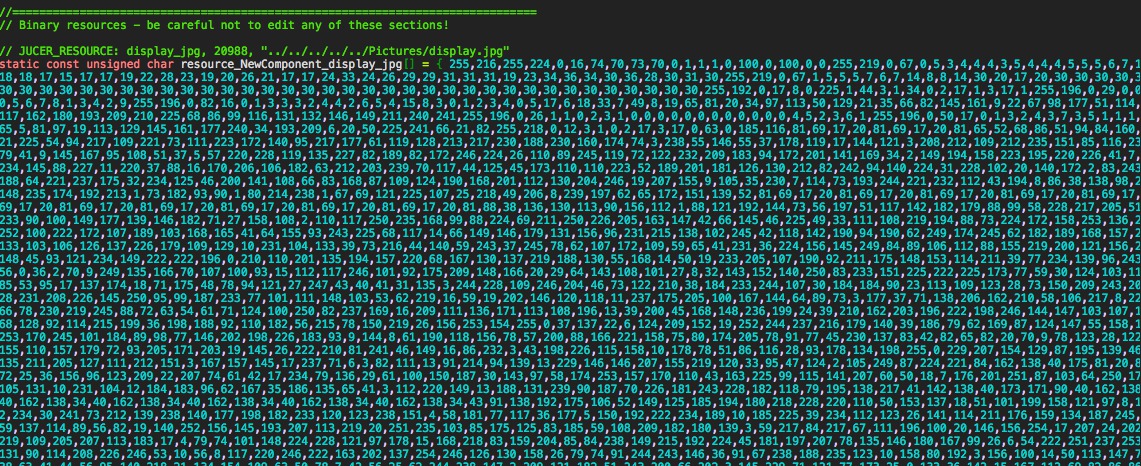
The second utility is binarybuilder , which allows you to transfer binary files directly to the code of your source files. For example, images and logos will turn into a set of binary data that you can use in your code. This utility is also part of Introjucer and is used there in the resource manager when editing the GUI. But it can be compiled as a separate console application.
Hello world
And where without sample code ...
Let's take a closer look at the example supplied with the framework:
../extras/example projects:
In JUCE projects , all header files are ultimately embedded in the same file "../JuceLibraryCode/JuceHeader.h" .
So the developer does not have to connect the entire heap of classes from the framework manually in each source file.
In this example, there are two program modules:
- Main.cpp which is not directly responsible for our application itself - start, display a window on the screen, completion, etc.
- MainComponent.cpp (.h) which is responsible for filling our window - buttons, background, text fields, etc.
It is worth noting that in JUCE all the contents of a GUI is a class inherited from the class JUCE Component .
Consider our MainComponent.h :
#ifndef __JUCE_HEADER_9002020A4DD09B20__ #define __JUCE_HEADER_9002020A4DD09B20__ // #include "../JuceLibraryCode/JuceHeader.h" // class MainComponent : public Component, // public ButtonListener // Next, you need to describe the behavior of the class, its constructors and destructors.
In the public section is the following code:
MainComponent (); ~MainComponent(); void paint (Graphics& g); // canvas void resized(); // void buttonClicked (Button* buttonThatWasClicked); // In the private section are directly our interface elements:
ScopedPointer<Label> helloWorldLabel; ScopedPointer<TextButton> quitButton; Path internalPath1; Let's go directly to the logic of our GUI in MainComponent.cpp :
// #include "MainComponent.h" // MainComponent::MainComponent () { addAndMakeVisible (helloWorldLabel = new Label (String::empty, "Hello World!")); // , helloWorldLabel->setFont (Font (40.00f, Font::bold)); helloWorldLabel->setJustificationType (Justification::centred); helloWorldLabel->setEditable (false, false, false); helloWorldLabel->setColour (Label::textColourId, Colours::black); helloWorldLabel->setColour (TextEditor::textColourId, Colours::black); helloWorldLabel->setColour (TextEditor::backgroundColourId, Colour (0x00000000)); addAndMakeVisible (quitButton = new TextButton (String::empty)); // quitButton->setButtonText ("Quit"); quitButton->addListener (this); setSize (600, 300); // } // GUI MainComponent::~MainComponent() { helloWorldLabel = nullptr; quitButton = nullptr; } // void MainComponent::paint (Graphics& g) { g.fillAll (Colour (0xffc1d0ff)); g.setColour (Colours::white); g.fillPath (internalPath1); g.setColour (Colour (0xff6f6f6f)); g.strokePath (internalPath1, PathStrokeType (5.200f)); } void MainComponent::resized() { helloWorldLabel->setBounds (152, 80, 296, 48); quitButton->setBounds (getWidth() - 176, getHeight() - 60, 120, 32); internalPath1.clear(); internalPath1.startNewSubPath (136.0f, 80.0f); internalPath1.quadraticTo (176.0f, 24.0f, 328.0f, 32.0f); internalPath1.quadraticTo (472.0f, 40.0f, 472.0f, 104.0f); internalPath1.quadraticTo (472.0f, 192.0f, 232.0f, 176.0f); internalPath1.lineTo (184.0f, 216.0f); internalPath1.lineTo (200.0f, 168.0f); internalPath1.quadraticTo (96.0f, 136.0f, 136.0f, 80.0f); internalPath1.closeSubPath(); } void MainComponent::buttonClicked (Button* buttonThatWasClicked) { if (buttonThatWasClicked == quitButton) { JUCEApplication::quit(); } } On this, our class is ready to settle in the application window. Let's go to Main.cpp and see how our example is initialized and started.
// #include "../JuceLibraryCode/JuceHeader.h" #include "MainComponent.h" // class HelloWorldWindow : public DocumentWindow { public: HelloWorldWindow(): DocumentWindow ("JUCE Hello World!", Colours::lightgrey, DocumentWindow::allButtons, true) { // setContentOwned (new MainComponent(), true); // centreWithSize (getWidth(), getHeight()); // setVisible (true); } ~HelloWorldWindow() { // } void closeButtonPressed() { // JUCEApplication::quit(); } }; The window we described is now the queue for the application itself:
class JUCEHelloWorldApplication : public JUCEApplication // JUCE { public: JUCEHelloWorldApplication() {} void initialise (const String& commandLine) { // helloWorldWindow = new HelloWorldWindow(); } void shutdown() { // helloWorldWindow = nullptr; } // const String getApplicationName() { return "Hello World for JUCE"; } const String getApplicationVersion() { // ProjectInfo::versionString Jucer, // JuceHeader.h return ProjectInfo::versionString; } bool moreThanOneInstanceAllowed() // { return true; } void anotherInstanceStarted (const String& commandLine) { } private: ScopedPointer<HelloWorldWindow> helloWorldWindow; // , // main() . START_JUCE_APPLICATION (JUCEHelloWorldApplication) Everything is ready, if our project is assembled and launched, then we get the following result:

If you want to look at what else JUCE is capable of I recommend building and running the Demo application from the extras folder, which shows the main features of this framework, but do not forget that there are many more of them and it all depends on how you apply what you have.
useful links
- Official site
- GitHub page
- Sourceforge Page
- Official Documentation Page
- Juce Programming Tutorial is a fairly detailed description of developing an application using JUCE
Afterword
I hope someone my impromptu will be useful.
My personal opinion is this: this framework deserves attention and that would be used in small and large projects.
I am pleased to accept any criticism and comments, thanks for paying attention to this post!
Source: https://habr.com/ru/post/209956/
All Articles