Getting Started at JetBrains PhpStorm
I want to tell you how to quickly and efficiently start working in a great integrated development environment (IDE) - PhpStorm. The full cycle of creating a project and its basic configuration is later in this article.
Before starting, I would like to say that the article is intended for people just starting work in this IDE and is intended to help the person who first discovered it to orient in the program. Therefore, a big request to treat with understanding.
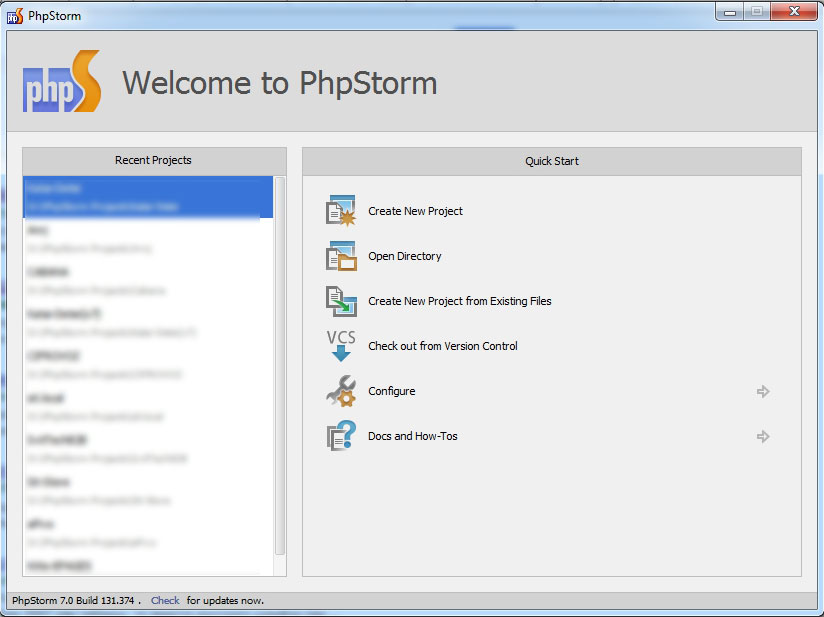
When you first start the program, we will see the following window:
')
PhpStorm works only with a local copy of the project, connecting to the server and editing the file directly will not work here.
In the most frequent cases - the script is this: you have files on a remote server, you need to edit them. There are a few dozen files that will be needed in the work, while there are several thousand files on the server and there is no need to download them all to a local copy.
Making a new project for this scenario:
Click Create New Project from Existing Files :

Select the item Web server is remote host files are accessible via FTP / SFTP / FTPS :

We give the name of the new project and be sure to select the radio button Custom , in order to set the initial settings for the project. Click Next

This screen will appear:

On this screen, we need to specify 3 important settings: Upload changed files automaticaly to the default server set On explict save action . This setting, if you don’t set it up, is a rather dangerous thing to keep an eye on all the time, otherwise you can ruin the project on production one fine day (deleted the daddy in the local copy and our IDE automatically synchronized it with the server)
Very important!!!
The next setting - Wharn when uploading over newer file is set to Compare timestamp & size , and also select the checkbox below Notify about remote changes . It will prompt a warning when you try to overwrite a file that your colleague has changed, for example. In this case, you need to merge your local copy with a copy on the server.
Click Next , proceed to setting up access to the server with which we will work

Select Add New Remote Server and click Next :

We see the settings of the new server. Here we enter the necessary passwords, the name for the server (as it will be shown in the list in the IDE) and don’t forget to click the Save password checkbox if you don’t want to enter the password every time you delete it.
To check the correctness of the entered parameters, you can click on the Test FTP connection button and get a message about whether we entered the correct data or not. Click Next .
We see a list of server directories. Here we need to specify the project root (Project Root). We select the directory we need and mark it by the root using the button on the top panel.

Folders will get a green backlight. This means that all of them will be downloaded to a local copy, and we don’t need this at all.

As you can see, we have activated additional buttons on the panel above: Excluded from download , Resource root , Exluded from Indexing .

Important! To save time and do everything in a normal way, at this stage we will not download files at all, but we will do it later in the background when the project is created (since at this stage we will not be able to do anything until the files are downloaded).
Moreover, if we still want to pick up a directory for ourselves, then we need to select the project root, which means that all the files in the root (such as index.php, .htaccess, etc.) will also be downloaded. And now an example: a good customer keeps an archive with the latest backup in the root of the site. We will have to download it, but this is nonsense.
In short, select all the folders and click Excluded from download and click Next and Finish on the next screen.
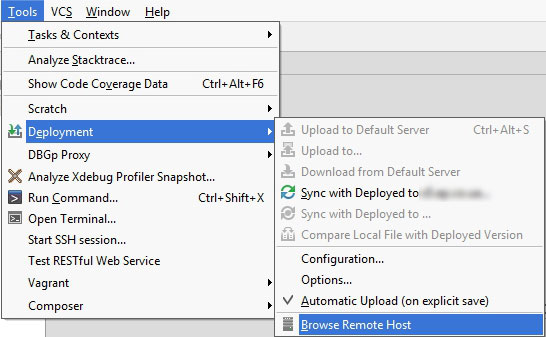
Beauty, the project is created! But we still have no files. Now we have the Remote Host tab on the right in the panel:

Who does not, turn it on in the main menu Tools -> Deployment -> Brows Remote Host :
Before you start downloading files, you need to do one little trick, otherwise the IDE may refuse to pick up files from the server.
Click the settings button in the top panel (1). Next, go to Deployment (2), select the newly created server (3), go to the Excluded Paths tab. And delete all entries with the brown folder icon, these are local paths (delete with the Remove path button below ). Apply settings:

Now our IDE will not stubborn and will always download files from the server when we ask for it.
Now we are not afraid of possible backups of client sites in the server root, since we now see in the Remote Host tab not only directories, but also files that we can exclude from downloading.
Let's download some file directory. Open the above tab. Select the desired directory and right-click on it. The menu will have the option Remove Path from Excluded , which we need.

But what are you doing! Now that his parent (in this case, the root directory, which means all-all files and folders) is also excluded and added to the download! What we need to do is: select all the directories and files (except the root folder) and use Ctrl + click to deselect the directories and files that we need (!) To download:

Now click on any selected folder with the right mouse button and exclude them from the download.
Next, select the folder you want to download and click Download from here :

Everything, the directory will be loaded and indexed. It is now available in the project directory tree on the left. And also all the files in it. Uploading changes to the file back to the server will occur when it is saved in the program (as was specified in the settings at the very beginning).
Before starting, I would like to say that the article is intended for people just starting work in this IDE and is intended to help the person who first discovered it to orient in the program. Therefore, a big request to treat with understanding.
Project creation
When you first start the program, we will see the following window:
')
PhpStorm works only with a local copy of the project, connecting to the server and editing the file directly will not work here.
In the most frequent cases - the script is this: you have files on a remote server, you need to edit them. There are a few dozen files that will be needed in the work, while there are several thousand files on the server and there is no need to download them all to a local copy.
Making a new project for this scenario:
Click Create New Project from Existing Files :
Select the item Web server is remote host files are accessible via FTP / SFTP / FTPS :
We give the name of the new project and be sure to select the radio button Custom , in order to set the initial settings for the project. Click Next
This screen will appear:
On this screen, we need to specify 3 important settings: Upload changed files automaticaly to the default server set On explict save action . This setting, if you don’t set it up, is a rather dangerous thing to keep an eye on all the time, otherwise you can ruin the project on production one fine day (deleted the daddy in the local copy and our IDE automatically synchronized it with the server)
Very important!!!
The next setting - Wharn when uploading over newer file is set to Compare timestamp & size , and also select the checkbox below Notify about remote changes . It will prompt a warning when you try to overwrite a file that your colleague has changed, for example. In this case, you need to merge your local copy with a copy on the server.
Click Next , proceed to setting up access to the server with which we will work
Server access setup
Select Add New Remote Server and click Next :
We see the settings of the new server. Here we enter the necessary passwords, the name for the server (as it will be shown in the list in the IDE) and don’t forget to click the Save password checkbox if you don’t want to enter the password every time you delete it.
To check the correctness of the entered parameters, you can click on the Test FTP connection button and get a message about whether we entered the correct data or not. Click Next .
We see a list of server directories. Here we need to specify the project root (Project Root). We select the directory we need and mark it by the root using the button on the top panel.
Folders will get a green backlight. This means that all of them will be downloaded to a local copy, and we don’t need this at all.
As you can see, we have activated additional buttons on the panel above: Excluded from download , Resource root , Exluded from Indexing .
- Excludes the directory and all its subdirectories and files from the download.
- Marks the directory as the root of the resource for hints, for example, in css files, when you register the paths to the pictures.
- Excludes files of the selected directory and all files of subdirectories from indexing after loading.
Important! To save time and do everything in a normal way, at this stage we will not download files at all, but we will do it later in the background when the project is created (since at this stage we will not be able to do anything until the files are downloaded).
Moreover, if we still want to pick up a directory for ourselves, then we need to select the project root, which means that all the files in the root (such as index.php, .htaccess, etc.) will also be downloaded. And now an example: a good customer keeps an archive with the latest backup in the root of the site. We will have to download it, but this is nonsense.
In short, select all the folders and click Excluded from download and click Next and Finish on the next screen.
Beauty, the project is created! But we still have no files. Now we have the Remote Host tab on the right in the panel:
Who does not, turn it on in the main menu Tools -> Deployment -> Brows Remote Host :
Before you start downloading files, you need to do one little trick, otherwise the IDE may refuse to pick up files from the server.
Click the settings button in the top panel (1). Next, go to Deployment (2), select the newly created server (3), go to the Excluded Paths tab. And delete all entries with the brown folder icon, these are local paths (delete with the Remove path button below ). Apply settings:
Now our IDE will not stubborn and will always download files from the server when we ask for it.
Download the desired files and directories
Now we are not afraid of possible backups of client sites in the server root, since we now see in the Remote Host tab not only directories, but also files that we can exclude from downloading.
Let's download some file directory. Open the above tab. Select the desired directory and right-click on it. The menu will have the option Remove Path from Excluded , which we need.
But what are you doing! Now that his parent (in this case, the root directory, which means all-all files and folders) is also excluded and added to the download! What we need to do is: select all the directories and files (except the root folder) and use Ctrl + click to deselect the directories and files that we need (!) To download:
Now click on any selected folder with the right mouse button and exclude them from the download.
Next, select the folder you want to download and click Download from here :
Everything, the directory will be loaded and indexed. It is now available in the project directory tree on the left. And also all the files in it. Uploading changes to the file back to the server will occur when it is saved in the program (as was specified in the settings at the very beginning).
Source: https://habr.com/ru/post/209254/
All Articles