Installing ownCloud 6 on Debian 7 wheezy
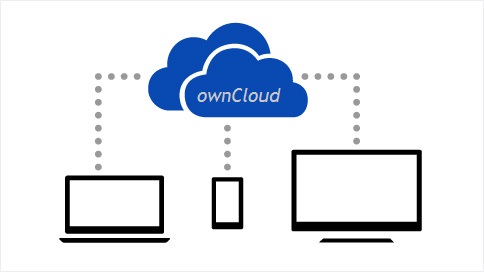
Hello, habravchane! Today I would like to talk about ownCloud personal cloud storage and its installation.
For us, it has become commonplace to use such services as Dropbox, Google Drive, SkyDrive, or even Mail.Ru Cloud, we use their services every day without paying attention to the obvious shortcomings of certain servers. There is not enough space on one service, no localization on the other, unreliable storage on the third, interface on the fourth curve and so on, but all of these services have a common significant drawback - your data is always stored on the servers you are not monitoring. In the case when it is necessary to use services to host data that does not have much value for you - these services should be completely enough. If you need content protection, complete confidentiality, security, unlimited free space, the ability to organize multi-user access to work in groups, version control, synchronization, the ability to view documents, spreadsheets, images, video, audio recordings, notes from anywhere in the world without need to download them - ownCloud is what you need.
')
Let's take a closer look at ownCloud and try to install it.
OwnCloud literally translated as "own cloud". This is an open source CMS that can be downloaded to your computer and later installed on a hosting or own server. By ownCloud functionality does not lag behind the leading companies in the world of cloud storage, and some surpasses.
Behind a simple concise interface there is a large functionality that can be expanded even more with the help of pre-installed modules and its own App store presented on the official website.
Features ownCloud out of the box:
Multi-threaded data loading "dragging" using technology drag-and-drop
Editing file permissions for specific users, groups or the Internet
Connect and view news RSS feeds
View images, videos, office documents
Synchronized calendar, task manager, contact manager, web bookmark manager
User activity tracking
Secure connection, data encryption, LDAP \ WebDAV authentication
Support for external storage: Google Drive, Dropbox, FTP, SMB, WebDAV, Amazon S3, IRODS, OpenStack Object Storage, as well as local
Full synchronization client applications for all relevant platforms
This is just a brief list of ownCloud features, but its benefits are already visible. If you wish, you can add an email client, a torrent client, a video chat, a full-fledged office, checking for VirusTotal files and much more.
Let's move from theory to practice.
Installing ownCloud on a server running Debian 7 wheezy
1. Installing basic software
Before we begin, let's make sure that our system is up to date.
Open the terminal and enter:
sudo apt-get update && sudo apt-get upgrade These two simple commands will update all the programs on our server, the process can take a long time depending on the speed of the Internet and our server.
Now, you can proceed with the installation of your ownCloud required software:
sudo apt-get install apache2 php5 php5-common php5-gd php5-intl php5-mcrypt php5-cli php5-ldap php5-sqlite curl libcurl3 libcurl4-openssl-dev php5-curl php-apc php5-mysql ffmpeg Now we have everything necessary for the rapid deployment of ownCloud on our server and you can proceed to step 4 or continue the full installation with me.
2. Installing MySQL
Install MySQL:
apt-get install mysql-client mysql-server Create a password for the MySQL database and go ahead.
Important: the password should not be the same as the superuser password.
Now let's take a little care of our security, enter into the console:
mysql_secure_installation All questions except “Change the root password” (If you do not want to change the MySQL password) are answered positively with Y.
Enter the MySQL management console and enter the password (it is not visible):
mysql -u root -p Create a database:
create database _; Create a user, preferably with the same name as the database:
create user '_'@'localhost' IDENTIFIED BY '_'; Important: the password should not be the same as the superuser password.
We transfer to the created user full rights to the created database:
GRANT ALL ON _.* to '_'@'localhost' ; We leave:
quit 3. Installing ntp to synchronize time on the server
Install the ntp client:
apt-get install ntp ntpdate Now we change the time synchronization server to the nearest one:
sudo gedit /etc/ntp.conf In the opened fale we find:
server 0.debian.pool.ntp.org iburst dynamic
server 1.debian.pool.ntp.org iburst dynamic
server 2.debian.pool.ntp.org iburst dynamic
server 3.debian.pool.ntp.org iburst dynamic
We change to the addresses of npt servers nearest to us, for example, to:
server 0.ru.pool.ntp.org iburst dynamic
server 1.ru.pool.ntp.org iburst dynamic
server 2.ru.pool.ntp.org iburst dynamic
server 3.ru.pool.ntp.org iburst dynamic
Save and exit the editor.
To check the correctness of the time is enough to enter in the terminal:
ntpdate 0.ru.pool.ntp.org If the time on our server does not match the time obtained from the ntp server, enter:
ntpdate -bs 0.ru.pool.ntp.org 4.Setting
Edit the / etc / apache2 / sites-enabled / 000-default file:
sudo gedit /etc/apache2/sites-enabled/000-default Find the line in the "<Directory / var / www />" section:
AllowOverride None
Change to:
AllowOverride All
Save the file and exit.
Restart apache:
service apache2 restart Editing php.ini:
sudo gedit /etc/php5/apache2/php.ini Find the lines:
mysql.default_socket = mysql.cache_size = memory_limit = post_max_size = upload_max_filesize = Change to:
mysql.default_socket=/var/run/mysqld/mysqld.sock mysql.cache_size = 4000 upload_max_filesize = 1024M // post_max_size = 1024M // upload_max_filesize memory_limit = 1024M // post_max_size Save the file and exit.
Restart apache again:
service apache2 restart 5. Installing ownCloud
Download the latest version of ownCloud, at the time of writing ownCloud 6:
cd /var/www/ wget http://download.owncloud.org/community/owncloud-6.0.0a.tar.bz2 Also, you can simply download the latest version from the official site of ownCloud in the folder / var / www /
Unpack:
tar -xvf owncloud-6.0.0a.tar.bz2 We set the rights:
sudo chown -R www-data:www-data /var/www/owncloud/ Now our site is ready, only a small stroke remains, open localhost / owncloud in the browser
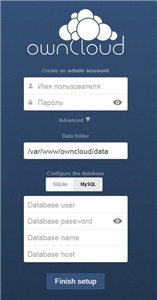
A) For those who immediately went to point 4: We come up with a login and password for the administrator - we enter
B) For those who installed MySQL: We create a login and password for the administrator, select “advanced” then “MySQL” and enter the name of the previously created database user, its password, the name of the database itself, in the Database host field we write localhost.
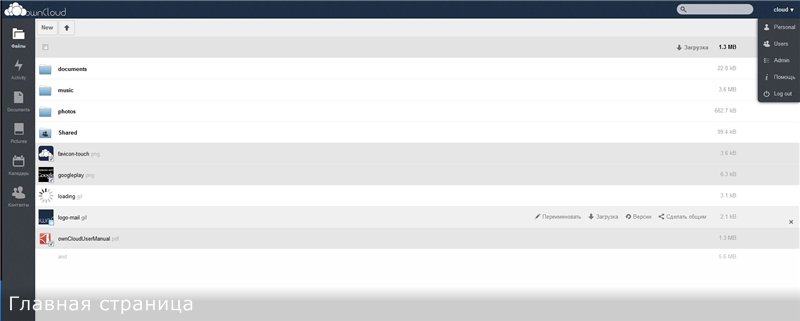
Done! Now you are a happy owner of your owncloud personal cloud with synchronization on all devices on your home network. To do this, just type your_internal_IP / ownCloud in your browser or if you are connected to the Internet directly you can access your owncloud by typing external_IP / ownCloud.
Setting up access to ownCloud from the Internet through the router
Consider an example based on an asus rt-n16 router:
From the browser we go to the address 192.168.1.1, enter the username and password and enter the router's web interface:
web interface
1. Go to the "Internet" tab 2. Go to the "Port Forwarding" tab (Virtual Server / Port Forwarding) 3. Turn on redirection.
Port Forwarding Menu
4. Select the profiles that have already been carefully prepared for us: FTP and HTTP.
Selection of prepared profiles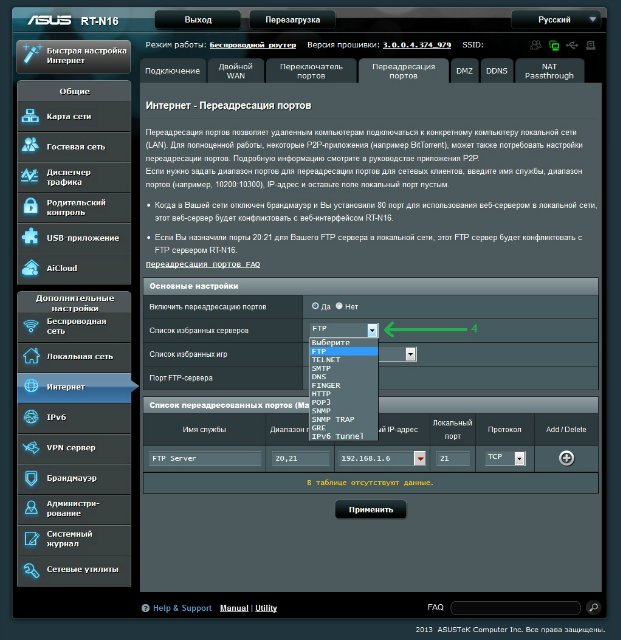
5. Select the internal IP address of our server (“ip a” in the terminal, an address like 192.168.1.X or 192.168.0.X) and click “+” to add to the list
Choosing an internal server IP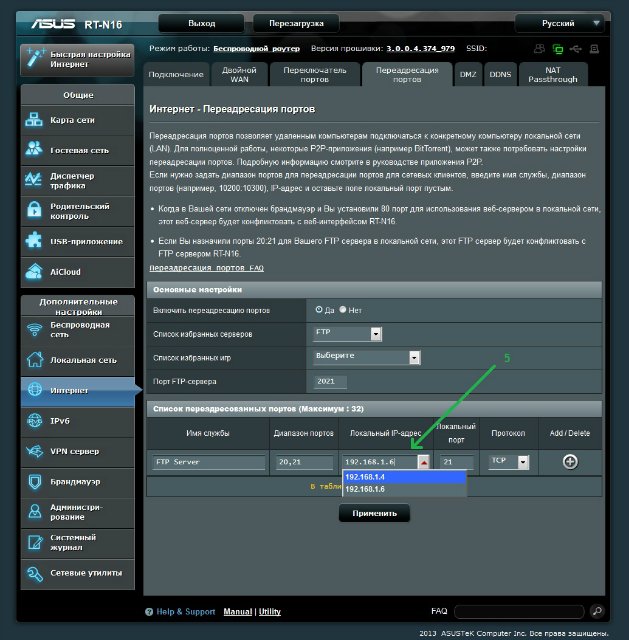
6. By analogy, fill in and add the ports we need, then click the “Apply” button
List of ports for ownCloud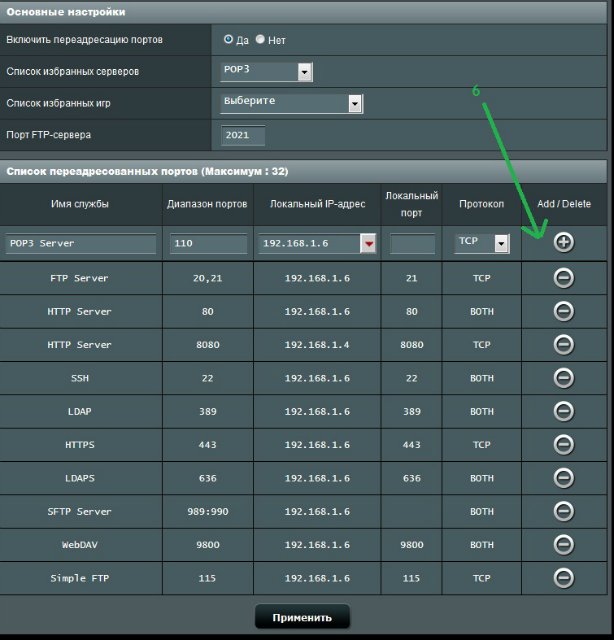
Notes
1. Incorrect installation of the application in the Apps section
If, after turning on the application, the web site began to work incorrectly, I found 3 solutions:
1. Complete reinstallation.
2. Clean up the database created for owncloud in phpmyadmin and delete the file:
3. Probably the most pleasant option, move the folder with the application after which the problems started from the \ var \ www \ owncloud \ apps folder to any other, check that the site works, return the folder to its place and do not touch it until it fixes.
If, after turning on the application, the web site began to work incorrectly, I found 3 solutions:
1. Complete reinstallation.
2. Clean up the database created for owncloud in phpmyadmin and delete the file:
rm -f \var\www\owncloud\config\config.php 3. Probably the most pleasant option, move the folder with the application after which the problems started from the \ var \ www \ owncloud \ apps folder to any other, check that the site works, return the folder to its place and do not touch it until it fixes.
2. Auto login user as soon as he visits the site
1. Create a user in the admin panel, for example Gman with the password noclip.
2. Open the file base.php:
3. At the very end we find:
Replace with
2. Open the file base.php:
Sudo gedit /var/www/owncloud/lib/base.php 3. At the very end we find:
protected static function tryBasicAuthLogin() { if (!isset($_SERVER["PHP_AUTH_USER"]) || !isset($_SERVER["PHP_AUTH_PW"]) ) { return false; } OC_App::loadApps(array('authentication')); if (OC_User::login($_SERVER["PHP_AUTH_USER"], $_SERVER["PHP_AUTH_PW"])) { //OC_Log::write('core',"Logged in with HTTP Authentication", OC_Log::DEBUG); Replace with
protected static function tryBasicAuthLogin() { //if (!isset($_SERVER["PHP_AUTH_USER"]) // || !isset($_SERVER["PHP_AUTH_PW"]) //) { // return false; //} if (OC_User::login(Gman, noclip)) { OC_App::loadApps(array('authentication')); //if (OC_User::login($_SERVER["PHP_AUTH_USER"], $_SERVER["PHP_AUTH_PW"])) { //OC_Log::write('core',"Logged in with HTTP Authentication", OC_Log::DEBUG); 3. The ban on deleting files
1. Open fileactions.js
2. We are looking for the following lines:
3. Comment on them:
4. Open:
5. Find the following lines:
6. Comment on them:
Sudo gedit /var/www/owncloud/apps/files/js/fileactions.js 2. We are looking for the following lines:
remove the existing delete action parent.parent().children().last().find('.action.delete').remove(); if (actions['Delete']) { var img = FileActions.icons['Delete']; if (img.call) { img = img(file); } if (typeof trashBinApp !== 'undefined' && trashBinApp) { var html = '<a href="#" original-title="' + t('files', 'Delete permanently') + '" class="action delete delete-icon" />'; } else { var html = '<a href="#" class="action delete delete-icon" />'; } var element = $(html); element.data('action', actions['Delete']); element.on('click', {a: null, elem: parent, actionFunc: actions['Delete']}, actionHandler); parent.parent().children().last().append(element); } 3. Comment on them:
// remove the existing delete action // parent.parent().children().last().find('.action.delete').remove(); // if (actions['Delete']) { // var img = FileActions.icons['Delete']; // if (img.call) { // img = img(file); // } // if (typeof trashBinApp !== 'undefined' && trashBinApp) { // var html = '<a href="#" original-title="' + t('files', 'Delete permanently') + '" class="action delete delete-icon" />'; // } else { // var html = '<a href="#" class="action delete delete-icon" />'; // } // var element = $(html); // element.data('action', actions['Delete']); // element.on('click', {a: null, elem: parent, actionFunc: actions['Delete']}, actionHandler); // parent.parent().children().last().append(element); // } 4. Open:
Sudo gedit /var/www/owncloud/apps/files/js/files.js 5. Find the following lines:
$('.delete-selected').click(function(event) { var files=getSelectedFilesTrash('name'); event.preventDefault(); FileList.do_delete(files); return false; }); 6. Comment on them:
//$('.delete-selected').click(function(event) { // var files=getSelectedFilesTrash('name'); // event.preventDefault(); // FileList.do_delete(files); // return false; // }); PS I want to thank user paullarionov for his excellent article about file storage, as well as KuniLinux for the article about installing ownCloud 4 on Ubuntu 12.04, it was his article that inspired me to write a more advanced and updated article.
Source: https://habr.com/ru/post/208566/
All Articles