NinjaMock is a free interface prototyping application.
Hi% username%! We have great news: the official version of NinjaMock - an online service for creating prototypes. Now you can draw great prototypes of web and mobile applications for free!
After last year’s article on how Ninja prototypes did , our NinjaMock service has matured significantly and experienced some interesting changes. We expanded the team, added a lot of new functionality, released the first official release (we have a free version) and started our own blog on Habré.
In this article we will talk about the most interesting features and how NinjaMock is better than other prototyping applications.
We all love free apps, especially if these are good free apps. Therefore, we decided to make NinjaMock free for non-commercial use, forever. This positively sets us apart from the competition, which cuts the free version. We decided not to impose any restrictions on the functionality of our editor. Everything is available in the free version: an unlimited number of pages in projects, export to PDF and PNG, support for comments, use of master pages, etc.
')
The same applies to all new features of the editor, which we will add in the future - all of them will be available for free.
We can afford this luxury for two reasons. First, we do not have an investor who would dictate to us what to do. Although we have already received several offers from investors, freedom is more important for us. Secondly, thanks to a competent approach to building an application, the support of the project infrastructure is practically worthless to us. In one of the following articles we can tell how we sustained the habra and reddit effect on hosting for 4 euros per month. Write in the comments if it's interesting.
We believe that it is inefficient to prototype in a realistic (high fidelity) style. We spent the whole of last year meeting with large and small teams developing mobile apps and websites, both in Russia and abroad. We mastered the subtleties of the work process - from prototyping to final design. As a result, we have achieved Zen excellence in creating low-detail “paper” prototypes.
Currently we support the following platforms:

The user controls used in prototyping are vector, although few people can be surprised by this now. But here there is an interesting feature: all the elements are made in the NinjaMock itself. We provide the basic vector tools needed for prototyping, such as a rectangle, ellipse, line, polygon, poly-line, Bezier curves, and a pencil that allows you to draw by hand.
What this means for you: if you lack an element or icon, you can very easily make it yourself.
In the last article, we described how the NinjaMock is built from the inside. We implemented a unique rendering technology using HTML5 canvas, which allowed us to make a full scale, as well as these interesting effects that improve the experience of use:
We really enjoy using Google Docs, especially the commenting feature. Therefore, when similar functionality was developed in NinjaMock, we took an example from Google Docs. As a result, we have an intuitive and familiar way of commenting on prototypes - with the support of responses to comments, changes in the status of comments, as well as email notifications.
In addition, we added the possibility of affixing the status of individual pages of prototypes (In progress, Completed, Approved). This allows you to easily determine how close to completion your design is.
This is how it looks in the application itself:

And so on the special page the project status is displayed:
NinjaMock has the ability to send a prototype to a customer to get feedback about it. It is enough just to open access to the project (by clicking on the share button) and send the link by mail or in any other way. But we went a little further, together with the link we generate a special QR code, by scanning which, for example, from a phone, you can run a prototype directly on the device and see how it will work.
QR code is real.
The important point is that you can select the status with which the pages will be available for viewing. For example, you can skip pages that are not yet complete.
We noticed that in many offices of design teams, the walls are hung with printed prototypes and pages with final designs. Some teams use them for inspiration, and some discuss and write notes directly on the wall.
In NinjaMock have the ability to export to PDF and PNG, with the ability to print comments and links to pages. Between ourselves, we call it “paper navigation” - if the element has a link to another page, we indicate this with a special footnote with the page number to which the link leads:

In complex projects, it becomes necessary to organize the pages - for example, group them logically (registration pages, profile editing pages, etc.), or simply display the many states of a certain page (the page is in the normal state, the same page but with the dialog above it and etc.).
Many of our competitors, such as Axure, allow you to create a tree of pages. We communicated with many designers and very few people could explain what it means when one page is a child of another - everyone understands this in his own way. Instead, we decided to reproduce the familiar experience of using PowerPoint, showing thumbnails of pages for faster and easier navigation.
For the logical organization of the project, we gave users the ability to create named page groups. In the project, you can create an unlimited number of groups, you can move pages between groups, as well as change the order of pages within the group, etc.
To organize projects in NinjaMock, we have reproduced the experience of working with files on your computer: projects can be grouped into folders, folders can be dragged into other folders, etc. This is your own cloud file system!
In NinjaMock there is a special type of account - ProPlus. The ProPlus administrator can add and delete users, as well as assign them various roles and rights. At the moment, you can choose one of three roles (Administrator, Designer, Reviewer), although we have implemented a very flexible system of rights. If there are user requests, we will implement more flexible ways to configure roles.
Most of the elements in NinjaMock know where they should and can be, so all you have to do is one click, and the element will automatically be added to the most appropriate place in the current context.
Since a large number of elements are containers, and very often it is necessary to preserve the relative position of elements inside the container, we added support for anchors (Anchors).
Here, for example, how this can be done with a group.
Any prototype page can be selected as a master page for any other page. Some interesting features:
For professional users, it will be a pleasant moment to support hotkeys, such as in Adobe Photoshop.
We believe that our application in many aspects is much better than all our competitors. We attach their list so that you yourself can compare and make sure.
balsamiq.com
proto.io
moqups.com
mockflow.com
hotgloo.com
Here is just a small list of what NinjaMock can do. If you are interested to learn more features of the application - go to the website ninjamock.com and start prototyping !
After last year’s article on how Ninja prototypes did , our NinjaMock service has matured significantly and experienced some interesting changes. We expanded the team, added a lot of new functionality, released the first official release (we have a free version) and started our own blog on Habré.
In this article we will talk about the most interesting features and how NinjaMock is better than other prototyping applications.
The most interesting features
Full free version
We all love free apps, especially if these are good free apps. Therefore, we decided to make NinjaMock free for non-commercial use, forever. This positively sets us apart from the competition, which cuts the free version. We decided not to impose any restrictions on the functionality of our editor. Everything is available in the free version: an unlimited number of pages in projects, export to PDF and PNG, support for comments, use of master pages, etc.
')
The same applies to all new features of the editor, which we will add in the future - all of them will be available for free.
We can afford this luxury for two reasons. First, we do not have an investor who would dictate to us what to do. Although we have already received several offers from investors, freedom is more important for us. Secondly, thanks to a competent approach to building an application, the support of the project infrastructure is practically worthless to us. In one of the following articles we can tell how we sustained the habra and reddit effect on hosting for 4 euros per month. Write in the comments if it's interesting.
Paper style
We believe that it is inefficient to prototype in a realistic (high fidelity) style. We spent the whole of last year meeting with large and small teams developing mobile apps and websites, both in Russia and abroad. We mastered the subtleties of the work process - from prototyping to final design. As a result, we have achieved Zen excellence in creating low-detail “paper” prototypes.
For those who used the beta version of our application
For those who used the beta version of our application, a noticeable difference between the final version was that we removed the realistic (high fidelity) prototypes. There were several reasons for this, which we will discuss in more detail in a separate article or in the comments.
Items
Currently we support the following platforms:
The user controls used in prototyping are vector, although few people can be surprised by this now. But here there is an interesting feature: all the elements are made in the NinjaMock itself. We provide the basic vector tools needed for prototyping, such as a rectangle, ellipse, line, polygon, poly-line, Bezier curves, and a pencil that allows you to draw by hand.
What this means for you: if you lack an element or icon, you can very easily make it yourself.
Zoom
In the last article, we described how the NinjaMock is built from the inside. We implemented a unique rendering technology using HTML5 canvas, which allowed us to make a full scale, as well as these interesting effects that improve the experience of use:
Comments and Notifications
We really enjoy using Google Docs, especially the commenting feature. Therefore, when similar functionality was developed in NinjaMock, we took an example from Google Docs. As a result, we have an intuitive and familiar way of commenting on prototypes - with the support of responses to comments, changes in the status of comments, as well as email notifications.
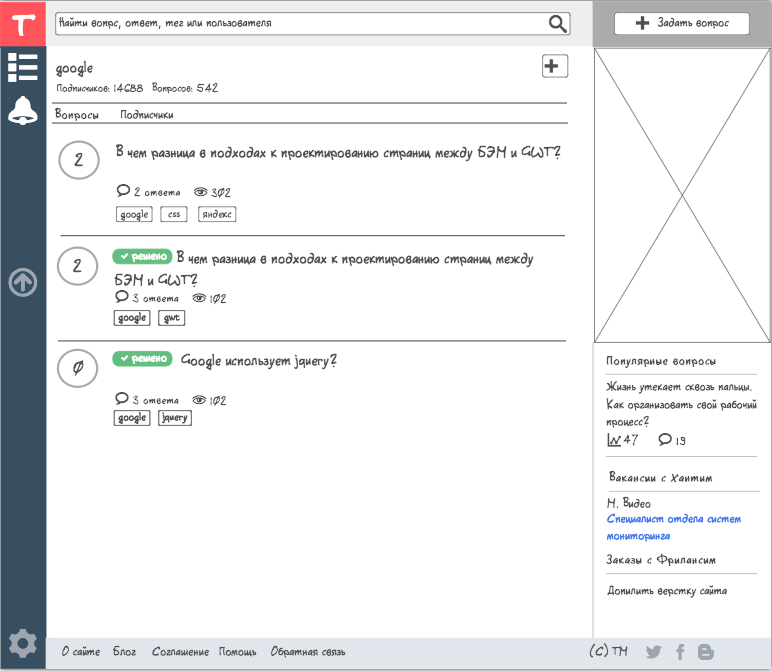
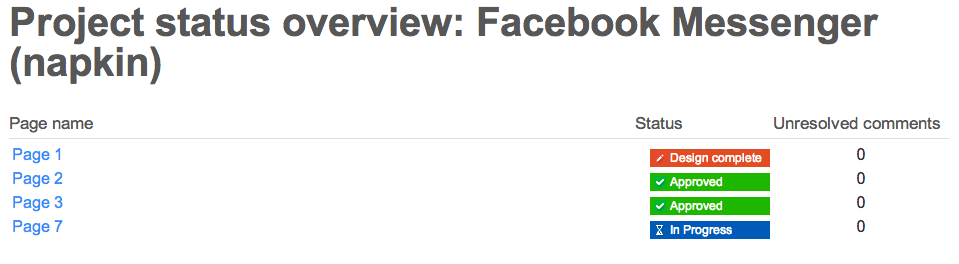
In addition, we added the possibility of affixing the status of individual pages of prototypes (In progress, Completed, Approved). This allows you to easily determine how close to completion your design is.
This is how it looks in the application itself:
And so on the special page the project status is displayed:
Project sharing (sharing)
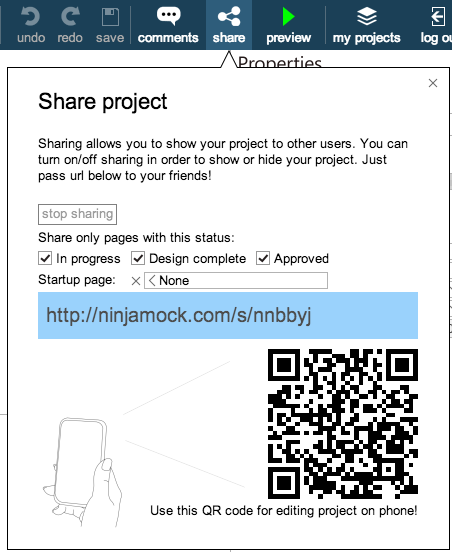
NinjaMock has the ability to send a prototype to a customer to get feedback about it. It is enough just to open access to the project (by clicking on the share button) and send the link by mail or in any other way. But we went a little further, together with the link we generate a special QR code, by scanning which, for example, from a phone, you can run a prototype directly on the device and see how it will work.
QR code is real.
The important point is that you can select the status with which the pages will be available for viewing. For example, you can skip pages that are not yet complete.
Export and navigation on paper
We noticed that in many offices of design teams, the walls are hung with printed prototypes and pages with final designs. Some teams use them for inspiration, and some discuss and write notes directly on the wall.
Example 1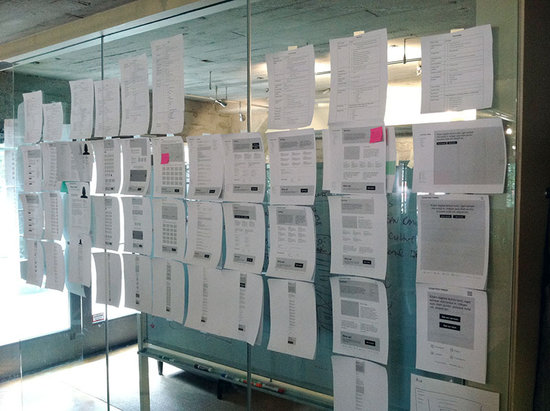
Example 2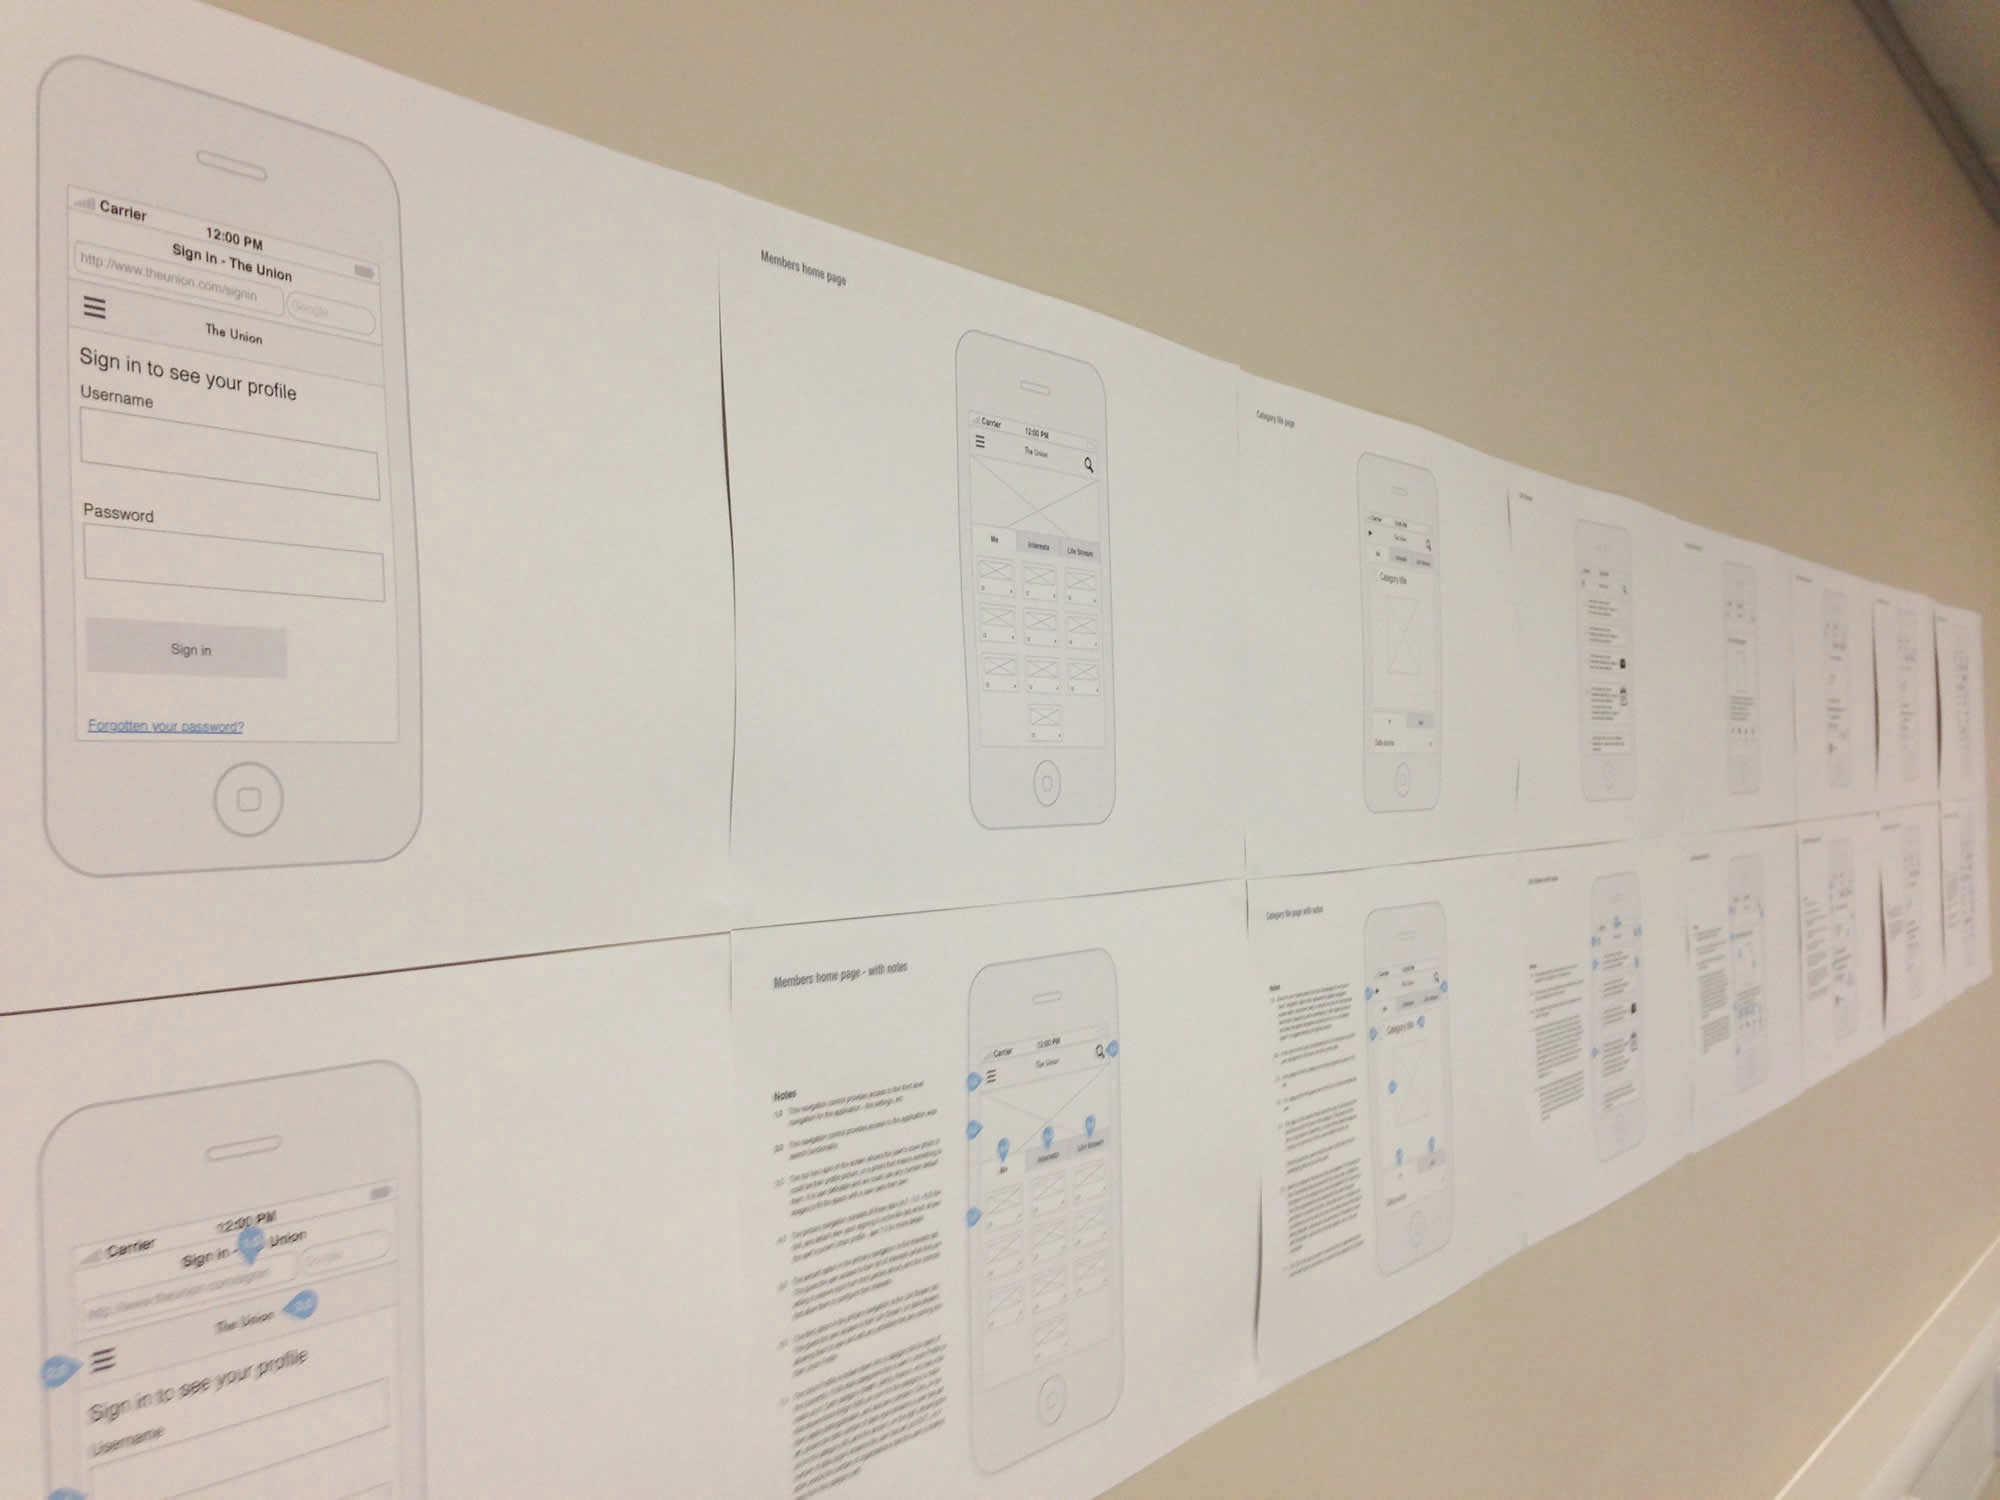
In NinjaMock have the ability to export to PDF and PNG, with the ability to print comments and links to pages. Between ourselves, we call it “paper navigation” - if the element has a link to another page, we indicate this with a special footnote with the page number to which the link leads:
Organization of pages and projects
In complex projects, it becomes necessary to organize the pages - for example, group them logically (registration pages, profile editing pages, etc.), or simply display the many states of a certain page (the page is in the normal state, the same page but with the dialog above it and etc.).
Many of our competitors, such as Axure, allow you to create a tree of pages. We communicated with many designers and very few people could explain what it means when one page is a child of another - everyone understands this in his own way. Instead, we decided to reproduce the familiar experience of using PowerPoint, showing thumbnails of pages for faster and easier navigation.
For the logical organization of the project, we gave users the ability to create named page groups. In the project, you can create an unlimited number of groups, you can move pages between groups, as well as change the order of pages within the group, etc.
To organize projects in NinjaMock, we have reproduced the experience of working with files on your computer: projects can be grouped into folders, folders can be dragged into other folders, etc. This is your own cloud file system!
User collaboration
In NinjaMock there is a special type of account - ProPlus. The ProPlus administrator can add and delete users, as well as assign them various roles and rights. At the moment, you can choose one of three roles (Administrator, Designer, Reviewer), although we have implemented a very flexible system of rights. If there are user requests, we will implement more flexible ways to configure roles.
Pleasant trifles
Clever positioning of elements
Most of the elements in NinjaMock know where they should and can be, so all you have to do is one click, and the element will automatically be added to the most appropriate place in the current context.
Video
Anchors
Since a large number of elements are containers, and very often it is necessary to preserve the relative position of elements inside the container, we added support for anchors (Anchors).
Here, for example, how this can be done with a group.
Video
Master page
Any prototype page can be selected as a master page for any other page. Some interesting features:
- Using anchors, you can easily make a sticky footer for a web site (the footer, which is always at the bottom of the page, regardless of its height). To do this, simply point to the footer elements of the anchors Left and Bottom.
- Using the page wizard, it is very easy to display the various states of a given page. For example, if a dialogue is displayed on your page, create a blank page, select your page as a master and simply draw a dialogue. Thus, you don’t have to duplicate the whole page, which will save time when making changes on the page.
Hotkeys
For professional users, it will be a pleasant moment to support hotkeys, such as in Adobe Photoshop.
What are we working on now?
- Version control. Each project is already stored in the Git repository. We are working to ensure that users can conveniently use the features of the version control system.
- User-created controls. As I wrote above, all elements are created using the vector editor inside NinjaMock itself. Now most of the possibilities for creating full-fledged controls are hidden from the user, because there is a lot of functionality, which, frankly, is still “raw”. We will gradually open all these opportunities for you. Now you can add your own element (Asset), soon we will enable the ability to create custom properties.
- Export to PDF in vector format. Many users ask us to add the ability to export vector elements, for example, to use them in Adobe Illustrator. Soon we will have such an opportunity.
- Copy / Paste - now you can copy items only within the project. Using the HTML5 Clipboard API will allow us to add the ability to copy between projects, and even between different applications.
Competitors
We believe that our application in many aspects is much better than all our competitors. We attach their list so that you yourself can compare and make sure.
balsamiq.com
proto.io
moqups.com
mockflow.com
hotgloo.com
Here is just a small list of what NinjaMock can do. If you are interested to learn more features of the application - go to the website ninjamock.com and start prototyping !
Source: https://habr.com/ru/post/208406/
All Articles