Learning OpenCV Cascade Haar
On Habré there are already several articles about the cascade of Haar ( one , two , three ). There is even one where the learning process is affected, but in relation to the task described. There are a couple of good articles in English on the topic of education ( first , second , third ), but, in my opinion, they are confused: they either tell very little or too much and about everything - it’s difficult to select the right idea.
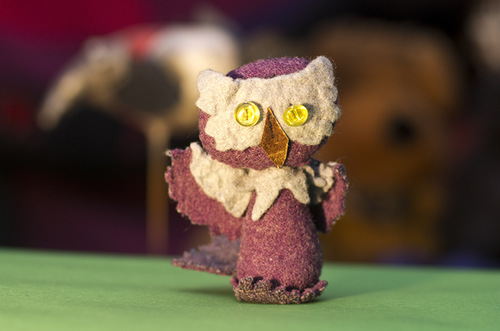
In this article I will try to show how to train a cascade from scratch in a few hours, having trained to search for a simple object in a video stream (an example would be a charming owl from a photo). All training samples and programs will be attached.
Why is all this necessary? Cascade Haar is one of the easiest ways to recognize classes of objects with high speed. These include the faces and hands of people, car numbers, and pedestrians. With the Haar detector, it’s easy to find animals in the frame (by the way, surprisingly, I haven’t seen any automatic tits feeder on a raspberry pi). In addition, there are ready-made OpenCV implementations for most of the existing systems (I even met it for blackfin). All this makes Haar one of the most convenient methods for solving video processing tasks even for people who have never worked with video processing.
The entire sample learning process does not require programming skills. For this there are ready-made console programs that are present in the main assembly of OpenCV. The use of a cascade requires a minimum programming skill, it is enough to change a couple of lines already in the finished example, which are under C, C ++, C #, Java, Python, etc.
There are several ways:
For options 1-3 there are several programs that simplify life. First of all, these are programs that allow you to mark up photos. Articles in English use a self-written program " imageclipper ". I did not like it, because it does not work correctly with large photos. For myself, I wrote a program that was convenient for me to work with. The source code and code are attached in the “Downloads” section of this article (PictureCropper).
For a stable face detector, this is 3000-4000 positive examples and as many negative ones. From 500 positive and 1000 negative I made a stable number detector. For the detector shown in this article, I took 250 positive and 500 negative photos.
The larger and more diverse the sample, the more stable it is and the longer it takes.
')
In order to start learning, we need to have 2 folders with examples. “Good” is a folder with positive images, “Bad” is with negative images. IMPORTANT ! At least in one of the previous versions of the training program, it did not respond well to the presence of spaces and dots in the file names. Russian does not accept any version. Try to call the image "0.bmp", "1. bmp ”itd The formats "bmp" and "jpg" work stably, with the rest did not check.
For each folder you need to have a text file that describes the images used. Let's call them “Good.dat” and “Bad.dat”. IMPORTANT ! This file should be at the same file system level as the folder.
Description files for negative and positive objects have different structure. For a file of negative examples, this is simply a list of relative paths to the images:
For files with positive examples, the record is a bit trickier. In addition to the path, the position of the object and its size must be indicated. In principle, each positive image may contain several examples of objects. But I do not advise. Best of all: one frame - one object.
"Good \ 0.bmp" is the address of the object relative to the description file. "1" - the number of positive objects in the image. "0 0 414 148" - coordinates of the rectangle on the image in which the object is located. If there are several objects, the record takes the form: "Good \ 0.bmp 2 100 200 50 50 300 300 25 25".
I repeat that it is most convenient when each object is a separate frame, while the coordinates of the object are equal to the frame size.
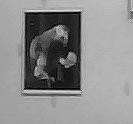
Example of a positive sample:


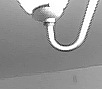
An example of a negative sample:


The learning itself takes place in two stages. The first stage - all positive images are reduced to a common format. This should be done by a program located in the OpenCV folder. Take the one that fits your system. I have this "opencv \ build \ x64 \ vc10 \ bin". The program is called opencv_createsamples.exe.
To create a bundle of these positive images, run opencv_createsamples through the console:
-info E: \ BAZAS \ Sova \ Good.dat - description file for positive images. Either the full address is specified or relative to the opencv_createsamples.exe program.
-vec samples.vec - file in which the base of positive images reduced to a common format will be saved. The address must be specified relative to the opencv_createsamples.exe program (suppose the full path in the system).
-w 20 -h 20 - the size of the template. Must approximately reflect the proportions of the desired object. For example, for persons or for an owl the most suitable proportion of height to width is 1 * 1. For numbers it is 3 * 1. And to search for a pencil it is logical to put something like 8 * 1. The size of the template should be quite small. Ideally set it so that the person himself could distinguish the depicted object, but not more than that. The larger the pattern, the longer the learning.
The result of the program is the samples.vec file, which will contain all your positive images in a format close to bmp and with the size w * h.
To calculate the final cascade, use the opencv_traincascade.exe program, which is located in the same folder as opencv_createsamples.exe. It works for a long time. Even very long. Training a cascade of 500-1000 objects takes almost a whole day. The example was trained for 2 hours. When calling:
-data haarcascade - the address of the folder where to put the results. Counted from the root folder of the program. You need to create in advance, otherwise it will fly out.
-vec samples.vec - the address of the file counted in the last paragraph with positive examples
-bg E: \ BAZAS \ Sova \ Bad.dat - the address of the file describing negative examples
-numStages 16 - the number of cascade levels that the program will train. The more levels, the more accurate, but the longer. Their normal amount is from 16 to 25.
-minhitrate 0.999 - coefficient determining the quality of training. In essence, this is the percentage of “correct” detections. If set to .999, that is, the initial sample will be no more than 1- 0.999 = 0.1% target omission. The higher the ratio, the higher the false alarm rate. In principle, if the sample is good, you can set 0.99-0.999. If the bad (few objects, they are mixed with the background) - then it should be omitted.
-maxFalseAlarmRate 0.4 - false alarm level. AdaBoost is an algorithm that can pull any level of a false alarm on a sample. But it is better to do something reasonable. By default, all set to 0.5. But perhaps it will make sense to play. In case the sample is very good, the level of the required alarm will be quickly reached and the training will be stopped.
-numPos 200 - the number of positive examples. IMPORTANT! It would seem that there should be the number of files that you had. But this is not the case (in most manuals this is not noted). The lower the minhitrate factor, the more your files will be considered unusable. In most cases, it is enough to put numPos 80% of the positive files you have. It is better to be safe so that after a day of work the program does not crash with an error :)
-numNeg 500 - the number of negative examples you have. What we have is what we write.
-w 20 -h 20 - the size of the primitive from the last item.
-mode ALL - to use or not the full set of Haar-signs. The speed and accuracy of the algorithm depends on this. But there are situations when a complete set of features is not needed (for example, if your object does not change its orientation).
-precalcValBufSize 1024 -precalcIdxBufSize 1024 is the memory allocated to the process. It seems that in the latest version of OpenCV, as I said, about as much the program ate, but slightly earlier versions ate about 2 times more. If during training you plan to use a computer, then put so much memory so that you have enough for further work.
It must be said that learning does not suffer from usability. There are a lot of bugs. But slowly OpenCV is fixed. In the latest OpenCV, most of the reasons why the program crashes are explained in some detail. As a rule, this is a lack of positive or negative examples, unreachable characteristics, crookedly written addresses. True, there was some kind of glitch with the suspension of training, when I was teaching an owl sample. Judging from everything, there were too few test cases (I then used 150 owls and 200 counter-examples).
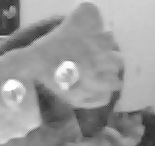
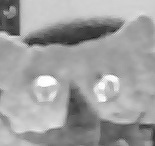
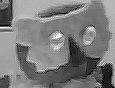
An example of the algorithm on the video. It is seen that there are gaps. But for a sample with only two hundred examples, this is a good result.
As promised, an example of the project and several programs that make life easier. You can download it entirely either here (rar-archive on Yandex disk), or here (github). But on githabe, the maximum file size is 100 megs, and the Emgu build (OpenCV for C #), which I use, pulls two large OpenCV files that are not used, but which cannot be excluded from the project. Both of these files are inside the Bin \ x86 folder, archived in the “lagedll.rar” archive, you just need to pull them out.
The whole project on VS2010, Windows 7. All executable programs are in the "Bin" folder.
VideoCropper - A program for creating sequences from a video camera. At the start you need to specify the folder to save and mode of operation (creating a positive or negative sample). The mouse highlights the area to be saved, the space is saved by a space.
PictureCropper - Program for cutting existing database of photos. At startup, the working folder is indicated. Creates a subfolder with sliced images. The mouse is allocated an area that must be saved. By "s" is saved. By "r" - save and move to the next image. By space - just go to the next image.
OwlDetector - the final program looking for an owl
Bad, Good - folders with negative and positive examples
haarcascade - Final cascades obtained during training
Bad.dat, Good.dat - image description files
samples.vec - a file with a set of positive images, prepared for training
In this article I will try to show how to train a cascade from scratch in a few hours, having trained to search for a simple object in a video stream (an example would be a charming owl from a photo). All training samples and programs will be attached.
Why is all this necessary? Cascade Haar is one of the easiest ways to recognize classes of objects with high speed. These include the faces and hands of people, car numbers, and pedestrians. With the Haar detector, it’s easy to find animals in the frame (by the way, surprisingly, I haven’t seen any automatic tits feeder on a raspberry pi). In addition, there are ready-made OpenCV implementations for most of the existing systems (I even met it for blackfin). All this makes Haar one of the most convenient methods for solving video processing tasks even for people who have never worked with video processing.
Process
The entire sample learning process does not require programming skills. For this there are ready-made console programs that are present in the main assembly of OpenCV. The use of a cascade requires a minimum programming skill, it is enough to change a couple of lines already in the finished example, which are under C, C ++, C #, Java, Python, etc.
What will we need?
- Photos of the subject in real habitat. The more similar the sample is to what we recognize, the better the results will be. If you train the face recognizer from photographs of people from the studio, then on the street the recognition level will be lower than in the studio. This is influenced by shadows, clothing, and facial expression.
- A selection of negative photographs in which there is no recognition object. Photos must be taken in the same environment where the recognition will be. If a sample of counterexamples is made from photographs at the north pole, and you recognize it in the tropical jungle, it will not work.
- OpenCV. This article uses current 2.4.7. All examples of programs located here will work with him. But if you make a project from scratch - better download the new OpenCV.
Where to get examples and counterexamples?
There are several ways:
- Take the camera yourself.
- Use the ready base, if it is on the Internet. For individuals, rooms, eyes, emotions, people, etc. There are many such bases.
- Turn on the camcorder and take a set of pictures from the video stream.
- Use the software attached to OpenCV and generate new samples from the existing 2-3 images. This option is described in detail here, I will not dwell on it. It works badly, for serious purposes it is no good.
For options 1-3 there are several programs that simplify life. First of all, these are programs that allow you to mark up photos. Articles in English use a self-written program " imageclipper ". I did not like it, because it does not work correctly with large photos. For myself, I wrote a program that was convenient for me to work with. The source code and code are attached in the “Downloads” section of this article (PictureCropper).
How many photos do you need?
For a stable face detector, this is 3000-4000 positive examples and as many negative ones. From 500 positive and 1000 negative I made a stable number detector. For the detector shown in this article, I took 250 positive and 500 negative photos.
The larger and more diverse the sample, the more stable it is and the longer it takes.
')
Getting to work.
In order to start learning, we need to have 2 folders with examples. “Good” is a folder with positive images, “Bad” is with negative images. IMPORTANT ! At least in one of the previous versions of the training program, it did not respond well to the presence of spaces and dots in the file names. Russian does not accept any version. Try to call the image "0.bmp", "1. bmp ”itd The formats "bmp" and "jpg" work stably, with the rest did not check.
For each folder you need to have a text file that describes the images used. Let's call them “Good.dat” and “Bad.dat”. IMPORTANT ! This file should be at the same file system level as the folder.
\Good \1. bmp \2. bmp \.... bmp \N. bmp \Bad \1. bmp \2. bmp \.... bmp \N. bmp Good.dat Bad.dat Description files for negative and positive objects have different structure. For a file of negative examples, this is simply a list of relative paths to the images:
Bad\1. bmp Bad\2. bmp Bad\.... bmp Bad\N. bmp For files with positive examples, the record is a bit trickier. In addition to the path, the position of the object and its size must be indicated. In principle, each positive image may contain several examples of objects. But I do not advise. Best of all: one frame - one object.
Good \0.bmp 1 0 0 414 148 Good \1.bmp 1 0 0 568 164 Good \....bmp 1 0 0 440 144 Good \N.bmp 1 0 0 590 182 "Good \ 0.bmp" is the address of the object relative to the description file. "1" - the number of positive objects in the image. "0 0 414 148" - coordinates of the rectangle on the image in which the object is located. If there are several objects, the record takes the form: "Good \ 0.bmp 2 100 200 50 50 300 300 25 25".
I repeat that it is most convenient when each object is a separate frame, while the coordinates of the object are equal to the frame size.
Example of a positive sample:
An example of a negative sample:
Begin to train!
The learning itself takes place in two stages. The first stage - all positive images are reduced to a common format. This should be done by a program located in the OpenCV folder. Take the one that fits your system. I have this "opencv \ build \ x64 \ vc10 \ bin". The program is called opencv_createsamples.exe.
To create a bundle of these positive images, run opencv_createsamples through the console:
opencv_createsamples.exe -info E:\BAZAS\Sova\Good.dat -vec samples.vec -w 20 -h 20 -info E: \ BAZAS \ Sova \ Good.dat - description file for positive images. Either the full address is specified or relative to the opencv_createsamples.exe program.
-vec samples.vec - file in which the base of positive images reduced to a common format will be saved. The address must be specified relative to the opencv_createsamples.exe program (suppose the full path in the system).
-w 20 -h 20 - the size of the template. Must approximately reflect the proportions of the desired object. For example, for persons or for an owl the most suitable proportion of height to width is 1 * 1. For numbers it is 3 * 1. And to search for a pencil it is logical to put something like 8 * 1. The size of the template should be quite small. Ideally set it so that the person himself could distinguish the depicted object, but not more than that. The larger the pattern, the longer the learning.
The result of the program is the samples.vec file, which will contain all your positive images in a format close to bmp and with the size w * h.
Create a final cascade
To calculate the final cascade, use the opencv_traincascade.exe program, which is located in the same folder as opencv_createsamples.exe. It works for a long time. Even very long. Training a cascade of 500-1000 objects takes almost a whole day. The example was trained for 2 hours. When calling:
opencv_traincascade.exe -data haarcascade -vec samples.vec -bg E:\BAZAS\Sova\Bad.dat -numStages 16 -minhitrate 0.999 -maxFalseAlarmRate 0.4 -numPos 200 -numNeg 500 -w 20 -h 20 -mode ALL -precalcValBufSize 1024 -precalcIdxBufSize 1024 -data haarcascade - the address of the folder where to put the results. Counted from the root folder of the program. You need to create in advance, otherwise it will fly out.
-vec samples.vec - the address of the file counted in the last paragraph with positive examples
-bg E: \ BAZAS \ Sova \ Bad.dat - the address of the file describing negative examples
-numStages 16 - the number of cascade levels that the program will train. The more levels, the more accurate, but the longer. Their normal amount is from 16 to 25.
-minhitrate 0.999 - coefficient determining the quality of training. In essence, this is the percentage of “correct” detections. If set to .999, that is, the initial sample will be no more than 1- 0.999 = 0.1% target omission. The higher the ratio, the higher the false alarm rate. In principle, if the sample is good, you can set 0.99-0.999. If the bad (few objects, they are mixed with the background) - then it should be omitted.
-maxFalseAlarmRate 0.4 - false alarm level. AdaBoost is an algorithm that can pull any level of a false alarm on a sample. But it is better to do something reasonable. By default, all set to 0.5. But perhaps it will make sense to play. In case the sample is very good, the level of the required alarm will be quickly reached and the training will be stopped.
-numPos 200 - the number of positive examples. IMPORTANT! It would seem that there should be the number of files that you had. But this is not the case (in most manuals this is not noted). The lower the minhitrate factor, the more your files will be considered unusable. In most cases, it is enough to put numPos 80% of the positive files you have. It is better to be safe so that after a day of work the program does not crash with an error :)
-numNeg 500 - the number of negative examples you have. What we have is what we write.
-w 20 -h 20 - the size of the primitive from the last item.
-mode ALL - to use or not the full set of Haar-signs. The speed and accuracy of the algorithm depends on this. But there are situations when a complete set of features is not needed (for example, if your object does not change its orientation).
-precalcValBufSize 1024 -precalcIdxBufSize 1024 is the memory allocated to the process. It seems that in the latest version of OpenCV, as I said, about as much the program ate, but slightly earlier versions ate about 2 times more. If during training you plan to use a computer, then put so much memory so that you have enough for further work.
Known bugs
It must be said that learning does not suffer from usability. There are a lot of bugs. But slowly OpenCV is fixed. In the latest OpenCV, most of the reasons why the program crashes are explained in some detail. As a rule, this is a lack of positive or negative examples, unreachable characteristics, crookedly written addresses. True, there was some kind of glitch with the suspension of training, when I was teaching an owl sample. Judging from everything, there were too few test cases (I then used 150 owls and 200 counter-examples).
results
An example of the algorithm on the video. It is seen that there are gaps. But for a sample with only two hundred examples, this is a good result.
Sources
As promised, an example of the project and several programs that make life easier. You can download it entirely either here (rar-archive on Yandex disk), or here (github). But on githabe, the maximum file size is 100 megs, and the Emgu build (OpenCV for C #), which I use, pulls two large OpenCV files that are not used, but which cannot be excluded from the project. Both of these files are inside the Bin \ x86 folder, archived in the “lagedll.rar” archive, you just need to pull them out.
The whole project on VS2010, Windows 7. All executable programs are in the "Bin" folder.
VideoCropper - A program for creating sequences from a video camera. At the start you need to specify the folder to save and mode of operation (creating a positive or negative sample). The mouse highlights the area to be saved, the space is saved by a space.
PictureCropper - Program for cutting existing database of photos. At startup, the working folder is indicated. Creates a subfolder with sliced images. The mouse is allocated an area that must be saved. By "s" is saved. By "r" - save and move to the next image. By space - just go to the next image.
OwlDetector - the final program looking for an owl
Bad, Good - folders with negative and positive examples
haarcascade - Final cascades obtained during training
Bad.dat, Good.dat - image description files
samples.vec - a file with a set of positive images, prepared for training
Source: https://habr.com/ru/post/208092/
All Articles