Customizing UICollectionViewLayout. In the name of art
Hey all, ho!
I work as an ios-developer in a provincial city of a provincial country nearest (in relation to Russia) foreign countries. About one and a half years ago, the country decided that I owed her something, specifically: I should have a year of my life, a year oflow skilled labor, a year of dreams of returning home, to family and work ... - in a word, I was drafted into the army. And behind this case, I somehow missed the release of iOS 6 with all its features, including the long overdue UICollectionView.
Having finished with outfits, polygons, charter and other fascinating things, I returned home, started working again, and of course the project in which the customer needed to display data in the form of what the designers call the “pinterest board”, that is, the UICollectionView itself, not long in coming.
The project is something like an iPad-catalog for auctions of a company engaged in the evaluation of antiques. I have no idea how the guys will react to their mention at the Habré, so I will not give any links, no design layouts, no real screenshots.
The application, in principle, is not complicated, from the design delights only one thing alerted me a little - the view of the main screen. It was supposed to be a collection of images of lots, arranged in three horizontal rows, with horizontal scrolling. Middle row with a fixed element height and an arbitrary width (depending on the image proportions). The height of the elements of the first and third rows should vary slightly downward, creating a sort of torn edges. If you do not quite understand my dry description in letters, look at the screenshot at the end of the article - a sample of the final result - it should explain everything to you. Or here.
This was the first attempt to spend a minimum of effort. Since I have never encountered these elements before, my hope for Apple’s class was extremely strong. For a start, I generally scored on torn edges, focusing simply on the output of the horizontal “interestboard”. Unfortunately, it was not possible to slip on the ball.
')
You can see two things in the screenshot.
Either my googling skills are extremely weak, or RFQuiltLayout is the only ready-made solution that seems to be rolling in my case.
This class uses the blockPixels variable, which stores the default CGSize cell size. Delegate method
returns multipliers for blockPixels of each cell. That is, if blockPixels = {100, 100}, and blockSizeForItemAtIndexPath = {2.2, 0.8}, then the size of the cell will be {220, 80}.
In my opinion, a slightly strange system, I want to set blockPixels to {1, 1} and return the required size for an element in the delegate method, however, the allocation algorithm in this case thinks even for 15 elements for a long time, and for placing 100 elements it needs computational power abruptly than the iPad. I did not have enough patience to disassemble the algorithm, so I selected the value {20, 20} for blockPixels using the matching method, which, with my 15 cells, gave a normal speed and good placement accuracy.
To create torn edges, I had to use a small deception - in fact, I did not touch the cell sizes themselves, because at the placement stage I could not find out which row the cell was in, but when I installed the picture I checked the row and for the first and last rows I reduced the height pictures. Images were slightly cropped at the top and bottom. If the lot, the picture of which fell under circumcision, was a portrait, then people lost their heads and bottoms, if the lot was a Chinese figurine, the dragon was displayed without a crest, and on the Persian carpets my dirty hack cut the pile. But the client was pleased, and therefore I was pleased, until the technical project was a little corrected. Instead of a miserable 15 items, all lots should have been displayed on the main screen. All one and a half thousand.
Fifteen hundred images of paintings, vases, jade figurines and everything else, no less beautiful. The harsh truth was such that no third-party decisions saved me. So it's time to write your placement manager.
As one would expect, I did not manage to find any information in Russian (I didn’t really hope so), but the tutorials in English, where there wouldn’t be a lot of unnecessary and there would be at least a good bit of information, wouldn’t be forgotten either. first ten pages of search results. As a result, my manual was, in fact, the documentation from Apple and the RFQuiltLayout code mentioned above (by the way, I would like to express my gratitude to its author Bryce Redd).
Immediately apologize for the dumb class name.
First, I defined a protocol for its delegate.
Since the delegate cannot affect the height of a cell in any way, he sends to the manager only the width that he would like to see in a particular cell. Well and the method returning UIEdgeInsets (internal indents for a cell), where without it.
And of course, the property that stores the number of rows is to walk so to walk, let the class be universal, and not just for the three rows!
Now implementation.
Apple tells us that if we don’t want to bother with all sorts of additional UICollectionView elements, such as the supplementary and decoration view, we need to override at least the following methods:
With the latter, everything is clear - return YES if newBounds does not match the current bounds of the collection.
Let's leave the first method, easy to implement, for later, and go to the layoutAttributesForItemAtIndexPath method. As is clear from its name, in it we must calculate the UICollectionViewLayoutAttributes for each item. Objects of the UICollectionViewLayoutAttributes class contain a lot of information about the location of the object, including even transform3D, which allows you to create all sorts of beauty for the cells, but in our case, you can do with just a banal frame.
Actually, nothing interesting - we get the UIEdgeInsets from the delegate, if he gives them to us, we get the frame using the frameForIndexPath method, create and return attributes with the received UIEdgeInsets and CGRect. But in the frameForIndexPath method, I also hide the main part of shamanism.
In case my macaroni code and half-English comments are not very clear, I will try to introduce morechaos of clarity with pseudo-code:
By the way, you need to remember to clear all of these indexPathsByFrame, framesByIndexPath and what else is cached in the invalidateLayout method. Naturally, not missing [super invalidateLayout].
Back to contentSize. Obviously, in our case with horizontal scrolling, it should look something like this:
where edgeX is the X coordinate of the farthest located cell. After all, we already know how all the cells are located. Or do not know. Or we still know ... To be sure, you need to override the prepareLayout method, remembering to call [super prepareLayout] in it, and calculate the frames for each cell
Yes, in the presence of hundreds of thousands of cells, the collection will not really hurry to load, but I do not see any other trivial way out.
And in the end, it remains to override the last method - layoutAttributesForElementsInRect. It is necessary to return the attributes for all elements that fall into this area. It is called every time the collection is scrolled by the size of its frame. Then it seems that all of this is cached, so the method will be called just contentSize.width / frame.size.width once.
My implementation, as they say, “in the forehead”: we look at the frames for each element, if they intersect with this area, we add to the returned array.
Immediately after the euphoria over the fact that everything works as it should, was over, my internal workaholic rendered a verdict: optimize! But the inner self, who turned out to be stronger than a workaholic, got the phrase “premature optimization” from the depths of his memory and, hiding behind the fact that, with ten thousand items, testing on the iPad 2 did not reveal any slowdowns, he decided to postpone the optimization for sometime afterwards.
I hope that someone was interested, someone is useful, and the rest just had the patience to read this post. Thanks for attention.
Finally, some links:
PS I have already written here that there is no picture in the last spoiler. I did the same operation three times - edited it, inserting the missing link, saved it, saw that the changes had occurred, closed the page, opened it again and cursed - the picture disappeared again. Moreover, the link Or here , which should lead to the same picture, has ceased to perform its functional duties. Trouble
Just in case, I leave this unauthorized link here simply text
habr.habrastorage.org/post_images/0e1/0c7/be4/0e10c7be44690901268d5dfa9e532d0e.png
Intro
I work as an ios-developer in a provincial city of a provincial country nearest (in relation to Russia) foreign countries. About one and a half years ago, the country decided that I owed her something, specifically: I should have a year of my life, a year of
Having finished with outfits, polygons, charter and other fascinating things, I returned home, started working again, and of course the project in which the customer needed to display data in the form of what the designers call the “pinterest board”, that is, the UICollectionView itself, not long in coming.
Project
The project is something like an iPad-catalog for auctions of a company engaged in the evaluation of antiques. I have no idea how the guys will react to their mention at the Habré, so I will not give any links, no design layouts, no real screenshots.
The application, in principle, is not complicated, from the design delights only one thing alerted me a little - the view of the main screen. It was supposed to be a collection of images of lots, arranged in three horizontal rows, with horizontal scrolling. Middle row with a fixed element height and an arbitrary width (depending on the image proportions). The height of the elements of the first and third rows should vary slightly downward, creating a sort of torn edges. If you do not quite understand my dry description in letters, look at the screenshot at the end of the article - a sample of the final result - it should explain everything to you. Or here.
UICollectionViewFlowLayout
This was the first attempt to spend a minimum of effort. Since I have never encountered these elements before, my hope for Apple’s class was extremely strong. For a start, I generally scored on torn edges, focusing simply on the output of the horizontal “interestboard”. Unfortunately, it was not possible to slip on the ball.
')
Oh, the picture!
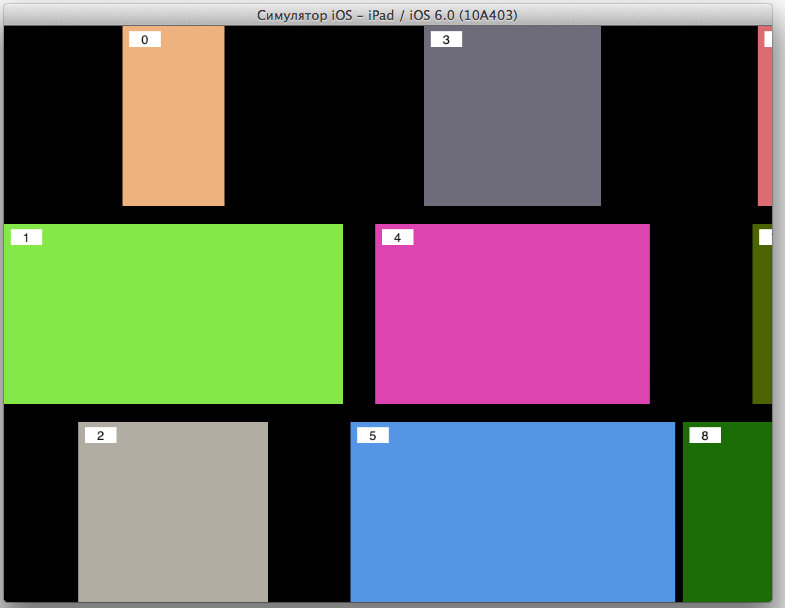
Figure # 0 - Developer assumes, and UICollectionViewFlowLayout has
You can see two things in the screenshot.
- First: UICollectionViewFlowLayout positions the elements so that the center of the element in the top row is above the center of the elements below. One word, does not immediately roll.
- Second: as an example, I decided to post more unwritten pictures of avant-garde artists against the background of the masterpiece of the founder of Suprematism.
RFQuiltLayout
Either my googling skills are extremely weak, or RFQuiltLayout is the only ready-made solution that seems to be rolling in my case.
This class uses the blockPixels variable, which stores the default CGSize cell size. Delegate method
- (CGSize) blockSizeForItemAtIndexPath:(NSIndexPath *)indexPath; returns multipliers for blockPixels of each cell. That is, if blockPixels = {100, 100}, and blockSizeForItemAtIndexPath = {2.2, 0.8}, then the size of the cell will be {220, 80}.
In my opinion, a slightly strange system, I want to set blockPixels to {1, 1} and return the required size for an element in the delegate method, however, the allocation algorithm in this case thinks even for 15 elements for a long time, and for placing 100 elements it needs computational power abruptly than the iPad. I did not have enough patience to disassemble the algorithm, so I selected the value {20, 20} for blockPixels using the matching method, which, with my 15 cells, gave a normal speed and good placement accuracy.
To create torn edges, I had to use a small deception - in fact, I did not touch the cell sizes themselves, because at the placement stage I could not find out which row the cell was in, but when I installed the picture I checked the row and for the first and last rows I reduced the height pictures. Images were slightly cropped at the top and bottom. If the lot, the picture of which fell under circumcision, was a portrait, then people lost their heads and bottoms, if the lot was a Chinese figurine, the dragon was displayed without a crest, and on the Persian carpets my dirty hack cut the pile. But the client was pleased, and therefore I was pleased, until the technical project was a little corrected. Instead of a miserable 15 items, all lots should have been displayed on the main screen. All one and a half thousand.
More art!
Fifteen hundred images of paintings, vases, jade figurines and everything else, no less beautiful. The harsh truth was such that no third-party decisions saved me. So it's time to write your placement manager.
As one would expect, I did not manage to find any information in Russian (I didn’t really hope so), but the tutorials in English, where there wouldn’t be a lot of unnecessary and there would be at least a good bit of information, wouldn’t be forgotten either. first ten pages of search results. As a result, my manual was, in fact, the documentation from Apple and the RFQuiltLayout code mentioned above (by the way, I would like to express my gratitude to its author Bryce Redd).
So, SKRaggyCollectionViewLayout
Immediately apologize for the dumb class name.
First, I defined a protocol for its delegate.
@protocol SKRaggyCollectionViewLayoutDelegate <UICollectionViewDelegate> - (float)collectionLayout:(SKRaggyCollectionViewLayout*)layout preferredWidthForItemAtIndexPath:(NSIndexPath *)indexPath; @optional - (UIEdgeInsets)collectionLayout:(SKRaggyCollectionViewLayout*)layout edgeInsetsForItemAtIndexPath:(NSIndexPath *)indexPath; @end Since the delegate cannot affect the height of a cell in any way, he sends to the manager only the width that he would like to see in a particular cell. Well and the method returning UIEdgeInsets (internal indents for a cell), where without it.
And of course, the property that stores the number of rows is to walk so to walk, let the class be universal, and not just for the three rows!
@property (nonatomic, assign) NSUInteger numberOfRows; Now implementation.
Apple tells us that if we don’t want to bother with all sorts of additional UICollectionView elements, such as the supplementary and decoration view, we need to override at least the following methods:
- (CGSize)collectionViewContentSize; - (NSArray*)layoutAttributesForElementsInRect:(CGRect)bounds; - (UICollectionViewLayoutAttributes*)layoutAttributesForItemAtIndexPath:(NSIndexPath *)indexPath; - (BOOL)shouldInvalidateLayoutForBoundsChange:(CGRect)newBounds; With the latter, everything is clear - return YES if newBounds does not match the current bounds of the collection.
Let's leave the first method, easy to implement, for later, and go to the layoutAttributesForItemAtIndexPath method. As is clear from its name, in it we must calculate the UICollectionViewLayoutAttributes for each item. Objects of the UICollectionViewLayoutAttributes class contain a lot of information about the location of the object, including even transform3D, which allows you to create all sorts of beauty for the cells, but in our case, you can do with just a banal frame.
- (UICollectionViewLayoutAttributes *)layoutAttributesForItemAtIndexPath:(NSIndexPath *)indexPath { UIEdgeInsets insets = UIEdgeInsetsZero; if ([self.delegate respondsToSelector:@selector(collectionLayout:edgeInsetsForItemAtIndexPath:)]) { insets = [self.delegate collectionLayout:self edgeInsetsForItemAtIndexPath:indexPath]; } // Get saved frame and edge insets for given path and create attributes object with them CGRect frame = [self frameForIndexPath:indexPath]; UICollectionViewLayoutAttributes* attributes = [UICollectionViewLayoutAttributes layoutAttributesForCellWithIndexPath:indexPath]; attributes.frame = UIEdgeInsetsInsetRect(frame, insets); return attributes; } Actually, nothing interesting - we get the UIEdgeInsets from the delegate, if he gives them to us, we get the frame using the frameForIndexPath method, create and return attributes with the received UIEdgeInsets and CGRect. But in the frameForIndexPath method, I also hide the main part of shamanism.
- (CGRect)frameForIndexPath:(NSIndexPath*)path { // if there is saved frame for given path, return it NSValue *v = [self.framesByIndexPath objectForKey:path]; if (v) return [v CGRectValue]; // Find X-coordinate and a row which are the closest to the collection left corner. A cell for this path should be placed here. int currentRow = 0; float currentX = MAXFLOAT; for (int i = 0; i < self.edgeXPositions.count; i++) { float x = [[self.edgeXPositions objectAtIndex:i] floatValue]; if (x < currentX) { currentRow = i; currentX = x; } } // Calculate cell frame values based on collection height, current row, currentX, the number of rows and delegate's preferredWidthForItemAtIndexPath: value // If variableFrontierHeight is YES this value will be adjusted for the first and last rows float maxH = self.collectionView.frame.size.height; float rowMaxH = maxH / self.numberOfRows; float x = currentX; float y = rowMaxH * currentRow; float w = [self.delegate collectionLayout:self preferredWidthForItemAtIndexPath:path]; float h = self.collectionView.frame.size.height / self.numberOfRows; float newH = h; // Adjust height of the frame if we need raggy style if (self.variableFrontierHeight) { if (currentRow == 0) { float space = arc4random() % self.randomFirstRowVar; if (self.prevWasTallFirst) { space += self.fixedFirstRowVar; } self.prevWasTallFirst = !self.prevWasTallFirst; y += space; newH -= space; } else if (currentRow == self.numberOfRows - 1) { float space = arc4random() % self.randomLastRowVar; if (self.prevWasTallLast) { space += self.fixedLastRowVar; } self.prevWasTallLast = !self.prevWasTallLast; newH -= space; } } // Assure that we have preferred height more than 1 h = h <= 1 ? 1.f : h; // Adjust frame width with new value of height to save cell's right proportions w = w * newH / h; // Save new calculated data ad return [self.edgeXPositions replaceObjectAtIndex:currentRow withObject:[NSNumber numberWithFloat:x + w]]; CGRect currentRect = CGRectMake(x, y, w, newH); NSValue *value = [NSValue valueWithCGRect:currentRect]; [self.indexPathsByFrame setObject:path forKey:value]; [self.framesByIndexPath setObject:value forKey:path]; return currentRect; } In case my macaroni code and half-English comments are not very clear, I will try to introduce more
Here he is
[we look through NSMutableDictionary, in which we saved the frames calculated earlier by the indexPath keys, if we find it is a victory, we don’t need to do anything else]
[if calculations cannot be avoided, we estimate in which row the right border of the last frame is closest to the top of the table — this is where we need to put the current element (such x coordinate for each row is stored in NSMutableArray edgeXPositions)]
[now, knowing the row and position along the X axis, knowing the width required by the delegate for an element, we can calculate its position of its upper left corner; knowing the height of the collection and the number of rows, we calculate at the same time the height of the element]
[if we need the notorious “torn edges”, and the row is the first or the last, we slightly reduce the calculated height]
[we are reinsured in case the height is less than one, we reduce the width in proportion to the decrease in height]
[save the resulting value to the indexPathsByFrame and framesByIndexPath dictionaries for quick access later and return from the method]
By the way, you need to remember to clear all of these indexPathsByFrame, framesByIndexPath and what else is cached in the invalidateLayout method. Naturally, not missing [super invalidateLayout].
Back to contentSize. Obviously, in our case with horizontal scrolling, it should look something like this:
- (CGSize)collectionViewContentSize { return CGSizeMake(self.edgeX, self.collectionView.frame.size.height); } where edgeX is the X coordinate of the farthest located cell. After all, we already know how all the cells are located. Or do not know. Or we still know ... To be sure, you need to override the prepareLayout method, remembering to call [super prepareLayout] in it, and calculate the frames for each cell
- (void)prepareLayout { [super prepareLayout]; // calculate and save frames for all indexPaths. Unfortunately, we must do it for all cells to know content size of the collection for (int i = 0; i < [self.collectionView.dataSource collectionView:self.collectionView numberOfItemsInSection:0]; i++) { NSIndexPath *path = [NSIndexPath indexPathForItem:i inSection:0]; [self frameForIndexPath:path]; } } Yes, in the presence of hundreds of thousands of cells, the collection will not really hurry to load, but I do not see any other trivial way out.
And in the end, it remains to override the last method - layoutAttributesForElementsInRect. It is necessary to return the attributes for all elements that fall into this area. It is called every time the collection is scrolled by the size of its frame. Then it seems that all of this is cached, so the method will be called just contentSize.width / frame.size.width once.
My implementation, as they say, “in the forehead”: we look at the frames for each element, if they intersect with this area, we add to the returned array.
- (NSArray*)layoutAttributesForElementsInRect:(CGRect)bounds { if (CGRectEqualToRect(bounds, self.previousLayoutRect)) { return self.previousLayoutAttributes; } [self.previousLayoutAttributes removeAllObjects]; self.previousLayoutRect = bounds; NSArray *allFrames = self.framesByIndexPath.allValues; for (NSValue *frameValue in allFrames) { CGRect rect = [frameValue CGRectValue]; if (CGRectIntersectsRect(rect, bounds)) { [self.previousLayoutAttributes addObject:[self layoutAttributesForItemAtIndexPath:[self.indexPathsByFrame objectForKey:[NSValue valueWithCGRect:rect]]]]; } } return self.previousLayoutAttributes; } There should have been a picture, but it will not be
because the habr engine deletes it in a surprisingly brazen way every time after saving changes in the edited post
Immediately after the euphoria over the fact that everything works as it should, was over, my internal workaholic rendered a verdict: optimize! But the inner self, who turned out to be stronger than a workaholic, got the phrase “premature optimization” from the depths of his memory and, hiding behind the fact that, with ten thousand items, testing on the iPad 2 did not reveal any slowdowns, he decided to postpone the optimization for sometime afterwards.
Afterword
I hope that someone was interested, someone is useful, and the rest just had the patience to read this post. Thanks for attention.
Finally, some links:
- Apple's Guide
- Hyde from some dude - in my opinion, too much offtopic
- My github code
PS I have already written here that there is no picture in the last spoiler. I did the same operation three times - edited it, inserting the missing link, saved it, saw that the changes had occurred, closed the page, opened it again and cursed - the picture disappeared again. Moreover, the link Or here , which should lead to the same picture, has ceased to perform its functional duties. Trouble
Just in case, I leave this unauthorized link here simply text
habr.habrastorage.org/post_images/0e1/0c7/be4/0e10c7be44690901268d5dfa9e532d0e.png
Source: https://habr.com/ru/post/207856/
All Articles