Development of Windows 8.1 applications on XAML / С #. Part 5. Pop-ups and panels
Today we will talk about the implementation of pop-up windows, menus and panels in the Windows 8.1 application.
We will look at the possibilities offered by Windows 8.1 to the application developer for implementing pop-up windows, settings panels and context menus, as well as adding all the listed possibilities to the “ Product Catalog ” application developed in previous articles.
In Windows 8, XAML developers used the Popup control and independently described its behavior. Now for this there are more simple mechanisms.
')
So, the Flyout pop-up panels are a set of controls with an already implemented logic of such basic things as opening, closing a window, and event handling.
The main scenarios for the use of pop-up windows and panels:
1. Request information, warnings, confirmation ( Flyout ).
2. Popup context menus ( MenuFlyout ).
3. Application settings panel ( SettingsFlyout ).
Now we will analyze how to implement it.
Implement a popup window
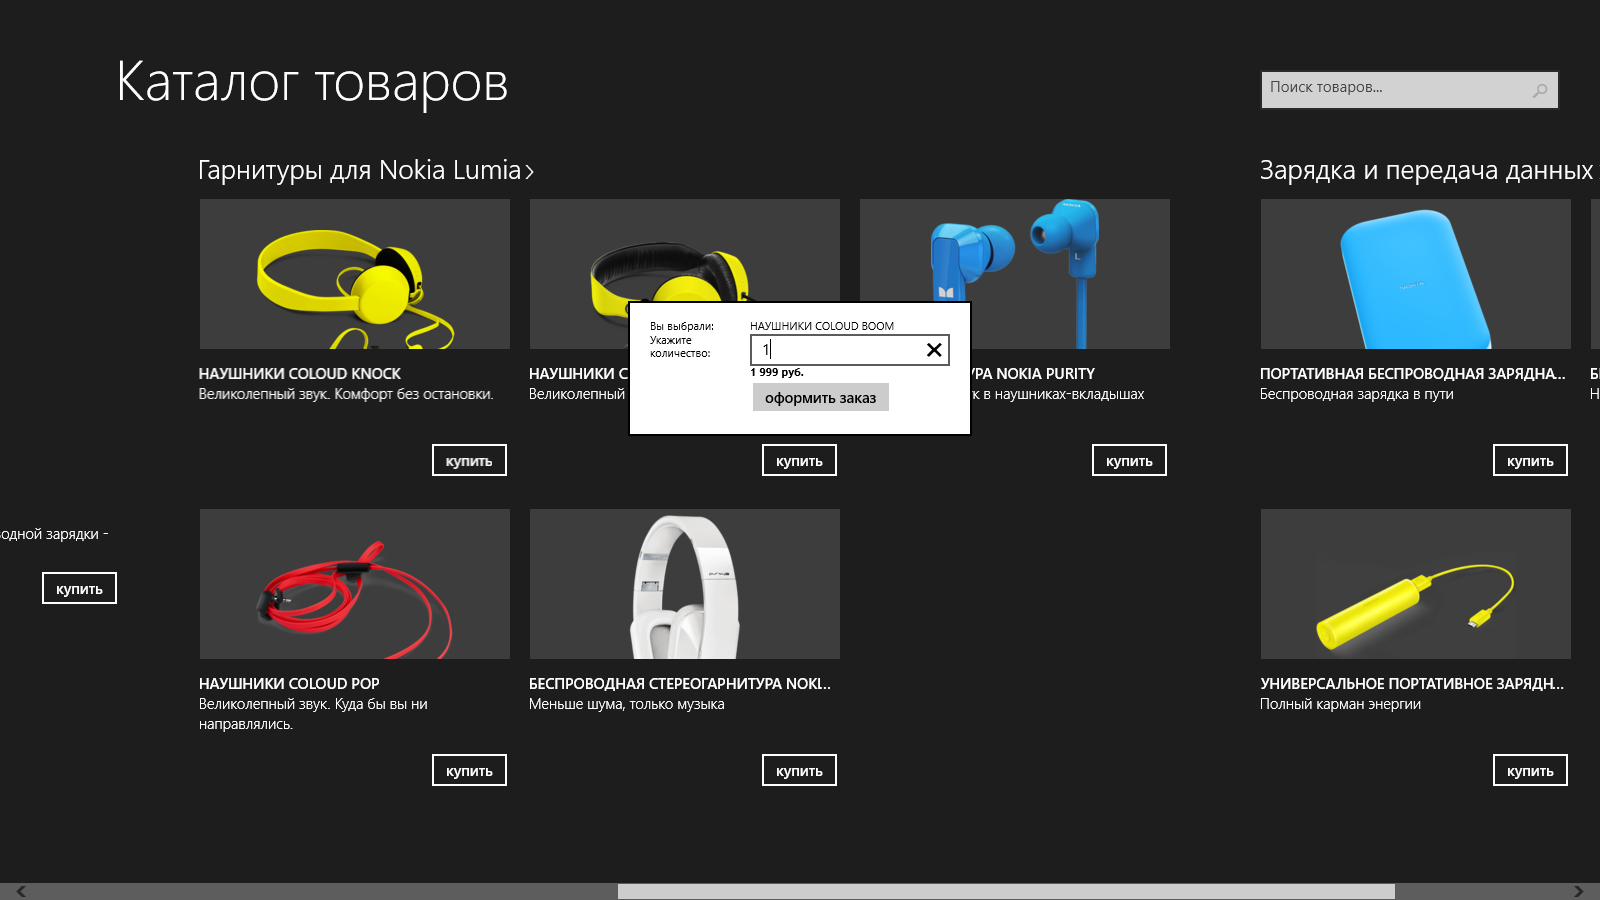
Add a pop-up window in the application " Catalog of goods ", which will occur when you click on the "Buy" button and specify the number of purchased goods from the user.
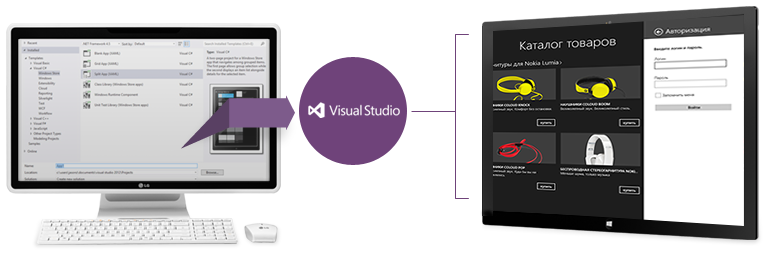
1. Open the Product Catalog application project in Visual Studio 2013 or create a new project.
2. In Solution Explorer, open the HubPage.xaml file.
3. Find the " Buy " button and paste the following code into it:

<Button Grid.Row="2" Content="" Margin="0,10,0,0" HorizontalAlignment="Right" > <Button.Flyout > <Flyout > <Grid Width="300"> <Grid.ColumnDefinitions> <ColumnDefinition Width="100"></ColumnDefinition> <ColumnDefinition></ColumnDefinition> </Grid.ColumnDefinitions> <Grid.RowDefinitions> <RowDefinition></RowDefinition> <RowDefinition></RowDefinition> <RowDefinition></RowDefinition> <RowDefinition></RowDefinition> </Grid.RowDefinitions> <TextBlock Text=" : " Grid.Column="0" /> <TextBlock Text="{Binding Title}" Grid.Column="1" TextWrapping="WrapWholeWords" /> <TextBlock Text=" : " Grid.Row="1" Grid.Column="0" TextWrapping="WrapWholeWords"/> <TextBox x:Name="valueTextBox" Grid.Row="1" Grid.Column="1" /> <TextBlock Text="1 999 ." Grid.Row="2" Grid.Column="1" FontWeight="Bold" /> <StackPanel Grid.Row="3" Grid.Column="1"> <Button x:Name="confirmPurchaseButton" Click="Button_Click" CommandParameter="{Binding UniqueId}"> </Button> </StackPanel> </Grid> </Flyout> </Button.Flyout> </Button> 4. Run the application.
When you click on the "Buy" button, a pop-up window will open.
Then you can handle popup events and perform some actions depending on the state of the object: Opening , Opened , Closed .
Implement the popup menu
Now let's add a popup menu. We implement it in the lower toolbar, which we already have in the application (see Part 3. Toolbars ).
1. In Solution Explorer, open the HubPage.xaml file.
2. Find Page.BottomAppBar and SettingAppBarButton . Replace its code:
<AppBarButton x:Name="SettingAppBarButton" IsCompact="True" Label="" Icon="Setting" > <AppBarButton.Flyout> <MenuFlyout > <MenuFlyoutItem x:Name="SettingAppBarButton1" Text=" " Click="SettingAppBarButton1_Click" /> <MenuFlyoutItem x:Name="SettingAppBarButton2" Text=" " Click="SettingAppBarButton2_Click" /> <MenuFlyoutItem x:Name="SettingAppBarButton3" Text="" Click="SettingAppBarButton3_Click" /> <MenuFlyoutSeparator/> <ToggleMenuFlyoutItem x:Name="SettingAppBarButton4" Text=" " Click="SettingAppBarButton4_Click" /> </MenuFlyout> </AppBarButton.Flyout> </AppBarButton> 3. Run the application.
4. Open the bottom toolbar.
5. Click on the "Settings" button. A popup menu will appear.
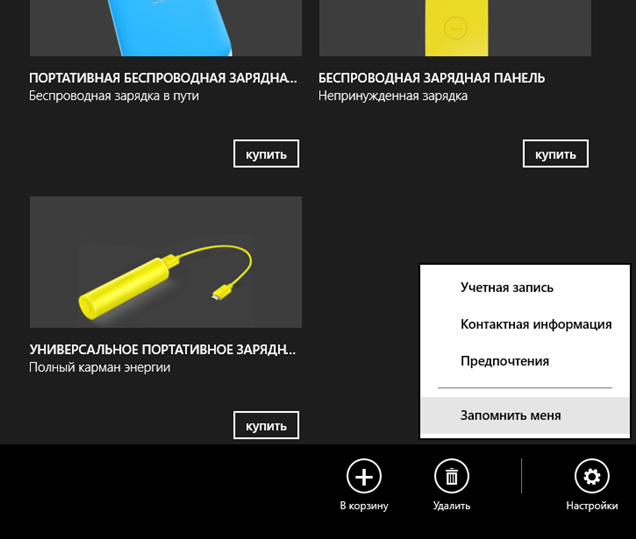
We used the MenuFlyout control that created the popup menu.
We have three usual menu items MenuFlyoutItem , a separator and a menu item that has two states, ToggleMenuFlyoutItem is turned on and off.
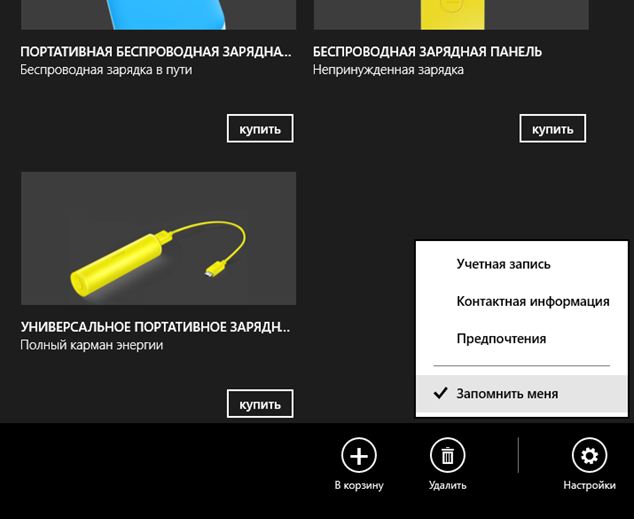
For all of them, you can implement a Click event handler with the necessary functionality.
Implement the settings panel
In Windows 8.1, a new SettingsFlyout control has appeared, which allows you to create settings bars according to the Guide for Windows Store application developers.
The settings panel is in each application and appears on the left side of the screen. By default, the panel looks like this:
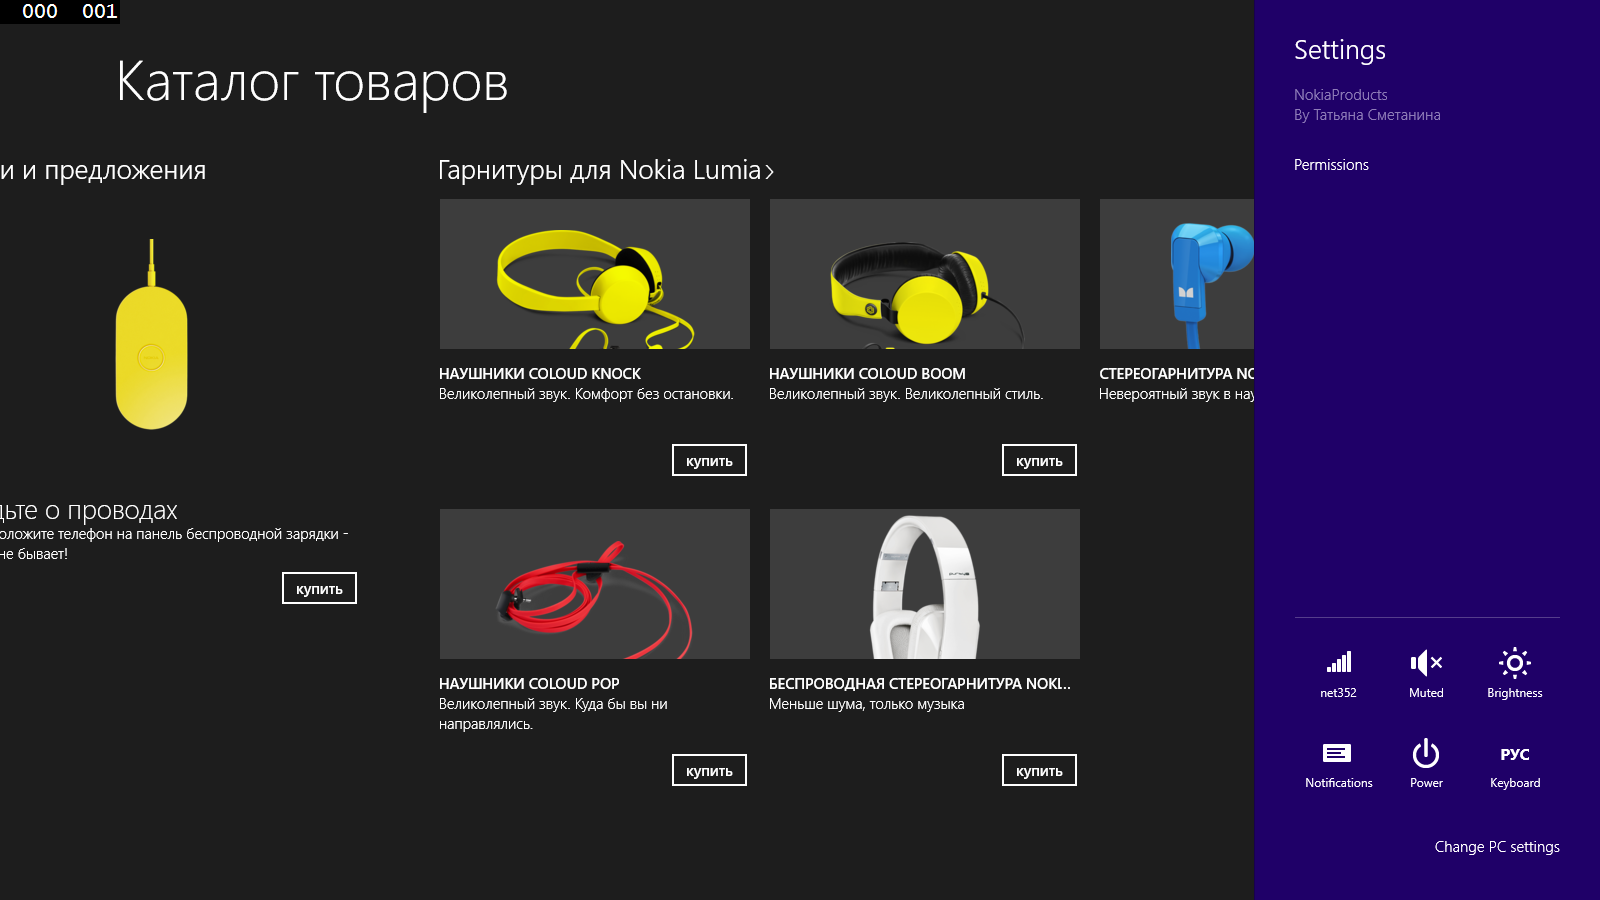
You can customize it by adding the settings needed by your application. For example, we will add an authorization page to the settings.
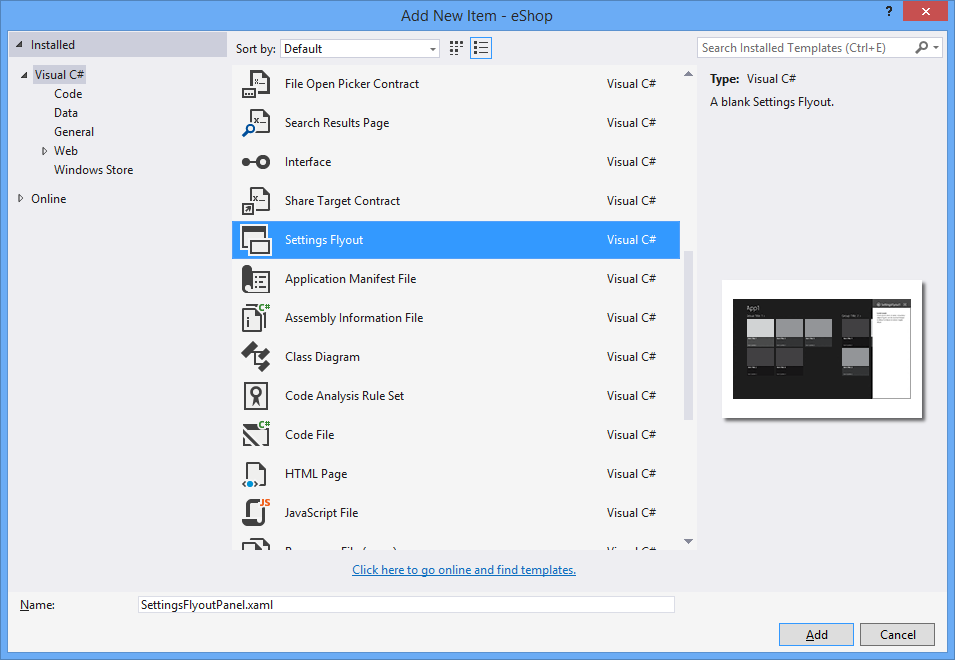
1. Create a new file in the project ( Add / New Item ).
2. Select the file type Setting Flyout and specify the name LoginSettingsFlyout.xaml .
3. In Solution Explorer, open the LoginSettingsFlyout.xaml file. By default, the panel will look like this:

If you look at the XAML view, you will see that this control is used as a container for any other controls and it has the following settings:
IconSource - icon.
Title - the name of the panel.
HeaderBackground - the background color of the panel header.
HeaderForeground - the font color of the panel headings .
4. Replace the LoginSettingsFlyout.xaml file code with the following:
<SettingsFlyout x:Class="eShop.LoginSettingsFlyout" xmlns="http://schemas.microsoft.com/winfx/2006/xaml/presentation" xmlns:x="http://schemas.microsoft.com/winfx/2006/xaml" xmlns:local="using:eShop" xmlns:d="http://schemas.microsoft.com/expression/blend/2008" xmlns:mc="http://schemas.openxmlformats.org/markup-compatibility/2006" mc:Ignorable="d" IconSource="Assets/SmallLogo.png" Title="" d:DesignWidth="346"> <StackPanel x:Name="FlyoutContent"> <TextBlock x:Name="PleaseSignInTextBlock" Text=" ." Style="{StaticResource TitleTextBlockStyle}" TextWrapping="Wrap" /> <TextBox x:Name="UserNameTextBox" Header="" HorizontalAlignment="Left" Margin="0,25,0,0" Width="250" /> <PasswordBox x:Name="PasswordBox" Header="" Width="250" Margin="0,25,0,0" HorizontalAlignment="Left" /> <CheckBox x:Name="SaveCredentialsCheckBox" Content=" " HorizontalAlignment="Left" Margin="0,20,0,0" /> <Button x:Name="SubmitButton" Content="" Click="SubmitButton_Click" Width="280" Margin="0,25,0,0" /> <TextBlock x:Name="ErrorTextBox" Margin="0,10,0,0" TextWrapping="Wrap" Foreground="Red" /> </StackPanel> </SettingsFlyout> 5. Open LoginSettingsFlyout.xaml.cs .
6. Locate the SubmitButton_Click event handler .
7. Add code to close the panel:
private void SubmitButton_Click(object sender, RoutedEventArgs e) { // // this.Hide(); } If you start the application now, you will find that there is no transition to our authorization panel on the settings panel.
8. Open the App.xaml.cs file and add code to add a transition to our panel from the standard settings panel:
protected override void OnWindowCreated(WindowCreatedEventArgs args) { SettingsPane.GetForCurrentView().CommandsRequested += (s, e) => { SettingsCommand defaultsCommand = new SettingsCommand("login", "", (handler) => { LoginSettingsFlyout loginFlyout = new LoginSettingsFlyout(); loginFlyout.Show(); }); e.Request.ApplicationCommands.Add(defaultsCommand); }; base.OnWindowCreated(args); } The OnWindowCreated method is called when the application is opened once, when the main screen is created. In it, we register the CommandsRequested event of the user opening the settings panel, in which we add a link to our custom panel.
9. Run the application.
10. Open the settings panel
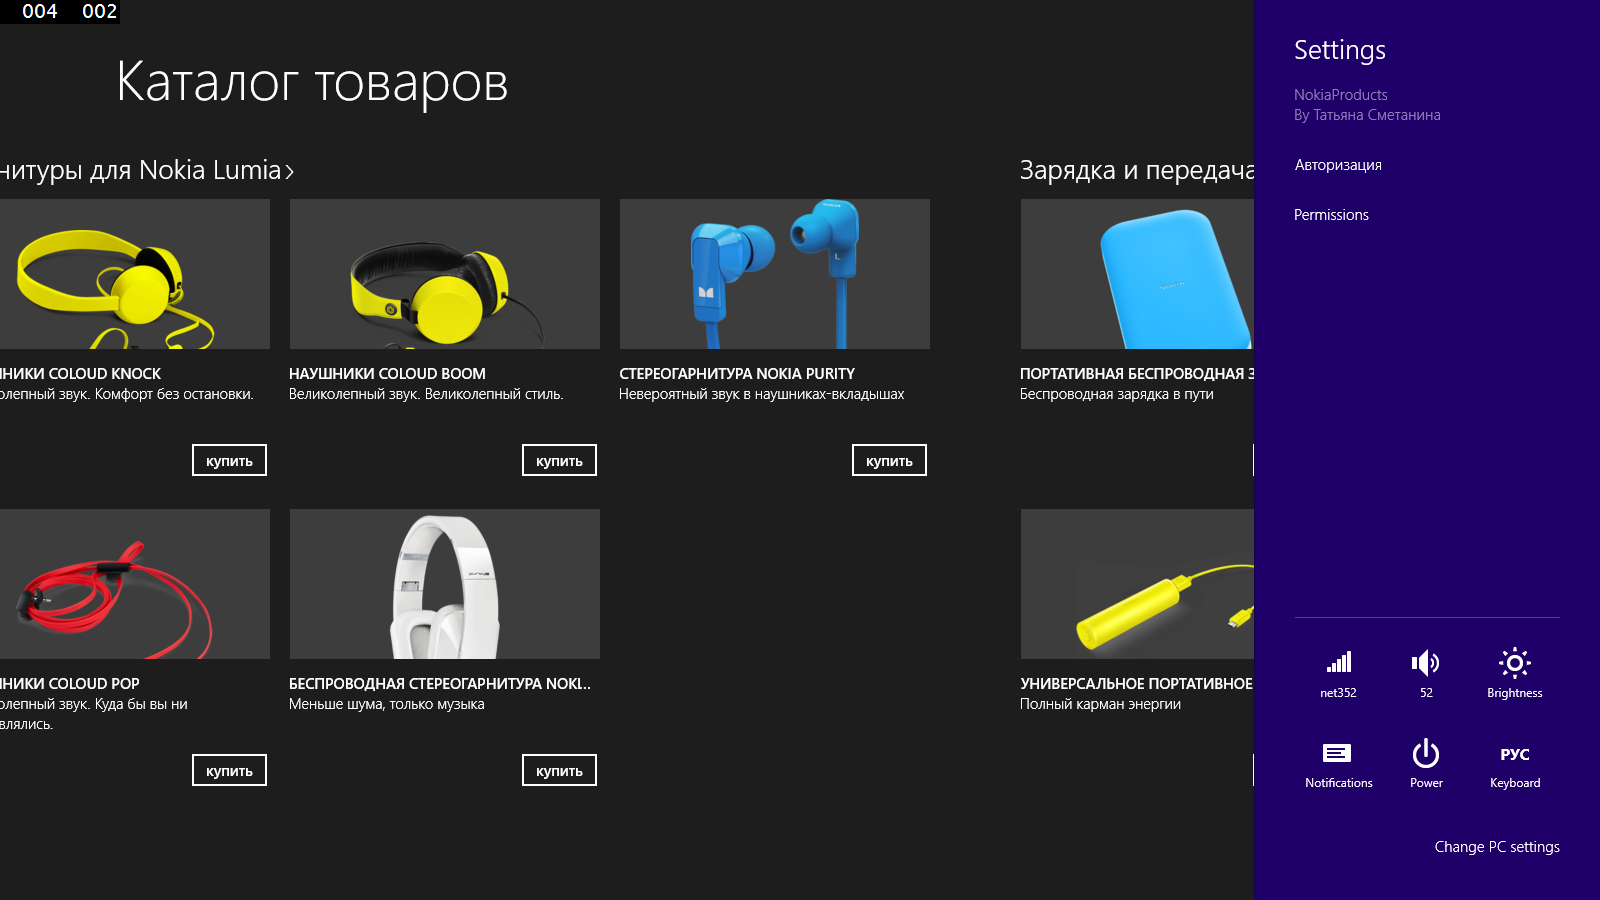
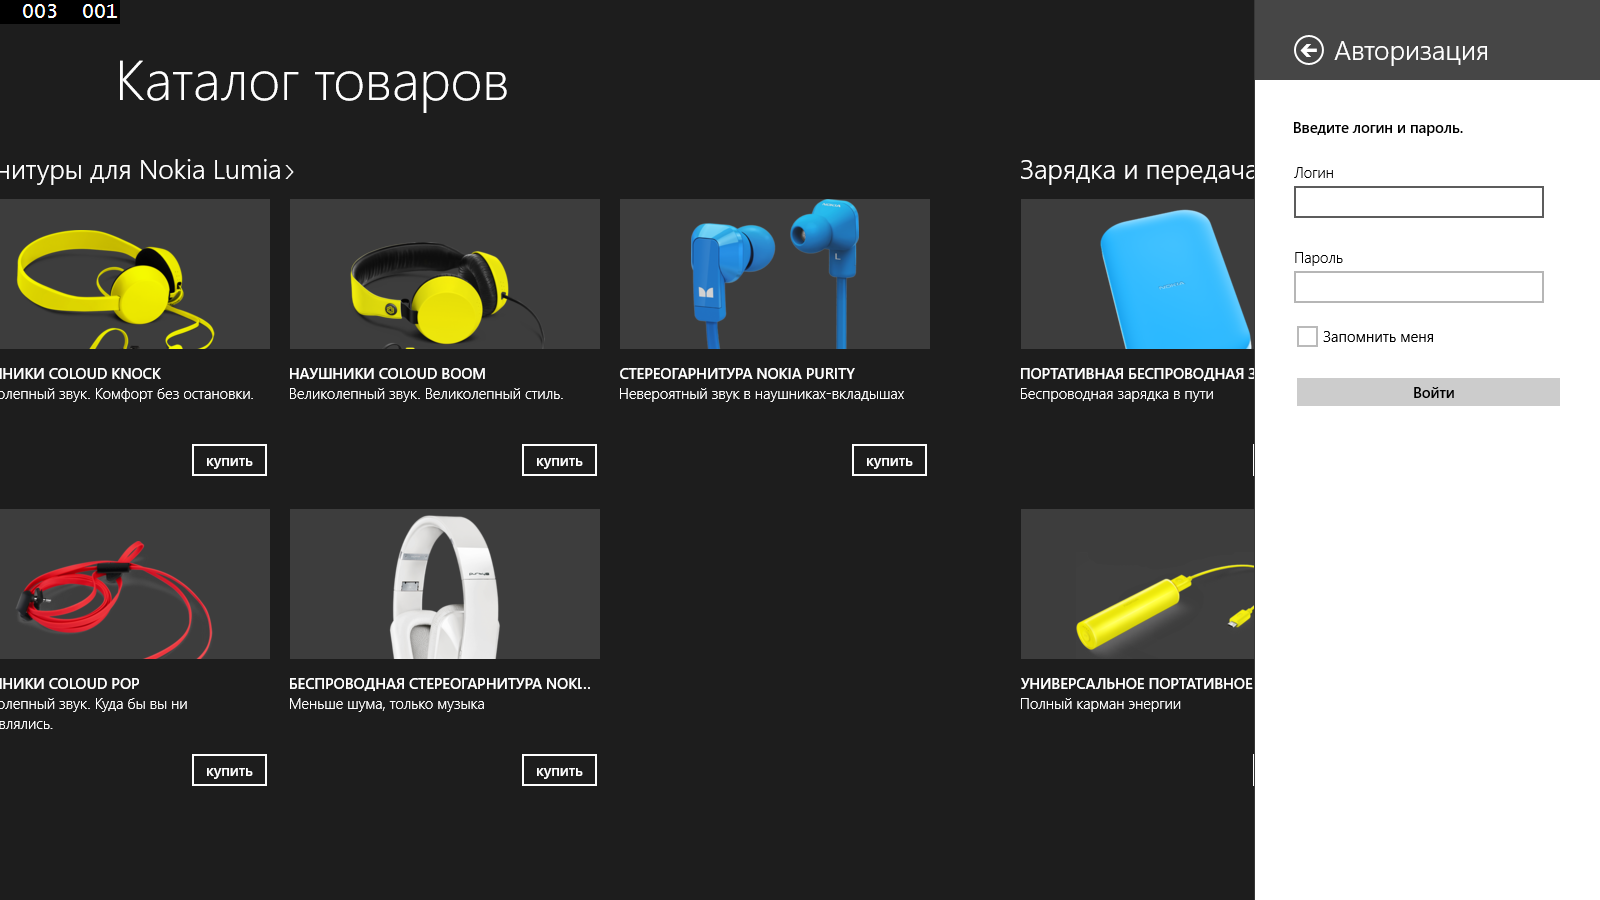
11. Click on the "Authorization" setting. You will see the panel we added.
Conclusion
Today we learned how to implement pop-up windows, menus and settings panels using Flyout controls. In the following articles, we will continue to comprehend the development of Windows 8.1 applications with simple examples.
Download the resulting application on SkyDrive at the link: http://sdrv.ms/1gKm4IJ
Useful materials
Pop-Up Guide
Application Parameter Guide
This year I say goodbye to you. I wish you happy and productive holidays.
Happy New Year and Merry Christmas!
Source: https://habr.com/ru/post/207800/
All Articles