Install and configure Asterisk under iD Phone (iDPhone)

This manual describes how to install and make the initial setup of computer telephony based on Asterisk from scratch with connection to the Kazakh Telecom company’s iD Phone service from scratch.
I got some ideas from this article: “A step-by-step guide on binding SIP numbers to Elastix (FreePBX, Asterisk) using the example of the Megaline iDPhone provider” (many thanks to asdForever for this), but:
- first, the system did not work for me according to the instructions;
- secondly, I do not agree with all the decisions in it;
- thirdly, we will configure not “Elastix”, but “AsteriskNow”;
- Fourth, I tried to write instructions as detailed as possible - for people with little knowledge of Linux systems and Asterisk (which I myself am).
Given:
- The operating system will be installed from scratch. The distribution package “AsteriskNOW” will be used - this is the operating system “CentOS” with the pre-installed software “Asterisk” and the web interface for its management “FreePBX”. In other words, in this manual there is no block in which the installation of “Asterisk” on an already deployed Linux system would be described.
- Kazakhtelecom does not provide the iD Phone service via the Internet, but by connecting subscribers to its special SIP network. Physically, of course, this is most often one channel (ADSL or optics) together with the Internet and / or “iD TV”. The router also provides the services provided to different ports. We believe that we already have a configured router that sends Internet from one port, and iD Phone from another.
- The computer has two network cards: one of them looks into the Internet, the other - into the Kazakhtelecom's SIP-network.
Task:
Get a working IP PBX with Internet access.
Decision:
')
Download “AsteriskNOW” from here: http://www.asterisk.org/downloads
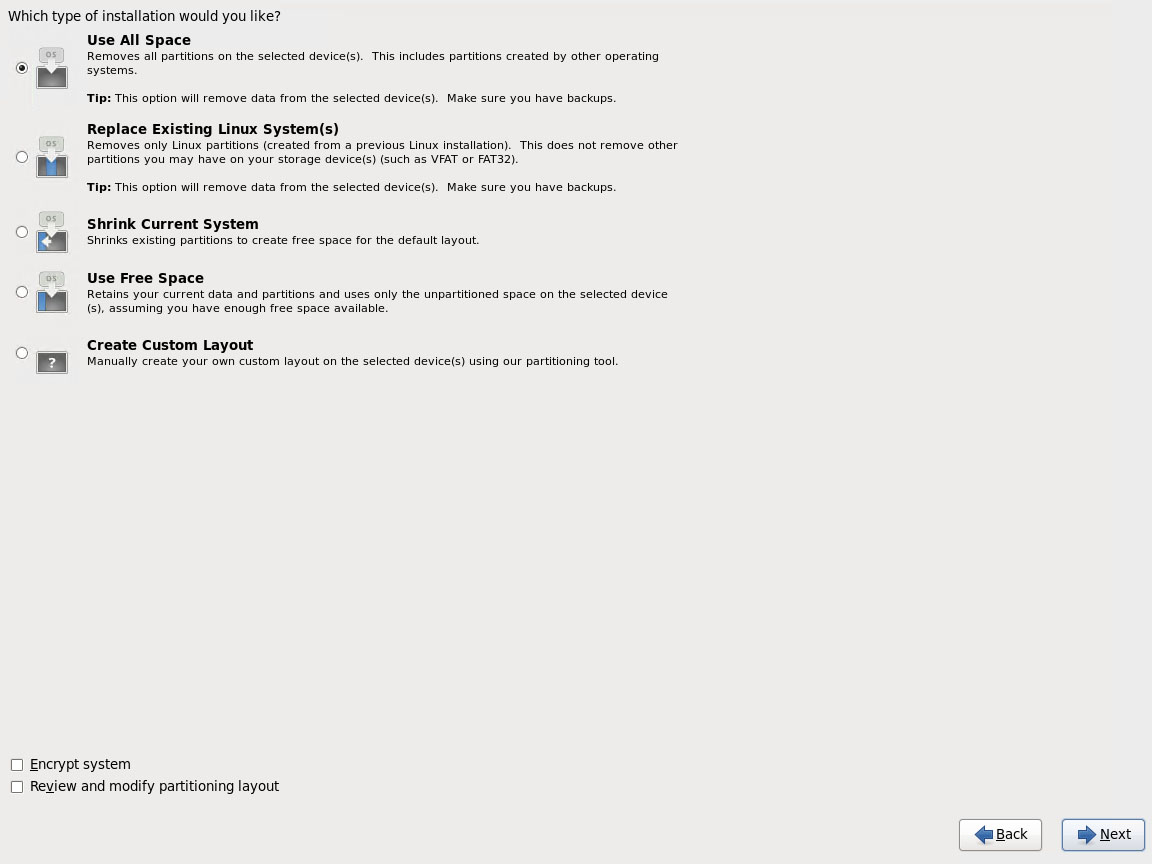
Install AsteriskNOW:
AsteriskNOW installation screenshots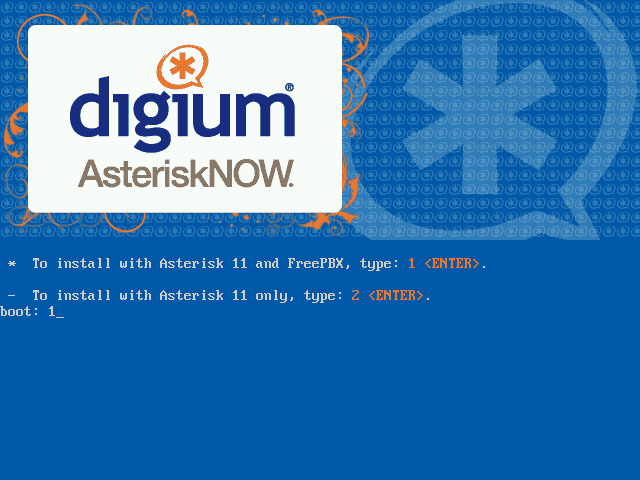

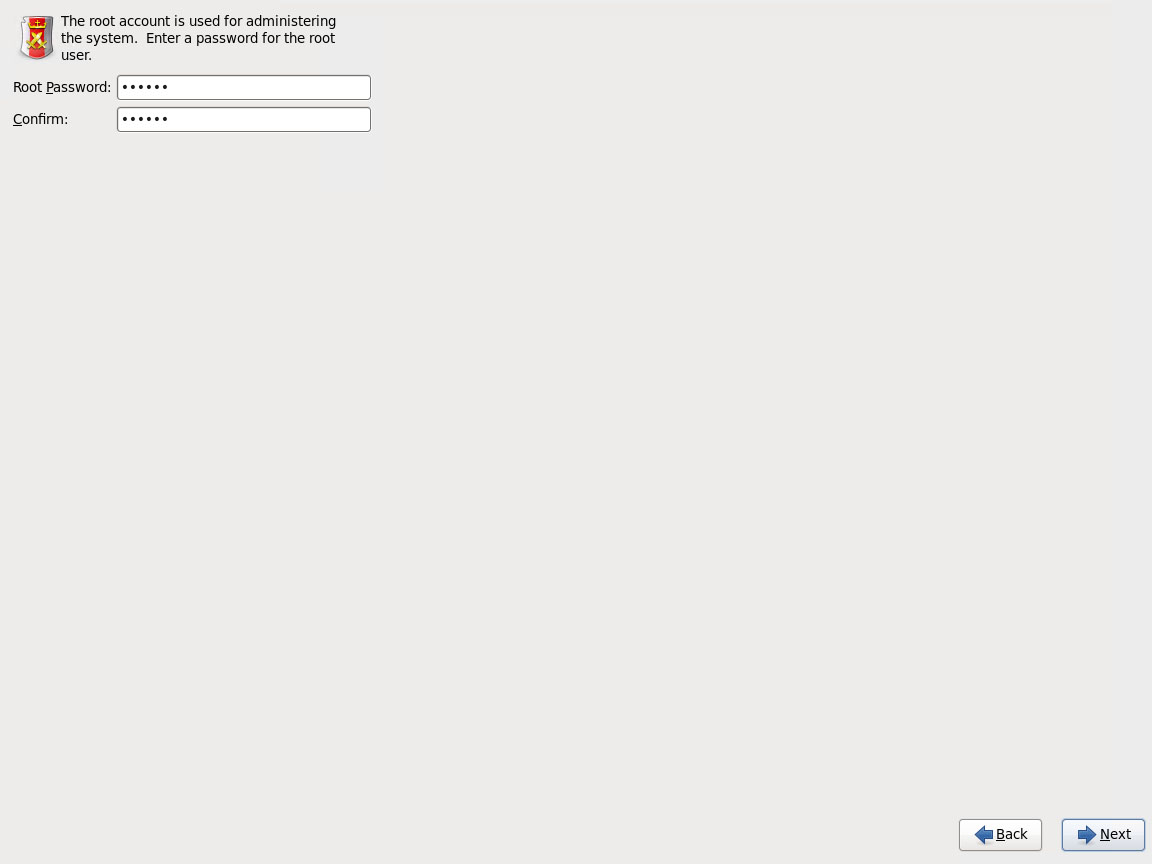


We log in as root and password, which was set during installation.
I use the Midnight Commander file manager to edit files. To install it, issue the following command:
yum install mc This command will work if your computer has already gained access to the Internet. This may not happen for the reasons described below. Then you can temporarily disconnect the network cable from the interface, which looks into the Kazakhtelecom's SIP network.
We agree on everything. When you need to edit a file, run the "Midnight Commander" command:
mc Add the Russian language to the operating system. To do this, first install the language settings management utility:
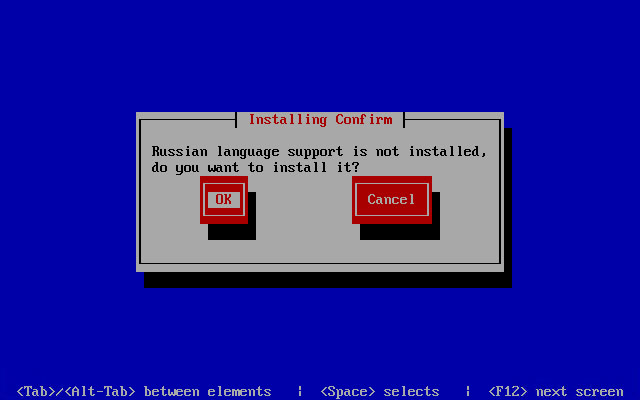
yum install system-config-language Install the Russian language. To do this, run the installed utility:
system-config-language Screenshots of the Russian language installation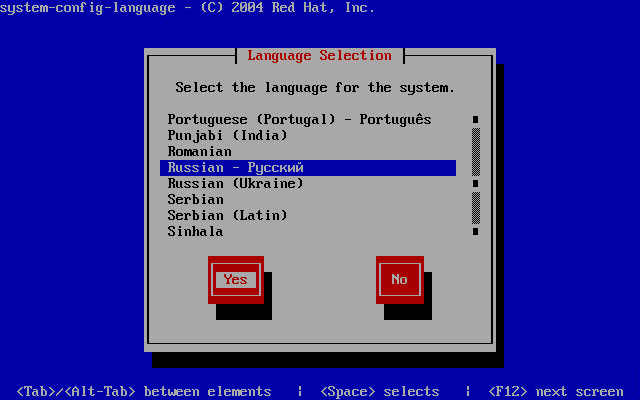
In order for the changes to take effect, you must exit the terminal and enter it again. After that, for example, in “Midnight Commander” the interface will be in Russian.
We check that both network interfaces work. We give the command:
ifconfig I have the following conclusion:
Output of the ifconfig command on a single interface
eth0 Link encap:Ethernet HWaddr 00:15:5D:7B:4F:18 inet addr:192.168.0.52 Bcast:192.168.0.255 Mask:255.255.255.0 inet6 addr: fe80::215:5dff:fe7b:4f18/64 Scope:Link UP BROADCAST RUNNING MULTICAST MTU:1500 Metric:1 RX packets:5695 errors:0 dropped:0 overruns:0 frame:0 TX packets:3363 errors:0 dropped:0 overruns:0 carrier:0 collisions:0 txqueuelen:1000 RX bytes:7623500 (7.2 MiB) TX bytes:241151 (235.4 KiB) Interrupt:9 Base address:0xc000 lo Link encap:Local Loopback inet addr:127.0.0.1 Mask:255.0.0.0 inet6 addr: ::1/128 Scope:Host UP LOOPBACK RUNNING MTU:16436 Metric:1 RX packets:0 errors:0 dropped:0 overruns:0 frame:0 TX packets:0 errors:0 dropped:0 overruns:0 carrier:0 collisions:0 txqueuelen:0 RX bytes:0 (0.0 b) TX bytes:0 (0.0 b) This means that only one interface is active. Activate the second interface. To do this, you must edit the file / etc / sysconfig / network-scripts / ifcfg-eth1 . The value of the ONBOOT parameter must be changed from “no” to “yes”.
We give the command to restart the network interfaces:
service network restart Once again we give the command:
ifconfig And we already have a new conclusion:
Output of the ifconfig command via two interfaces
eth0 Link encap:Ethernet HWaddr 00:15:5D:7B:4F:18 inet addr:192.168.0.52 Bcast:192.168.0.255 Mask:255.255.255.0 inet6 addr: fe80::215:5dff:fe7b:4f18/64 Scope:Link UP BROADCAST RUNNING MULTICAST MTU:1500 Metric:1 RX packets:5981 errors:0 dropped:0 overruns:0 frame:0 TX packets:3503 errors:0 dropped:0 overruns:0 carrier:0 collisions:0 txqueuelen:1000 RX bytes:7646872 (7.2 MiB) TX bytes:281444 (274.8 KiB) Interrupt:9 Base address:0xc000 eth1 Link encap:Ethernet HWaddr 00:15:5D:7B:4F:19 inet addr:10.2.XX Bcast:255.255.255.255 Mask:255.255.255.0 inet6 addr: fe80::215:5dff:fe7b:4f19/64 Scope:Link UP BROADCAST RUNNING MULTICAST MTU:1500 Metric:1 RX packets:2 errors:0 dropped:0 overruns:0 frame:0 TX packets:21 errors:0 dropped:0 overruns:0 carrier:0 collisions:0 txqueuelen:1000 RX bytes:684 (684.0 b) TX bytes:4379 (4.2 KiB) Interrupt:9 Base address:0xe000 lo Link encap:Local Loopback inet addr:127.0.0.1 Mask:255.0.0.0 inet6 addr: ::1/128 Scope:Host UP LOOPBACK RUNNING MTU:16436 Metric:1 RX packets:0 errors:0 dropped:0 overruns:0 frame:0 TX packets:0 errors:0 dropped:0 overruns:0 carrier:0 collisions:0 txqueuelen:0 RX bytes:0 (0.0 b) TX bytes:0 (0.0 b) Now it is clear that both interfaces were activated. We will understand which of them is looking.
eth0 received the address from the subnet 192.168.0.X - this is the interface that looks to the Internet. It is from this subnet that the router's DHCP server distributes addresses.
eth1 received an address from the 10.XXX subnet - this is an interface that looks into the Kazakhtelecom's SIP network. It is from this subnet that the Kazakhtelecom’s DHCP server distributes addresses.
But now we are closer to the problem that hinders the simultaneous functioning of access to the Internet and to the Kazakhtelecom SIP network. For a better understanding, we will give the command:
route We get the output:
Route command output
Kernel IP routing table Destination Gateway Genmask Flags Metric Ref Use Iface 192.168.0.0 * 255.255.255.0 U 0 0 0 eth0 10.2.X.0 * 255.255.255.0 U 0 0 0 eth1 link-local * 255.255.0.0 U 1002 0 0 eth0 link-local * 255.255.0.0 U 1003 0 0 eth1 default 10.2.X.1 0.0.0.0 UG 0 0 0 eth1 What conclusion can be made from this? We have a default gateway 192.168.0.1 (the IP-address of the router) assigned to the first interface. But along with obtaining the IP address, the gateway address comes to the second interface from the Kazakhtelecom's DHCP server, which interrupts the one installed on the first interface. After that, all Internet traffic starts to go to Kazakhtelecom's SIP network. Let's remember the address of the Kazakhtelecom gateway - we may need it further. In my case, 10.2.X.1.
To eliminate the problem of gateway conflict, let the second interface get only those parameters from the DHCP server that do not interfere with the first interface operation. To do this, create the file /etc/dhclient-eth1.conf - this is the configuration file of the DHCP client. The following lines should be added to the file:
reject 192.168.0.1; send host-name "asterisk"; request subnet-mask, broadcast-address, time-offset, host-name; Concerning the first line. I had a problem with one of the D-Link routers - even when the DHCP server was disabled, the router assigned an address to the interface connected to Kazakhtelecom's SIP network. The first line of the configuration file prevents the eth1 interface from receiving an IP address from a DHCP server from 192.168.0.1.
So, we have achieved that the default gateway remains a router. This solution creates another problem - part of the telephony traffic would have to go to the SIP network, but it will go to the Internet. For the normal functioning of telephony, it is necessary that the SIP-network interface leaves not only the traffic having a subnet 10.2.X.X (in my case), but all the traffic for the 10.X.X.X. subnet. To do this, create the file / etc / sysconfig / network-scripts / route-eth1 and add the following line to it:
10.0.0.0/8 dev eth1 Sometimes this line is not enough. In Petropavlovsk, for example, the above option works, but in Astana it was required to clearly indicate the address of the gateway to the Kazakhtelecom subnetwork. It is done this way:
10.0.0.0/8 via 10.2.X.1 dev eth1 10.2.X.1 is the address of Kazakhtelecom’s gateway for my case. I don’t really like this decision because Kazakhtelecom may change the address of its gateway at any time, but I don’t know how to do it better. In theory, you must first somehow get the gateway address via DHCP, and then create a route through this address.
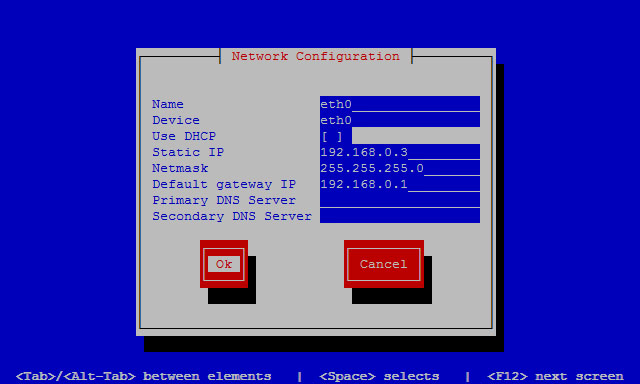
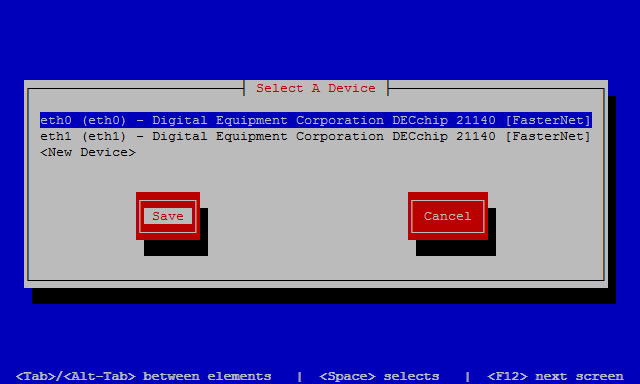
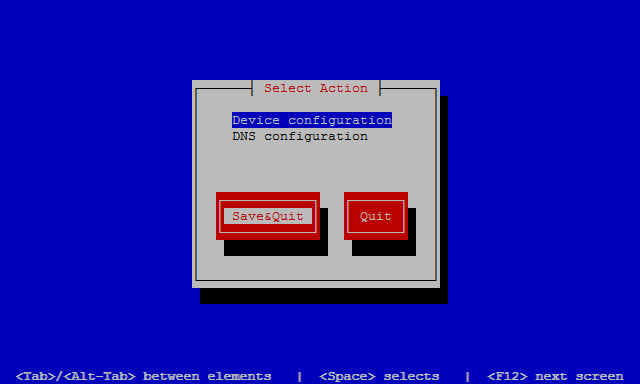
We configure a static IP address on the interface that looks to the Internet, and in combination to a local area network, where SIP clients of our IP PBX will be deployed in the future. For this we give the command:
system-config-network Screenshots of static IP settings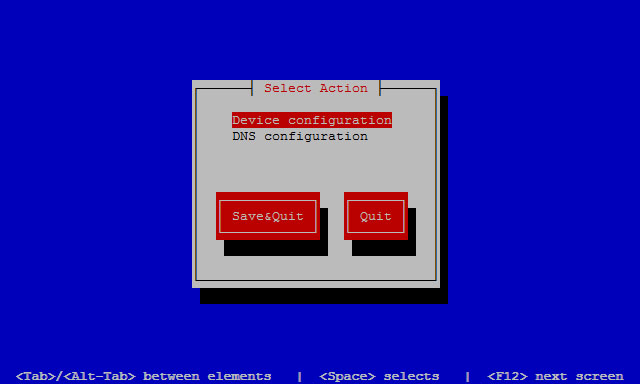


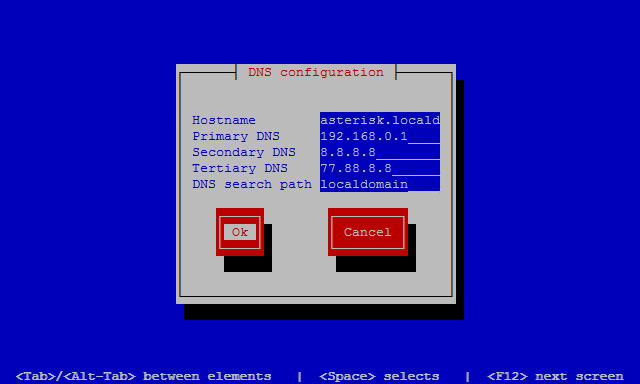
We give the command to restart the network interfaces:
service network restart In the further configuration of our IP PBX, we will repeatedly refer to the name of the SIP server of Kazakhtelecom: sip.telecom.kz. With the current configuration of our computer, this name is resolved to the white IP address 92.46.61.21. We need to ensure that this name is resolved to the IP address of the Kazakhtelecom SIP network.
First you need to know the internal IP address of the server that is defined for your region. To do this, open the following page: http://idphone.kz/?page_id=1010 . It has an Outbound Proxy address table when setting up an iD Phone service via pvc 0/41. It is in it that we look for the address we need.
Just in case, I will quote this table here:
Aktau 10.0.0.44
Aktobe 10.0.0.36
Almatytelecom 10.0.0.12
Astanatelecom 10.0.0.20
Atyrau 10.0.0.28
Karaganda 10.0.0.148
Kokshetau 10.0.0.140
Kostanay 10.0.0.129
Kyzylorda 10.0.0.60
Pavlodar 10.0.0.108
Petropavlovsk 10.0.0.116
Semey 10.0.0.92
Shymkent 10.0.0.68
Taldy-Korgan 10.0.0.84
Taraz 10.0.0.76
Uralsk 10.0.0.52
Ust-Kamenogorsk 10.0.0.100
Zhezkazgan 10.0.0.156
Now add the following line to the / etc / hosts file:
10.0.0.116 sip.telecom.kz This is for Petropavlovsk (my case). Replace the address 10.0.0.116 with the appropriate one for your region.
Make sure everything works correctly. We give the command:
ping 8.8.8.8 If ping goes, then the computer has access to the Internet.
We give the command:
ping ya.ru If the name is resolved, then DNS is working correctly.
We give the command:
ping 10.0.0.1 If ping goes, then the computer has access to Kazakhtelecom's SIP network. At the time of writing this article in the Kazakhtelecom network, the addresses were pinged 10.0.0.1, 10.0.0.2, 10.0.0.3. But, in fact, the lack of ping can not 100% say that you have problems with the setting. The fact is that Kazakhtelecom can close the ping on its servers at any time. For example, the address 10.0.0.116 at the time of this writing was not pinging.
We give the command:
ping sip.telecom.kz If the name is resolved to the address that was specified in the / etc / hosts file , then this time setting is correct. As it is written above, ping on sip.telecom.kz can not go.
We will update the operating system modules. For this we give the command:
yum update We agree to all questions of the system.
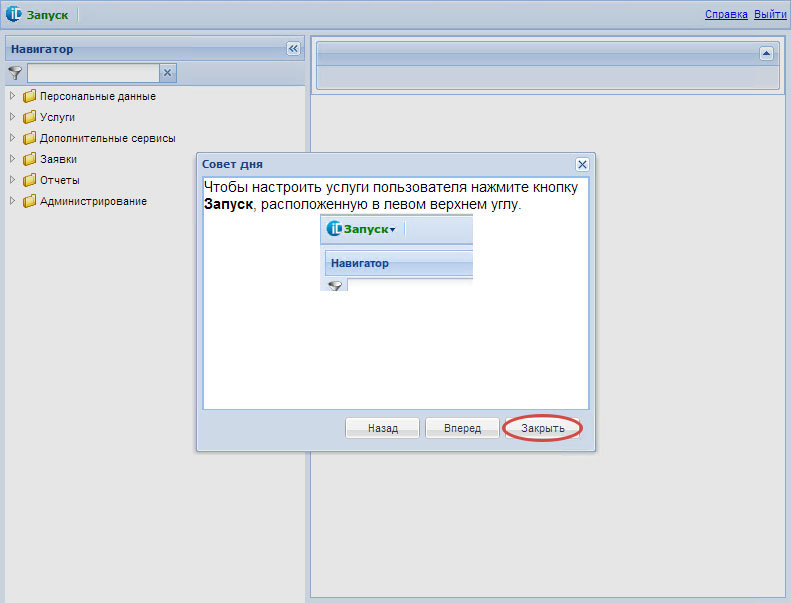
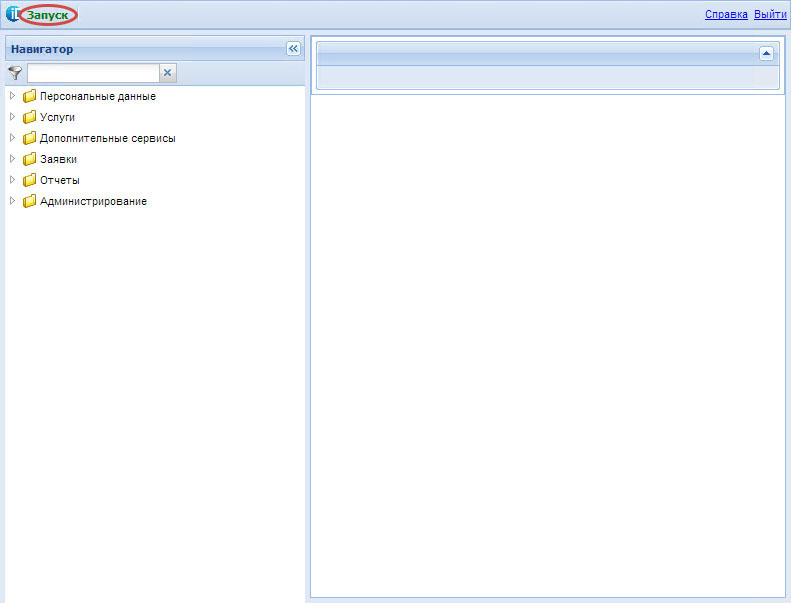
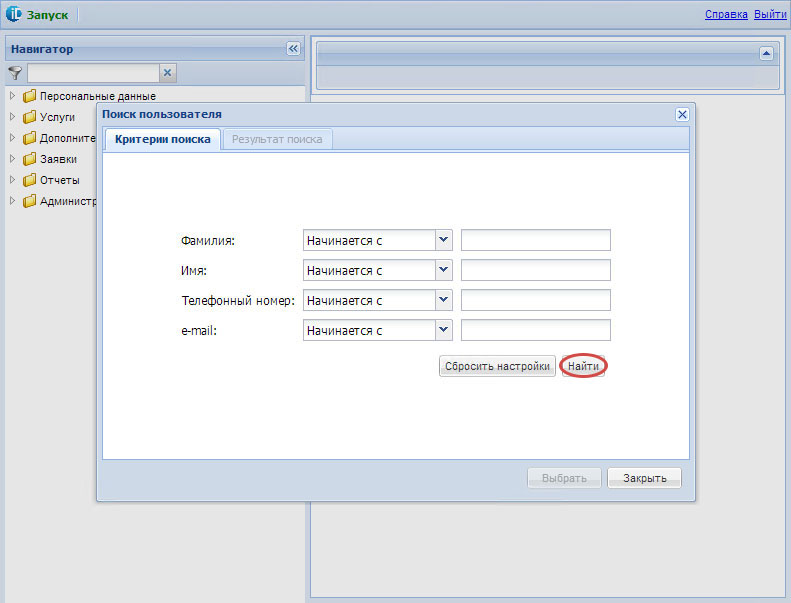
We’ve finished with setting up the operating system and now it’s time to move on to setting up Asterisk. First we need to find out our connection parameters to the Kazakhtelecom SIP-server. To do this, go to the personal account of the service “ID Phone”: https://cabinet.idphone.kz . Be careful: this site opens only for Internet users from Kazakhtelecom. Those. if you are, for example, a happy user of wired Internet from Beeline, then your office will not open.
In the office we follow the section with connection parameters:
Screenshots of the path to the ID Phone connection options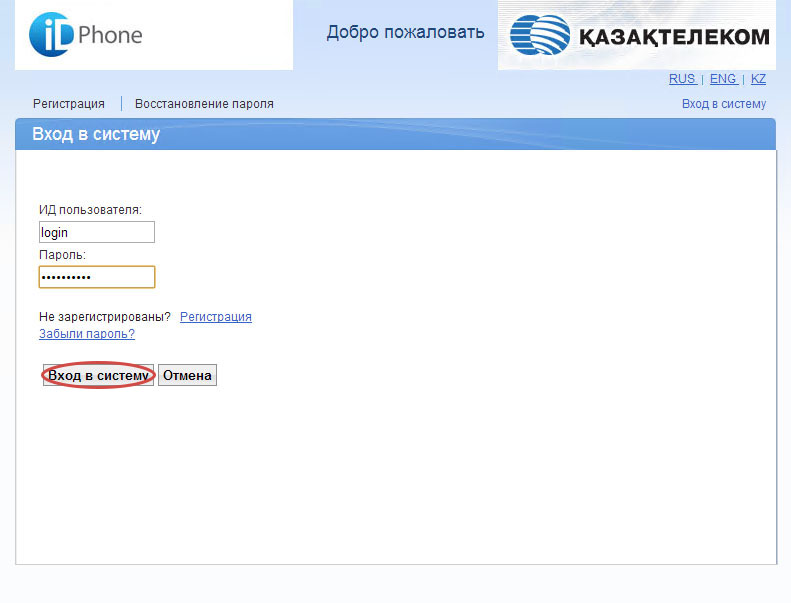
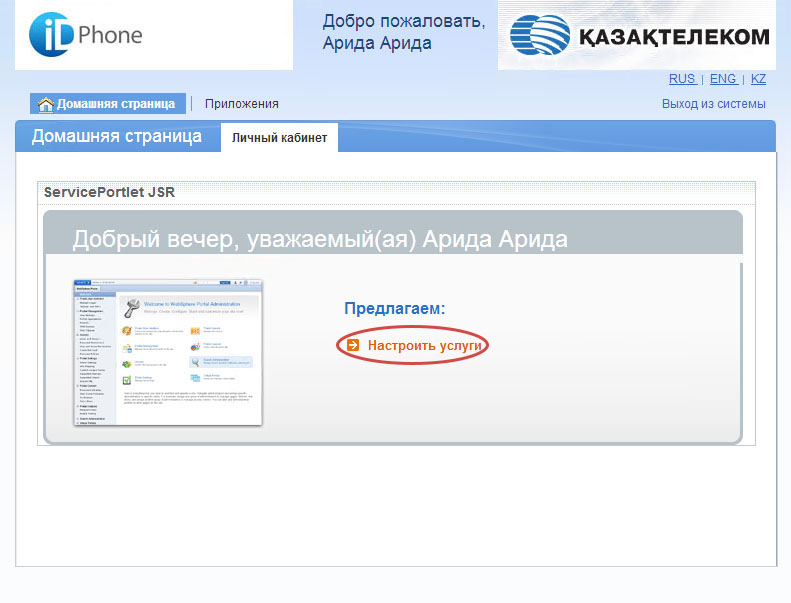
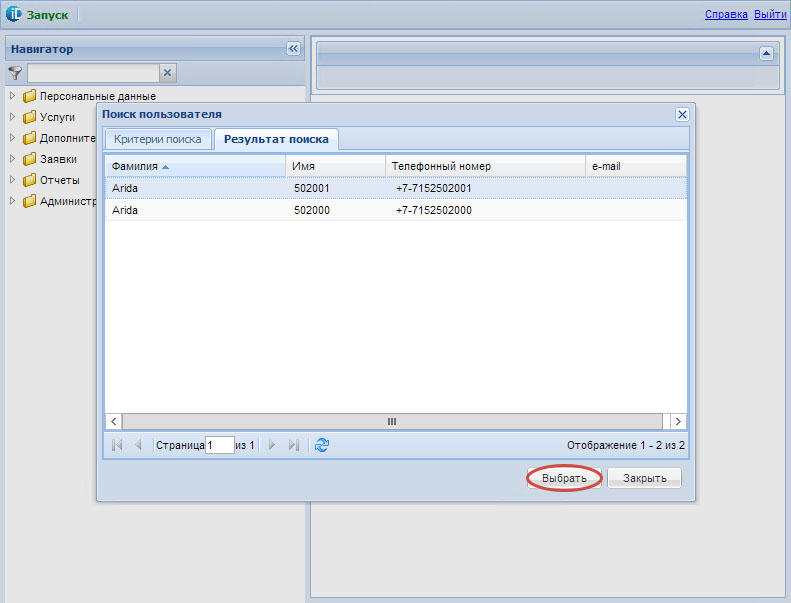
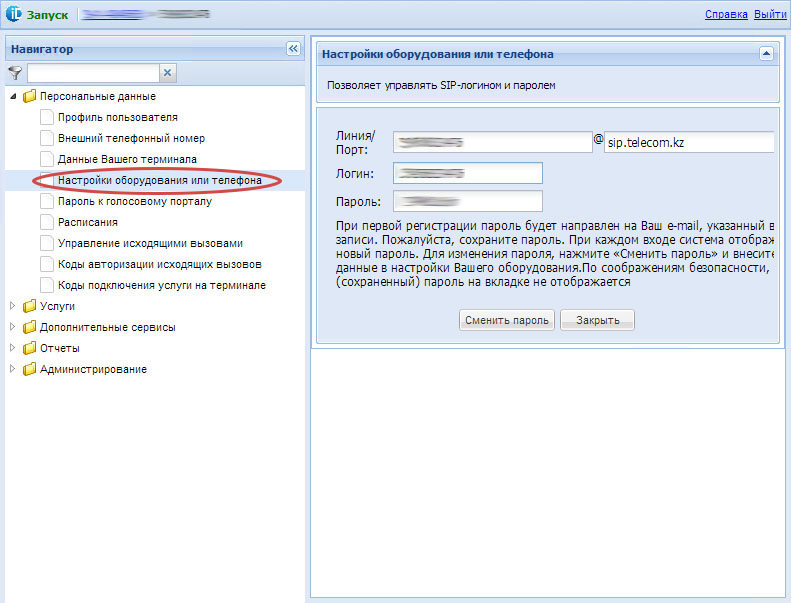
The values in the fields “Line / Port” and “Login” are the same for me. You, too, most likely, because These fields for editing are closed. We agree in the future to call this value <SIP-login>. Well, the value from the "Password" field will be called <SIP-password>.
Open the Asterisk web management interface, called FreePBX. To do this, on any computer in the local network, open a web browser and in the address bar type the address assigned by “Asterisk”. In our case:
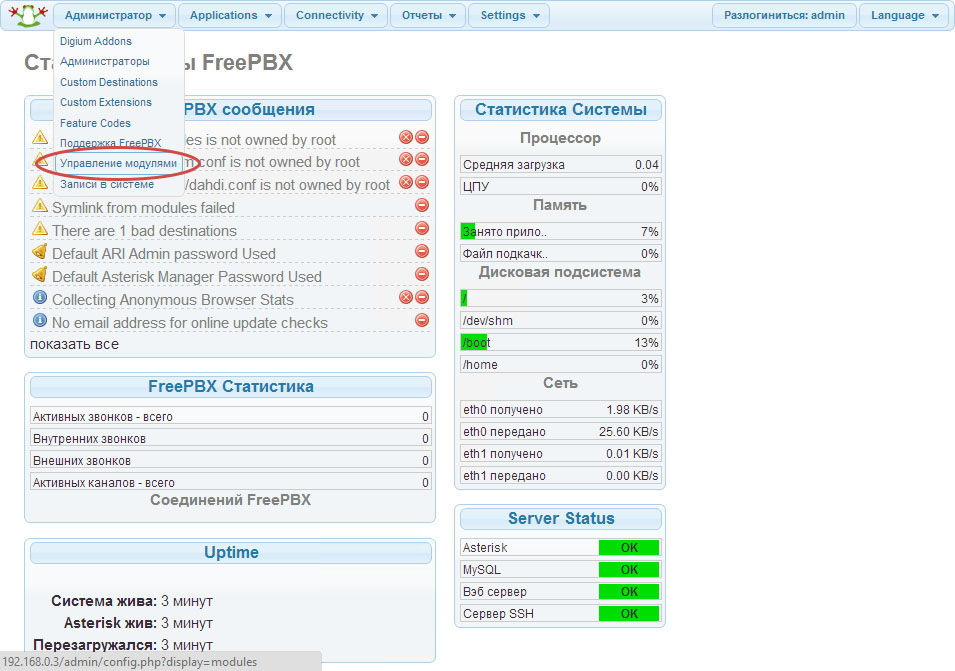
192.168.0.3 First of all, we will update all FreePBX modules to the latest versions.
Screenshots of the path to the upgrade section of the FreePBX modules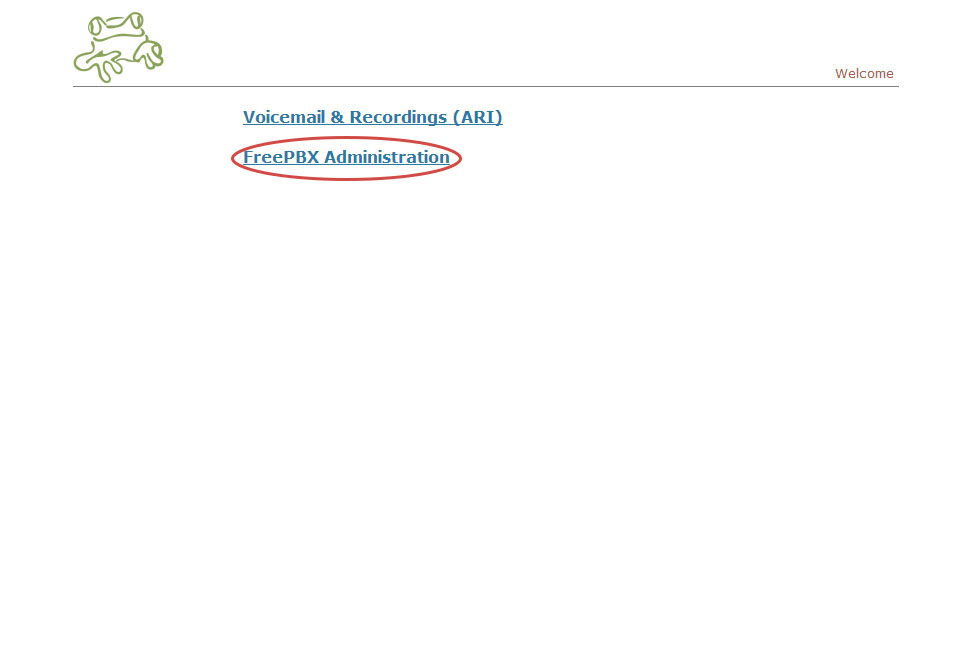
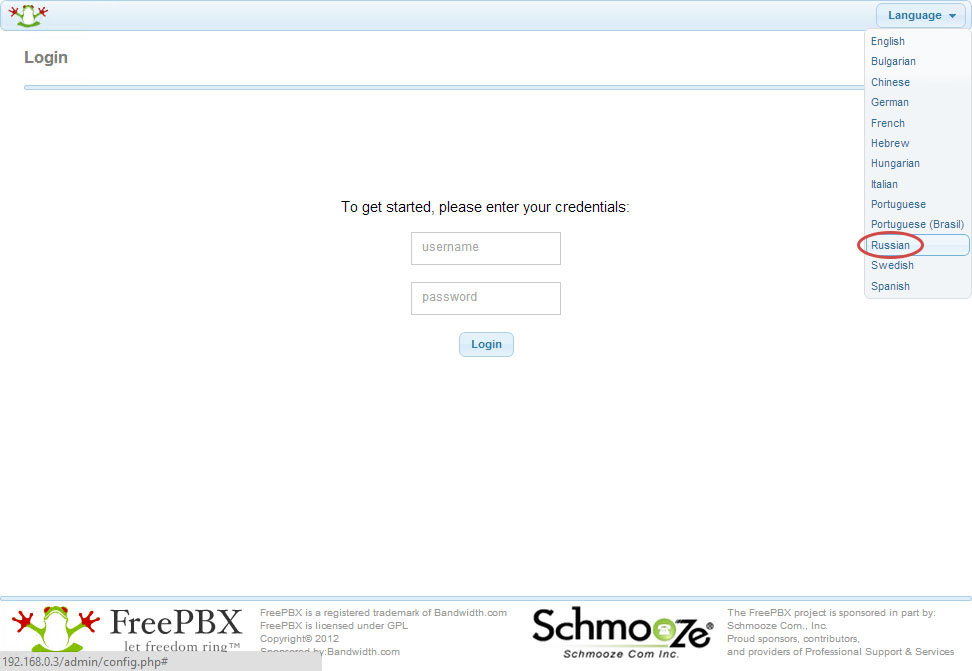
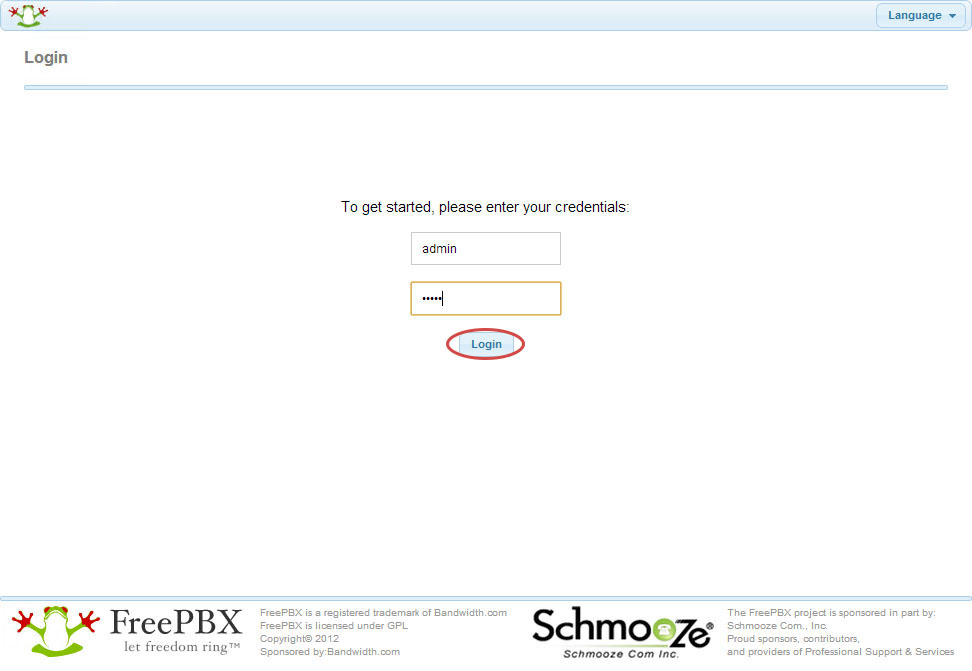
The pre-set login parameters for admin are: login - admin, password - admin:
The pre-set login parameters for admin are: login - admin, password - admin:
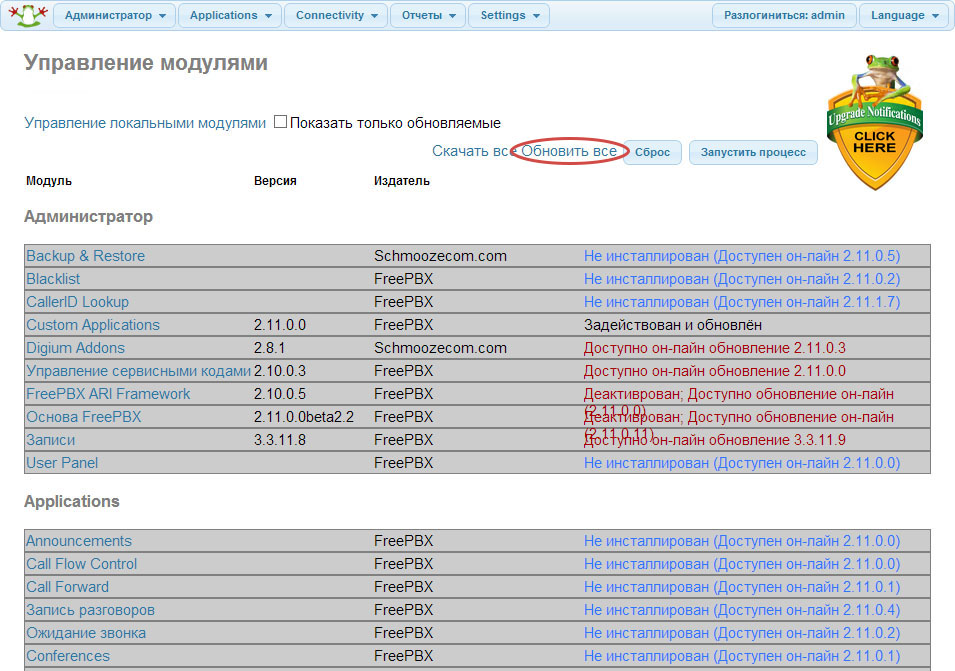
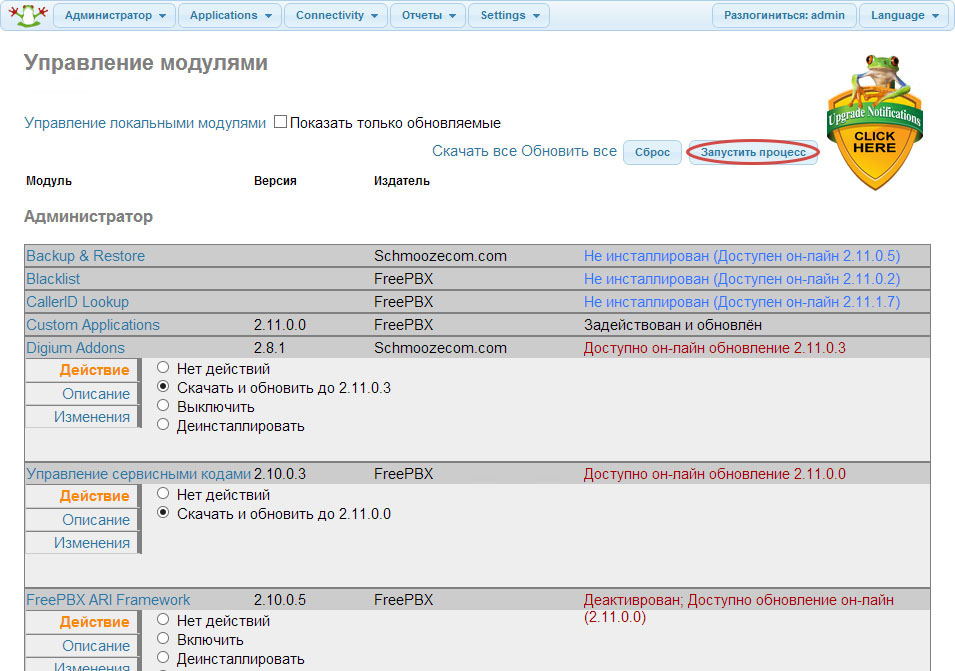
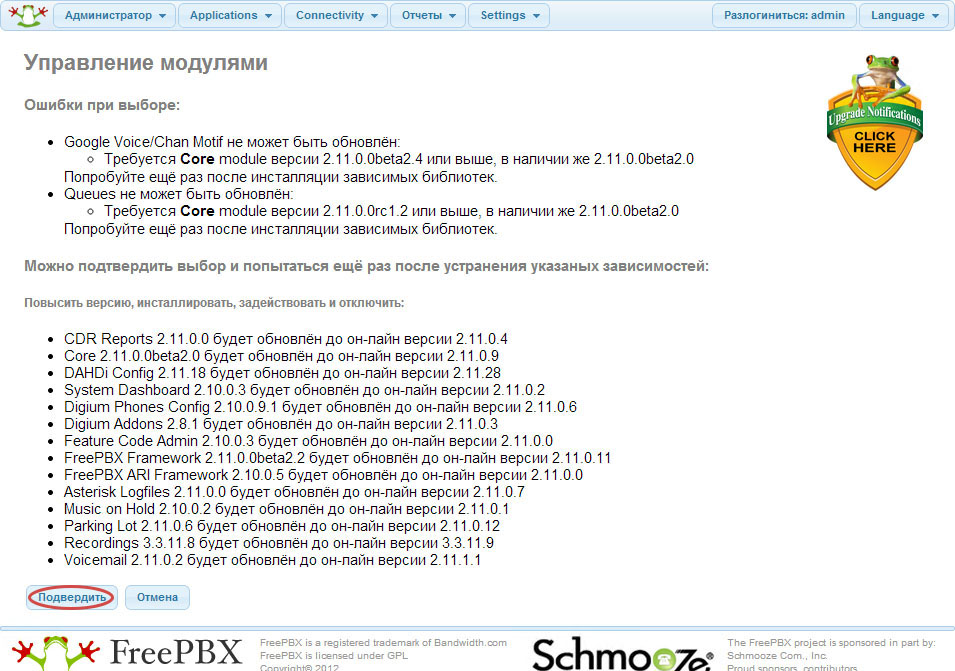
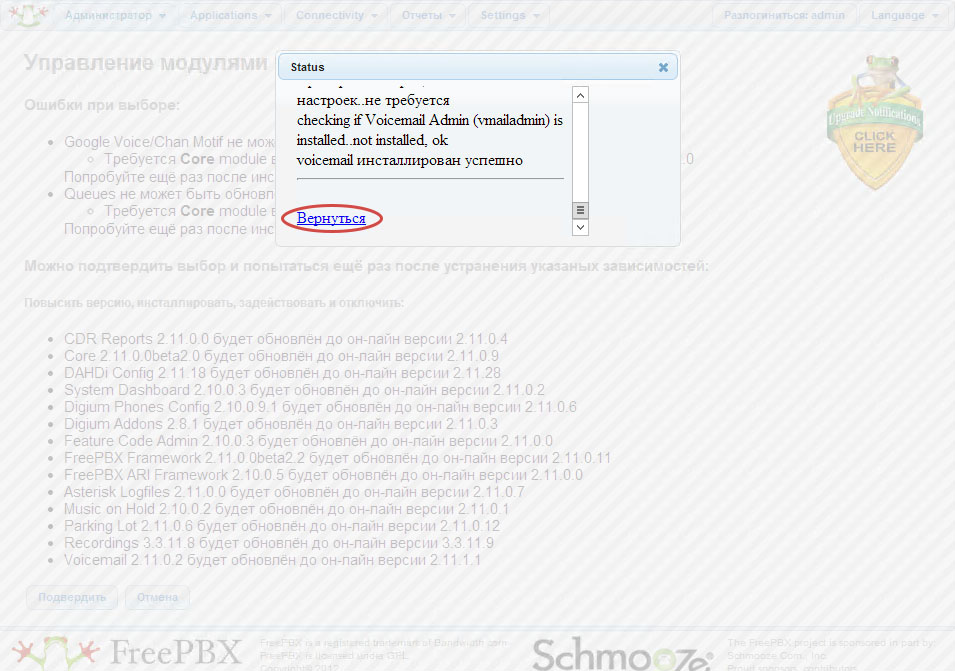
In this section, we press the buttons in this order: “Check online” - “Update all” - “Start process” - “Confirm” and after completion of the update “Return”. Some modules depend on others, i.e. the order of updating modules is important, and therefore you may need to do this process several times.
Screenshots of the update process for FreePBX modules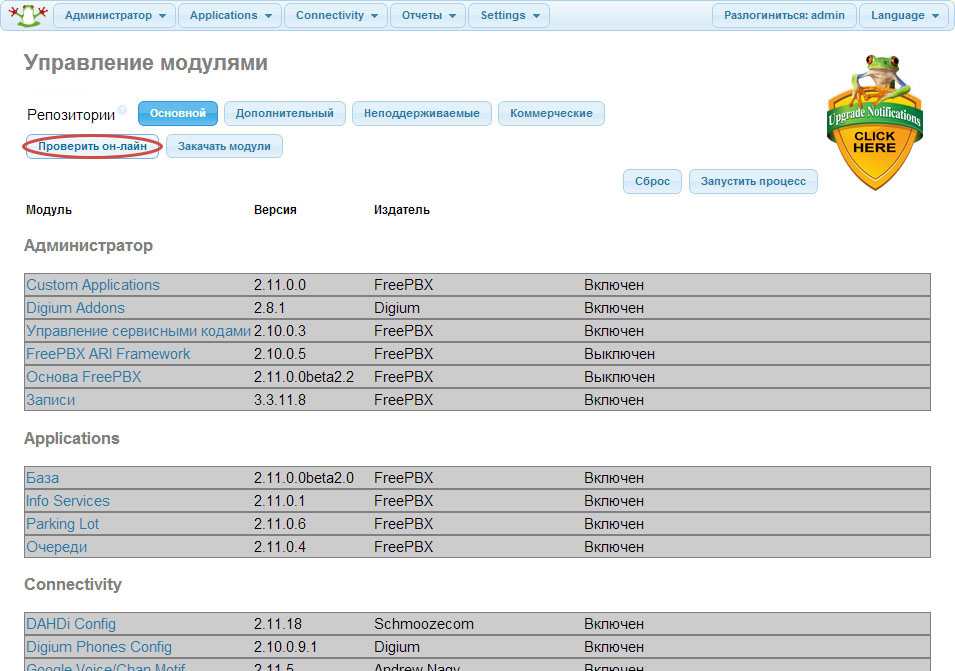
Click the big red button “Apply Config” (do not forget to press it every time it appears - without this, our settings will not work):
Screenshot of the big red button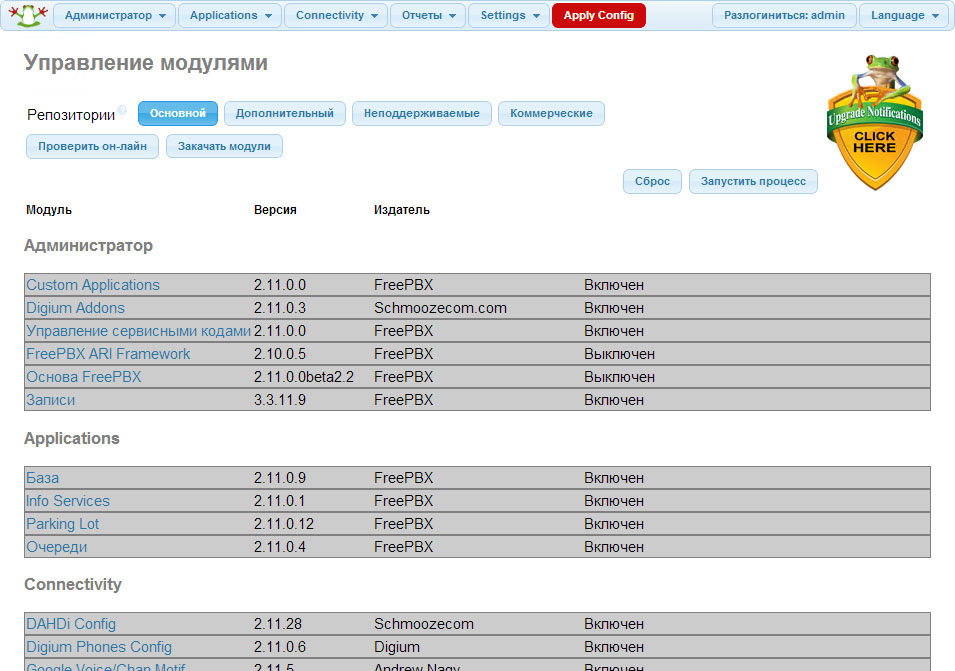
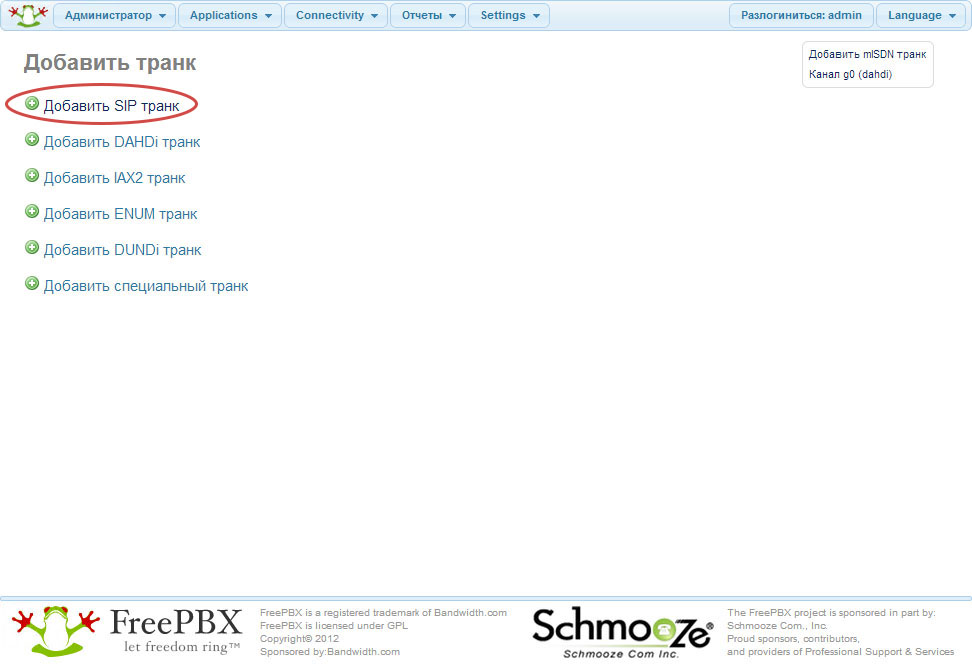
We are going to configure the trunk, i.e. connection between our Asterisk and Kazakhtelecom's SIP server:
Screenshots of the path to the trunk settings
Insert the following text into the "options for PEER" section:
type=friend username=<SIP-> secret=<SIP-> host=sip.telecom.kz nat=no fromuser=<SIP-> fromdomain=sip.telecom.kz dtmfmode=rfc2833 insecure=port,invite canreinvite=nonat qualify=yes disallow=all allow=alaw Insert the following text into the “USER options” section:
fromuser=<SIP-> canreinvite=no secret=<SIP-> type=user context=from-trunk The field "Registration line" is filled with the following line:
<SIP->:<SIP->@sip.telecom.kz/502000 I fill in the remaining fields with the value of the phone number and its derivatives:
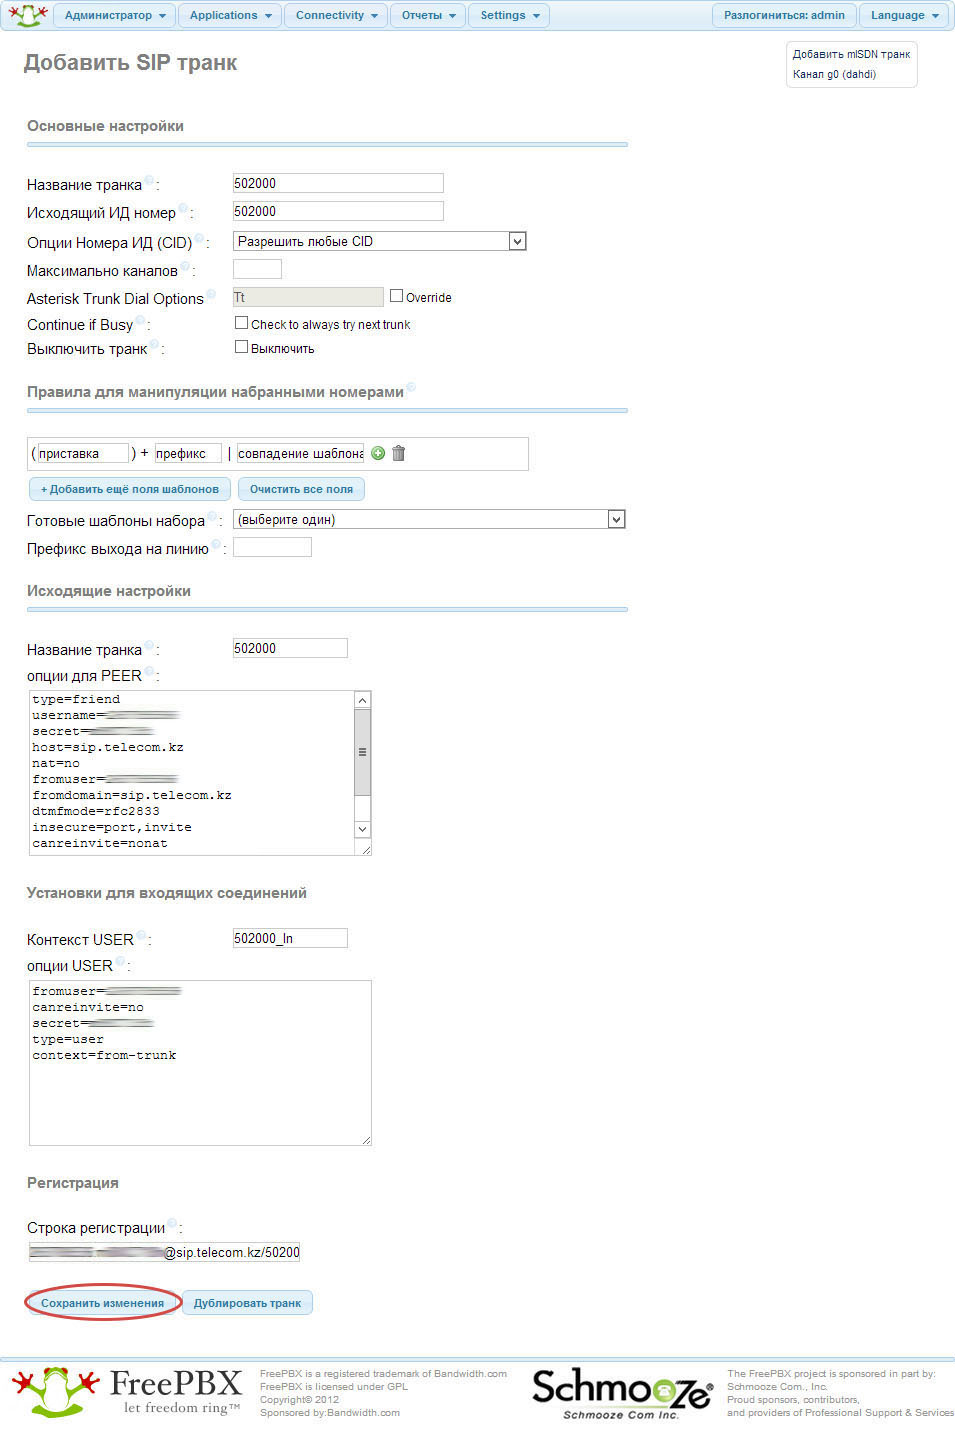
Check in the operating system console that the trunk is registered. To do this, you first need to get into the Asterisk command line interface. We collect:
asterisk -r Next, type:
sip show registry Our trunk should be displayed and its status should be Registered. Here is an example of my output:
Command output
[root@asterisk ~]# asterisk -r Privilege escalation protection disabled! See https://wiki.asterisk.org/wiki/x/1gKfAQ for more details. Asterisk 11.6.1, Copyright (C) 1999 - 2013 Digium, Inc. and others. Created by Mark Spencer <markster@digium.com> Asterisk comes with ABSOLUTELY NO WARRANTY; type 'core show warranty' for details. This is free software, with components licensed under the GNU General Public License version 2 and other licenses; you are welcome to redistribute it under certain conditions. Type 'core show license' for details. ========================================================================= Connected to Asterisk 11.6.1 currently running on asterisk (pid = 1607) asterisk*CLI> sip show registry Host dnsmgr Username Refresh State Reg.Time sip.telecom.kz:5060 N XXXXXXXXX 85 Registered Sun, 22 Dec 2013 13:53:45 1 SIP registrations. We create outbound routing (we explain the system what to do when someone from the PBX users tries to call outside):
Screenshot of the path to the outgoing route settings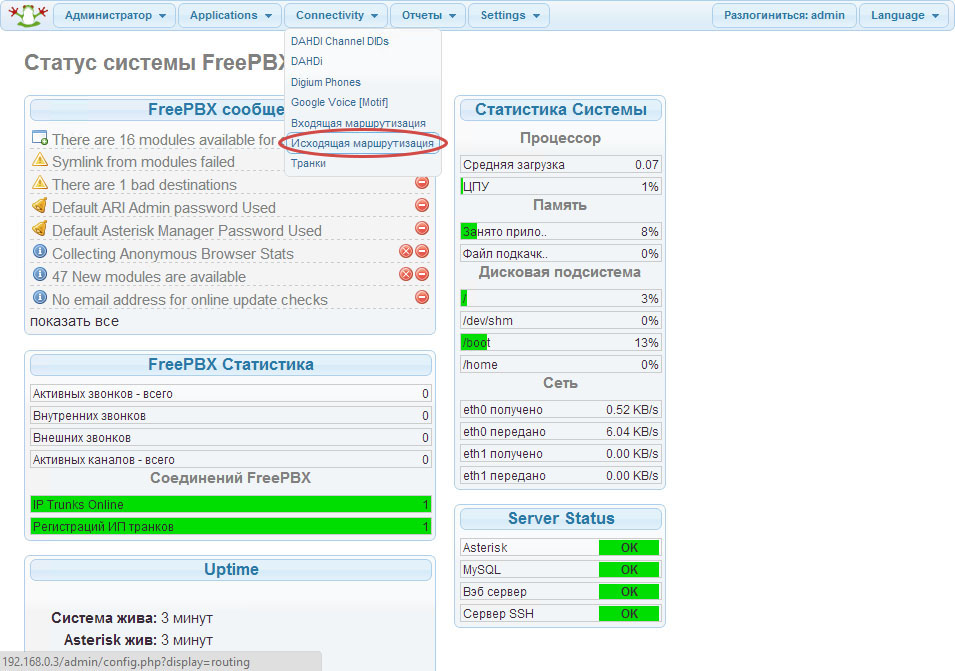
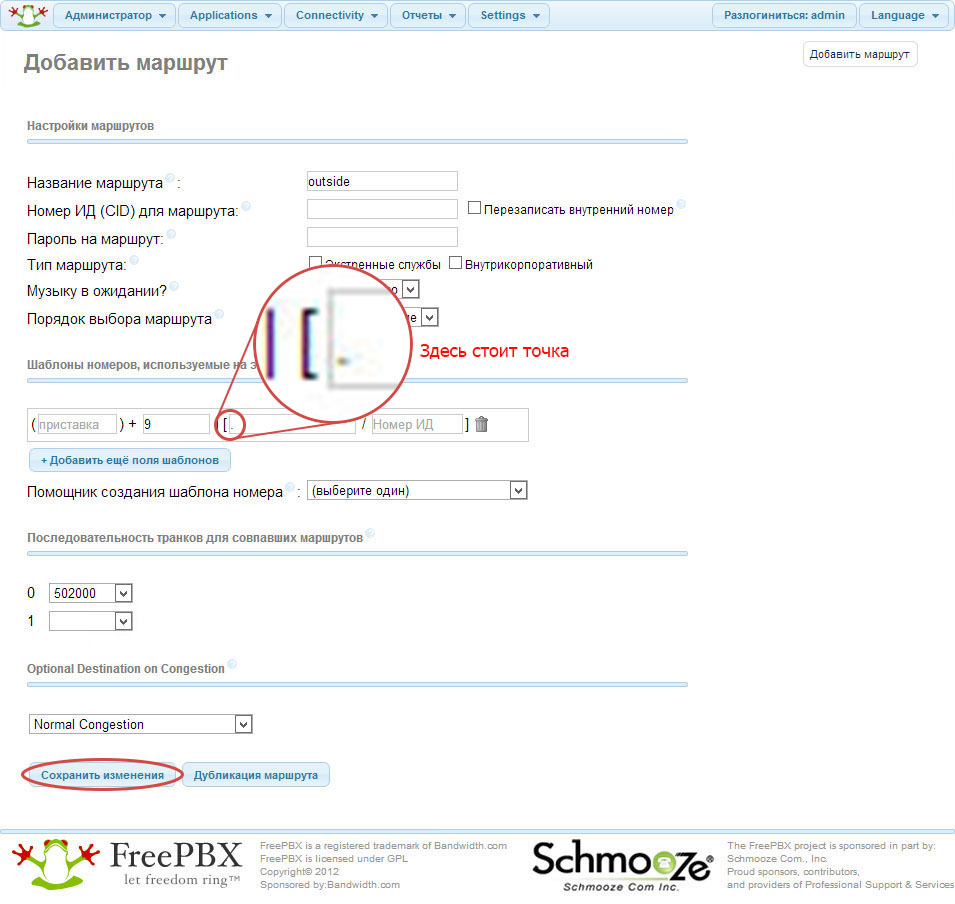
In the configuration of the outgoing route, you must specify:
- its name ("outside", for example);
- the number pattern that this route will work on (the pattern “9 |.” means that all numbers that begin with “9” will be worked out by this route, while the nine will be removed from the number when the number goes to the trunk);
- the trunk that we created earlier, and to which we want to send all our calls ("502000").
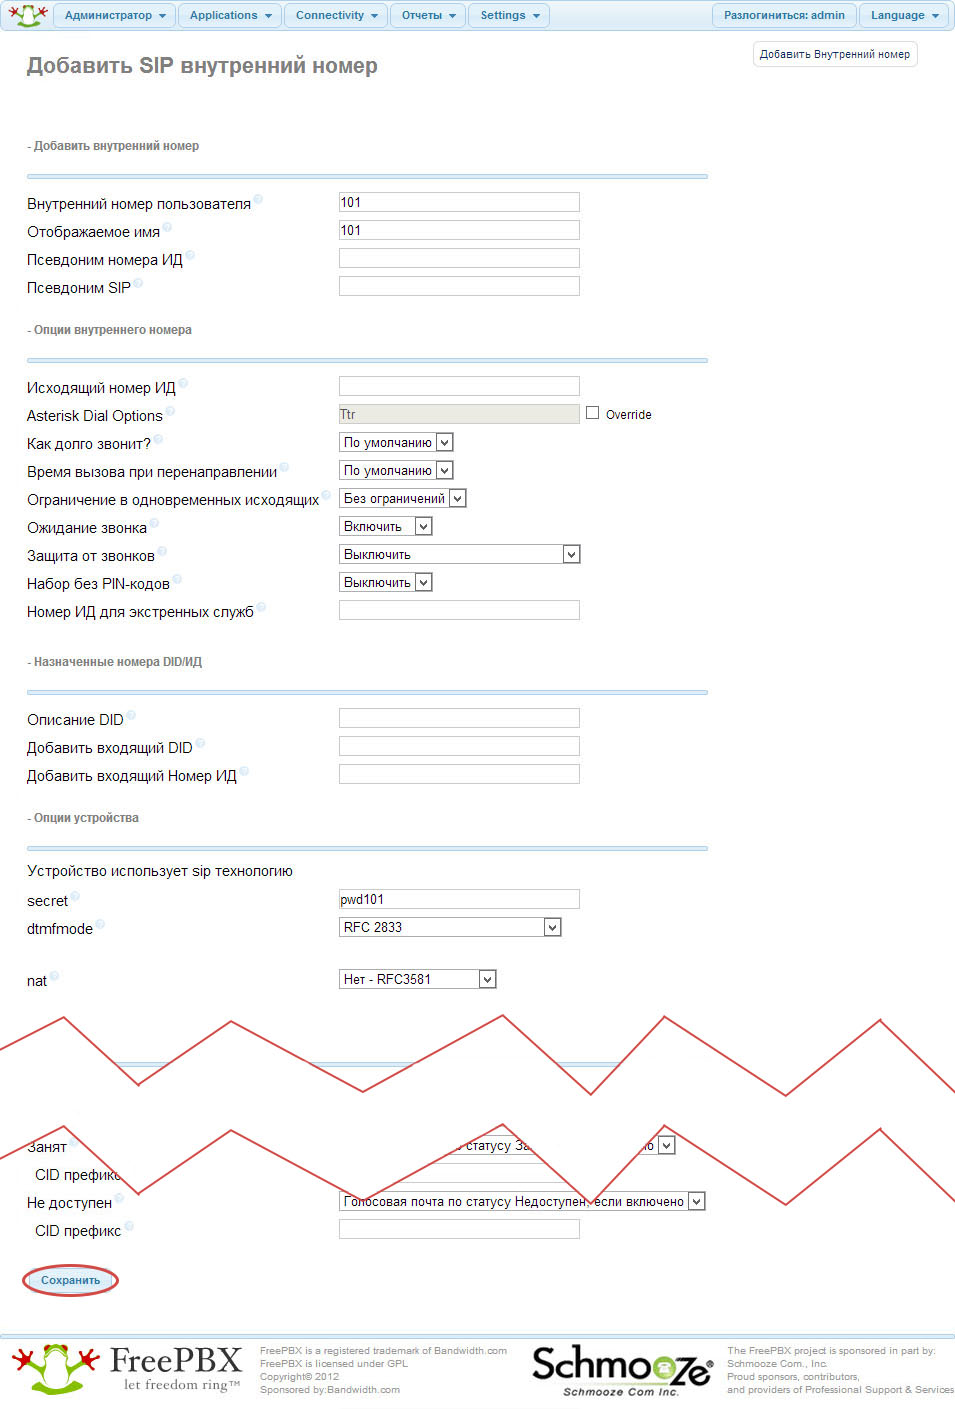
Create an internal number:
Screenshots of the path to the internal number settings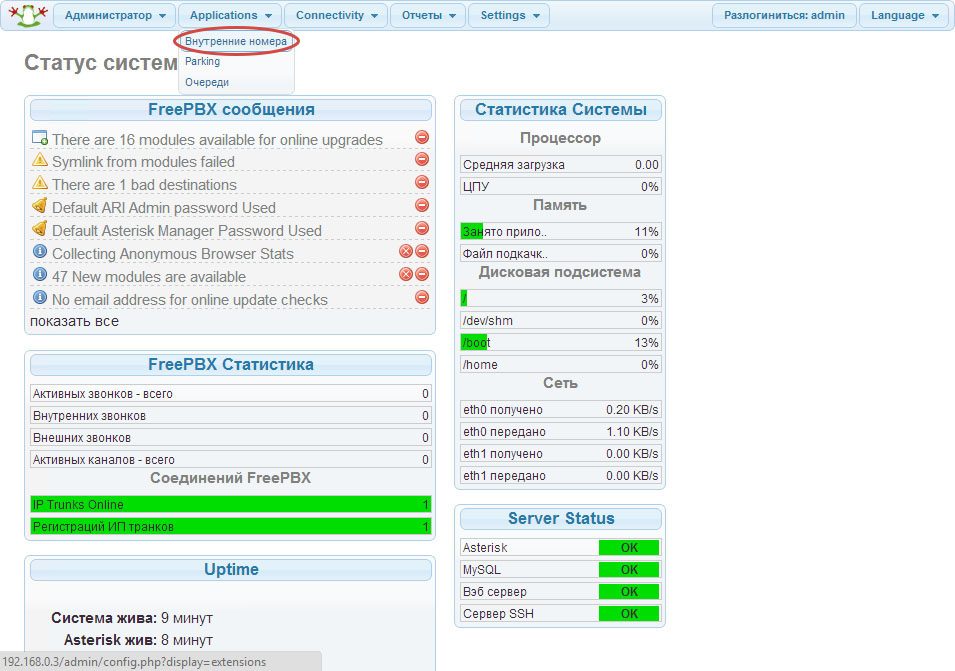

In the settings of the extension number you must specify:
- the number itself (for example, “101”);
- how the caller from this number will be displayed on the screen (for example, also “101”);
- internal number password (at least 6 characters, at least two letters, at least two numbers - for example, “pwd101”).
We create incoming routing (we explain to the system what to do when someone calls our trunk outside):
Screenshot of the path to the settings of the incoming route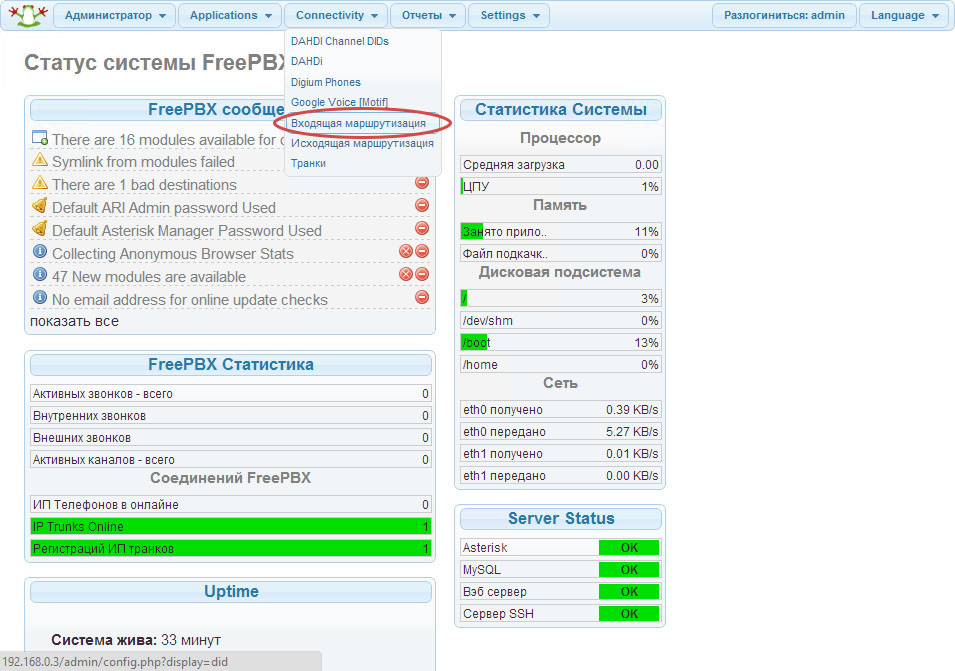
In the settings of the incoming route, you must specify:
- its description (for example, "inside");
- where to send the incoming call (in our case we send to the internal number “101”).

Well, we have finished setting up our PBX. It's time to check how everything works. To do this, install the soft-background and register at our PBX for the internal number "101".
Downloading “X-lite” from here http://www.counterpath.com/x-lite-for-windows-download.html . Install on one of the computers on the local network.
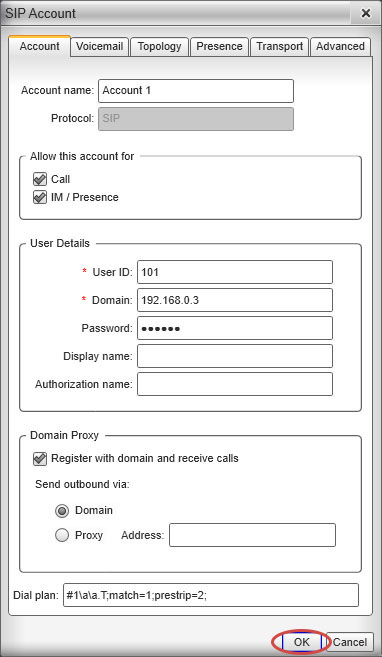
Configuring "X-lite":
Screenshot of the path to the X-lite settings
In the account settings, specify:
- internal number for which we want to register (in our case, "101");
- IP-PBX address in the local network (in our case "192.168.0.3");
- internal number password (in our case “pwd101”).
If we did everything correctly, then “Available” will appear in the status of the soft background:
Screenshot of the connected X-lite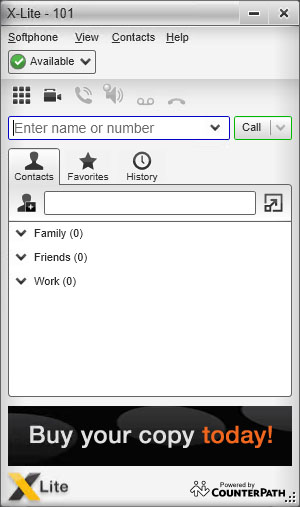
And now really everything! We try to call from the soft background to the city, and then from the city, to our ID Phone number.
Russify IVR (a set of voice messages that PBX can say). To do this, we give a number of commands:
mkdir /var/lib/asterisk/sounds/ru mkdir /tmp/asteriskru cd /tmp/asteriskru wget --no-check-certificate https://github.com/pbxware/asterisk-sounds/tarball/master tar xfz master --strip-components 1 -C /var/lib/asterisk/sounds/ru/ rm master wget --no-check-certificate https://github.com/pbxware/asterisk-sounds-additional/tarball/master tar xfz master --strip-components 1 -C /var/lib/asterisk/sounds/ru/ rm -rf /tmp/asteriskru I download the russification package from github, since there is no package with additional sounds on the official resource ( http://downloads.asterisk.org/pub/telephony/sounds/ ), and without them, the PBX will only speak Russian partially.
Now you need to add the line to the /etc/asterisk/sip_general_custom.conf file:
language=ru Restart the PBX and call the number * 60. If everything is done correctly, then the PBX in the correct Russian language will tell us the current time.
As a bonus, for those who are just as paranoid as I am, a bit of security.
First, let's make FreePBX available via https. To do this, install the appropriate package:
yum install mod_ssl Restart the web server:
service httpd restart For security reasons, we will allow you to work with our PBX only from our local network - if someone from the Kazakhtelecom subnet tries our PBX for strength. We configure the firewall with a group of commands (based on “Asterisk + iptables is the easiest way to configure” - thanks to varnav for this):
# localhost iptables -A INPUT -i lo -j ACCEPT # iptables -A INPUT -m state --state ESTABLISHED,RELATED -j ACCEPT # ping iptables -A INPUT -p icmp -s 192.168.0.0/24 --icmp-type echo-request -j ACCEPT # SSH iptables -A INPUT -p tcp -s 192.168.0.0/24 --dport 22 -j ACCEPT # HTTPS (FreePBX) iptables -A INPUT -p tcp -s 192.168.0.0/24 --dport 443 -j ACCEPT # SIP iptables -A INPUT -p udp -s 192.168.0.0/24 --dport 5060 -j ACCEPT # RTP iptables -A INPUT -p udp --dport 10000:20000 -j ACCEPT # IAX2 ( - 192.168.2.3) iptables -A INPUT -p udp -s 192.168.2.3 --dport 4569 -j ACCEPT # Asterisk Manager API ( 1 ) iptables -A INPUT -p tcp -s 192.168.0.0/24 --dport 5038 -j ACCEPT # mysql ( ) iptables -A INPUT -p tcp -s 192.168.0.0/24 --dport 3306 -j ACCEPT # , , iptables -P INPUT DROP iptables -P FORWARD DROP We keep our rules:
service iptables save To make sure we didn’t miss anything, we’ll see a list of firewall rules:
iptables -L -v Change management history
12/22/2013 - The first version of the manual.
12/24/2013 - Added block on updating FreePBX modules.
01/07/2014 - A block on the Russification of the operating system has been added, information on the creation of a route to the Kazakhtelecom subnetwork has been modified.
01/11/2014 - Added block on security.
01/14/2014 - Trunk settings corrected.
02/01/2014 - Minor additions to the security block.
02/03/2014 - Minor additions to the security block.
03/04/2014 - Added a block on the Russification of IVR.
Source: https://habr.com/ru/post/206964/
All Articles