CSS menu for beginners

This guide will help you to create a CSS menu for your site, it will not be normal, it will attract the attention of users, do not hesitate. And so let's get started ...
Background for the menu
To begin with, let's create a background, I'm certainly not a PhotoShop master, but what I did in a couple of minutes:

Graphic buttons
We create images that we will use as links in the menu. To do this, use PhotoShop:
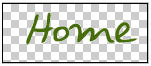
- Create a new file with 144x58px size. (link size for the first item in the menu)
- We fill this menu item with graphical contents (for me this is just an inscription made in a funny font):
- Next, increase the size of the canvas in half
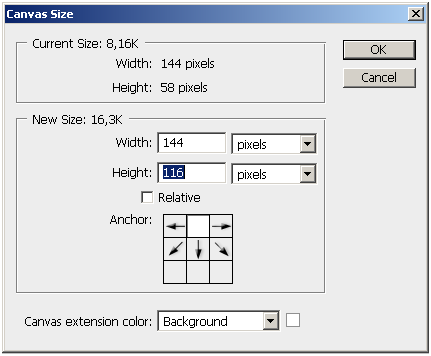
- And draw the appearance of the menu item to implement the hover event.

How will this construction work? It's very simple - we explicitly specify the size 144x58px for the link, but the mouseover event moves the background image up:
- Create a new file with an arbitrary size and text - this will be our hint to the link
- We will repeat all the previous items to create all the menu items, as a result of our manipulations, we should have this set of images:

')
HTML code
We’ve finished building designers out of ourselves, it's time to start coding - let's create a non-numbered list - <ul>:
- the <ul> element is assigned id = "menu"
- for each link <a> we assign a unique class name
- Inside the <a> tag we will throw an empty <span> tag (needed to implement links hints)
<ul id = "menu">
<li> <a href="#" class= directly / home> Home <span> </ span> </a> </ li>
<li> <a href="#" class= theaboutabout"> About <span> </ span> </a> </ li>
<li> <a href="#" class= activecss> RSS <span> </ span> </a> </ li>
</ ul>
CSS code
#menu
To begin, remove the padding and margin from the menu, list-style set to none, specify the position as relative. Specify the height and width of the menu (see dimensions menu-bg.jpg). Add a background image.
#menu {
list-style: none;
padding: 0;
margin: 0;
width: 774px;
height: 210px;
background: url (images / menu-bg.jpg) no-repeat;
position: relative;
}
#menu span
For span elements, the display parameter is set to none (by default, they will not be displayed). We also set the position as absolute.
#menu span {
display: none;
position: absolute;
}
#menu a
For links, we need to hide the text, for this we assign a negative value to the text-indent parameter (-900%), and the text will be hidden.
#menu a {
display: block;
text-indent: -900%;
position: absolute;
outline: none;
}
#menu a: hover
Now we want to move the image on the link for the mouseover event, for this we will add the following code to the CSS:
#menu a: hover {
background-position: left bottom;
}
#menu a: hover span
Also on the mouseover event, you must display a hint.
#menu a: hover span {
display: block;
}
#menu .home
Now we need to properly arrange the menu items. To begin with, we will indicate the size of the element and the background image, and then we will take up positioning, we will change the parameters left and top until we feel moral satisfaction from the appearance of the menu:
#menu .home {
width: 144px;
height: 58px;
background: url (images / home.gif) no-repeat;
left: 96px;
top: 96px;
}
#menu .home span
Now let's perform a similar operation for a tooltip.
#menu .home span {
width: 86px;
height: 14px;
background: url (images / home-over.gif) no-repeat;
left: 28px;
top: -20px;
}
#menu .about
Copy everything we did for the .home element and rename it to .about. Customize the size and location, just replace the background.
#menu .about {
width: 131px;
height: 51px;
background: url (images / about.gif) no-repeat;
left: 338px;
top: 97px;
}
#menu .about span {
width: 40px;
height: 12px;
background: url (images / about-over.gif) no-repeat;
left: 44px;
top: 54px;
}
#menu .rss
Repeat for .rss
#menu .rss {
width: 112px;
height: 47px;
background: url (images / rss.gif) no-repeat;
left: 588px;
top: 94px;
}
#menu .rss span {
width: 92px;
height: 20px;
background: url (images / rss-over.gif) no-repeat;
left: 26px;
top: -20px;
}
All in one
#menu {
list-style: none;
padding: 0;
margin: 0;
width: 774px;
height: 210px;
background: url (images / menu-bg.jpg) no-repeat;
position: relative;
}
#menu span {
display: none;
position: absolute;
}
#menu a {
display: block;
text-indent: -900%;
position: absolute;
outline: none;
}
#menu a: hover {
background-position: left bottom;
}
#menu a: hover span {
display: block;
}
#menu .home {
width: 144px;
height: 58px;
background: url (images / home.gif) no-repeat;
left: 96px;
top: 73px;
}
#menu .home span {
width: 86px;
height: 14px;
background: url (images / home-over.gif) no-repeat;
left: 28px;
top: -20px;
}
#menu .about {
width: 131px;
height: 51px;
background: url (images / about.gif) no-repeat;
left: 338px;
top: 97px;
}
#menu .about span {
width: 40px;
height: 12px;
background: url (images / about-over.gif) no-repeat;
left: 44px;
top: 54px;
}
#menu .rss {
width: 112px;
height: 47px;
background: url (images / rss.gif) no-repeat;
left: 588px;
top: 94px;
}
#menu .rss span {
width: 92px;
height: 20px;
background: url (images / rss-over.gif) no-repeat;
left: 26px;
top: -20px;
}
This is all, you can test the menu here , and download an example here .
Free translation: http://www.webdesignerwall.com/tutorials/advanced-css-menu/
Crosspost: CSS Web 2.0 style menu
Source: https://habr.com/ru/post/20670/
All Articles