Congratulations on geeky, without writing firewood
I read the article "Creating Your Own Linux Drivers" from comrade dlinyj and caught fire with the idea voiced at the end of the article. Namely
Now nothing prevents to pay 500 rubles for a month (and if we throw off, the amount will be quite small), and rent a server on a virtual machine. There put a programmer who will send messages. Either jabber or some other methods (but at least nc and telnet do everything). And on the computer to put the receiver of these messages. And on the New Year we all will have congratulations.
')
And he made the decision to join the general crowd, to receive and send his geek greeting. I did not search for LPT-port on my laptop, I know that it does not exist. But he remembered that several years ago he was making a display connected to a COM port. More precisely, not quite to the COM port, this is the USB-to-UART adapter, which dlinyj spoke about in this post “UART and what it is eaten with . ” As a result, it was decided to make it.
Iron
The protocol was used there samopisny, which has nothing to do with ESC-sequences. But I still have one of the copies.
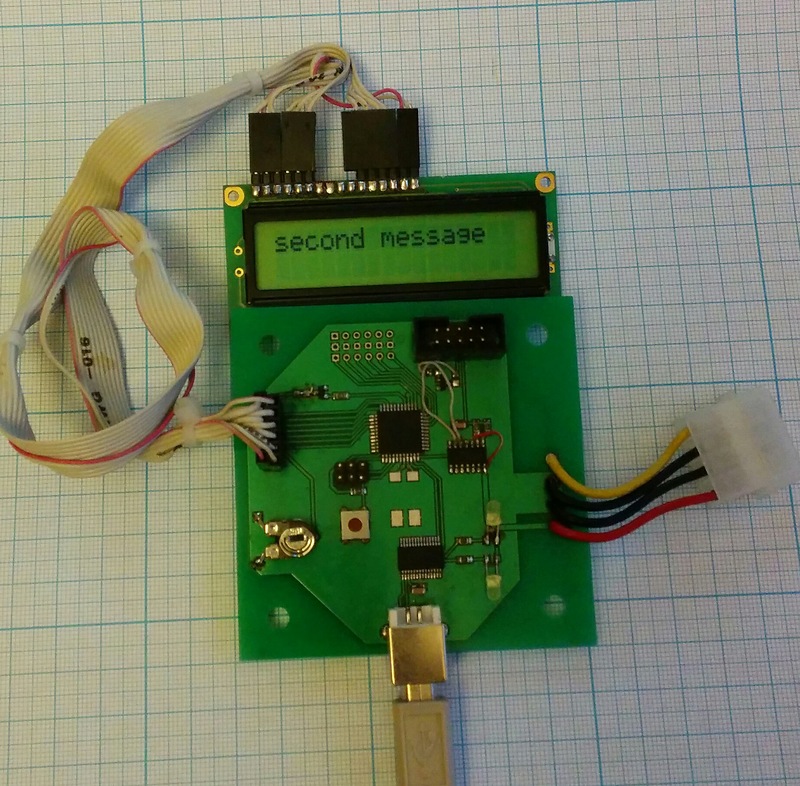
The appearance of the board
There is quite a bit of excess on this board. In fact, the scheme is as follows:
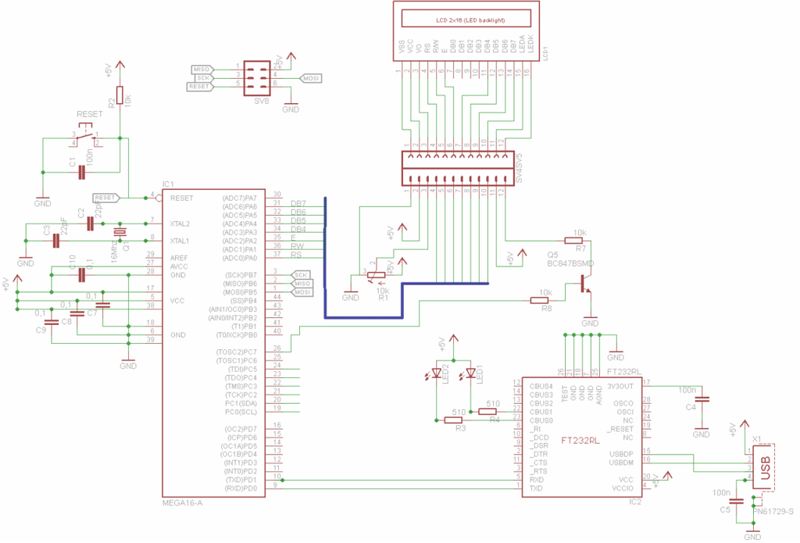
Scheme Full Size
Nothing complicated. And each radio amateur probably presented a set of elements. I am even more than sure that everyone who worked with AVR controllers has at least one such handkerchief, only with a bit of other schemes. FT232RL can be replaced with MAX232 (with a corresponding body kit) or use a ready USB-UART adapter. The transistor on the backlight is also not necessary (this is the backlight control circuit). It can be easily replaced simply by connecting to the ground.
Those who are happy owners of the debugging board PinBoard v1 from DIHALT will not even have to search and solder anything. Everything you need is already there.

PinBoard v1
Almost the same can be said about the owners of the Arduino. You will only need to find a display, a resistor for adjusting the contrast and a pair of wires for connecting
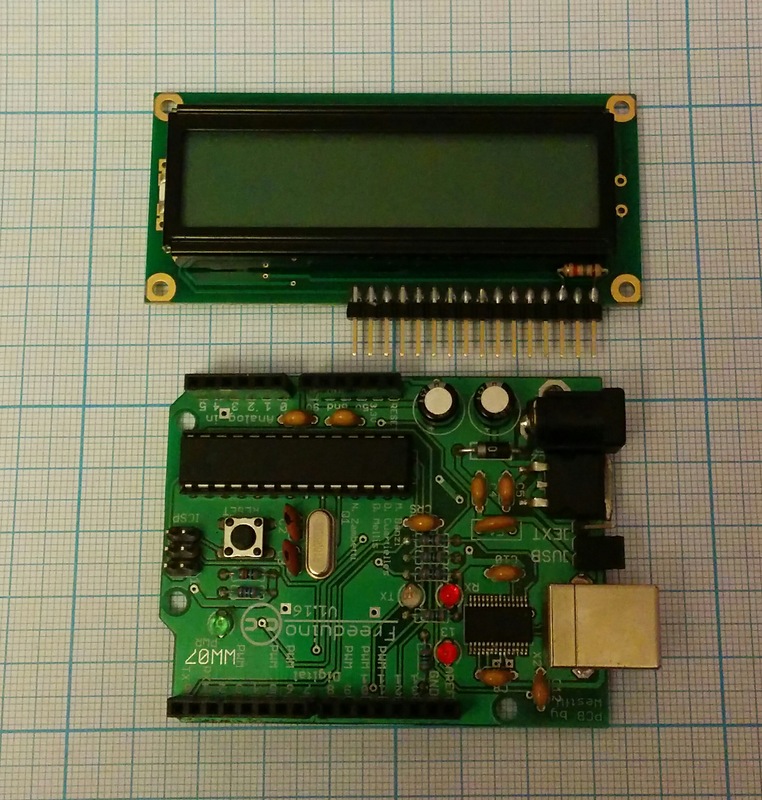
Arduino
Realizing that I am fine with the hardware (and even redundantly), I moved on to writing the firmware for the existing microcontroller. In my case, it is the Atmega 16, but in general it does not matter much.
Soft!
I already had libraries for working with LCD, the code for initialization was pulled out of the old project and is rather trivial. There was an attempt to use the library from the project comrade dlinyj , but apparently from the number of function call calls to the controller the stack was broken, and everything was unstable. As a result, I decided to do everything in my library.
I will not give the whole code, everyone will be able to see the whole project in the source code. I will focus on the key points.
First, it is necessary to describe the pins for connecting the display, they are described in the file hd44780_hw.h
#include "hd44780_hw.h" //describe LCD PINS connection The speed of the UART was chosen 9600. It happened historically, and do not ask why.
#define baudrate 9600L All initialization of the hardware is in the HwInit function. Initializing nothing at all:
//HW initialisation void HwInit(void) { //InitUSART UBRRL = LO(bauddivider); UBRRH = HI(bauddivider); UCSRA = 0; UCSRB = 1<<RXEN|1<<TXEN|1<<RXCIE|0<<TXCIE; UCSRC = 1<<URSEL|1<<UCSZ0|1<<UCSZ1; sei();// //InitLCD lcd_init(LCD_DISP_ON); lcd_clrscr(); } The main task is the processing of ESC sequences, which I brazenly took from Long, and he accordingly took from Michael McLellan in his project lptlcd . The handler itself is in esc.c, and we call the same handleInput function, which parses our request. This function is called in the UARTa interrupt handler.
//UART interapt ISR(USART_RXC_vect) { handleInput(UDR); return; } Every byte that arrives at the UART causes an interrupt. And in the interrupt handler, we take and feed the handleInput functions.
This function is not much different from the similar function in the project driver on the lpt-port. Is that the functions of the installation in the position of the screen, cleaning the screen and displaying the character on the screen to the functions from my library were replaced Plus, the Easter egg output function is also removed, since it works only on the four-line screen and with the Long libraries, and we have a different screen and the screen is only 16x2. Well, from the unpleasant, until the function of loading your fonts is implemented. There is still a stub.
We are testing
Compile. I use AVR Studio version 4 + avr-toolchain (3.3.0.710) for the build. Stitching. While we are running the firmware, take another look at the used escape sequences. I quote the text of the original article.
So, control sequences for our screen:
- \ 033 = Sending an ESC sequence from which commands begin.
- [A = Move cursor one line up
- [B = Move cursor one line down
- [C = Move the cursor one position to the right.
- [D = Move the cursor one position to the left
- [H = Move the cursor to the upper left corner - home (position 0.0)
- [J = Clear all, does NOT return the cursor home!
- [K = Erases to the end of the line, does NOT return the cursor home!
- [M = New Character Map (DZ - explain why!)
- [Y = Position Y (see FAQ below)
- [X = Position X (see FAQ below)
- [R = CGRAM memory selection
- [V = Scroll Enabled
- [W = Scrolling off
- [b = Backlight on / off (will not work with us).
Other useful commands work without the \ 033 prefix!
- \ r = Carriage return (return the cursor to position 0 on the current line!)
- \ n = New line
- \ t = Tab (default 3 characters)
I also strongly recommend to return again to the original article habrahabr.ru/post/206148 and see the FAQ with pictures - examples of their application.
We cling to the freshly flashed controller to the USB port, and see, with the dmesg command, that we have a new device in the system:
/dev/ttyUSB0 And we give the following command:
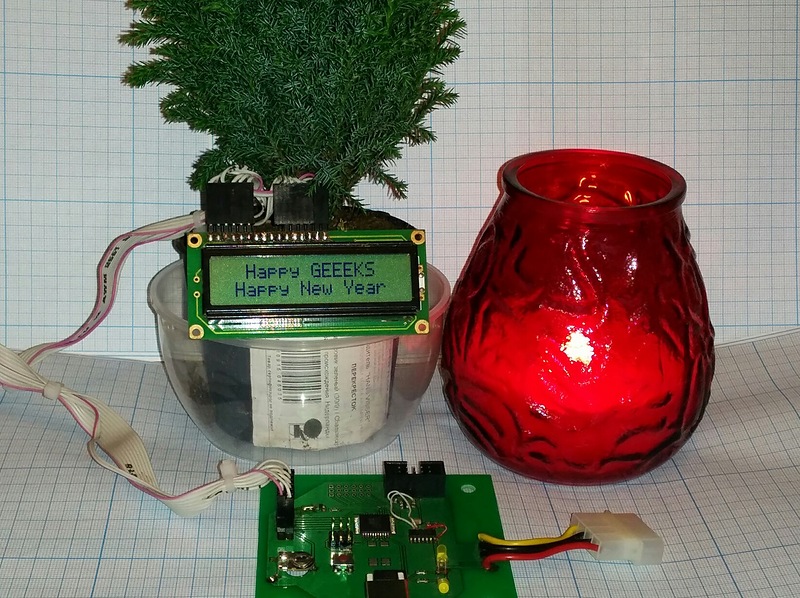
echo -en "\033[H\033[J Happy GEEEKS\r\n Happy New Year" > /dev/ttyUSB0 And as a result we get a completely New Year greetings from geeks:

Congratulations on GIKOVSKI !!!
Well, the already traditional time output script also works:
while true; do echo -en "\033[H`date +\"%d.%m.%Y\"` \r\n`date +%r`" > /dev/ttyUSB0 ; sleep 1s; done 
Geek watch
What about PinBoard V1?
To transfer the code for pinboard does not require much effort. You just need to connect the display just like in the diagram. If the display is already connected and there is no desire to redo it, you can change the defaults of the pins to which the screen is connected in the file hd44780_hw.h. It looks like this:
#define LCD_DATA_PIN_D7 PA6 /* arbitrary pin for LCD data line D7 */ #define LCD_DATA_PIN_D6 PA5 /* arbitrary pin for LCD data line D6 */ #define LCD_DATA_PIN_D5 PA4 /* arbitrary pin for LCD data line D5 */ #define LCD_DATA_PIN_D4 PA3 /* arbitrary pin for LCD data line D4 */ #define LCD_DATA_PINR_D7 PINA /* input pin register for LCD data line D7 */ #define LCD_DATA_PINR_D6 PINA /* input pin register for LCD data line D6 */ #define LCD_DATA_PINR_D5 PINA /* input pin register for LCD data line D5 */ #define LCD_DATA_PINR_D4 PINA /* input pin register for LCD data line D4 */ #define LCD_DATA_DDR_D7 DDRA /* ddr for LCD data line D7 */ #define LCD_DATA_DDR_D6 DDRA /* ddr for LCD data line D6 */ #define LCD_DATA_DDR_D5 DDRA /* ddr for LCD data line D5 */ #define LCD_DATA_DDR_D4 DDRA /* ddr for LCD data line D4 */ #define LCD_DATA_PORT_D7 PORTA /* port for LCD data line D7 */ #define LCD_DATA_PORT_D6 PORTA /* port for LCD data line D6 */ #define LCD_DATA_PORT_D5 PORTA /* port for LCD data line D5 */ #define LCD_DATA_PORT_D4 PORTA /* port for LCD data line D4 */ #define LCD_RS_DDR DDRA /* ddr for RS line */ #define LCD_RS_PORT PORTA /* port for RS line */ #define LCD_RS_PIN PA0 #define LCD_RW_DDR DDRA /* ddr for RW line */ #define LCD_RW_PORT PORTA /* port for RW line */ #define LCD_RW_PIN PA1 #define LCD_E_DDR DDRA /* ddr for Enable line */ #define LCD_E_PORT PORTA /* port for Enable line */ Save, compile and flash the result into a pinboard and execute the following command:
echo -en "\033[H033[JSpasibo DiHalt" > /dev/ttyUSB0 
Thank the author of the board!
Why is all this necessary?
If we tear away from the habr and look at the calendar, we will EXTREMELY discover that there are 10 days left before the New Year. But you want a holiday not only with relatives, but also with a soldering-virtual one! This is what all this is about.
Comrade dlinyj created a group who wants to congratulate each other on geeks. Right now there people are thinking about the server-client part. Unfortunately, it is not ready yet. But we hope that if you connect to us, then we will definitely bring everything to mind! If you have a display, and you want to be in a party, then enter there. It does not carry any commerce or personal gain, just kind congratulations happy new year on the screen.
Those who do not have the screen, but I want to receive congratulations on geeks, it’s too early to get upset. ESC sequences work in a regular console. So displaying messages on the screen, everything will work.
For example, if you run the command:
while true; do echo -en "\033[H`date +\"%d.%m.%Y\"` \r\n`date +%r`" ; sleep 1s; done Removing output redirection do not forget about cleaning the screen. Otherwise, we get an interesting effect:

Watch right on the console
To avoid this, add the clear; command before the while; Now everything will look like this:
clear; while true; do echo -en "\033[H`date +\"%d.%m.%Y\"` \r\n`date +%r`" ; sleep 1s; done 
Console instead of display
Results
I want to create a festive atmosphere, but for a holiday we need friends. Where else can a geek find friends other than his own? Therefore, it is possible and we choose such an exotic way to congratulate each other happy New Year!
Download links:
Sources for my board and Pinboard can be downloaded here.
Source: https://habr.com/ru/post/206692/
All Articles