Synchronization in Android applications. Part one
In the yard in 2014, the share of Android JellyBean exceeded 60% , new trends in design appeared. In general, a lot of interesting things happened. But data synchronization with the server has remained an integral part of most applications. There are many ways to implement it in an application. Android provides us with the SyncAdapter Framework, which allows you to automate and coordinate this process and provides many buns in the appendage.
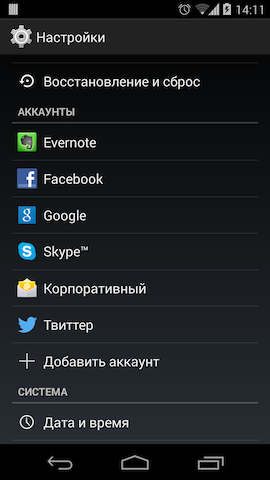
Account
First we need our own account on the device. At first, I think it is necessary to answer the question, why? Indeed, why?
Brief summary of benefits:
- Support for background mechanisms like syncadapter
- Standardize authorization method
- Support for various tokens (access rights)
- Sharing an account with privilege delimitation (the ability to use one account for different applications, as Google does)
Steps to get buns:
1) Creating an Authenticator
2) Creating an Activity for login
3) Creating a service to communicate with our account
')
AccountManager - manages device accounts. Applications request authorization tokens from him.
AbstractAccountAuthenticator is a component for working with a specific type of account. All account mechanics (authorization, demarcation of rights) is carried out here. May be common to various applications. AccountManager works with him.
AccountAuthenticatorActivity - the base activation class for authorization / account creation. Called by AccountManager if necessary to identify the account (token is missing or rotten).
How it all works, you can look at the diagram from the documentation.

When we need a token, we work with the AccountManager method - getAuthToken. It is worth noting that this is an asynchronous method and can be safely called from a UI stream. There is also a synchronous version of this method - blockingGetAuthToken. Let's return to the diagram.
Creating an Authenticator
To create our own Authenticator, we need to extend the AbstractAccountAuthenticator and implement several of its methods (7 to be precise). But for us, at the moment, only two are of interest.
addAccount
@Override public Bundle addAccount(AccountAuthenticatorResponse response, String accountType, String authTokenType, String[] requiredFeatures, Bundle options) throws NetworkErrorException { final Intent intent = new Intent(mContext, NewAccountActivity.class); intent.putExtra(NewAccountActivity.EXTRA_TOKEN_TYPE, accountType); intent.putExtra(AccountManager.KEY_ACCOUNT_AUTHENTICATOR_RESPONSE, response); final Bundle bundle = new Bundle(); if (options != null) { bundle.putAll(options); } bundle.putParcelable(AccountManager.KEY_INTENT, intent); return bundle; } The method, as the name implies, is called when you try to add a new account. All we have to do in it is to return the Intent, which should launch our Activity. To be able to add an account from the application, we will need the appropriate permissions.
<uses-permission android:name="android.permission.GET_ACCOUNTS" /> <uses-permission android:name="android.permission.MANAGE_ACCOUNTS" /> <uses-permission android:name="android.permission.AUTHENTICATE_ACCOUNTS" /> <uses-permission android:name="android.permission.USE_CREDENTIALS" /> getAuthToken
@Override public Bundle getAuthToken(AccountAuthenticatorResponse response, Account account, String authTokenType, Bundle options) throws NetworkErrorException { final Bundle result = new Bundle(); final AccountManager am = AccountManager.get(mContext.getApplicationContext()); String authToken = am.peekAuthToken(account, authTokenType); if (TextUtils.isEmpty(authToken)) { final String password = am.getPassword(account); if (!TextUtils.isEmpty(password)) { authToken = AuthTokenLoader.signIn(mContext, account.name, password); } } if (!TextUtils.isEmpty(authToken)) { result.putString(AccountManager.KEY_ACCOUNT_NAME, account.name); result.putString(AccountManager.KEY_ACCOUNT_TYPE, account.type); result.putString(AccountManager.KEY_AUTHTOKEN, authToken); } else { final Intent intent = new Intent(mContext, LoginActivity.class); intent.putExtra(AccountManager.KEY_ACCOUNT_AUTHENTICATOR_RESPONSE, response); intent.putExtra(LoginActivity.EXTRA_TOKEN_TYPE, authTokenType); final Bundle bundle = new Bundle(); bundle.putParcelable(AccountManager.KEY_INTENT, intent); } return result; } What happens at the time of calling this method: trying to get the current token using the peekAuthToken method, if the token exists, we can add validation checks (remember, this is an asynchronous method, so we can break into the server) and return the result. If there is no token and / or the server did not give it to us, we return the same intent as in the addAccount method. In this case, the user will knock on the login screen.
Creating Activity Authorization
Our activit should be inherited from the AccountAuthenticatorActivity (strictly speaking, it shouldn’t but: in the AccountAuthenticatorActivity there are 20 lines of auxiliary code that you can write with your hands in any other activation). We will have the simplest activation with login / password fields and a login button. In general, in AccountManager you can save arbitrary information about the user profile. AuthTokenLoader will be responsible for obtaining the token, but you can use any mechanism you like. The task is simple - get a token from the server.
onTokenReceived
public void onTokenReceived(Account account, String password, String token) { final AccountManager am = AccountManager.get(this); final Bundle result = new Bundle(); if (am.addAccountExplicitly(account, password, new Bundle())) { result.putString(AccountManager.KEY_ACCOUNT_NAME, account.name); result.putString(AccountManager.KEY_ACCOUNT_TYPE, account.type); result.putString(AccountManager.KEY_AUTHTOKEN, token); am.setAuthToken(account, account.type, token); } else { result.putString(AccountManager.KEY_ERROR_MESSAGE, getString(R.string.account_already_exists)); } setAccountAuthenticatorResult(result); setResult(RESULT_OK); finish(); } This method is called when the token from the server is received (and this indicates the validity of the account) and, accordingly, you can add an account to the device. setAccountAuthenticatorResult - the method for sending the result back to the AccountManager.
Service for integration into the system
The service will allow the system and other applications to contact our Authenticator. The service code is as simple as possible:
GitHubAuthenticatorService
public class GitHubAuthenticatorService extends Service { private GitHubAuthenticator mAuthenticator; @Override public void onCreate() { super.onCreate(); mAuthenticator = new GitHubAuthenticator(getApplicationContext()); } @Override public IBinder onBind(Intent intent) { return mAuthenticator.getIBinder(); } } All he does is return the IBinder of our Authenticator. Moreover, the getIBinder method is already implemented in AbstractAccountAuthenticator. It remains only to register our service in the application manifest.
<service android:name=".account.GitHubAuthenticatorService" android:exported="false"> <intent-filter> <action android:name="android.accounts.AccountAuthenticator" /> </intent-filter> <meta-data android:name="android.accounts.AccountAuthenticator" android:resource="@xml/github_authenticator" /> </service> A very small detail remains: you might notice such a line
android:resource="@xml/github_authenticator" This is the metafile that our Authenticator describes. It must be created in the res / xml folder. In it we indicate our account icon, its name and type. In the simplest case, it looks like this:
<?xml version="1.0" encoding="utf-8"?> <account-authenticator xmlns:android="http://schemas.android.com/apk/res/android" android:accountType="com.github.elegion" android:icon="@drawable/ic_github" android:label="@string/github" android:smallIcon="@drawable/ic_github" /> Here, in general, everything. After these cunning manipulations, we were able to create our account on the device. With all the seeming complexity, this process actually comes down to implementing 2 methods, creating an xml metafile and describing the service in the manifest. The remaining Authenticator methods are necessary for sharing our account to the outside world with privilege sharing, which we will discuss in the following articles.
PS As a bonus: AccountManager has a setUserData method (final Account account, final String key, final String value) which essentially gives us the ability to store any information in the key-value format. This is what I talked about a little higher. This is another good thing to add to the rest - the ability to store a user profile without the need to create / use internal repositories.
Project sources can be found here .
Synchronization in Android applications. Part two
Source: https://habr.com/ru/post/206210/
All Articles