Creating your own drivers for Linux
Many of my friends and acquaintances twist their fingers at their heads, or they wonder if their skulls are too tight for me when they find out that I am writing drivers for Linux. The word “driver” is shrouded in some almost mystical sense, and only selected gurus can grasp the Tao of its writing.
Fortunately, it is not. I do not know how things are going with writing drivers for other operating systems, incl. and most popular, but under linux, regardless of the hardware architecture, drivers are written very simply. To write a driver, you need basic knowledge of the C language, an understanding of the Linux operating system (basic), an understanding of what we want to receive, a desire to read the documentation and source codes, and also perseverance. Everything.
Do you want to see how to write a driver for your device? Then dive under the cat!
The ease of writing drivers is due to the fact that the linux source code is superbly documented and is available in source code, there are many examples in the network and a lot of literature. And to create a driver, you need only your favorite distribution and kernel sources, and the compiler for the architecture you need. I wrote my first non-training driver for the PowerPC 8360 processor, it interacted with the FPGA chip and reset the default settings. Strange as it sounds, I did it by rewriting the SPI driver for this architecture a bit. I say this to the fact that a unified standardization of writing programs in the Linux kernel allows for such things.
The Linux driver development handbook is “Linux Device Drivers”. The book is an exhaustive guide to development and if something is missing in the book, then you can definitely find it yourself in the source code of the kernel. Of course, this post does not pretend to replace this wonderful book. Moreover, it was written based on the reading of these works, but still is not a brief retelling of this book. The author of these lines aims to interest the reader in the simplicity and elegance of the Linux operating system, and lower the threshold for people to enter driver development. Believe it is very simple!
What we will write a driver for
')
Since the main purpose of this article is to write drivers, we will pay minimum attention to the hardware. I hope everyone is friends with a soldering iron, and those who are not friends - it is time to start making friends, I will briefly tell you what and how was done.
We will write a driver for a display of the HD44780 family connected via an LPT port to a computer. I know that the port is ancient, and the type of display is not less than the years to me, but still - this is a beautiful and simple example of writing drivers for linux, without delving into the hardware details. And all the more so, to remake this driver for this screen for other architectures will be a matter of replacing one line!
So, we need an LPT port; a cord for an old printer and an optional CENTRONICS connector for up to 36 pins, although you can simply unwind the cable; Of course, the screen of the HD44780 family, the best is at least 4x40 characters, although even the smallest ones will do; Well, a variable resistor of 10 kOhm, to adjust the contrast. Since I don’t have an LPT port a long time ago, I bought the first available PCI card (PCI-E can also be used). And the board got so much Chinese that I couldn’t even find any documentation on the soldered chip on it. Nothing, we will also reverse it :)))).
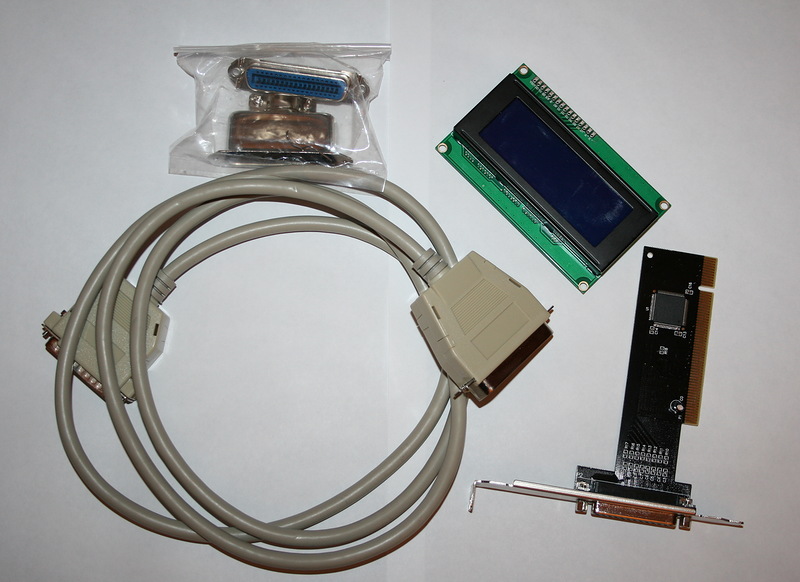
Hardware source
We assume that to get these components was not difficult, and your hands are burning with impatience to do everything.
A warning!!!
Read carefully!

I want to indicate that we work in the most difficult conditions, with iron, and we will also work at the core level. We live, so to speak, inside the patient. Any error in the program and the kernel falls. At what it may not even have time to wave to you kernel_panic, just suddenly everything stops working. Please note that you started the driver, unloaded it, and suddenly the implicit glitches began - that's all, your path - reboot. If the system is alive, then the reboot command. If not already, then hardware reset. Although in severe cases, the system can sometimes restart itself.
Plus, if you do not know what you are doing (writing to the port, referring to memory areas, etc.), then it is better not to do it. For all this, at best, can knock down the settings (the incorrect value written to port 70h used to reset the BIOS to x86) or even spoil the hardware (for example, by putting the GPIO leg on the ground). Therefore, clearly understand what you are doing, both on the hardware and on the software level!
Getting started
For the lucky owners of the built-in lpt-port in your computer, I will say that in your case the port lives at the standard address 378h . You can wake me in the middle of the night and I will say this figure, so much is connected with it. But now we have been given an enemy wage, and we have to defeat it!
We insert the board into a PCI or PCI-E slot, boot up and see what happens on the PCI bus with the following command:
lspci -v … 05:01.0 Serial controller: Device 4348:5053 (rev 10) (prog-if 02 [16550]) Subsystem: Device 4348:5053 Flags: medium devsel, IRQ 18 I/O ports at c030 [size=8] I/O ports at c020 [size=8] Kernel driver in use: serial As you can see, linux found something on the PCI bus, and even tried to give it some kind of left, obviously wrong driver. But we are most interested in the addresses on which this port sits. These lines are: I / O ports, namely the digits c030h and c020h .
We now need to find out which addresses are responsible for what. To do this, we connect LEDs with resistors to the output port in approximately the same way (resistors are approximately 310 Ohms, or more or less, it does not matter)

Checkout scheme
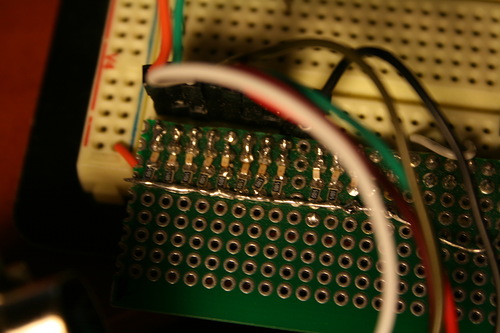
Since I already have a blank LED for this kind of test, I inserted the wires directly into the CENTRONICS connector and I did not fit all 8 pieces of wires, so I inserted only 6 (the first 4 and the last two).

Assembled Port Tester
And sketch a small program to check.
To work with the port, I took an example from here www.faqs.org/docs/Linux-mini/IO-Port-Programming.html#s9 . The only thing that needs to be corrected is the line:
#include <asm/io.h> on
#include <sys/io.h> We make normal delays per second (instead of usleep (100,000);
, we write sleep (1);) and make three consecutive conclusions to the port:
outb(0, BASEPORT); sleep(1); outb(0xAA, BASEPORT); sleep(1); outb(0xFF, BASEPORT); sleep(1); Define #define BASEPORT change to port 0xc030. Compile, run from under the root: LEDs are off. Change to another digit - 0xc020 - ale op:
Zero

On the conclusions of AAh
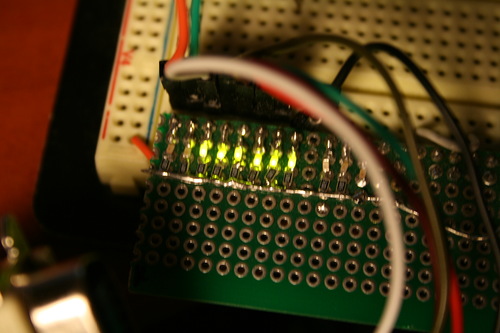
And, of course, in a second FFh
The result is obvious. Those. With the port numbering, we guessed it, you can proceed to the wood. The LPT port of this board lives at. 0Xc020 !
I want to draw the attention of tinsmith programmers to the magic number 0xAA - this is a sequence of ones and zeros. Like this: 10101010b . This is very convenient for any debugging. In general, anyone who works with iron should easily translate binary, decimal, hexadecimal back and forth in mind.
Taki display
Drum roll, it's time to put together a piece of iron! For this we need to solder everything together. We collect everything according to the following scheme.

I know that the scheme is not according to GOST, but this is not Radio magazine either.
To power the screen, I spread the USB cable, and now I have two wires going to the screen. There is a tricky option, it’s just that no hands reach it - it is to power the USB right into the LPT wire, soldering one of the many earth wires. As hands reach - I will definitely do it. I will add only this article :)))).
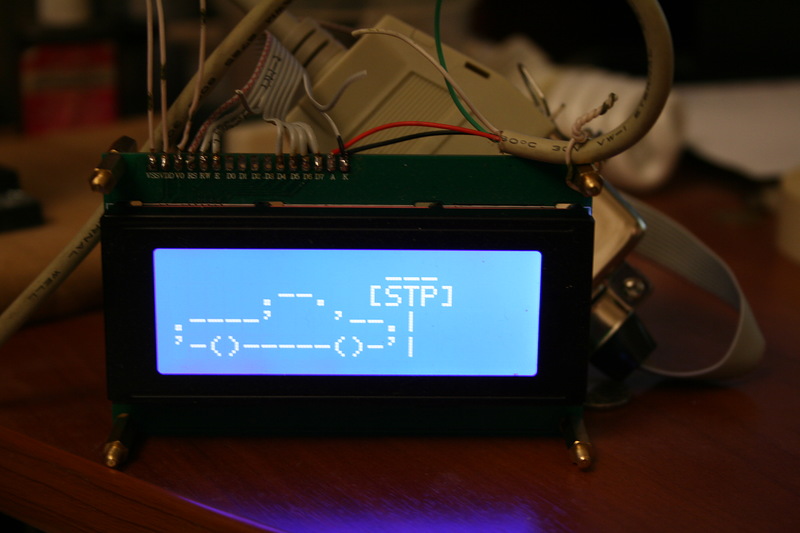
As a result, after energizing, we should get something like this. Adjust the brightness with a resistor so that two bars appear. They indicate that the display is not initialized.
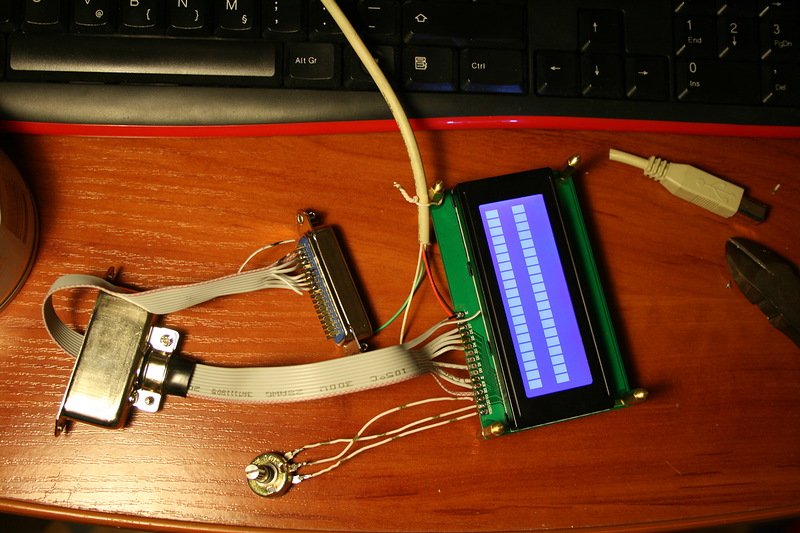
Device Assembly
Fuh, with the hardware we finished, it's time to move on to the program.
We start evil experiments with the screen in the program
As a finished product for working with the display, I used the code from the Arduino taken from here . I also do not like this platform, but the code is suitable for displays connected via I2C . If the last word to you does not mean anything, do not be intimidated. The bottom line is that the same display is connected via two wires (as the bus name implies), and then there is a register, which again converts the transmitted byte into a parallel bus, just like our LPT port. As a result, having thrown out some of the work with I2C, we get a valid libu.
For cleanliness, I rewrote it, added a couple of necessary functions, renamed some conflicting ones, made some other changes (I don’t remember, a lot of water has flowed under the bridge) and got a candy.
By the way, the code was used on the STM32, also with displays connecting via I2C. And now we port it already to x86 and under linux. Here it is - the great power of code portability! Spending just 10 minutes to adapt the code already under the new platform.
Work with the port is carried out in one single function - it is an unbearable node, and depending on the platform, the output method should be changed. There was a conclusion on I2C:
void expanderWrite(unsigned char _data){ outb(((_data) | _backlightval), BASEPORT); //x86 instruction!!!!! } Pay attention to this feature. Replacing it, the code can be run in AVR, STM32, MIPS, etc.
Already familiar to us output to the port. Define the port defined in the header lcd.h. Everything, now it is possible to try to draw a conclusion. The program has become even easier and clearer.
The print_to_string wrapper function is used for display.
void print_to_string (unsigned char col, unsigned char row, unsigned char c[], unsigned char len); The first parameter is the column number (from zero to 19), the second line number (from zero to three), the third is a pointer to a character string, and the last is the length of the string. The string is not checked for the ending “\ 0”, the length must be controlled independently! As a result, let's try the display:
#include <stdio.h> #include <stdlib.h> #include <unistd.h> #include <sys/io.h> #include "lcd.h" #define LCD_STRINGS 4 // #define LCD_COLUMNS 20 // int main() { LCD_init(0, LCD_COLUMNS, LCD_STRINGS);// print_to_string (0, 0, "XXXXXXXXXXXXXXXXXXXX" , 20); print_to_string (0, 1, "YYYYYYYYYYYYYYYYYYYY" , 20); print_to_string (0, 2, "ZZZZZZZZZZZZZZZZZZZZ" , 20); print_to_string (0, 3, "MMMMMMMMMMMMMMMMMMMM" , 20); exit(0); } As a result, something like this should appear on the screen:

Our first debut!
Do not be intimidated by this pornography. This screen was written off for dead pixels, more precisely, the controller from static static there just died (there are several of them). It is not suitable for work, but it is for all such experiments. Such shitty screens are made by the Chinese!
At this one could stop, because With this example, you can display any characters, download fonts, etc. But, not as a driver. Although you can remake a demon or something else, as far as fantasy allows.
Therefore, for those who become bored to read further, I post the full version of this example here .
Our global goal is a device driver, so let's get to it.
Driver Build Tool
To start writing a driver, you need to put the necessary tools. How to prepare tools for Ubuntu and Debian is well explained in this article blog.markloiseau.com/2012/04/hello-world-loadable-kernel-module-tutorial
I’ll just say briefly that if you don’t need to build debian packages and you’re writing a module for yourself, it’s enough to install the necessary components with the following command:
sudo apt-get install build-essential linux-headers-$(uname -r) I strongly recommend that you also download the source code of your kernel. There are two options to do this. The first, and obvious, but perhaps slightly hemorrhoid is to find out the version of your kernel with the command:
uname - a and download it from www.kernel.org . I'm lazy to climb the links and look for the kernel version, I trust this thing automation.
# sudo -s cd /usr/src/ apt-get source linux-image-$(uname -r) # . # linux_3.8.0-9.18.tar.gz /usr/src/linux-3.8.0 Truncate, remember this path or add a link to it, for example / usr / src / linux, but I do not recommend it, because Kernels tend to upgrade. Here the question is controversial to be or not to be, decide for yourself.
Now you have a real treasure: a storehouse of current documentation and a monstrous number of examples of source code, and of course the necessary springboard for building the module.
I highly recommend climbing Documents, drivers and others into the daddy, looking at the source code - this is incredibly useful!
Own driver
If you think that we now just fix the makefile and get a ready-made driver, then you are deeply mistaken. Everything, now we are in another world: not in user space, in kernel space. And here are completely different rules.
To realize the full misfortune of the situation, you must understand that the core is one big, very large program. This means that global variables, functions, etc. may be available elsewhere in the kernel! Therefore, ALL global variables (they should be avoided to the maximum) should be declared static!
We will not rebuild the kernel by embedding the driver into it, and restart each time trying it. This is certainly fun, but very long. Instead, we will make a kernel module, which we will load and unload directly during operation.
In our future module, compared to the user space program, the changes will not be very significant. First of all, let's move all the files into one in order not to have problems with compiling (or, if necessary, embed each other). Header is left, but we clearly define all the parameters of the functions (if there are no parameters, then it is necessary to prescribe void). We recall that we are in kernel space, and all our libraries are different. We change all headers for nuclear:
#include <linux/module.h> #include <linux/init.h> #include <linux/fs.h> /* everything... */ #include <asm/io.h> #include <linux/unistd.h> #include <linux/delay.h> /* udelay */ #include <asm/uaccess.h> #include <linux/miscdevice.h> Note that even unistd.h and io.h have become nuclear.
Let's take the hello world module as the primary driver base. Let's fix the init function:
static int __init hello_init(void) { LCD_init(0, LCD_COLUMNS, LCD_STRINGS); print_to_string (0, 1, "Hello Habrahabr " , 20); printk(KERN_INFO "Lpt module init\n"); return 0; // Non-zero return means that the module couldn't be loaded. } Here everything is almost unchanged. The function of working with iron is changing (the most platform-dependent), since It will work with the nuclear output function to the port:
void expanderWrite(unsigned char _data){ //outb(((_data) | _backlightval), BASEPORT); //x86 instruction rootfs!!!!! outb_p(((_data) | _backlightval),BASEPORT); //x86 instruction kernel!!!!! } And, oddly enough, the delay function. In general, the delay - a separate song, which can devote an entire article. We should have everything quickly, and as little as possible to occupy the core to any nonsense. But still:
static inline int delayMicroseconds(int value) { //usleep(value); //rootfs if (value > 1000) msleep(value/1000); udelay(value%1000); return 0; //kernel } The explanation of such a fraud is simple: udelay inside the kernel can not take values more than a thousand. To avoid incidents, such a stub is necessary.
After that, we collect something like this makefile:
TARGET = lptlcd obj-m := $(TARGET).o KERNELDIR ?= /lib/modules/$(shell uname -r)/build PWD := $(shell pwd) CC = gcc all: $(MAKE) -C $(KERNELDIR) M=$(PWD) clean: rm -rf *.o *~ core .depend .*.cmd *.ko *.mod.c .tmp_versions And we load the module into the system with the following command:
sudo insmod lptlcd.ko If we did everything correctly, then we will not get any errors, and the screen will correctly initialize and dmesg will show the message of your module in the last line:
[10036.950566] Lpt module initYou can unload the module with the command
sudo rmmod lptlcd dmesg will say:
[10077.176714] Cleaning up moduleGenerally, in order not to constantly press dmesg there is a script there is a solution that Comrade Jtu suggested to me :
while true; do sudo dmesg -c; sleep 1; done Or, if you are using a distribution other than Ubuntu, you should execute it as root, and remove sudo.
Result on the screen:
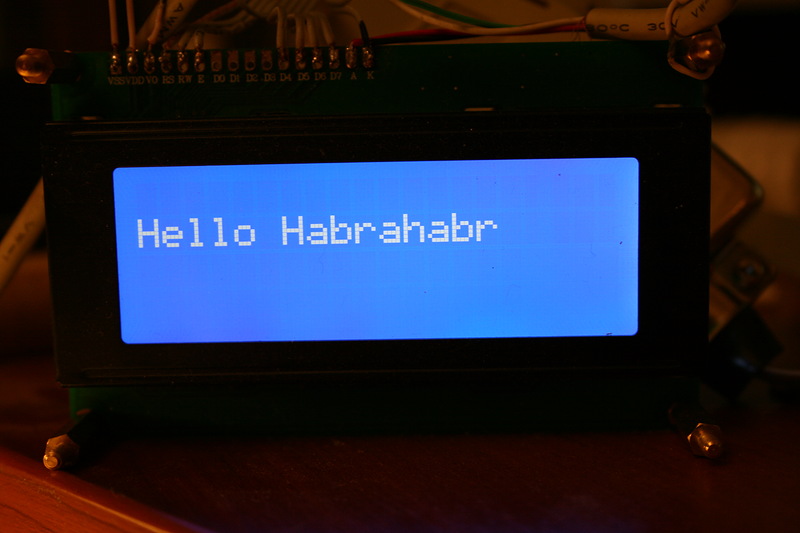
Hello to you!
If you saw all this - congratulations, this is your first working useless kernel module that displays the inscription on the screen! This is certainly entertaining, but we still have to turn our experiments into a normal driver with which to work. And for this you still have to talk about the materiel, at least a little.
A few words about the materiel
Like it or not, but without knowledge of certain materiels you will not get far. There are symbolic, block and network devices. Also, each device has a major and minor device number. Better than in the book “ The Linux Kernel Module Programming Guide ” can not be said, for this I will quote from the book in the spoiler:
Major and minor device number
Major and minor device number
Let's take a look at some device files. Listed below are those that represent the first three partitions on the primary hard disk:
Noticed a column with numbers separated by a comma? The first number is called the “High Number” of the device. The second - "Junior number." The major number indicates which driver is used to maintain the hardware. Each driver has its own unique major number. All device files with the same major number are controlled by the same driver. All of the above device files have a major number of 3, because they are all controlled by the same driver.
The minor number is used by the driver to distinguish between the hardware it controls. Returning to the example above, we note that although all three devices are serviced by the same driver, each of them has a unique minor number, so the driver “sees” them as different hardware devices.
Devices are divided into two large groups - block and character. The main difference between block and character devices is that data is exchanged with a block device in portions of bytes - blocks. They have an internal buffer, thereby increasing the rate of exchange. In most Unix systems, the size of a single block is 1 kilobyte or another number, which is a power of 2. But character devices are only information transfer channels that the data follow in sequence, byte by byte. Most devices belong to the character class, since they are not limited by the block size and do not need to be buffered. If the first character in the list received by the ls-l / dev command is 'b', then this is a block device, if 'c', then a character device. The devices that were given in the example above are block. The following is a list of some character devices (serial ports):
If you are interested in knowing how high-order device numbers are assigned, look in the /usr/src/linux/documentation/devices.txt file.
mknod. , «coffee», 12 2, mknod /dev/coffee c 12 2. /dev, , . , , , — . — , .
, , . , , , . , . , — . , .
, «», , , PCI , . :
, — , ( 2). , , , . ? , , 1.44 . — , 1.68 , , «» («superformatted» disk). , - . , , , . , «», , .
Let's take a look at some device files. Listed below are those that represent the first three partitions on the primary hard disk:
# ls -l /dev/hda[1-3] brw-rw---- 1 root disk 3, 1 Jul 5 2000 /dev/hda1 brw-rw---- 1 root disk 3, 2 Jul 5 2000 /dev/hda2 brw-rw---- 1 root disk 3, 3 Jul 5 2000 /dev/hda3 Noticed a column with numbers separated by a comma? The first number is called the “High Number” of the device. The second - "Junior number." The major number indicates which driver is used to maintain the hardware. Each driver has its own unique major number. All device files with the same major number are controlled by the same driver. All of the above device files have a major number of 3, because they are all controlled by the same driver.
The minor number is used by the driver to distinguish between the hardware it controls. Returning to the example above, we note that although all three devices are serviced by the same driver, each of them has a unique minor number, so the driver “sees” them as different hardware devices.
Devices are divided into two large groups - block and character. The main difference between block and character devices is that data is exchanged with a block device in portions of bytes - blocks. They have an internal buffer, thereby increasing the rate of exchange. In most Unix systems, the size of a single block is 1 kilobyte or another number, which is a power of 2. But character devices are only information transfer channels that the data follow in sequence, byte by byte. Most devices belong to the character class, since they are not limited by the block size and do not need to be buffered. If the first character in the list received by the ls-l / dev command is 'b', then this is a block device, if 'c', then a character device. The devices that were given in the example above are block. The following is a list of some character devices (serial ports):
crw-rw---- 1 root dial 4, 64 Feb 18 23:34 /dev/ttyS0 crw-r----- 1 root dial 4, 65 Nov 17 10:26 /dev/ttyS1 crw-rw---- 1 root dial 4, 66 Jul 5 2000 /dev/ttyS2 crw-rw---- 1 root dial 4, 67 Jul 5 2000 /dev/ttyS3 If you are interested in knowing how high-order device numbers are assigned, look in the /usr/src/linux/documentation/devices.txt file.
mknod. , «coffee», 12 2, mknod /dev/coffee c 12 2. /dev, , . , , , — . — , .
, , . , , , . , . , — . , .
, «», , , PCI , . :
% ls -l /dev/fd0 /dev/fd0u1680 brwxrwxrwx 1 root floppy 2, 0 Jul 5 2000 /dev/fd0 brw-rw---- 1 root floppy 2, 44 Jul 5 2000 /dev/fd0u1680 , — , ( 2). , , , . ? , , 1.44 . — , 1.68 , , «» («superformatted» disk). , - . , , , . , «», , .
Create a device file
We will use a character device driver file. In order not to retell the book Linux Device Driver, as well as to simplify your life, I took a ready-made example of registering the character driver from this article. This article does not search for a free fixed minor, but uses a dynamic minor. For us, that's the thing.
So, the module will now look like this: working with the screen that we have implemented above remains unchanged, but we rewrite the rest of it from scratch.
We define the file_operations structure
static const struct file_operations lptlcd_fops = { .owner = THIS_MODULE, .read = dev_read, .write = dev_write, }; Where dev_read and dev_write are pointers to functions (callback registration) that will handle read and write from the device file, respectively. Here you can still, yes, and probably need to add .open and .release pointers to check for a single opening and closing of the device file, but I'm still lazy.
To register the driver, we start this structure
static struct miscdevice lptlcd_dev = { MISC_DYNAMIC_MINOR, "lptlcd", &lptlcd_fops }; where MISC_DYNAMIC_MINOR is a macro for the dynamic minor, the string "lptlcd" is the name of the device, as it will appear in the / dev / folder (in our case it will be / dev / lptlcd), & lptlcd_fops is a pointer to the file_operations structure.
The driver registration code is also very simple.
static int __init dev_init( void ) { int ret; // ret = misc_register( &lptlcd_dev ); // if( ret ) printk( KERN_ERR "=== Unable to register misc device\n" ); // LCD_init(0, LCD_COLUMNS, LCD_STRINGS); print_to_string (0, 0, "lptlcd init " , 16); return ret; } Device deregistration is simple:
static void __exit dev_exit( void ) { misc_deregister( &lptlcd_dev ); } Well, do not forget the macros installation of cones, license, author and version
module_init( dev_init ); module_exit( dev_exit ); MODULE_LICENSE("GPL"); MODULE_AUTHOR( "Dolin Sergey <dlinyj@gmail.com>" ); MODULE_VERSION( "0.1" ); The magic begins in the dev_read and dev_write functions. I'll start with the first
static char *info_str = "lcdlpt device driver\nAuthor Dolin Sergey aka dlinyj dliny@gmail.com\n"; // buffer! static ssize_t dev_read( struct file * file, char * buf, size_t count, loff_t *ppos ) { int len = strlen( info_str ); if( count < len ) return -EINVAL; if( *ppos != 0 ) { return 0; } if( copy_to_user( buf, info_str, len ) ) return -EINVAL; *ppos = len; return len; } It does the following: if we produce a reading of the device file, for example:
cat /dev/lptlcd Then we will see the line behind the info_str pointer.
The code is so obvious that I hope it does not need comments. The only thing is that the copy_to_user function along with the copy_from_user function is used to copy data between user and kernel address spaces.
The other function is dev_write, which is what shoves the data on the screen.
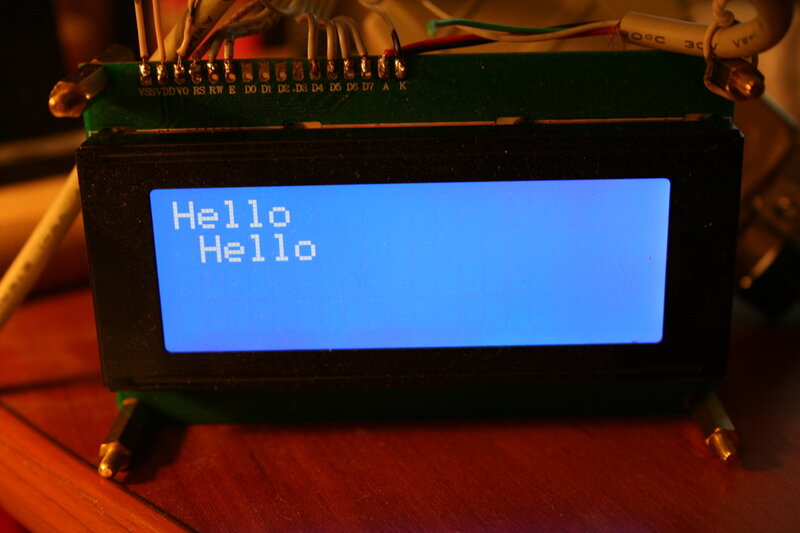
static int str_pos = 0; // static int col_pos = 0; // static ssize_t dev_write( struct file *file, const char *buf, size_t count, loff_t *ppos ) { int i; // . for (i=0; i<count;i++) { // setCursor(col_pos, str_pos); // , if ((col_pos==0) && (str_pos==0)) clear(); // , if (buf[i] != '\n') { write_l(buf[i]); col_pos++; } // , else {col_pos=LCD_COLUMNS;} // if (col_pos == LCD_COLUMNS) { col_pos=0; str_pos++; // , if (str_pos == LCD_STRINGS) { str_pos=0; } } } return count; } In my opinion, do not add or remove. I hope everything is clear.
We compile, add the module to the kernel and see that we have a file:
$ ls /dev/lptlcd /dev/ttylptlcd We try to read from it and write something down:
$ cat /dev/lptlcd lcdlpt device driver Author Dolin Sergey aka dlinyj dliny@gmail.com echo -ne "Trolo Pysh\nPysh" > /dev/lptlcd And we’ll see this:

I’m a UFO driver.
Everything, we now have a fully working driver with a reciprocating device! Congratulations, you can run to the storage shed for champagne, and then in the user space under the magic bubbles to write programs that work with this device.
But still I personally have some doubts, here is something wrong ...
Want MORE !!!
So, now we have written quite a working driver, which can already be used in everyday practice. Display any text on it, even text from a file, to use in your programs. But there is a feeling of incompleteness, imperfection.
If you take and read any documentation on the screen, for example, an article that DIHALT wrote about initializing the display for the AVR , then you will be surprised by the wealth of possibilities. For example:
1. You can load text into memory, and then simply move the visible area, saving time for loading new data (as we remember, we have great delays).
2. You can display the text in any position.
3. You can clear the screen.
4. And of course, you can upload your own fonts. Do not flatter yourself about this, only 8 characters are available. For example, the task of implementing a Russian menu with this screen without a Russian font, with Latin letters and partially loaded Russian (8 characters), turns into a quite entertaining rebus for the whole department (was, floated). So this is used for some specific characters.
I found a good example of using the ability to download fonts on a coffee machine at work, in which a similar screen is just installed, just Russified.

The screen on the coffee machine
Here you can clearly see the use of symbols:
- two symbols for sugar, an empty circle (did not guess to remove) and a full one;
- five characters of a running line (in a symbol of 5 columns).
Total 2 + 5 - there is only one spare character, which is also probably used. Do not really run away.
In general, the display has enough chips, so much that I am already lazy to read in the documentation. But, as we see, we cannot do all this for now. And at this wonderful moment it is time to get my piano out of the bushes, which is already there a long time ago.
Before I started the implementation of this idea (even before I started buying parts), I googled, and did someone do something like that. And, about a miracle (!), Such a driver already exists. Wrote itMichael McLellan and dwells the driver here .
Honestly, this driver made a mixed impression on me. Let's say it has become a valuable tool, how to NOT write drivers - rewriting it under a different inclusion scheme will be a nontrivial task, as there is a dull record of bytes, and which ones, where and why is not clear. Portability is missing as a class. A bunch of define-s for different cores endure mosk. Plus, the driver was originally conceived under the full wiring scheme (8 bits per data port, see the lcd-mod.sourceforge.net/wiring.php scheme), and I was immediately focused on a 4-bit bus. Though it is slower (about two times, because a byte is sent by two parcels), but firstly, it will be less soldering, and secondly - it will not be necessary to look for other ports. And thirdly, I already had an excellent and logical code for a 4-bit bus. As a result, I decided to write my own driver from scratch, telling me how to do it.
Okay, to hell with lyrics. There is an invaluable thing in that driver - it is processing of control or ESC sequences. If you bother and swing this “grand piano”, then you can find all sorts of readme and how-that there. Also at the office there is a fact. So that you do not have to climb all this data, I decided to put everything in one heap and in Russian. First, a few words about these sequences, you all came across them when the printf operator was added a line break in the form of '\ n' - this is the simplest ESC sequence, which is interpreted as the character 0Ah in ASCII. The same parsley lies in the management of this display.
So, control sequences for our screen:
- \ 033 = Sending an ESC sequence from which commands begin.
- [A = Move cursor one line up
- [B = Move cursor one line down
- [C = Move the cursor one position to the right.
- [D = Move the cursor one position to the left
- [H = Move the cursor to the upper left corner - home (position 0.0)
- [J = Clear all, does NOT return the cursor home!
- [K = Erases to the end of the line, does NOT return the cursor home!
- [M = New Character Map (DZ - explain why!)
- [Y = Position Y (see FAQ below)
- [X = Position X (see FAQ below)
- [R = CGRAM memory selection
- [V = Scroll Enabled
- [W = Scrolling off
- [b = Backlight on / off (will not work with us).
Other useful commands work without the \ 033 prefix!
- \ r = Carriage return (return the cursor to position 0 on the current line!)
- \ n = New line
- \ t = Tab (default 3 characters)
The idea seemed to me very cool, and I brazenly decided to borrow this function in our project.
By the way, all these sequences work wonderfully in a conventional console, they can be used when displaying text.
Who has not yet understood what it is and why, then he described lcd-mod.sourceforge.net/faq.php here in more detail . In order not to suffer, I freely translated it and carefully put it in the spoiler with pictures
FAQ
Q. , , ?
A. , vt52- ru.wikipedia.org/wiki/VT52 , . , ASCII . , — '\r' '\n' (. ). , :

“Line One” “Line Two” . , “echo” :
-n — '\n'
-e —
Q. , ?
A. . For example:
(. )
Q. , , n n- , n-1 , ?
A. , “echo”. , '\n' . -n, .
Q. ?
A. : ESC-Y[Y-+037][X-+037]. For example:

Hello 0:0
, “Hello”;
, 1, 1;
Hello 1:1 ( )
, 2, 2

Hello 2:2 ( , )
“037” , , , vt52 ( :) )..
Q. ?
A. HD4480 , . GUI , ( ). , . , .
, : Esc-R[ ][8 , ]. , 5 . . For example:
1, . , .

0 .

«» , :

, .
A. , vt52- ru.wikipedia.org/wiki/VT52 , . , ASCII . , — '\r' '\n' (. ). , :
echo -en "Line One\r\nLine Two" > /dev/lptlcd “Line One” “Line Two” . , “echo” :
-n — '\n'
-e —
Q. , ?
A. . For example:
echo -en "line1\r\nline2" > /dev/lptlcd (. )
Q. , , n n- , n-1 , ?
A. , “echo”. , '\n' . -n, .
Q. ?
A. : ESC-Y[Y-+037][X-+037]. For example:
echo -en "\033[Y\037\037Hello" > /dev/lptlcd Hello 0:0
, “Hello”;
echo -en "\033[Y\040\040Hello" > /dev/lptlcd , 1, 1;
Hello 1:1 ( )
echo -en "\033[Y\041\041Hello" > /dev/lptlcd , 2, 2
Hello 2:2 ( , )
“037” , , , vt52 ( :) )..
Q. ?
A. HD4480 , . GUI , ( ). , . , .
, : Esc-R[ ][8 , ]. , 5 . . For example:
echo -en "\033[R1\037\037\037\037\037\037\037\037" > /dev/lptlcd 1, . , .
echo -en "\033[R2\037\000\037\000\037\000\037\000" > /dev/lptlcd 0 .
«» , :
echo -en "\000\001\002\003\004\005\006\007" > /dev/lptlcd , .
In general, as you can see, the dev_write function needs to be rewritten. And she now began to look like this:
static ssize_t dev_write( struct file *file, const char *buf, size_t count, loff_t *ppos ) { int i; for (i=0; i<count;i++) handleInput(buf[i]); return count; } And the handleInput function took all the dirty work of debriefing. The code of this function is monstrous, so I will not give it here. I'll leave it to you on your homework to sort it out and find the backdoor. Who will find the Easter egg in the code, be noted in the comments, to that sweetie.
For priming backdoor vidos (it is implemented in the driver)
ASCII-ART Move! Easter
egg starts! Those who show me a similar vidos on their screens will receive a gift from me!
In general, as a result, we got a kosher screen, which can be used to display various useful and useless information. Here, for example, you can display the current time on it.
while true; do echo -en "\033[H`date +\"%d.%m.%Y\"` \r\n`date +%r`" > /dev/lptlcd ; sleep 1s; done 
And they still go!
Of course, I wrote - share it with the people! Source codes are available by reference (I’m still not going to use the github for code exchange, shame).
What I would like to do
Just because the screen on the table is little clear why you need it, it's true. Especially in the age of tablets and other equipment. When everything can be redirected to your smartphone. Another thing is that the New Year is coming soon, and I remember one wonderful New Year's device - a Christmas tree on the lpc2104

Embedded Artists Cristmas Tree processor.
You shouldn't google this device, all references to it are removed even from the official site, and rare references to it are difficult to find even in the open spaces the internet.
I even took a video of the work of this Christmas tree
How the Embedder Christmas Tree Works
In addition to the cheerful blinking of lights, this funny device had a cool feature - it was possible to correspond with other owners of such Christmas trees. There was a certain sideboard, where through a special form it was possible to drive a message and it was sent out by Christmas trees and displayed on the screen. It was very, very cool and fun.
Now attention: idea! Now nothing prevents to pay 500 rubles for a month (and if we throw off, the amount will be quite small), and rent a server on a virtual machine. There put a programmer who will send messages. Either jabber or some other methods (but at least nc and telnet do everything). And on the computer to put the receiver of these messages. And on the New Year we all will have congratulations.
Who is ready to help realize this, and who will make such screens for themselves? If we have at least three people, it will be very, very fun! Join the developer community :)))). I will listen to ANY ideas!
Total
I'll be brief. This post, I set a goal not to retell the book Linux Device Drivers, but simply to show that writing firewood is a trivial task. I deliberately left the USB, because there is a lot of theory, pitfalls and other hemorrhoids. But you can easily rewrite this module for USB-LPT-laces, such as this

is done relatively simply: the exchange protocol with usb is intercepted and implemented in your program. Believe me - it's easy. It will be interesting how - I'll tell you!
And this driver, by changing the entire ONE (!!!) output line to the port, can be rewritten for use, for example, on the Raspberry Pi on the GPIO port. I will not tell you exactly what to write, but everything is solved by reading the datasheet by the percentage used and it takes only a few minutes.
Thanks:
1. I want to express my main gratitude to my teacher Boronin Sergey Sergeevich sboronin for teaching programming under linux and an excellent course of developing drivers for linux. Thanks to his courses, I am a very successful developer.
2. Comrade Ariman with his wonderful series of articles about the development of the display for the router ( first , second , third part (and the fourth was promised ...)). This series, albeit a very specific one, perfectly illustrates the creation of a device and the writing of appropriate drivers for it. And I repeatedly turned to it as a source of invaluable information, both in driver development and in the development of modules for OpenWRT.
3. Of course, Greg Kroah-Hartman, author of the book “Linux Device Driver” . This book is just a bible, and in the core you can often find drivers that are based on examples of it. For example, in USB drivers I met this:
/drivers/usb/misc/idmouse.c
...
Derived from the USB Skeleton driver 1.1,
Copyright © 2003 Greg Kroah-Hartman (greg@kroah.com)
...
And so in many drivers. So, use the book - this is the bible.
4. Michael McLellan author of a similar driver. As he says in his driver:
LCD driver for * HD44780 compatible displays the connected to the parallel port,
* Because real men use device files is.
Unfortunately, I do not have his coordinates, except for the link to linkedin . Mail from its programs no longer works. So, how can I personally thank him, I don’t know ... If someone writes him, I will be very grateful.
Links
1. Sources of my rootfs program working with a display swing
2. Sources of my kernel module, which we sorted out in this post swing
3. “Grand piano in the bushes”
4. dmilvdv.narod.ru/translate.html Translations of articles. Handbook - Linux Device Drivers, Third Edition ".
5. An excellent library of articles on programming in Russian from IBM lives here . Specifically on the development of kernel modules
6. Description of the HD44780 display (for AVR, but in general it is universal) easyelectronics.ru/avr -uchebnyj-kurs-podklyuchenie-k-avr-lcd-displeya-hd44780.html
7. Display programs (kernel module and spectrum analyzer for this module) by Michael McLellanlinux.downloadatoz.com/developer-michael-mclellan.html
PS Do not shoot the pianist, he plays as best he can. Such an enormous article in my innate illiteracy cannot be written normally. Be sure to send me comments, edits, and additions, I will be very grateful !!!
PPS Nothing warms the soul like a comment left.
PPPS The text also has Easter eggs, who will find - that sweetie;)))
UPD So I created a group , for the messenger who want to participate :)
For participants who wish, please join :)))
Source: https://habr.com/ru/post/206148/
All Articles