Install SteamOS on a virtual machine
This Saturday in the morning on Habré there was news about the release of SteamOS. Valve offers users 2 installation options: restore from an image (2.4Gb) and use the Debian Installer (960Mb). There are also links to brief instructions for each installation method. In this small article I want to tell you how to install SteamOS on a virtual machine.
We will install using the Debian Installer. In fact, this method is not particularly difficult when using an unattended installation.
First we need to download the installer itself and VirtualBox directly.
The installer needs to unpack and make an ISO image of it. How - decide for yourself, in this case it does not matter.
After that we create a virtual machine for 64-bit Debian:
In the settings you need to enable EFI and 3D acceleration. Highlight the operational and video memory, I personally used 2GB of operational and 128MB of video. The installer image is mounted in the virtual machine drive.
Settings in pictures for those who are not familiar with virtualbox
one:

2:

3:

four:

2:
3:
four:
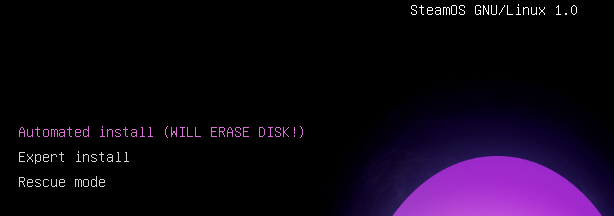
We start the virtual machine, we do not pay attention to the error "prefix is not set". After a short delay, grub should start, from which you can run an automatic installation. Before starting the installation, grub will lower a bit, do not panic.
The installation really takes place completely in automatic mode, so you can distract from the process for a while. Personally, my installation took about 30 minutes.
')
After installation, boot into the recovery and set VboxAdditions:
- We connect the disk image of the add-ons (Host + D or via the menu. For those who do not know, the host key is written in the lower right corner of the virtual machine screen, by default - Right Ctrl)
- Create a folder to mount the disk:
mkdir ~/vboxadds/ - We look id cd-rom'a:
ls /dev/disk/by-id/ - Directly mount:
mount /dev/disk/by-id/ata-[cdrom id] ~/vboxadds/. - Go to the folder vboxadds
cd ~/vboxadds/and run the installation./VBoxLinuxAdditions.run - reboot:
reboot
After rebooting the system, we see the Debian login window: log in to the system through the “steam” account (login:
steam , pass: steam ), use Gnome as the shell.We start steam through the terminal (since it refuses to start from the menu, at least for me):
steam . Next, we accept the agreement and wait until steam is updated. We go into your Steam account, specifying the confirmation code and remembering the computer.We close steam and log out of the account in the system, go to the desktop account (login:
desktop pass: desktop ). Open the terminal and execute the ~/post_logon.sh .After working off the script, the system will automatically reboot and try to perform Capture System Partition. Why I need it, I do not know, but in any case, this process will end badly and we will again get into the grub. From it, you can immediately boot into SteamOS recovery mode and reinstall VboxAdditions: you don’t need to create a folder, just plug in the disk, mount it, execute the script and reboot.
This time, the full SteamOS will be loaded. For some reason, when I first started, I always had problems with the network, so if necessary, reboot again.
Few screenshots
Main screen:

Browser:

Desktop:

Browser:
Desktop:
Also, after restarting the virtual machine, the UEFI Interactive Shell will be loaded instead of grub. You can start grub from it with the command
FS1:\EFI\steamos\grubx64 (instead of FS1 it can be FS0).Source: https://habr.com/ru/post/206098/
All Articles