Character drawing in vector
Did you draw a character on paper and now you need to draw it in a vector? Then this lesson is for you.

So let's get started.
1. The first thing you need to scan (take a picture) picture. Then you need to import it into CorelDraw. Select the menu item file -> Import ... and specify the path to the scanned (photographed) file.
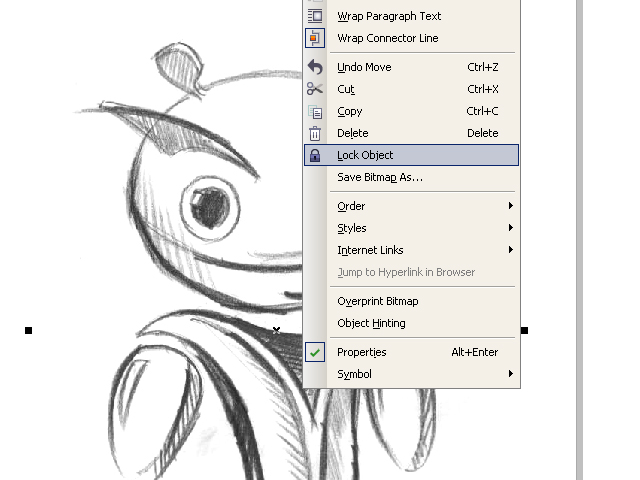
2. Place the imported file in the working area of the document and right-click on the object, select the item Lock Object . This action will block the object, which will make the operation more convenient.
')
Now, using the Ellipse and Bezier tools, we outline the body parts of our character along the contour.
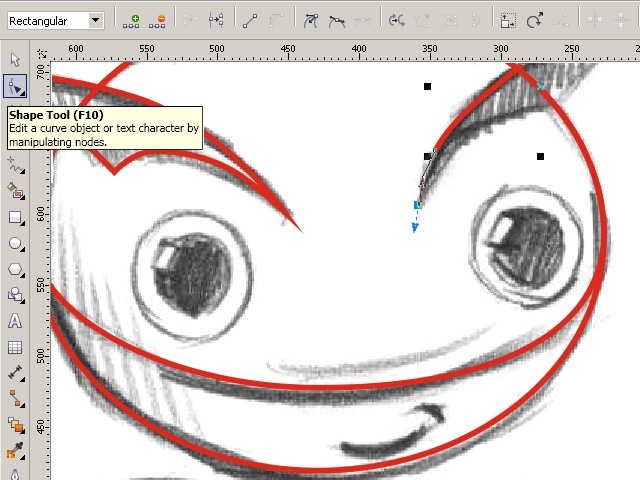
If you recently use CorelDraw or the Bezier tool, and the contours are not quite even - no big deal. Use the ShapeTool tool and edit point by point. You can change the type of the reference point either by clicking on it with the right mouse button and selecting the desired type, or by selecting the point and changing its type in the Property Bar .
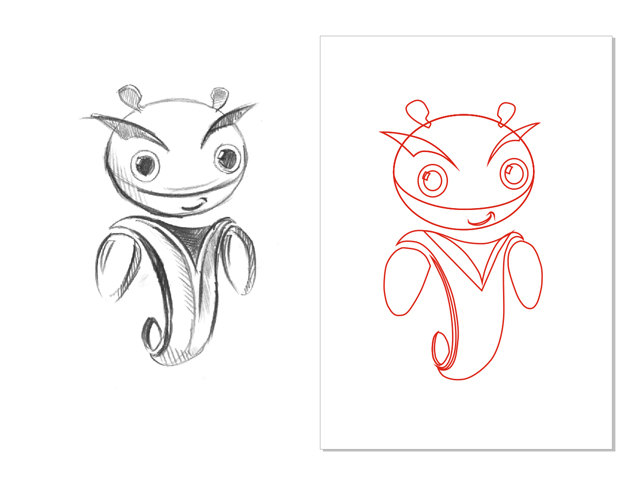
3. Here is our hero already drawn. In the contours, we now remove the scanned pattern so that it does not interfere with perception. Click on it with the right mouse button and select Unlock Object , then move the drawing to the side.
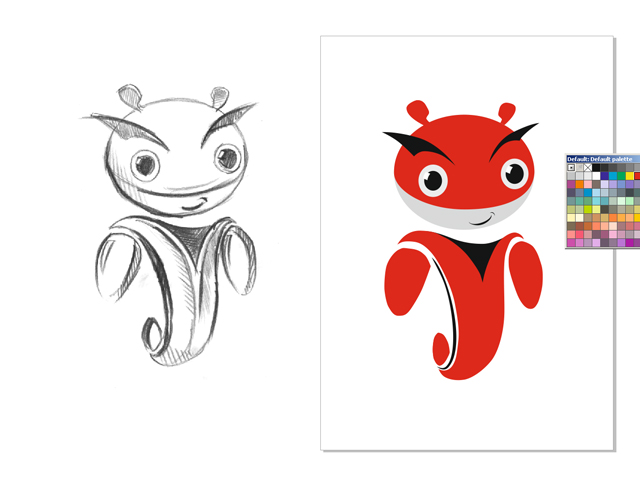
The next step is to fill with color. Select body parts and fill with the desired color by left-clicking on a color pattern to change the fill and right-click to change the outline.
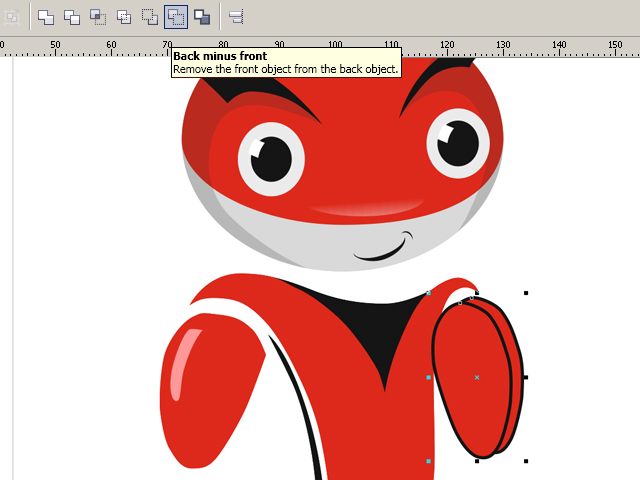
4. Now the character is colored, but looks flat and uninteresting. To give volume let's draw our own shadows and highlights. Usually the illumination is taken from the left-top, so the shadows will be on the right-bottom, and the glare on the left-top. Shadows and highlights are created by the Bezier tool we already know. Or you can use another technique. For example, to make a shadow on a hand, we duplicate the hand itself twice and shift the top duplicate to the left, so that a part of the bottom duplicate becomes the size of the shadow. Next, select both duplicates and in the Property Bar select the Back minus front manipulation.
The resulting shadow set the color a little darker than the main. Glare made on the same principle, only the color must be set lighter than the main.
Remember! When creating shadows on objects of complex shape, the shape of the shadow should follow the shape of the object. For example, on the head the shadow in some places the shadow will pass like meridians on the globes.
When the shadows and highlights are placed, there remains a small touch - a drop shadow. To do this, draw an oval with the Ellipse tool and use the Drop Shadow tool to create a drop shadow. Adjust the shadow parameters in the Property Bar .
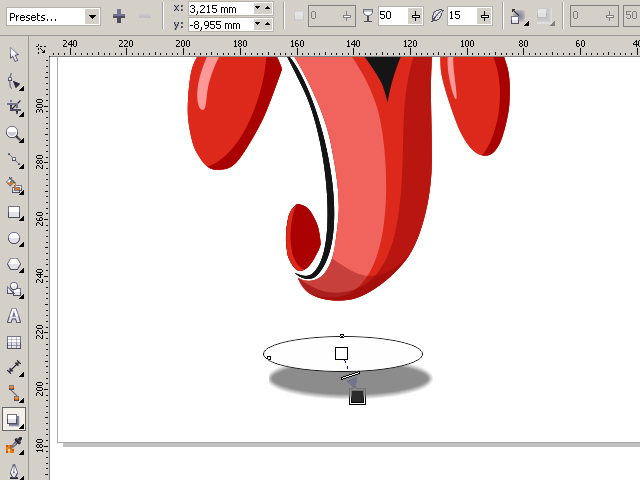
From the group oval + shadow, we need only the shadow. To remove the oval, open the Windows-> Dockers-> Object Manager palette, right-click on the oval + shadow group and select Break Drop Shadow . Remove the oval, place the shadow under the character.
The character is ready!

5. It remains to save the image in raster format for easier viewing. Select the menu item File-> Export ..., give the name of the file, specify the file type, for example jpg. In the next dialog box, specify the RGB color scheme and click Ok.
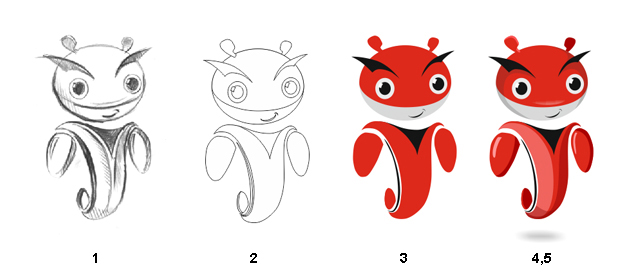
To consolidate the lesson materials repeat the drawing steps
1. Scanning the picture. Import to CorelDraw
2. Drawing contours
3. Fill color
4. Giving volume
5. Export to raster file type
Guided by these simple rules, you can create very high-quality work. Remember that Corel products are not only designed to entertain or unleash their creative potential, it’s also a handy professional tool with which you can earn. The character of this lesson was created in CorelDraw for the competition, which was announced by one very large automaker. Our hero managed to reach the final. So fill your hand and go for it!
Good luck to all.
Viktor Sokolov
So let's get started.
1. The first thing you need to scan (take a picture) picture. Then you need to import it into CorelDraw. Select the menu item file -> Import ... and specify the path to the scanned (photographed) file.
2. Place the imported file in the working area of the document and right-click on the object, select the item Lock Object . This action will block the object, which will make the operation more convenient.
')
Now, using the Ellipse and Bezier tools, we outline the body parts of our character along the contour.
If you recently use CorelDraw or the Bezier tool, and the contours are not quite even - no big deal. Use the ShapeTool tool and edit point by point. You can change the type of the reference point either by clicking on it with the right mouse button and selecting the desired type, or by selecting the point and changing its type in the Property Bar .
3. Here is our hero already drawn. In the contours, we now remove the scanned pattern so that it does not interfere with perception. Click on it with the right mouse button and select Unlock Object , then move the drawing to the side.
The next step is to fill with color. Select body parts and fill with the desired color by left-clicking on a color pattern to change the fill and right-click to change the outline.
4. Now the character is colored, but looks flat and uninteresting. To give volume let's draw our own shadows and highlights. Usually the illumination is taken from the left-top, so the shadows will be on the right-bottom, and the glare on the left-top. Shadows and highlights are created by the Bezier tool we already know. Or you can use another technique. For example, to make a shadow on a hand, we duplicate the hand itself twice and shift the top duplicate to the left, so that a part of the bottom duplicate becomes the size of the shadow. Next, select both duplicates and in the Property Bar select the Back minus front manipulation.
The resulting shadow set the color a little darker than the main. Glare made on the same principle, only the color must be set lighter than the main.
Remember! When creating shadows on objects of complex shape, the shape of the shadow should follow the shape of the object. For example, on the head the shadow in some places the shadow will pass like meridians on the globes.
When the shadows and highlights are placed, there remains a small touch - a drop shadow. To do this, draw an oval with the Ellipse tool and use the Drop Shadow tool to create a drop shadow. Adjust the shadow parameters in the Property Bar .
From the group oval + shadow, we need only the shadow. To remove the oval, open the Windows-> Dockers-> Object Manager palette, right-click on the oval + shadow group and select Break Drop Shadow . Remove the oval, place the shadow under the character.
The character is ready!
5. It remains to save the image in raster format for easier viewing. Select the menu item File-> Export ..., give the name of the file, specify the file type, for example jpg. In the next dialog box, specify the RGB color scheme and click Ok.
To consolidate the lesson materials repeat the drawing steps
1. Scanning the picture. Import to CorelDraw
2. Drawing contours
3. Fill color
4. Giving volume
5. Export to raster file type
Guided by these simple rules, you can create very high-quality work. Remember that Corel products are not only designed to entertain or unleash their creative potential, it’s also a handy professional tool with which you can earn. The character of this lesson was created in CorelDraw for the competition, which was announced by one very large automaker. Our hero managed to reach the final. So fill your hand and go for it!
Good luck to all.
Viktor Sokolov
Source: https://habr.com/ru/post/205196/
All Articles