Writing a plugin for CKEditor 4
CKEditor is a WYSIWYG HTML editor for browsers. Whenever I came across his documentation or his source code, I was lost with the source code of his plugins. And this is not surprising, because CKEditor is a very large product with a rather complex infrastructure. But, often, the standard features are not enough and you need to add your own. In this article I would like to highlight the plugin that allows you to embed and operate in the editor Yandex-maps.
This is how it will look at the end of editing:
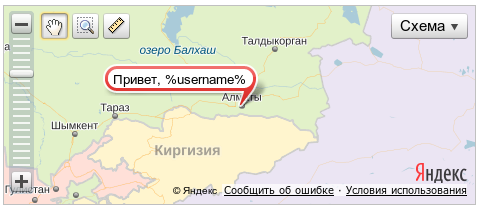
And this is in edit mode:

')
So. Let's define how we want to see the future tool in the work. It is necessary that the card can be embedded in the document, removed from it and it was possible to change any of its parameters. Since manipulating <script /> - in HTML editing mode is at least a trivial task, then we will use the standard plugin “fakeobjects”, which allows us to replace our HTML with something more handy, or rather <img />, while editing. (fakeobjects use them). Among other things, we will need the “dialog” plugin to edit the map settings. Immediately, I note that the plugin will turn out pretty primitive, because I had no task to do anything complicated. The plugin will allow you to place a map using the values of 2 coordinates (latitude and longitude), scale (1-17), will be able to place a label on the map, as well as text with a description below the map.
Since Yandex maps are dynamically connected objects, and embedding unnecessary <script /> - s, with or without, a thankless job, at the output I will receive the following HTML code: <em data-plugin = "- json_data -"> MAP < / em>. And with the help of a simple javascript function, turn the <em />carriage into a map using the YandexMap API.
I want to note that in many respects I relied on the work of the standard “Flash” plug-in, so some of the things I use are not completely understood by me. Largely due to the inadequate documentation, partly due to my incompetence. I made most of the conclusions based on the source code, and partly on the base of answers in StackOverflow .
For convenience, we place all the plugin code inside a self-executing anonymous function:
To add a plugin to the system, use:
More about init:
The most important point is the definition of allowedContent when creating a new team. The fact is that in CKEditor 4 they added a new system - “Allowed Content Rules”. This system fights incorrect HTML code (for example, when inserted from the outside). It removes unnecessary tags, attributes, styles, and classes from the HTML code. And in order for the system to make it clear what is superfluous and what is not, when registering commands, we specify an object that can contain the allowedContent and requiredContent fields. The task of the first is to request opportunities, the task of the second is to disable the command if there are not enough opportunities. I only had the use of allowedContent. The principles of its work can be found here . I will focus on the most basic:
A separate moment with localization. You are free to organize it as you prefer, I settled on the following approach:
In the code of this function, we will add our own to the editor filters, which, when switching from source mode (or just when the editor is initialized) to edit mode, will allow us to replace the real code with fakeobject:
Function to check if the item is a "map"
Fukntion to turn em into fakeobject:
Under the stretchability should be understood the possibility of having the object width and height. If false is specified, fakeobject does not inherit the width and height of the source element.
Here we come to the most important thing - to the dialogue. It is almost everything. It is described as follows:
Well, now in order. Let's start with the components:
Components can specify the following handlers:
The id field is used as the component identifier, not as an attribute. You can see all types of ready validators in the CKEDITOR.dialog.validate object.
As you might guess, this method will be called when the dialog is displayed. Our task in it is to do all the preparations and fill in the field values, if our fakeobject was allocated before the call.
Setup function (for components):
This function is called when the user clicks the “Ok” button in the dialog, and at the same time all the fields did not contain errors. The most important of all our functions :) In it, we create and manipulate fakeobjects, as well as create the final EM.
The commit function of components (invoked by us with commitContent):
I’ll note that if the object’s width and height fields are supposed to be present, then they must be used, otherwise the allowedContents :( may fall off
In CSS, we need to specify the appearance for EM and for IMG-fakeobject. The appearance for the EM-ki is set in the styles of your site, and the appearance of the IMG in the styles that connect to the editor. They can be set via JS, using:
The plugin as a whole was not difficult. The reason for this is the presence of the fakeobject plugin and the fact that we work with one block object. I believe that working with inline tags is much more difficult, because the user can select text so that different parts of the contents of different tags get into it. However, I did not try :)
If desired, we can connect a context menu to our plug-in, add fields (for example, allow us to specify multiple labels, not just one), a preview panel, and much more.
The plugin is located here (github). The repository also contains an example of connecting to YandexMaps. But, in fact, you can use any other online-card service.
This is how it will look at the end of editing:
And this is in edit mode:
')
Principle of operation
So. Let's define how we want to see the future tool in the work. It is necessary that the card can be embedded in the document, removed from it and it was possible to change any of its parameters. Since manipulating <script /> - in HTML editing mode is at least a trivial task, then we will use the standard plugin “fakeobjects”, which allows us to replace our HTML with something more handy, or rather <img />, while editing. (fakeobjects use them). Among other things, we will need the “dialog” plugin to edit the map settings. Immediately, I note that the plugin will turn out pretty primitive, because I had no task to do anything complicated. The plugin will allow you to place a map using the values of 2 coordinates (latitude and longitude), scale (1-17), will be able to place a label on the map, as well as text with a description below the map.
Since Yandex maps are dynamically connected objects, and embedding unnecessary <script /> - s, with or without, a thankless job, at the output I will receive the following HTML code: <em data-plugin = "- json_data -"> MAP < / em>. And with the help of a simple javascript function, turn the <em />
I want to note that in many respects I relied on the work of the standard “Flash” plug-in, so some of the things I use are not completely understood by me. Largely due to the inadequate documentation, partly due to my incompetence. I made most of the conclusions based on the source code, and partly on the base of answers in StackOverflow .
Creating a plugin
For convenience, we place all the plugin code inside a self-executing anonymous function:
function() { /* code */ } )(); To add a plugin to the system, use:
CKEDITOR.plugins.add( 'ymap' /* */, // { // requires: [ 'dialog', 'fakeobjects' ], // init: function( editor /* - */ ) { }, // , API afterInit: function( editor ) { } } ); More about init:
this._initTranslations( editor ); // , var req = 'em' /* tag */ + '[!data-plugin,!width,!height]' /* attrs */ + '(' + ymap_class_name + ')' /* classes */ + '{width,height}' /* styles */; // editor.addCommand( 'ymap', new CKEDITOR.dialogCommand( 'ymap', { allowedContent: req } ) ); // editor.ui.addButton( 'YMap', { label: lang.button_label, command: 'ymap' } ); // CKEDITOR.dialog.add( 'ymap', add_dialog /* , */ ); // - // fakeobject - editor.on( 'doubleclick', function( evt ) { var element = evt.data.element; if( element.is('img') && element.data('cke-real-element-type') == 'ymap' ) { evt.data.dialog = 'ymap'; } } ); The most important point is the definition of allowedContent when creating a new team. The fact is that in CKEditor 4 they added a new system - “Allowed Content Rules”. This system fights incorrect HTML code (for example, when inserted from the outside). It removes unnecessary tags, attributes, styles, and classes from the HTML code. And in order for the system to make it clear what is superfluous and what is not, when registering commands, we specify an object that can contain the allowedContent and requiredContent fields. The task of the first is to request opportunities, the task of the second is to disable the command if there are not enough opportunities. I only had the use of allowedContent. The principles of its work can be found here . I will focus on the most basic:
- The value is a string that can consist of 4 parts: tags, attributes, styles, and classes. Example: “p [data-role] {text-align} (tip)”
- Attributes that are mandatory for support must be specified through "!". Example: "[! Width]"
- The principle of operation is somewhat not obvious, I did not manage to figure it out. Periodically, I dropped support for attributes and classes. The treatment was nontrivial. May the force be with you!
A separate moment with localization. You are free to organize it as you prefer, I settled on the following approach:
var translations = { ru: { fake_object_label: 'Yandex ', title: 'Yandex ', // ... }, en: { fake_object_label: 'Yandex Map', title: 'Yandex Map', // ... }, def: 'ru' }; var lang; // shotrcut // ... CKEDITOR.plugins.add( 'ymap', { // ... _initTranslations: function( editor ) { var current_lang = CKEDITOR.lang.detect(); CKEDITOR.lang[ current_lang ]['ymap'] = translations[ current_lang ] ? translations[ current_lang ] : translations[ translations.def_lang ]; lang = editor.lang.ymap; // fakeobject editor.lang.fakeobjects.ymap = lang.fake_object_label; }, // ... } ); afterInit
In the code of this function, we will add our own to the editor filters, which, when switching from source mode (or just when the editor is initialized) to edit mode, will allow us to replace the real code with fakeobject:
afterInit: function( editor ) { // var dataProcessor = editor.dataProcessor, dataFilter = dataProcessor && dataProcessor.dataFilter; if( dataFilter ) { // dataFilter.addRules ( { // elements: { // em. // , inline-, // CKEditor- // P- 'em': function( el ) { // em - Ymap, if( ! is_plugin_node( el ) ) { for( var i = 0 ; i < el.children.length; ++ i ) { if( el.children[ i ].name === 'cke:ymap' ) { if( ! is_plugin_node( el.children[ i ] ) ) { return null; // } // fakeobject return create_fake_element( editor, el ); } } return null; // } // - fakeobject return create_fake_element( editor, el ); } } }, 1 /* */ ) } // if dataFilter } Function to check if the item is a "map"
var is_plugin_node = function( el ) { return el.attributes['class'] === ymap_class_name; }; Fukntion to turn em into fakeobject:
var create_fake_element = function( editor, real_el ) { // , IMG, , return editor.createFakeParserElement( real_el, 'cke_ymap', 'ymap', true ); }; Under the stretchability should be understood the possibility of having the object width and height. If false is specified, fakeobject does not inherit the width and height of the source element.
Dialogue
Here we come to the most important thing - to the dialogue. It is almost everything. It is described as follows:
var add_dialog = function( editor ) { var dialog = { title: lang.title, // // width: 300, height: 100, // — , , … contents: [ ], // onShow: function(){}, onOk: function(){} }; return dialog; }; Well, now in order. Let's start with the components:
{ // , , 1, id: 'tab_info', expand: true, padding: 0, elements: [ { // id: 'name', type: 'text', label: lang.f_name, commit: commit, setup: load }, { // id: 'label', type: 'text', label: lang.f_label, commit: commit, setup: load }, { // . type: 'hbox', align: 'left', children: [ { // latitude id: 'lon', type: 'text', label: lang.f_lat, commit: commit, validate: CKEDITOR.dialog.validate .regex( /^[\d\,\.]+$/, lang.inc_coord ), setup: load, 'default': '43.2503' }, // … Components can specify the following handlers:
- “Commit” - called when collecting values
- “Setup” - called when setting values
- "Validate" - used to validate the value
The id field is used as the component identifier, not as an attribute. You can see all types of ready validators in the CKEDITOR.dialog.validate object.
onShow
As you might guess, this method will be called when the dialog is displayed. Our task in it is to do all the preparations and fill in the field values, if our fakeobject was allocated before the call.
// this.fake_image = this.ymap_node = null; // - var fake_image = this.getSelectedElement(); // ... if( fake_image && fake_image.data( 'cke-real-element-type' ) === 'ymap' ) { this.fake_image = fake_image; // EM- ( , // ) this.ymap_node = editor.restoreRealElement( fake_image ); // .. JSON "data-plugin", // cfg var cfg = JSON.parse( this.ymap_node.getAttribute('data-plugin') ) // setup . // setup- , // . cfg this.setupContent( cfg ); } Setup function (for components):
var load = function( cfg ) { // - cfg // data-plugin // ( :) ) this.setValue( cfg[ '_' + this.id ] ); }; onOk
This function is called when the user clicks the “Ok” button in the dialog, and at the same time all the fields did not contain errors. The most important of all our functions :) In it, we create and manipulate fakeobjects, as well as create the final EM.
// this.fake_image onShow, // fakeobject // , // if( ! this.fake_image ) { // EM- var node = CKEDITOR.dom.element .createFromHtml( '<cke:em>MAP</cke:em>', editor.document ); // node.addClass( ymap_class_name ); } else { // // EM- , // onShow // restoreRealElement var node = this.ymap_node; } // var extra_styles = {}, extra_attributes = {}; // commit // load. // , // this.commitContent( node, extra_styles, extra_attributes ); // EM- node.setStyles( extra_styles ); // - node.$.setAttribute( 'data-plugin', JSON.stringify( extra_attributes ) ); // fakeobject- // - , // - , IMG // - // - var new_fake_image = editor.createFakeElement( node, 'cke_ymap', 'ymap', true ); new_fake_image.setAttributes( extra_attributes ); new_fake_image.setStyles( extra_styles ); // fakeobject if( this.fake_image ) { // new_fake_image.replace( this.fake_image ); // editor.getSelection().selectElement( new_fake_image ); } else { // // - // editor.insertElement( new_fake_image ); } The commit function of components (invoked by us with commitContent):
var commit = function( ymap, styles, attrs ) { var value = this.getValue(); if( this.id === 'width' || this.id === 'height' ) { // // styles[ this.id ] = value; } else if( this.id === 'lat' || this.id === 'lon' ) { // - value = value.replace( ',', '.' ); } // , // onOk data-plugin attrs[ '_' + this.id ] = value; }; I’ll note that if the object’s width and height fields are supposed to be present, then they must be used, otherwise the allowedContents :( may fall off
CSS
In CSS, we need to specify the appearance for EM and for IMG-fakeobject. The appearance for the EM-ki is set in the styles of your site, and the appearance of the IMG in the styles that connect to the editor. They can be set via JS, using:
CKEDITOR.addCss( 'img.cke_ymap { /* css */ }' ); Total
The plugin as a whole was not difficult. The reason for this is the presence of the fakeobject plugin and the fact that we work with one block object. I believe that working with inline tags is much more difficult, because the user can select text so that different parts of the contents of different tags get into it. However, I did not try :)
If desired, we can connect a context menu to our plug-in, add fields (for example, allow us to specify multiple labels, not just one), a preview panel, and much more.
The plugin is located here (github). The repository also contains an example of connecting to YandexMaps. But, in fact, you can use any other online-card service.
Links
Source: https://habr.com/ru/post/204176/
All Articles