XCP for those who want but are afraid
At one time, many of us come to such a wonderful technology as virtualization. Someone just wants to try it out, others see it as an opportunity to ease the administration and development process. It is only important what technology we will use to solve the tasks and, accordingly, how difficult it will be in the study and further support. Shoveling mountains of information and conducting comparisons of the technologies presented, many, including myself, emphasize the availability of accessible and understandable information. So the replenishment of knowledge sources is one of the important tasks of the IT community.
For those who say about the inappropriateness of such information here, I want to note that if this cycle of posts is not relevant here, then why do you need Habr in general?
This post wants to start a series of articles on the Xen Cloud Platform. As a guinea pig, XCP 1.6 will be used; therefore, it was his name, he answered all the goals that were set for the future virtual machine, is not picky about resources, is free. This is not just a virtualization technology; it is also a cloud platform (what the name itself says). But first of all it is a very convenient, interesting and productive hypervisor. Here's how to make friends with him, and I want to tell you today.
Some background information. There is a small network of 80 machines geographically located in one building, there are several servers that serve this network and connected remote clients. The network is gradually being modernized, the server park is growing, but with iron, as usual, there is no problem, then there is no money, then just get out the way you want, but it should work. It was from these prerequisites that my acquaintance with XCP began, to be honest, I practically did not come across any virtualization earlier. Using Virtualbox to solve one-time tasks does not count. Designating a circle of supposed tasks that will be solved by means of virtual servers and estimating which capacities will be required for this, it was decided to use the servers with 4 screws in RAID 0 + 1 and 16 Gb of RAM and 2 embedded gigabit network as the HP DL120 G7 host machines. In the future, we had to add network cards - but this is a separate story.
')
So, having familiarized myself with the current state of affairs in the hypervisor market and after reading the reviews, I stopped at the XCP. Somewhere on the Internet there was an article about its installation (and the article was originally in English and not complete, when trial and error Xen already stood found its equivalent in Russian). But again, in my opinion, the article was not complete, and I decided to describe my thorny path ...
You can download the hypervisor on off. project website http://www.xenproject.org at . There you can download and useful add-ons, source and so on. To install, you can burn the image on a DVD or using the UltraISO utility, deploy the image on a flash drive (4GB is more than enough). As a preliminary preparation, using a disk from HP, I configured a RAID (1 TB total volume) and split it into 2 partitions: 1st per 100GB under the hypervisor and 2nd under Storage (storage) for virtual machines (VM).
To revive the post, add a little bit of pictures to it, naturally with comments. Pictures are planned for about 25 pieces.
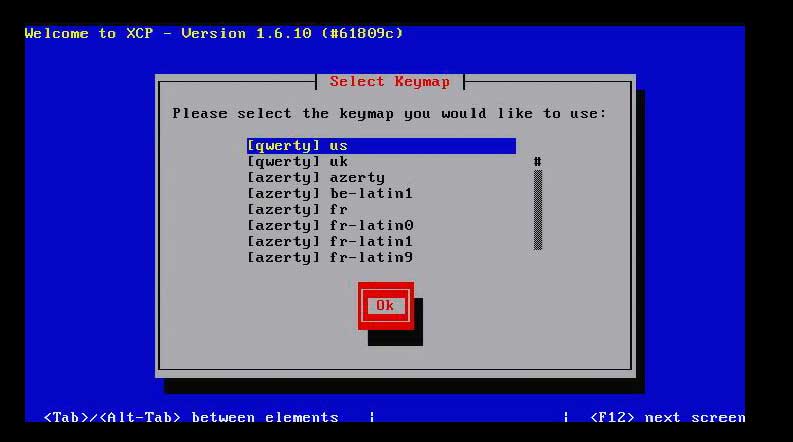
1. The installation screen greets us with the keyboard layout selection window, I left English as the default (more precisely American).
2. The warning window, they say, take your important data, because this utility can delete everything during the installation. We are brave guys do not get lost and agree with the possible consequences.

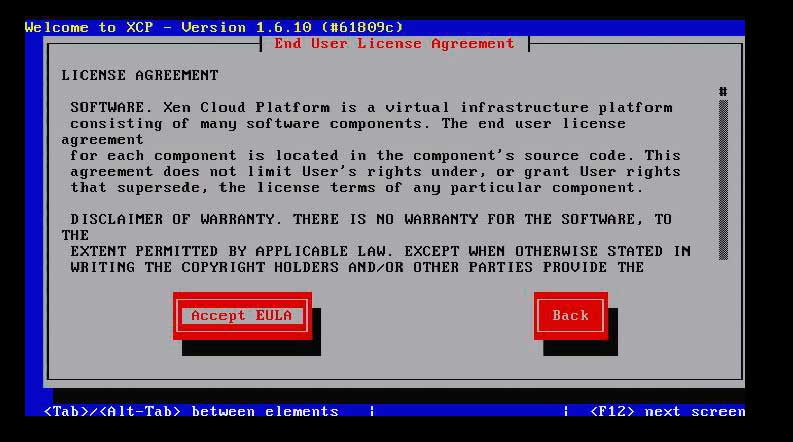
3. We agree with the license offered to us.
4. Select the disk on which we will have the hypervisor itself (I chose sda - size per 100 GB).

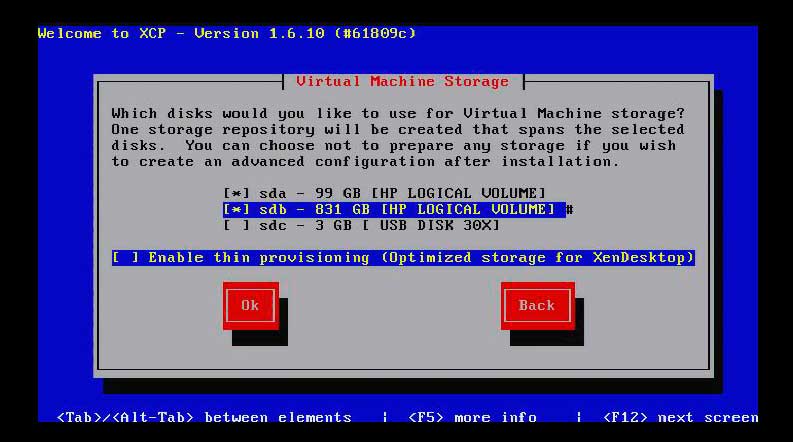
5. Select the storage location for our future VM Storage virtual machines (here choose sdb).
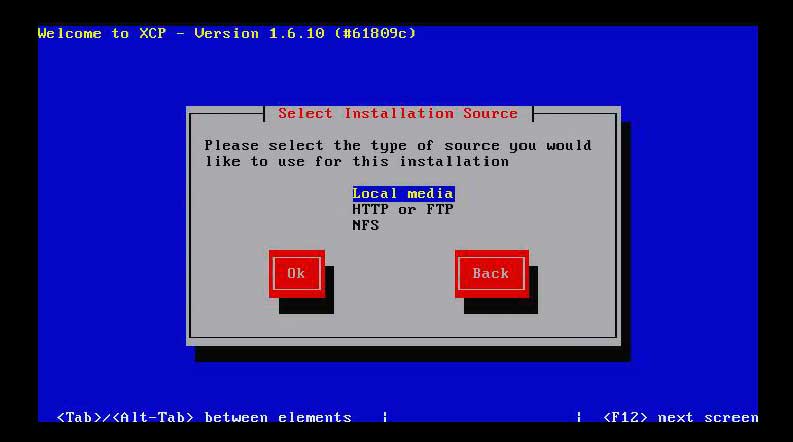
6.We indicate the source from which the installation will be performed - here we leave Local media
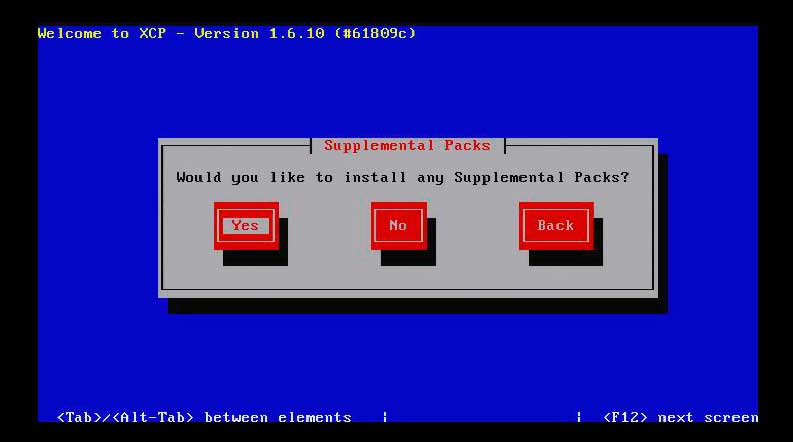
7. Whether we want to install additional packages, I chose Yes, but since there are no additional packages by default, feel free to choose No.
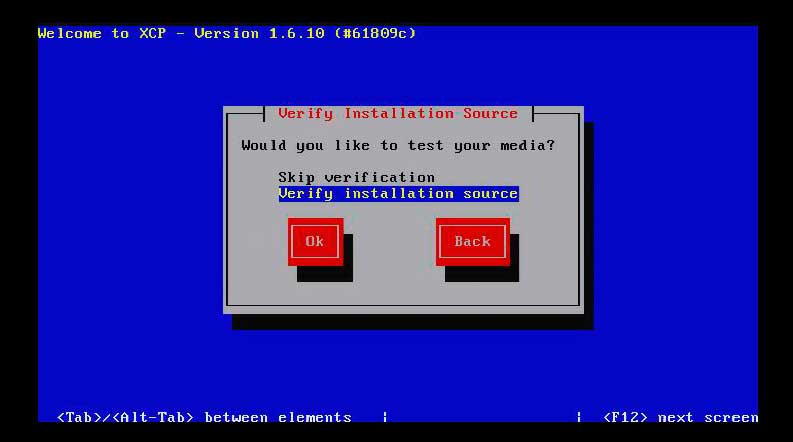
8. Do we want to check your carrier for correctness, if you are in a hurry somewhere then choose Skip verivications, but it’s better not to hurry and check the carrier.
9. If everything went well, we will see a message like this, and we will be glad to click Ok.

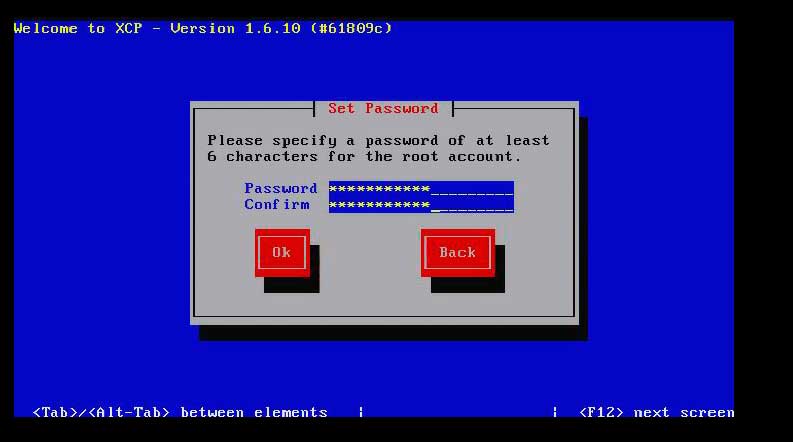
10. It is time to establish a root password (I strongly recommend that you save it somewhere, otherwise there are all sorts of cases).
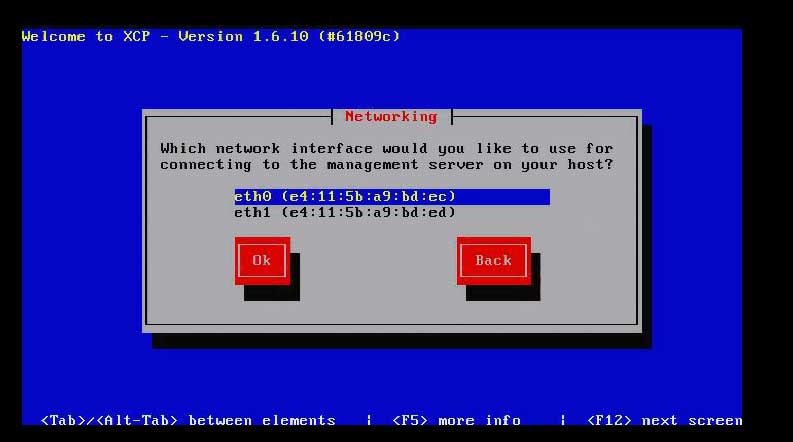
11. Select the network card that will be used to manage your hypervisor.
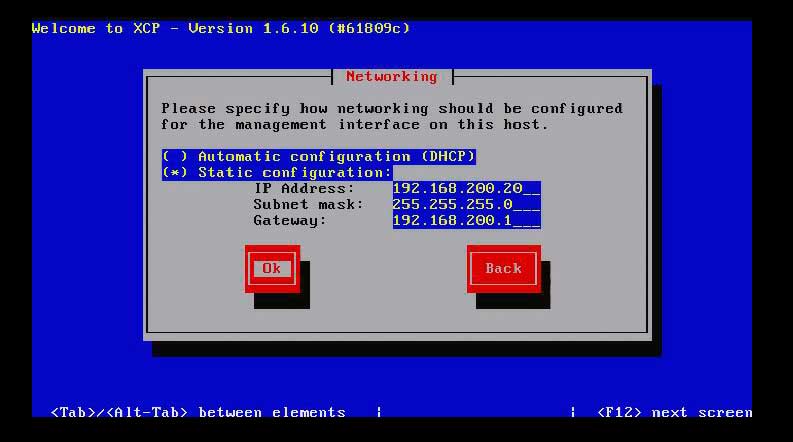
12. Configure your network card.
13. Specify the name of our hypervisor, and data DNS servers.

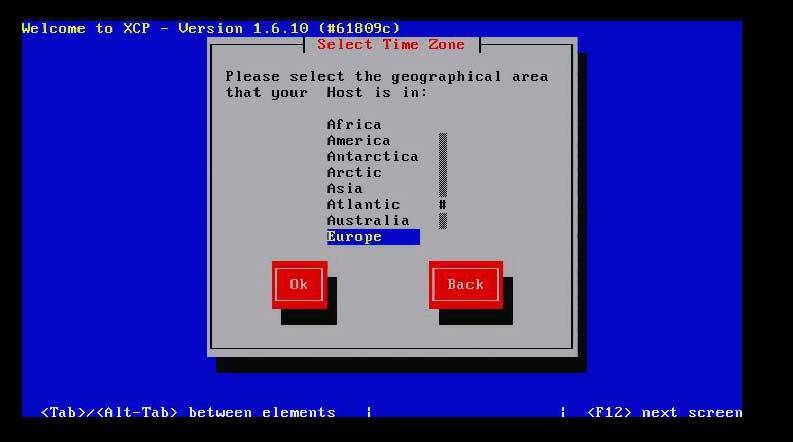
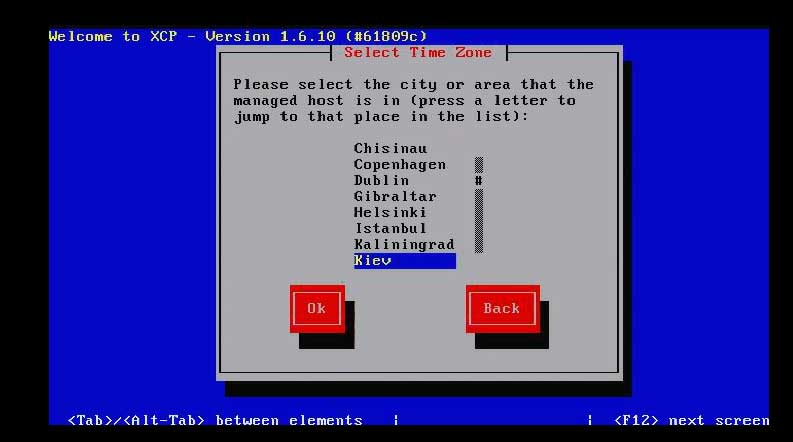
14. Specify the time zone and the city with the correct time zone (by the way, it’s a serious moment, later I will describe what problems this might cause).
and
15. We inform about the manual configuration of NTP.

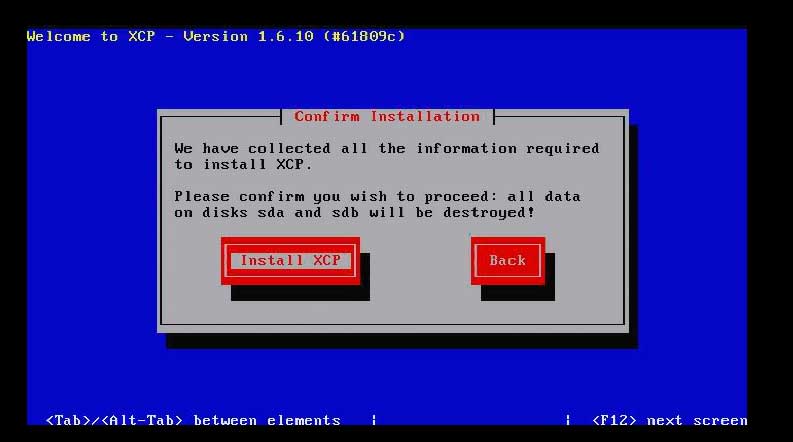
16. Click on the cherished Install XCP button and wait until the installation process is completed (subjectively, no more than 5 minutes).
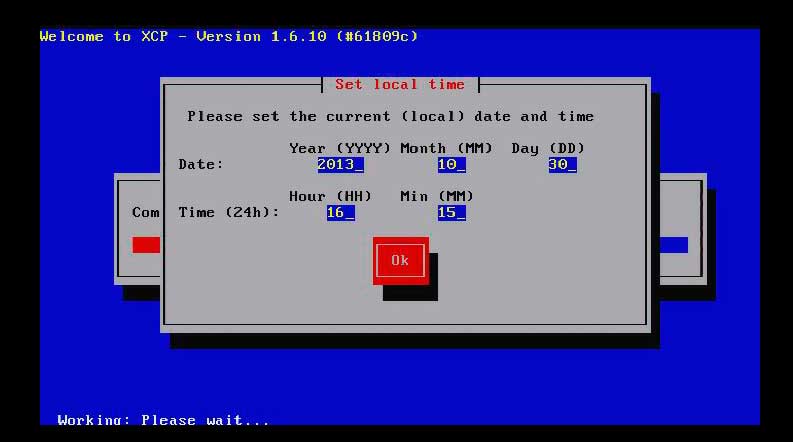
17. Perform customization of the current date and time.
18. And we meditate with the panda on the launch of the established Xen.

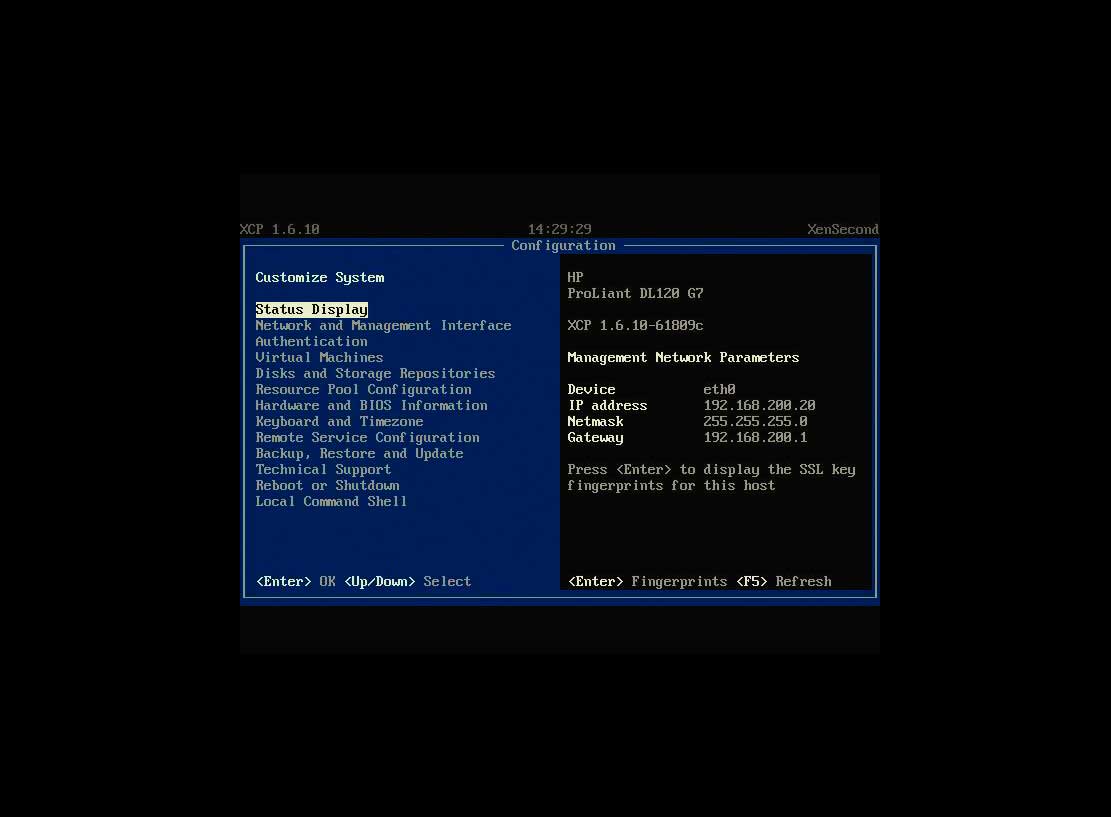
19. If everything went smoothly and cleanly, then we will be able to witness such a console (in the future it is easy to call it with the
In general, the installation of XCP 1.6 on this and completed, you can safely go to the administration stage. And then there is someone to like, who loves the console, who likes what thread the client is. I use XenCenter, you can download it here , the latest version is 6.2.
By itself, the client is intuitive, and allows you to perform almost all operations with virtual machines, the exclusion of “low-level” storage and fine-tuning of the hypervisor itself.
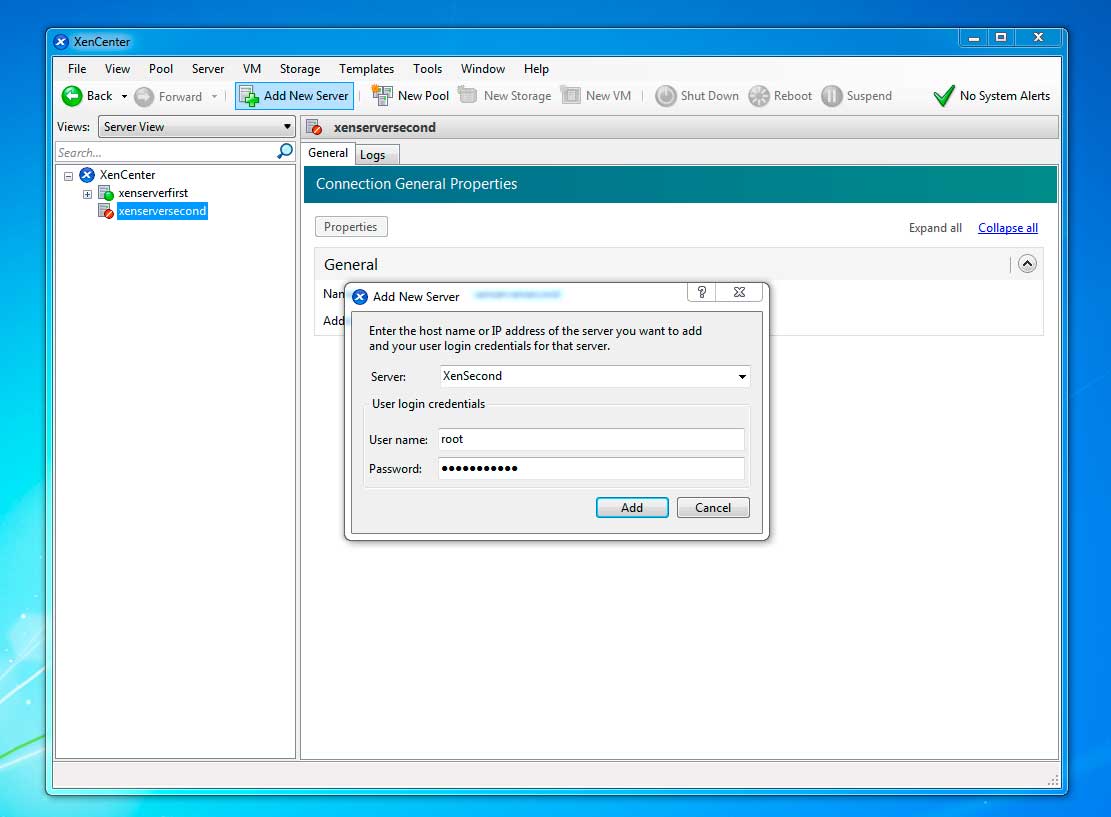
20. So this is the process of connecting to our control center of a new hypervisor.
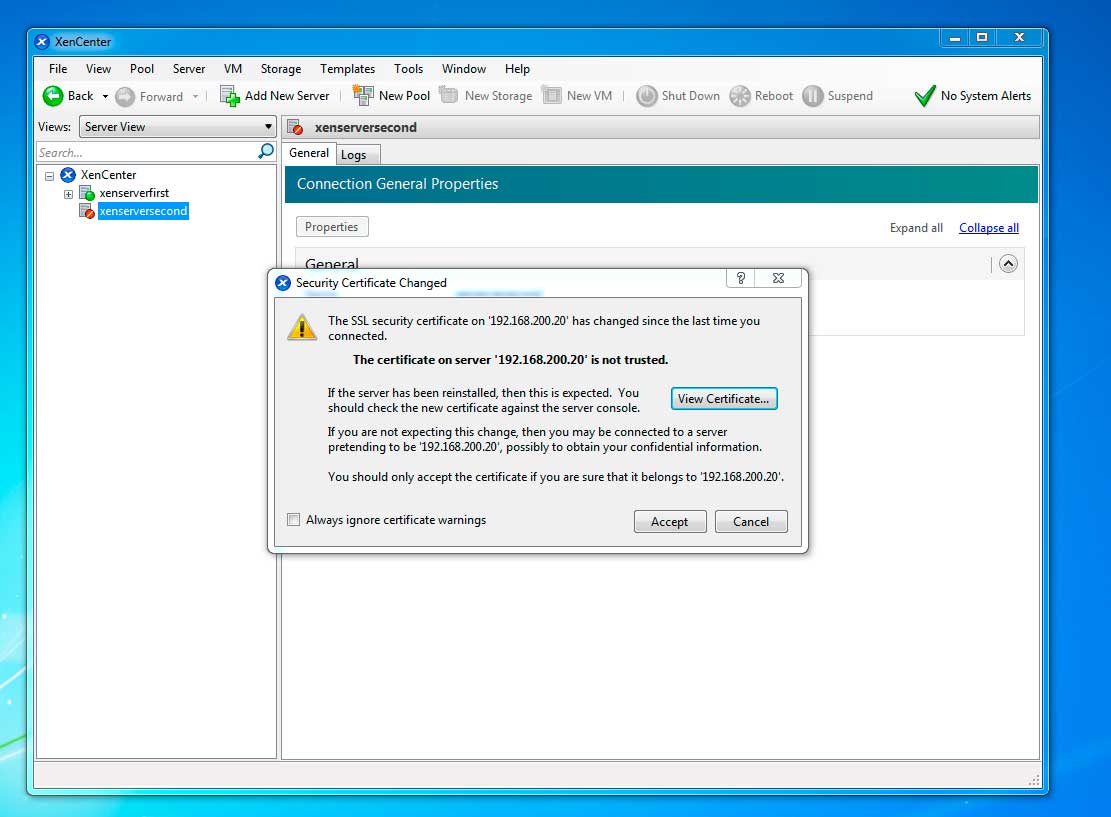
21. He will curse the SSL certificate, and we will graciously accept it by clicking on Accept.
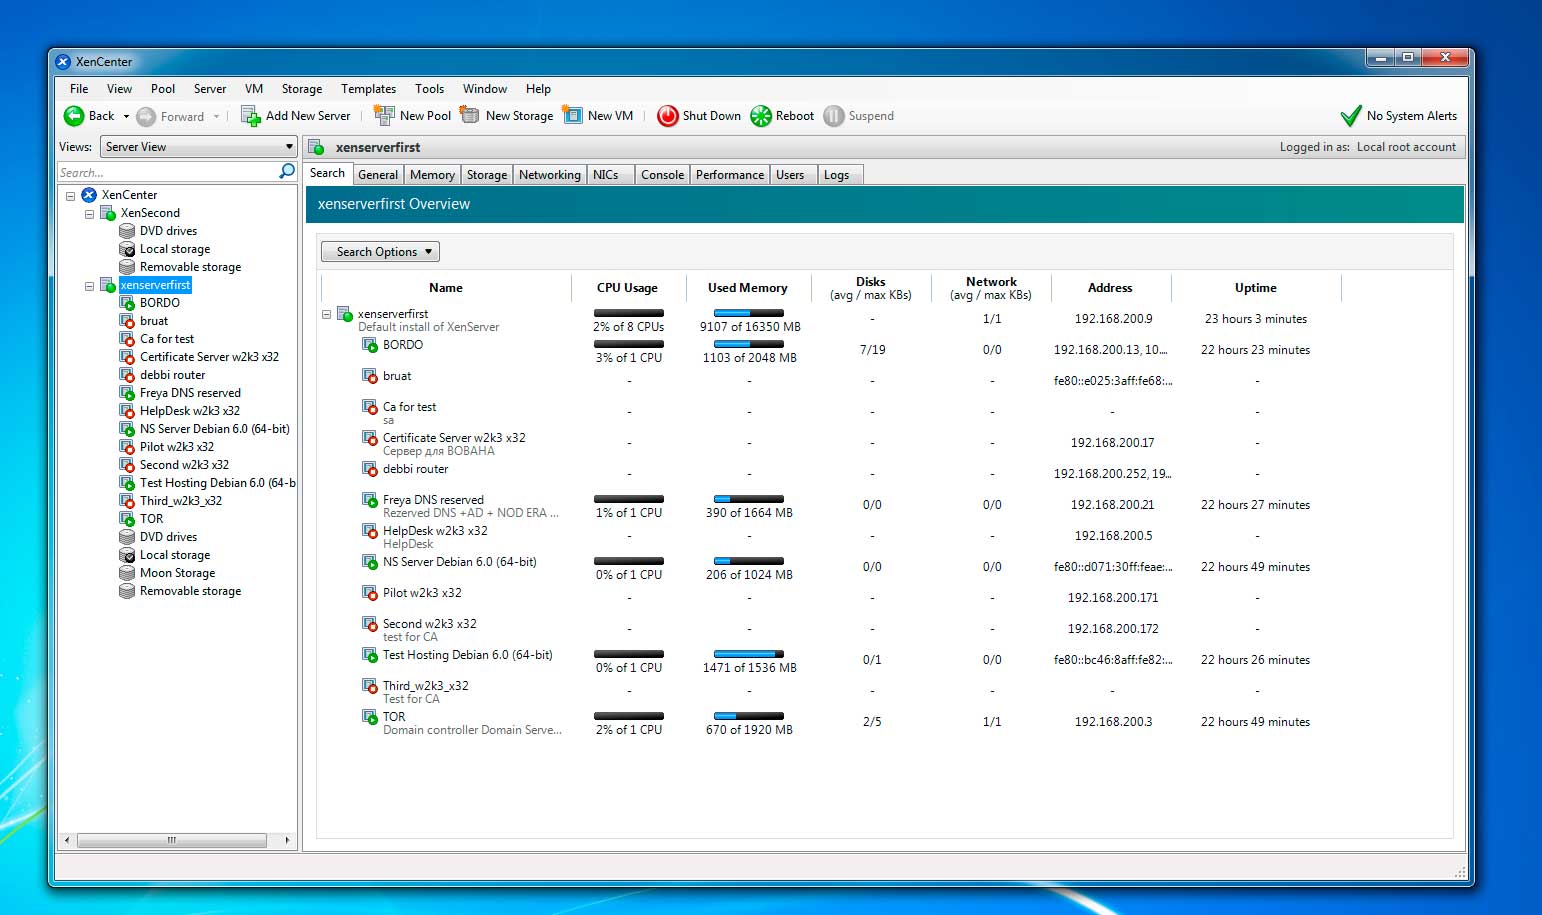
22. This is what my testing ground looks like, everything is quite civil and informative.
For this, let me leave. In the following parts, I plan to highlight the topic of installing drivers for non-default hardware using the example of a network card, as it turned out to be a rather trivial task, creating and managing virtual machines, creating a pool, connecting and working with external storage. Ready to answer possible questions, alas, even with such a seemingly “toy” system, adult problems may arise.
For those who say about the inappropriateness of such information here, I want to note that if this cycle of posts is not relevant here, then why do you need Habr in general?
This post wants to start a series of articles on the Xen Cloud Platform. As a guinea pig, XCP 1.6 will be used; therefore, it was his name, he answered all the goals that were set for the future virtual machine, is not picky about resources, is free. This is not just a virtualization technology; it is also a cloud platform (what the name itself says). But first of all it is a very convenient, interesting and productive hypervisor. Here's how to make friends with him, and I want to tell you today.
Some background information. There is a small network of 80 machines geographically located in one building, there are several servers that serve this network and connected remote clients. The network is gradually being modernized, the server park is growing, but with iron, as usual, there is no problem, then there is no money, then just get out the way you want, but it should work. It was from these prerequisites that my acquaintance with XCP began, to be honest, I practically did not come across any virtualization earlier. Using Virtualbox to solve one-time tasks does not count. Designating a circle of supposed tasks that will be solved by means of virtual servers and estimating which capacities will be required for this, it was decided to use the servers with 4 screws in RAID 0 + 1 and 16 Gb of RAM and 2 embedded gigabit network as the HP DL120 G7 host machines. In the future, we had to add network cards - but this is a separate story.
')
So, having familiarized myself with the current state of affairs in the hypervisor market and after reading the reviews, I stopped at the XCP. Somewhere on the Internet there was an article about its installation (and the article was originally in English and not complete, when trial and error Xen already stood found its equivalent in Russian). But again, in my opinion, the article was not complete, and I decided to describe my thorny path ...
You can download the hypervisor on off. project website http://www.xenproject.org at . There you can download and useful add-ons, source and so on. To install, you can burn the image on a DVD or using the UltraISO utility, deploy the image on a flash drive (4GB is more than enough). As a preliminary preparation, using a disk from HP, I configured a RAID (1 TB total volume) and split it into 2 partitions: 1st per 100GB under the hypervisor and 2nd under Storage (storage) for virtual machines (VM).
To revive the post, add a little bit of pictures to it, naturally with comments. Pictures are planned for about 25 pieces.
1. The installation screen greets us with the keyboard layout selection window, I left English as the default (more precisely American).
2. The warning window, they say, take your important data, because this utility can delete everything during the installation. We are brave guys do not get lost and agree with the possible consequences.
3. We agree with the license offered to us.
4. Select the disk on which we will have the hypervisor itself (I chose sda - size per 100 GB).
5. Select the storage location for our future VM Storage virtual machines (here choose sdb).
6.We indicate the source from which the installation will be performed - here we leave Local media
7. Whether we want to install additional packages, I chose Yes, but since there are no additional packages by default, feel free to choose No.
8. Do we want to check your carrier for correctness, if you are in a hurry somewhere then choose Skip verivications, but it’s better not to hurry and check the carrier.
9. If everything went well, we will see a message like this, and we will be glad to click Ok.
10. It is time to establish a root password (I strongly recommend that you save it somewhere, otherwise there are all sorts of cases).
11. Select the network card that will be used to manage your hypervisor.
12. Configure your network card.
13. Specify the name of our hypervisor, and data DNS servers.
14. Specify the time zone and the city with the correct time zone (by the way, it’s a serious moment, later I will describe what problems this might cause).
and
15. We inform about the manual configuration of NTP.
16. Click on the cherished Install XCP button and wait until the installation process is completed (subjectively, no more than 5 minutes).
17. Perform customization of the current date and time.
18. And we meditate with the panda on the launch of the established Xen.
19. If everything went smoothly and cleanly, then we will be able to witness such a console (in the future it is easy to call it with the
xsconsole command).In general, the installation of XCP 1.6 on this and completed, you can safely go to the administration stage. And then there is someone to like, who loves the console, who likes what thread the client is. I use XenCenter, you can download it here , the latest version is 6.2.
By itself, the client is intuitive, and allows you to perform almost all operations with virtual machines, the exclusion of “low-level” storage and fine-tuning of the hypervisor itself.
20. So this is the process of connecting to our control center of a new hypervisor.
21. He will curse the SSL certificate, and we will graciously accept it by clicking on Accept.
22. This is what my testing ground looks like, everything is quite civil and informative.
For this, let me leave. In the following parts, I plan to highlight the topic of installing drivers for non-default hardware using the example of a network card, as it turned out to be a rather trivial task, creating and managing virtual machines, creating a pool, connecting and working with external storage. Ready to answer possible questions, alas, even with such a seemingly “toy” system, adult problems may arise.
Source: https://habr.com/ru/post/203980/
All Articles