Creating games for Windows Store using WebGL
 Windows Store is currently perhaps the most open platform for gaming studios. To create applications, you can use DirectX 11 , HTML5 2d-Canvas , Cocos2D-X , Unity3D, and with the release of Windows 8.1, even for WebGL !
If you have an interest in some of these technologies, you can see the article for Windows 8 modern UI , which lists links to resources on technologies DirectX, HTML5 canvas 2d and MonoGame.
I would also like to note that the add-on for Unity, which allows you to publish applications in the Windows Store, is free: http://unity3d.com/pages/windows : “ 8 for free ” . You can start exploring Unity for Windows Store development from the video cycle Building Windows Games with Unity .
In addition to this, I would also like to note that Cocos2D-X was recently updated to better support Windows 8 and Windows Phone 8: game to your Windows 8 and Windows Phone 8 .
But let's go back to WebGL .
In my opinion, WebGL provides excellent new opportunities for the gaming applications industry. Now you can create cross-platform games for the web and use the same code to create Windows Store apps. At the same time, you have the opportunity to add monetization mechanisms and other features of the Windows 8 platform to the game.
As far as I understand, we are now offering one of the first platforms that supports WebGL on personal computers and tablets, which is enabled by default in the browser and inside the Windows Store applications .
I would like to give you an overview of how to create games based on WebGL for the Windows Store and a small course on how to do this. Let's start with what is needed to create such applications.
')
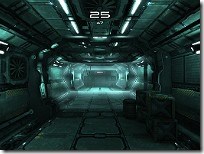
After reading this material, you will learn how to create a WebGL game for the Windows Store as shown in this short video:
Already, you can install this application on your computer or tablet from the Windows Store: Espilit BabylonJS demo.
This application was created in just a few hours . Want to know how? Let's review the necessary steps that I had to do to create this application.
Validation in IE11, WebGL engine selection and VS2013 installation
My first recommendation is to check your code in Internet Explorer 11 . Even better, make sure your game works in all browsers that support WebGL. This will help save some effort in the future and increase the availability of your application. In any case, if you are a good web developer, you are somehow familiar with the principles of creating web applications that run on different browsers. So this should not be a particular problem.
IE11 includes JS & Render engines (Chakra & Trident) which are also used when running Windows Store applications. Therefore, when you create HTML5 code for the Windows 8.1 Store, anyway you create and the code that will work in IE11. That is why you should definitely check that your existing web application works in IE11 if you then do not want to lose time integrating with the Windows Store.
For testing, you need a computer with Windows 8.1 installed. IE11 is also available for Windows 7. Tests can also be done in a virtual machine or using BrowserStack . You can find free virtual machines for testing on the website http://www.modern.ie/en-us and the trial version of BrowserStack.
Undoubtedly, when creating a game, you need a real device, which will be used for performance and game tests.
My second recommendation is to choose the WebGL engine and not to create code for your application from scratch.
Some of the existing WebGL engines work fine in IE11. Let's take a quick look at two of them. Both are available as source code on Github.
Threejs
One of the most famous WebGL engines is ThreeJs: http://threejs.org/ . It is created and maintained by the wonderful Mr Doob . You will find many excellent online learning resources on ThreeJS. However, be attentive to the specific demos that are created based on the capabilities present only in Chrome. Once again, I would like to remind you if the game or demo does not work in IE11, so they will not work in the Windows Store.
Some of the latest games and demo “ Hello Run ” and “ HexGL ”:

These applications can be ported to the Windows Store in just a few hours, as they work fine in IE11.
Babylonjs
David Catuhe , Pierre Lagarde , Michel Rousseau and I created our open WebGL engine specifically for creating games. It is called Babylon.JS . The main architectural decisions that were made during the creation of this engine are primarily aimed at application in gaming applications and the new generation of mobile devices.
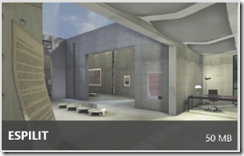
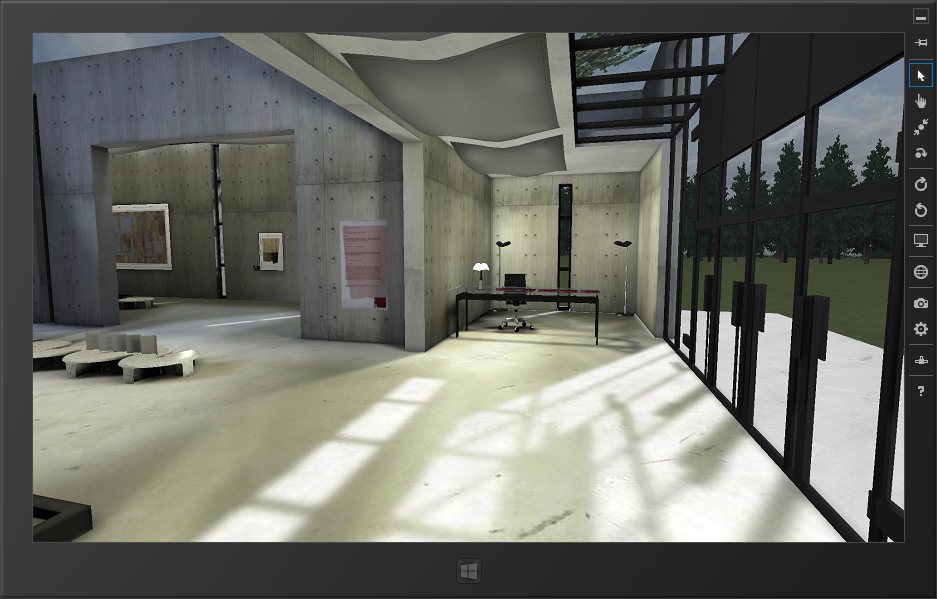
First, BabylonJS is based on scenes and has excellent support for exporting from Blender . Now it’s much easier to get great results from just a few lines of code. Try viewing the scene in your WebGL browser: Esplit . You need only 10 lines of JavaScript to load it !
Babylon.JS includes a collision engine (to prevent walking through walls), the camera and light sources are loaded from our file format, and gravity is supported.
Because of this, using only 10 lines of JavaScript code, you can navigate inside the scene using the classic mouse + keyboard combination, or using touches and keyboard, as is usually the case in FPS. All the modeling work was done by Michel with tools like Blender. In addition, 3D designers do not need to learn the 3D engine. Our export formats include everything you need.
Our export from Blender includes many features . Scene, lights, cameras, materials, textures, animations and bones. The complete list is here: Entities exported from Blender . But our online converter works the same with .FBX, .OBJ and .MBX.
We spent a lot of time optimizing performance with different approaches:
- Reducing the load on the garbage collector
- Shader optimization and testing on ARM devices
- The implementation of mechanisms such as octree
- Incremental load support for large scenes
- Implementing an indexed base for storing the scene and supporting offline scripts
We also support touch input on all browsers ! As mobile devices become increasingly important target gaming platforms, we support touch input right out of the box. To do this, use event pointers using handjs polyfill . Touch input works on IE11, Chrome, Firefox and Android devices and Firefox OS.
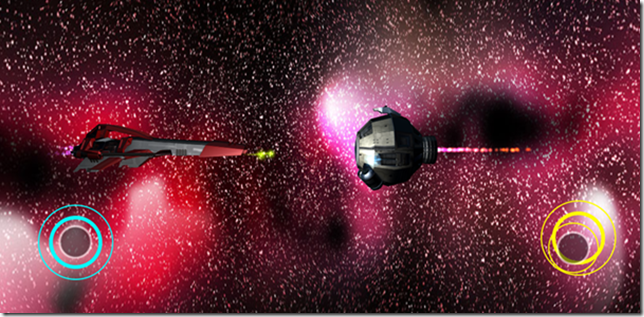
If you have a device with WebGL support and touch input, be sure to try this demo here:
And finally, our engine works fine on all browsers. What is more interesting for Windows Store apps: IE 11 is supported out of the box . Our users will not deal with cross-browser compatibility issues, correct errors in WebGL shaders. We took all this on ourselves.
With all these features, we believe that Babylon JS is an excellent candidate for creating WebGL games for the Windows Store . But at the same time, we are still far from our goals, since this is only the beginning of our development.
If I managed to interest you, look at our examples and documentation at https://github.com/BabylonJS/Babylon.js .
There is also a large number of other HTML5 engines for creating games. TechSlides did a great job and consolidated basic information at http://techslides.com/html5-game-engines-and-frameworks/ . Look at the 3D section.
Installing Visual Studio 2013
To create Windows Store applications, you need to install Visual Studio 2013 on Windows 8.1. You can download the free version of Visual Studio 2013 Express for Windows 8 . This toolkit is enough to create WebGL games.
Step 1. Migrate WebGL games "as is" from the browser to the application
In this walkthrough, we will use Babylon.js as a WebGL engine. But the basic concepts remain the same if you use other libraries.
Create the first application on Babylon.js
Follow these steps to create a cool example in literally 5 minutes:
- Download BabylonJS from Github: https://github.com/BabylonJS/Babylon.js . Select the package in which the sample Espilit scene is included.
- Download Hand.js polyfill: http://handjs.codeplex.com/
- Create a web project using your familiar tools. Copy babylon.js and hand.js to the “scripts” folder and copy the “Espilit” scene into the same “Espilit” folder.
Add support for additional mime types to your web server. This is necessary for the correct operation of Babylon.JS. If you use asp.net, then it’s enough to edit the web.config file of your web project.
<system.webServer> <staticContent> <mimeMap fileExtension=".fx" mimeType="application/fx" /> <mimeMap fileExtension=".babylon" mimeType="application/babylon" /> <mimeMap fileExtension=".babylonmeshdata" mimeType="application/babylonmeshdata" /> </staticContent> </system.webServer> Create a homepage:
<!DOCTYPE html> <html> <head> <title>BabylonJS - Espilit demo</title> <script src="scripts/hand.minified-1.1.3.js"></script> <script src="scripts/babylon.js"></script> <script src="scripts/main.js"></script> <style> html, body { width: 100%; height: 100%; padding: 0; margin: 0; overflow: hidden; } #renderCanvas { width: 100%; height: 100%; touch-action: none; -ms-touch-action: none; } </style> </head> <body> <canvas id="renderCanvas"></canvas> </body> </html> Create a "main.js" script in the "scripts" directory:
document.addEventListener("DOMContentLoaded", startGame, false); function startGame() { if (BABYLON.Engine.isSupported()) { var canvas = document.getElementById("renderCanvas"); var engine = new BABYLON.Engine(canvas, true); BABYLON.SceneLoader.Load("Espilit/", "Espilit.babylon", engine, function (newScene) { // Wait for textures and shaders to be ready newScene.executeWhenReady(function () { // Attach camera to canvas inputs newScene.activeCamera.attachControl(canvas); // Once the scene is loaded, just register a render loop to render it engine.runRenderLoop(function () { newScene.render(); }); }); }, function (progress) { // To do: give progress feedback to user }); } } That's all! Literally in a few lines, we repeated the demo which is located at http://www.babylonjs.com/index.html?ESPILIT . While you do not have a control panel and boot screen. But you already have the opportunity to move around the scene using the mouse and keyboard.
Since this example works in Chrome, Firefox, Opera and what is important for us, in IE11 we are ready to create an application for the Windows Store.
Copy to Windows Store project.
If the application works in IE11, let me show how you can convert it into a Windows Store app in about 60 seconds.
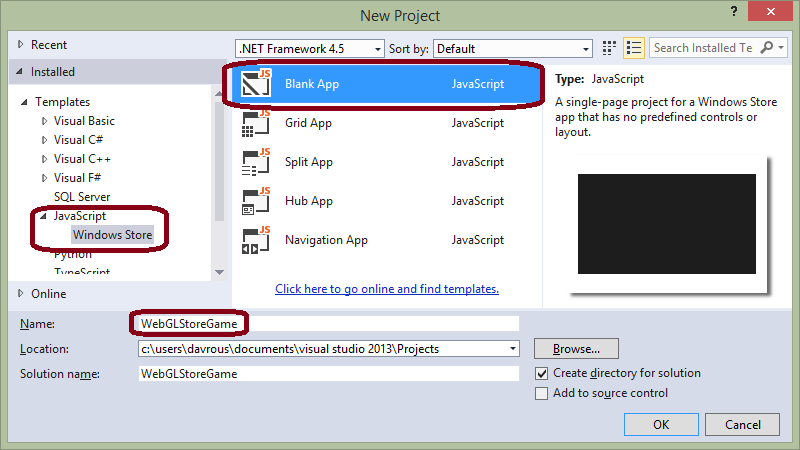
Open Visual Studio 2013 and create a new project “ JavaScript ” -> “Windows Store ” . Call it “ WebGLStoreGame ” :
Copy - the index.html file, the “Espilit” and “scripts” folder into the Windows Store App project:
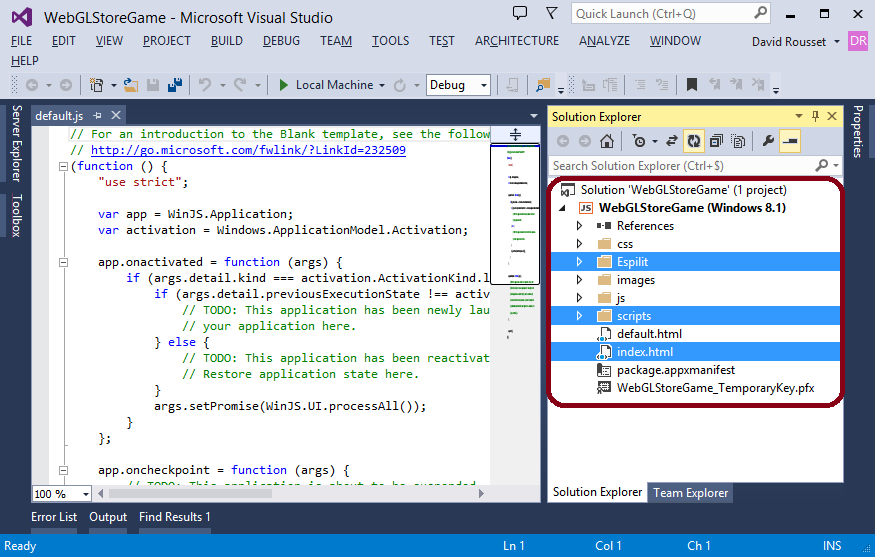
By default, the Windows Store application is launched by downloading the “default.html” page. Let's change this. Open the “package.appxmanifest” file and change the start page to “index.html”:

It's all! You have completed the migration of your web application, and now it runs as a Windows Store app!
Step 2. Connecting Windows 8 features to the game
Windows Store applications based on HTML5 and Jscript technology offer significantly more features than web presentation. In order to create a really good game for the Windows Store, you must use these features in your application.
Be sure to read the article Designing a great game for Windows . This material explains how you can use the capabilities of the Windows 8.1 platform. Live tiles and notifications, contracts, panels, support for various form factors and screen sizes and much more.
For JavaScript, it will be interesting to study the example of the finished application: JavaScript and HTML5 touch game sample . In this example, you will find blanks for creating application panels, settings, and other important elements.

In order for this application to support different views, there are two options:
- Preserve the proportions of the render and add black bars above and below. There is a simple solution based on CSS3 Grid. I already told about it in one of my articles: Modernizing your HTML5 Canvas games Part 1: hardware scaling & CSS3
- Just change what the camera is currently looking at. To do this, you just need to subscribe to the onresize event and change the size of the canvas. The BabylonJS engine will do the rest.
In order to understand this mechanism in more detail, look at the example link to which is indicated at the end of the article.
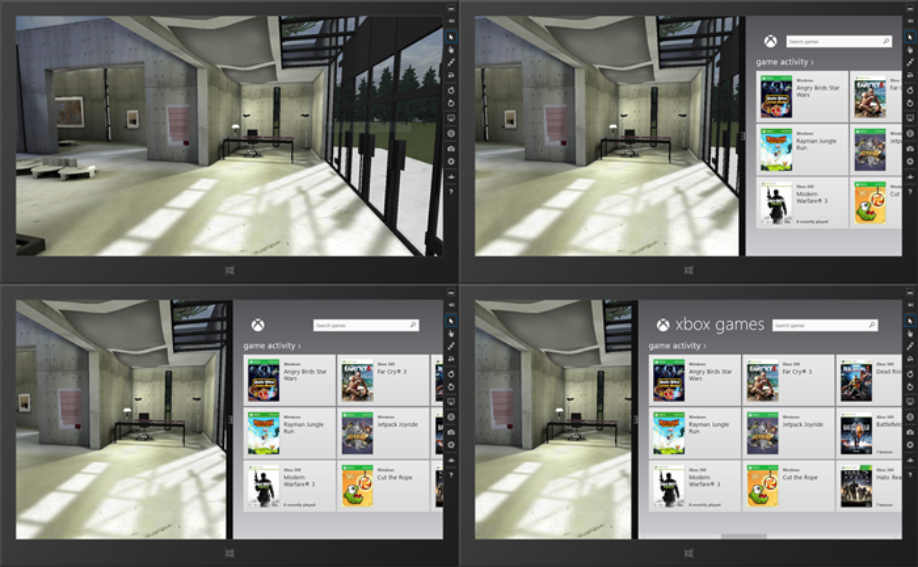
Now our game is ready for publication in the Windows Store! We already support touch input, keyboard and mouse. This is the required minimum for playing Windows Store.
Step 3. Expanding the game features by connecting C ++ WinRT components
Since our application is now running in the WinRT world, we are not limited by the capabilities of just JavaScript, WebGL, and the browser. We can also use literally all the features of the Windows 8.1 platform. If you have C ++ developers in your studio, you can use their knowledge to extend the logic of your game.
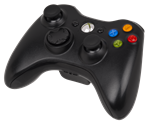
Let's try to connect the support of the Xbox 360 gamepad to our game. At the moment, there is no controller support for IE11, but this does not hurt us. We will create a WinRT component in C ++ language that will use the DirectX Input capabilities and connect this component to our application.
Download the XInput and JavaScript controller sketch sample and copy the C ++ project into the “WebGLStoreGame”:

Add a new reference in the WebGLStoreGame project:
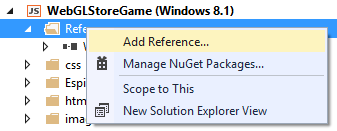
And select the project "GameController":

After that, you will be able to call C ++ logic directly from JavaScript.
// babylon.xboxControllerCamera.js var BABYLON = BABYLON || {}; (function () { BABYLON.XboxControllerCamera = function (name, position, scene) { BABYLON.FreeCamera.call(this, name, position, scene); // You need first to referance the WinRT C++ component from the Windows SDK samples if (GameController) { // Although the API supports up to 4 controllers per machine, // this sample only works with a single controller. this.controller = new GameController.Controller(0); } }; // We're mainly based on the logic defined into the FreeCamera code BABYLON.XboxControllerCamera.prototype = Object.create(BABYLON.FreeCamera.prototype); BABYLON.XboxControllerCamera.prototype.angularSensibility = 8000000.0; BABYLON.XboxControllerCamera.prototype.moveSensibility = 20000.0; BABYLON.XboxControllerCamera.prototype._checkInputs = function () { var offsetLeftX, offsetLeftY, offsetRightX, offsetRightY; var state = this.controller.getState(); if (!state.connected) { return; } // Gamepad thumbstick values are between -32768 and 32767. // Drawing position is moved incrementally if // the thumbstick value exceeds a deadzone value of 6500. offsetLeftX = Math.abs(state.leftThumbX) > 6500 ? 0 + state.leftThumbX : 0; offsetLeftY = -(Math.abs(state.leftThumbY) > 6500 ? 0 - state.leftThumbY : 0); offsetRightX = Math.abs(state.rightThumbX) > 6500 ? 0 + state.rightThumbX : 0; offsetRightY = -(Math.abs(state.rightThumbY) > 6500 ? 0 - state.rightThumbY : 0); this.cameraRotation.y += offsetRightX / this.angularSensibility; this.cameraRotation.x += -offsetRightY / this.angularSensibility; var speed = this._computeLocalCameraSpeed(); var direction = new BABYLON.Vector3(speed * offsetLeftX / this.moveSensibility, 0, speed * offsetLeftY / this.moveSensibility); BABYLON.Matrix.RotationYawPitchRollToRef(this.rotation.y, this.rotation.x, 0, this._cameraRotationMatrix); this.cameraDirection.addInPlace(BABYLON.Vector3.TransformCoordinates(direction, this._cameraRotationMatrix)); }; })(); This is a fairly obvious example. The X axis of the left analog stick is strafe left / right, and the Y axis is forward and backward in the direction of the camera view. The right analog stick controls the orientation of the camera.
Step 4. Publish the game in the store
The first thing you need to do before publishing your application is to pass the WACK tests (Windows App Certification Kit). This tool automatically performs tests and checks the application to make sure that it meets the minimum quality requirements (start-up time, no prohibited API calls, crashes, and the like).
Validation is carried out after you build a package of your application:
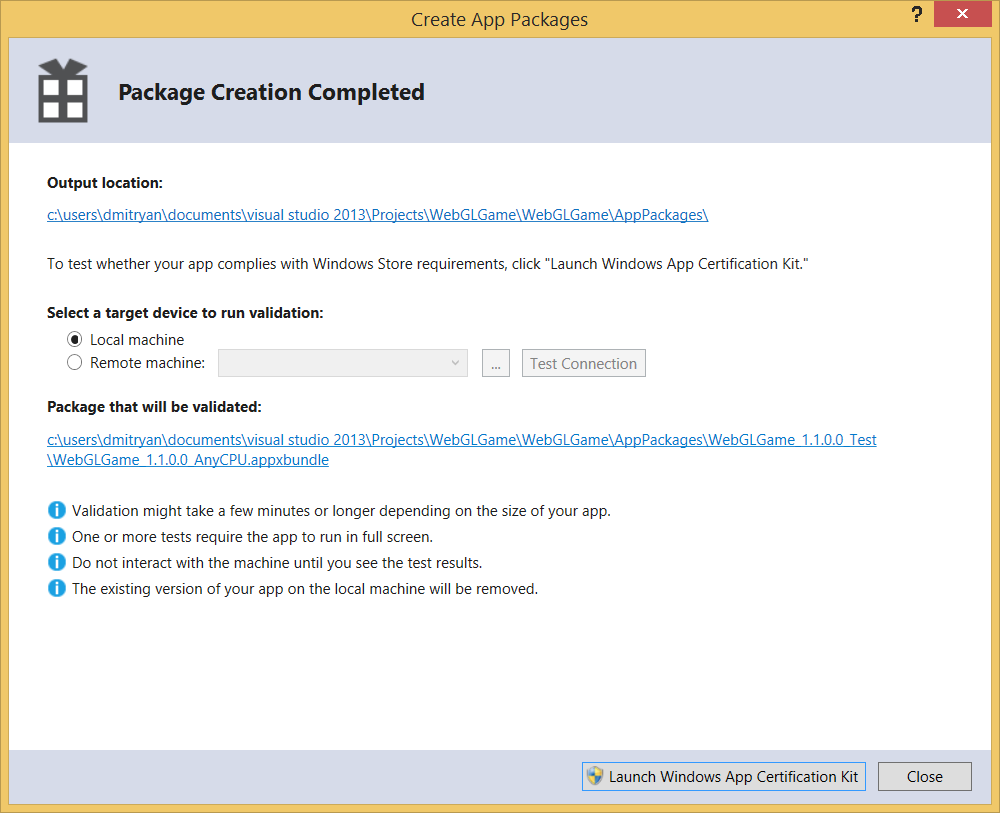
After all the tests are completed, you will receive a report and recommendations for fixing the errors found.
Download the finished sample.
If you want to look at the finished project, you can download it at http://david.blob.core.windows.net/babylonjs/WebGLStoreGame.zip . He passes the WACK tests and is fully prepared for publication in the Windows Store app store. You can also download the finished application directly from the store: Espilit BabylonJS demo
Source: https://habr.com/ru/post/203550/
All Articles