Home all-in-one server - success story
I lived and I had a router of one good company with the letter “Dead”. Well, it actually happened to him.
I looked at the prices of new ones, at a bunch of computer junk in the corner, at the list of connections on my home computer ... And I realized that I didn’t need a router. I will collect my own, with normal routing, DNS, WINS, i2p,blackjack and so on.
After a brief excavation in the deposits of iron, the light was extracted:
• Intel Core 2 Duo E8400 @ 3GHz processor
• With it - the motherboard Asus P5Q
• 2 strips DDR2 for 2Gb
• PCI-e TP-Link TG-3468 Network Card
• Unidentified WiFi Network Card (b / g / n) based on Ralink RT3060
• Seagate 250Gb hard drive
The output of lshw can be viewed here .
All this was cleared of dust, built into the case with the power supply, running and tested in memtest and mhdd. Having found no defects, I began installing everything I needed.
I took the Debian Testing distribution kit, rolled out through Debootstrap, as a basis. Immediately, the openssh-server, firmware-ralink and pppoe / pppoeconf were installed.
Having rebooted into the newly installed system, I immediately transferred the SSH to 192.168.1.1 and turned off password authentication (by setting my own key).
For a start, pppoeconf was launched. A network card with the name eth1 was connected to the DOCSIS modem, as a result, the following config / etc / ppp / peers / rt was received:
But this is not all - you need to configure / etc / network / interfaces as follows:
')
The original idea was to make 2 WiFi networks: one for their computers and laptops, with a strong password and connection to all necessary resources, and the second for guests who wanted to go online, but don’t need to know what's going on in my network.
As a result, hostapd was installed on the server with the following configuration file (all network names and passwords were changed):
Here we also set bridge for eth0 and wlan0 - this will allow those who connect to our network to see it as a whole, and not the wireless segment. Modify networks:
A bit about magic in pre-up for wlan0: to work with multiple APs, we need to use more than one MAC address. Hostapd assigns MACs for virtual interfaces (wlan0_0 in our case) automatically, but to do this, the address of the first access point must have several “empty” bits at the end. I did not trivialize and released immediately 4 pieces. The task at home - calculate how much maximum AP can now be run on a single map.
All computers on the network, sadly, must issue IP addresses. Yes, yes, we will do it.
Without thinking, the server was running a DHCP server with the following configuration:
It can be seen that DNS, WINS, NTP and Gateway 192.168.1.1 are also issued for 192.168.1.1/24 - it's time to configure them.
With the gateway, everything is simple, I think, only the lazy does not know these commands:
Of course, we install iptables-persistent to save our settings, as well as prescribe the appropriate parameters in /etc/sysctl.conf.
Now our server is a full-fledged Chinese router for $ 10. What? Does it seem weak to you? Me too. We go further.
I think no one forgot that we need a DNS? The simplest forwarding is configured to absurdly simple, but after all we are doing a full-fledged server with rezolving and reverse-zones ... We put bind9, and configure:
Now we need the forward and reverse zone files:
Simply? And now we will make it so that every computer on the network can be seen not by IP, but by DNS name.
To do this, we need to configure DDNS. This technology allows you to associate a DHCP server that provides addresses and a DNS server.
First, create a key for our DDNS:
This command will create us 2 files with DDNS-key. We need the key content:
“HEyb0FU9 + aOXnYFQiXfiVA ==” is our key.
Let's a little edit our DHCP config by adding the following options to it:
Do the same with DNS:
Voila - and this killer feature works.
So historically, ©, my provider (a contemptuous glance towards Rostelecom) does not issue IPv6 (although promised ).
Well, fix this misunderstanding. As a broker, I chose sixxs.net - they have tunnel servers in Russia, and their tunnel is easy to configure for the case of dynamic IP.
I will omit the process of registering and getting the tunnel / subnet settings - everything is pretty simple. I will stop on adjustment.
Setting up IPv6 on the server itself is done in 2 steps. First, put the aiccu package - this is the tunneling program. When installing we will be asked for a login and password from sixxs, and some other data. After launch, we will have a new interface:
The server now has access to the v6 network - why not share it with others?
To begin with, let's allow IPv6-forwarding (don't forget to put it in /etc/sysctl.conf):
You do not need to make settings with iptables - hello, 21st century!
Next on the sixxs site we get the subnet. Its address will be very similar to the address of our tunnel - be careful, they are different!
After receiving the address of the form 2a02: 578: 5002: xxxx :: / 64, proceed to configure it. First, let's set our server to 2a02: 578: 5002: xxxx :: 1, adding the following lines to interfaces:
Secondly, let's allow the issuance of IPv6 computers on the network. Install the radvd package, and configure it as follows:
Add IPv6 DNS to our bind settings - for complete feng shui:
That's all - now we have access, for example, to ipv6.google.com , or, which is much more valuable, to ipv6.nnm-club.me ;)
I love it when everything is beautiful on my network. And this is possible only in the case of complete harmony. For example, when all computers see each other. For Windows workstations, it is fair to recall WINS (remember, we even issued this setting in DHCP).
Its setup is extremely simple: install the samba package. The default config needs to be slightly changed:
Checking the results ... Oh, it's all good!
By the way, since we have samba, you can immediately set up a file dump. But this is already so hackneyed topic that I leave it on Google’s shoulders. In fact, everything should work out of the box - except for read only for homes, turn off yes smbpasswd -a user ...
Set up the distribution of time on the server: install ntp. With configs, everything is absurdly simple:
And here is the result:
We are already close to microtik level routers for $ 150- $ 200. But this is not all? Of course not.
And why not have access to this network without any settings, without proxy servers and so on? So I think "why." To get started, let's install the imputed version of Java:
And install the router itself:
Now we will create a zone directing all requests to * .i2p to our server. In the bind config:
The zone itself:
Great, but how to handle it now? It was trivial to wrap all the traffic to the port of the router I did not succeed - the proxy cursed that it could not work that way. I had to set up a bunch of nginx + php5-fpm and write a small script. How to do the first part - it is not necessary to search for a long time, the benefit of the manuals on the network is complete. The second part of:
The script itself can be seen here .
It's all! Now we have access to i2p even from the phone - no problem.
So historically ©, that I am a system administrator for the remote in several companies. And it is very useful to have access to them from any computer on the network. Setting up OpenVPN (or any other) for the server is carried out as for any other client. For example, after these actions we have a tap0 interface with IP 10.0.0.7/24. But if we turn to the local network at 10.0.0.1, the traffic will go to the default gateway of the provider. Fix this flaw:
We do the same for all networks on the server.
We have a full-fledged server that we can use at our discretion. DNS, nginx, IPv6, i2p ... You can also set a zone for local development, for example, * .dev, and test your sites from any device on the local network. Since each computer on the network has a permanent IPv6 address, you can access it from anywhere in the world (Security warning! Configure firewalls correctly!).
And this is all - just the tip of the iceberg. What will be its underwater part - you decide.
I will be glad to hear comments, suggestions, sensible criticism and so on. Thank.
I looked at the prices of new ones, at a bunch of computer junk in the corner, at the list of connections on my home computer ... And I realized that I didn’t need a router. I will collect my own, with normal routing, DNS, WINS, i2p,
How it was?
After a brief excavation in the deposits of iron, the light was extracted:
• Intel Core 2 Duo E8400 @ 3GHz processor
• With it - the motherboard Asus P5Q
• 2 strips DDR2 for 2Gb
• PCI-e TP-Link TG-3468 Network Card
• Unidentified WiFi Network Card (b / g / n) based on Ralink RT3060
• Seagate 250Gb hard drive
The output of lshw can be viewed here .
All this was cleared of dust, built into the case with the power supply, running and tested in memtest and mhdd. Having found no defects, I began installing everything I needed.
Basics of the basics
I took the Debian Testing distribution kit, rolled out through Debootstrap, as a basis. Immediately, the openssh-server, firmware-ralink and pppoe / pppoeconf were installed.
Having rebooted into the newly installed system, I immediately transferred the SSH to 192.168.1.1 and turned off password authentication (by setting my own key).
Let there be a network!
For a start, pppoeconf was launched. A network card with the name eth1 was connected to the DOCSIS modem, as a result, the following config / etc / ppp / peers / rt was received:
noipdefault defaultroute replacedefaultroute hide-password noauth persist plugin rp-pppoe.so eth1 user "ptn" usepeerdns But this is not all - you need to configure / etc / network / interfaces as follows:
auto rt iface rt inet ppp pre-up /sbin/ifconfig eth1 up provider rt ')
We turn a router into WiFi-AP
The original idea was to make 2 WiFi networks: one for their computers and laptops, with a strong password and connection to all necessary resources, and the second for guests who wanted to go online, but don’t need to know what's going on in my network.
As a result, hostapd was installed on the server with the following configuration file (all network names and passwords were changed):
interface=wlan0 driver=nl80211 country_code=RU ieee80211d=1 hw_mode=g channel=9 ssid=Private bridge=br0 preamble=1 ignore_broadcast_ssid=0 wpa=3 wpa_key_mgmt=WPA-PSK wpa_pairwise=TKIP CCMP rsn_pairwise=CCMP wpa_passphrase=MyVeryStrongPassword wmm_enabled=1 ieee80211n=1 ht_capab=[HT40-][SHORT-GI-20][SHORT-GI-40] internet=1 bss=wlan0_0 ssid=Guest preamble=1 ignore_broadcast_ssid=0 wpa=3 wpa_key_mgmt=WPA-PSK wpa_pairwise=TKIP CCMP rsn_pairwise=CCMP wpa_passphrase=passw0rd wmm_enabled=1 ieee80211n=1 ht_capab=[HT40-][SHORT-GI-20][SHORT-GI-40] internet=1 Here we also set bridge for eth0 and wlan0 - this will allow those who connect to our network to see it as a whole, and not the wireless segment. Modify networks:
auto eth0 wlan0 wlan0_0 br0 iface eth0 inet manual allow-hotplug wlan0 allow-hotplug wlan0_0 iface wlan0 inet manual pre-up ifconfig wlan0 hw ether f2:7d:68:6d:51:30 iface br0 inet static bridge_ports eth0 wlan0 address 192.168.1.1 netmask 24 iface wlan0_0 inet static address 192.168.254.1 netmask 24 A bit about magic in pre-up for wlan0: to work with multiple APs, we need to use more than one MAC address. Hostapd assigns MACs for virtual interfaces (wlan0_0 in our case) automatically, but to do this, the address of the first access point must have several “empty” bits at the end. I did not trivialize and released immediately 4 pieces. The task at home - calculate how much maximum AP can now be run on a single map.
Fly - IP to each and everyone, for free!
All computers on the network, sadly, must issue IP addresses. Yes, yes, we will do it.
Without thinking, the server was running a DHCP server with the following configuration:
update-static-leases on; authoritative; allow unknown-clients; use-host-decl-names on; log-facility local7; subnet 192.168.1.0 netmask 255.255.255.0 { interface br0; authoritative; range 192.168.1.2 192.168.1.254; option subnet-mask 255.255.255.0; option ntp-servers 192.168.1.1; option domain-name-servers 192.168.1.1; option netbios-name-servers 192.168.1.1; option routers 192.168.1.1; option domain-name "local"; } subnet 192.168.254.0 netmask 255.255.255.0 { interface wlan0_0; authoritative; range 192.168.254.2 192.168.254.254; option subnet-mask 255.255.255.0; option domain-name-servers 8.8.8.8, 8.8.4.4; option routers 192.168.254.1; } local-address 192.168.1.1; It can be seen that DNS, WINS, NTP and Gateway 192.168.1.1 are also issued for 192.168.1.1/24 - it's time to configure them.
With the gateway, everything is simple, I think, only the lazy does not know these commands:
sysctl net.ipv4.ip_forward=1 iptables –t nat -A POSTROUTING -o ppp0 -j MASQUERADE Of course, we install iptables-persistent to save our settings, as well as prescribe the appropriate parameters in /etc/sysctl.conf.
Now our server is a full-fledged Chinese router for $ 10. What? Does it seem weak to you? Me too. We go further.
How do I get to the library?
I think no one forgot that we need a DNS? The simplest forwarding is configured to absurdly simple, but after all we are doing a full-fledged server with rezolving and reverse-zones ... We put bind9, and configure:
options { directory "/var/cache/bind"; forwarders { 8.8.8.8; 8.8.4.4; }; dnssec-validation auto; auth-nxdomain no; listen-on { 127.0.0.1; 192.168.1.1; }; allow-transfer { none; }; version none; }; zone "local" IN { type master; file "/var/lib/bind/db.localnet"; }; zone "1.168.192.in-addr.arpa" IN { type master; file "/var/lib/bind/db.localnet-rev"; }; Now we need the forward and reverse zone files:
/var/lib/bind/db.localnet
$ORIGIN . $TTL 86400 ; 1 day local IN SOA ns.local. router.local. ( 200216990 ; serial 28800 ; refresh (8 hours) 7200 ; retry (2 hours) 604800 ; expire (1 week) 86400 ; minimum (1 day) ) NS ns.local. $ORIGIN local. $TTL 86400 ; 1 day ns A 192.168.1.1 server A 192.168.1.1 router A 192.168.1.1 /var/lib/bind/db.localnet-rev
$ORIGIN . $TTL 86400 ; 1 day 1.168.192.in-addr.arpa IN SOA ns.local. router.local. ( 2001105214 ; serial 28800 ; refresh (8 hours) 14400 ; retry (4 hours) 3600000 ; expire (5 weeks 6 days 16 hours) 86400 ; minimum (1 day) ) NS ns.local. $ORIGIN 1.168.192.in-addr.arpa. $TTL 3600 ; 1 hour 1 PTR router.local. Simply? And now we will make it so that every computer on the network can be seen not by IP, but by DNS name.
To do this, we need to configure DDNS. This technology allows you to associate a DHCP server that provides addresses and a DNS server.
First, create a key for our DDNS:
dnssec-keygen -a HMAC-MD5 -b 128 -r /dev/urandom -n USER DDNS_UPDATE This command will create us 2 files with DDNS-key. We need the key content:
cat Kddns_update.+157+36693.key DDNS_UPDATE. IN KEY 0 3 157 HEyb0FU9+aOXnYFQiXfiVA== “HEyb0FU9 + aOXnYFQiXfiVA ==” is our key.
Let's a little edit our DHCP config by adding the following options to it:
ddns-updates on; ddns-update-style interim; key rndc-key { algorithm HMAC-MD5; secret HEyb0FU9+aOXnYFQiXfiVA==; } zone local. { primary 192.168.1.1; key rndc-key; } zone 1.168.192.in-addr.arpa. { primary 192.168.1.1; key rndc-key; } subnet 192.168.1.0 netmask 255.255.255.0 { … ddns-domainname "local."; ddns-rev-domainname "in-addr.arpa."; } Do the same with DNS:
key "rndc-key" { algorithm hmac-md5; secret "HEyb0FU9+aOXnYFQiXfiVA=="; }; zone "local" IN { … allow-update { key rndc-key; }; }; zone "1.168.192.in-addr.arpa" IN { … allow-update { key rndc-key; }; }; Voila - and this killer feature works.
The future is still here. Sixth version
So historically, ©, my provider (a contemptuous glance towards Rostelecom) does not issue IPv6 (although promised ).
At present, throughout the entire length of the Rostelecom network, it has provided the ability to work over IPv6, says the operator’s press service.
Well, fix this misunderstanding. As a broker, I chose sixxs.net - they have tunnel servers in Russia, and their tunnel is easy to configure for the case of dynamic IP.
I will omit the process of registering and getting the tunnel / subnet settings - everything is pretty simple. I will stop on adjustment.
Setting up IPv6 on the server itself is done in 2 steps. First, put the aiccu package - this is the tunneling program. When installing we will be asked for a login and password from sixxs, and some other data. After launch, we will have a new interface:
sixxs Link encap:IPv6-in-IPv4 inet6 addr: 2a02:578:5002:xxx::2/64 Scope:Global UP POINTOPOINT RUNNING NOARP MTU:1280 Metric:1 … The server now has access to the v6 network - why not share it with others?
To begin with, let's allow IPv6-forwarding (don't forget to put it in /etc/sysctl.conf):
sysctl net.ipv6.conf.all.forwarding=1 You do not need to make settings with iptables - hello, 21st century!
Next on the sixxs site we get the subnet. Its address will be very similar to the address of our tunnel - be careful, they are different!
After receiving the address of the form 2a02: 578: 5002: xxxx :: / 64, proceed to configure it. First, let's set our server to 2a02: 578: 5002: xxxx :: 1, adding the following lines to interfaces:
iface br0 inet6 static address 2a02:578:5002:xxxx::1 netmask 64 Secondly, let's allow the issuance of IPv6 computers on the network. Install the radvd package, and configure it as follows:
interface br0 { AdvSendAdvert on; prefix 2a02:578:5002:xxxx::/64 { AdvOnLink on; AdvAutonomous on; AdvRouterAddr on; }; RDNSS 2a02:578:5002:xxxx::1 { }; }; Add IPv6 DNS to our bind settings - for complete feng shui:
options { forwarders { … 2001:4860:4860::8888; 2001:4860:4860::8844; }; listen-on-v6 { ::1/128; 2a02:578:5002:xxxx::/64; }; … }; That's all - now we have access, for example, to ipv6.google.com , or, which is much more valuable, to ipv6.nnm-club.me ;)
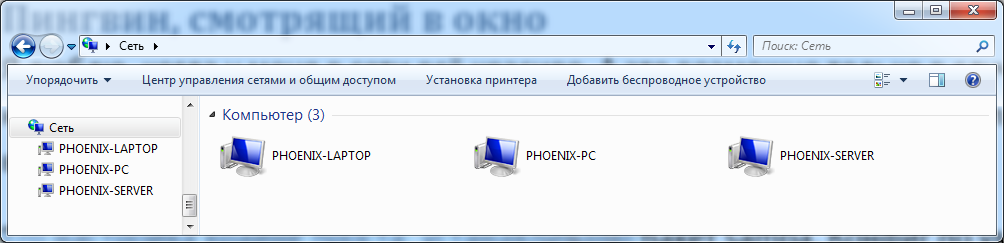
Penguin looking out the window
I love it when everything is beautiful on my network. And this is possible only in the case of complete harmony. For example, when all computers see each other. For Windows workstations, it is fair to recall WINS (remember, we even issued this setting in DHCP).
Its setup is extremely simple: install the samba package. The default config needs to be slightly changed:
workgroup = WORKGROUP wins support = yes dns proxy = yes interfaces = lo br0 bind interfaces only = yes server role = standalone server Checking the results ... Oh, it's all good!
By the way, since we have samba, you can immediately set up a file dump. But this is already so hackneyed topic that I leave it on Google’s shoulders. In fact, everything should work out of the box - except for read only for homes, turn off yes smbpasswd -a user ...
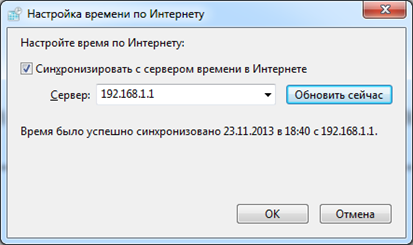
What time is it now?
Set up the distribution of time on the server: install ntp. With configs, everything is absurdly simple:
server 0.ru.pool.ntp.org server 1.ru.pool.ntp.org server 2.ru.pool.ntp.org server 3.ru.pool.ntp.org … broadcast 192.168.1.1 And here is the result:
We are already close to microtik level routers for $ 150- $ 200. But this is not all? Of course not.
Killer-feature # 1: I2P
And why not have access to this network without any settings, without proxy servers and so on? So I think "why." To get started, let's install the imputed version of Java:
echo "deb http://ppa.launchpad.net/webupd8team/java/ubuntu precise main" >> /etc/apt/sources.list apt-key adv --keyserver hkp://keyserver.ubuntu.com:80 --recv-keys EEA14886 apt-get update apt-get install oracle-java7-installer And install the router itself:
echo "deb http://deb.i2p2.no/ unstable main" >> /etc/apt/sources.list wget "http://www.i2p2.de/_static/debian-repo.pub" -O- -q | apt-key add - apt-get update apt-get install i2p i2p-keyring Now we will create a zone directing all requests to * .i2p to our server. In the bind config:
zone "i2p" IN { type master; file "/etc/bind/db.i2p"; }; The zone itself:
$ORIGIN i2p $TTL 7200 i2p. IN SOA ns.i2p. hostmaster.i2p. ( 2010020701 ; serial 7200 ; refresh 1800 ; retry 7200 ; expire 7200 ; minimum ) i2p. IN NS ns.i2p. ns.i2p. IN A 192.168.1.1 *.i2p. IN A 192.168.1.1 *.i2p. IN AAAA 2a02:578:5002:xxxx::1 Great, but how to handle it now? It was trivial to wrap all the traffic to the port of the router I did not succeed - the proxy cursed that it could not work that way. I had to set up a bunch of nginx + php5-fpm and write a small script. How to do the first part - it is not necessary to search for a long time, the benefit of the manuals on the network is complete. The second part of:
/ etc / nginx / sites-enabled / i2p
server { listen [2a02:578:5002:xxxx::1]:80; listen 192.168.1.1:80; # server_name localhost.i2p; location / { proxy_pass http://127.0.0.1:7657; } } server { listen [2a02:578:5002:xxxx::1]:80; listen 192.168.1.1:80; server_name *.i2p; location / { fastcgi_pass unix:/var/run/php5-fpm; include fastcgi_params; # fastcgi_param SCRIPT_FILENAME /etc/nginx/proxy.php; # HTTP proxy i2p fastcgi_param PROXY_PASS 127.0.0.1:4444; } } The script itself can be seen here .
It's all! Now we have access to i2p even from the phone - no problem.
Killer-feature # 2: make the workplace a working network
So historically ©, that I am a system administrator for the remote in several companies. And it is very useful to have access to them from any computer on the network. Setting up OpenVPN (or any other) for the server is carried out as for any other client. For example, after these actions we have a tap0 interface with IP 10.0.0.7/24. But if we turn to the local network at 10.0.0.1, the traffic will go to the default gateway of the provider. Fix this flaw:
iptables -t nat -A POSTROUTING -d 10.0.0.0/24 -o tap0 -j MASQUERADE iptables-save > /etc/iptables/rules.v4 We do the same for all networks on the server.
Instead of conclusion
We have a full-fledged server that we can use at our discretion. DNS, nginx, IPv6, i2p ... You can also set a zone for local development, for example, * .dev, and test your sites from any device on the local network. Since each computer on the network has a permanent IPv6 address, you can access it from anywhere in the world (Security warning! Configure firewalls correctly!).
And this is all - just the tip of the iceberg. What will be its underwater part - you decide.
I will be glad to hear comments, suggestions, sensible criticism and so on. Thank.
Source: https://habr.com/ru/post/203376/
All Articles