CRON in the cloud: the complete guide to the new Windows Azure Scheduler task scheduler service

Performing scheduled tasks in Windows Azure has always been an interesting topic with a number of off-the-shelf solutions that helped to get the job done right: mobile services scheduler , Quartz Scheduler, FluentScheduler , WebBackgrounder , ScheduledEnqueueTimeUtc , etc. Although you could successfully use these options, in fact they were not designed specifically for your Windows Azure applications that are based on the role of cloud services or websites.
For this reason, almost a year ago, Aditi announced its new service - a scalable task scheduler that was built specifically to meet the needs of applications running in Windows Azure. Aditi Scheduler was created by Ryan Dunn , a legend from the Windows Azure team, a few months ago, the service celebrated 500,000 tasks and added support for Windows Azure Storage Queues.
')
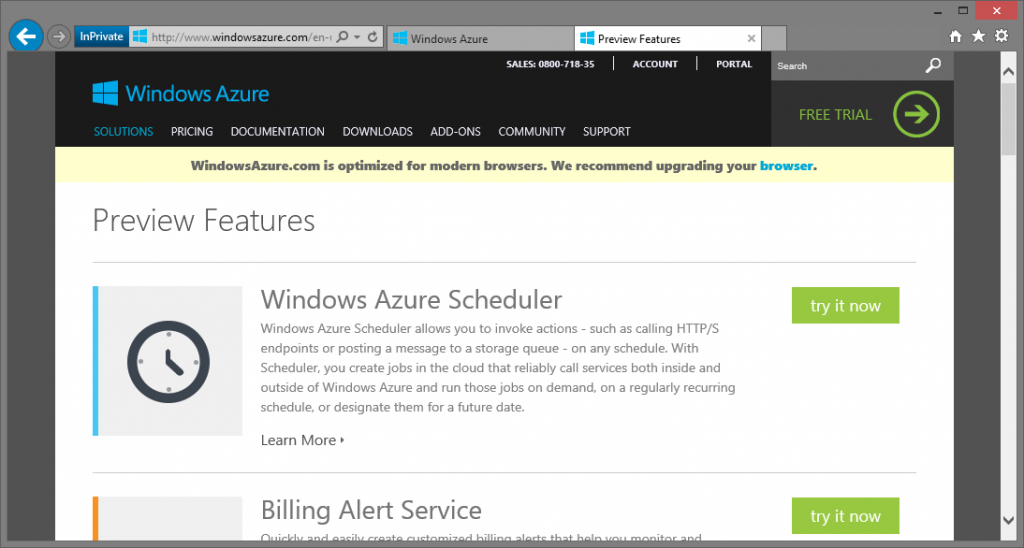
But recently, Microsoft announced an excellent alternative to Aditi Scheduler - a new Windows Azure Scheduler service:
Windows Azure Scheduler allows you to perform various actions, such as HTTP / S requests or sending messages to the storage queue, on a schedule. With the help of the scheduler, you can create tasks in the cloud that are guaranteed to cause services both inside the cloud infrastructure and outside it. You can perform these tasks on demand or on a regular basis on a schedule, as well as schedule a performance on some date in the future.
Let's take a closer look at the new service.
Activation of the preview service
The Windows Azure Scheduler service is currently available as a preview, so to use it you must subscribe to it on the advanced services page: http://www.windowsazure.com/en-us/services/preview/ .

Service management is not yet available in the Windows Azure administration portal. The only way to interact with the scheduler is the open REST API or the use of a ready-made SDK. The service APIs are described in detail on MSDN in the Scheduler REST API Reference section.
Install SDK
Scheduler SDK is available as a NuGet package (in the first version) and is part of the new Windows Azure Management Libraries management libraries released some time ago. First you need to install the package:
PM> Install-Package Microsoft.WindowsAzure.Management.Scheduler –Pre
Getting started
In order to quickly test new features, I used the Windows Azure Publishing Settings File (which you can download from here ). The following class extracts data from a file and creates a CertificateCloudCredentials object on its base, which you can use for authentication when working with the management library:
public static class CertificateCloudCredentialsFactory { public static CertificateCloudCredentials FromPublishSettingsFile(string path, string subscriptionName) { var profile = XDocument.Load(path); var subscriptionId = profile.Descendants("Subscription") .First(element => element.Attribute("Name").Value == subscriptionName) .Attribute("Id").Value; var certificate = new X509Certificate2( Convert.FromBase64String(profile.Descendants("PublishProfile").Descendants("Subscription").Single().Attribute("ManagementCertificate").Value)); return new CertificateCloudCredentials(subscriptionId, certificate); } } Using this class is a very simple task:
var publishSettingsFilePath = @"D:\\azdem.publishsettings"; var subscriptionName = "Azdem194D92901Y"; var credentials = CertificateCloudCredentialsFactory .FromPublishSettingsFile(publishSettingsFilePath, subscriptionName); The task scheduler service is executed in the cloud service (Cloud Service), which is why we started with the creation of a cloud service. At the moment, you should take into account one thing: the cloud service created should be located in the region where the Windows Azure Scheduler service is supported (at the preview stage, support is limited to only some of the regions, but the rest will be added later with the service coming into commercial operation).
var cloudServiceClient = new CloudServiceManagementClient(credentials); var result = cloudServiceClient.CloudServices.Create("sandrino-cs1", new CloudServiceCreateParameters() { Description = "sandrino-cs1", GeoRegion = "north europe", Label = "sandrino-cs1" }); Console.WriteLine(result.Status); Console.WriteLine(result.HttpStatusCode); Registering a task scheduler resource provider
It is known that a cloud service can contain both virtual machines (IaaS) and web or worker roles (PaaS). However, we can now make sure that the cloud service can also contain a Resource Provider, such as the Windows Azure Scheduler. In order to use such a resource provider in your cloud service, you first need to enable it for your Subscriptions. If you do not do this, then you will encounter the following error:
An unhandled exception of type 'Microsoft.WindowsAzure.CloudException' occurred in Microsoft.WindowsAzure.Management.Scheduler.dllNow let's register the task scheduler provider (registration is valid for the entire subscription):
Additional information: ForbiddenError:
var schedulerServiceClient = new SchedulerManagementClient(credentials); var result = schedulerServiceClient.RegisterResourceProvider(); Console.WriteLine(result.RequestId); Console.WriteLine(result.StatusCode); Console.ReadLine(); After registering a resource provider, it becomes possible to request its properties:
var schedulerServiceClient = new SchedulerManagementClient(credentials); var result = schedulerServiceClient.GetResourceProviderProperties(); foreach (var prop in result.Properties) { Console.WriteLine(prop.Key + ": " + prop.Value); } Console.ReadLine(); For example, this code allows us to find out the usage plans available for the service and the regions in which the service can operate:

Job Collections
The next step is to create a “Job Collection” (Job Collection), which is a container for storing your tasks and a mechanism for applying various quotas to them. In addition, this is the place where you need to choose free or paid service usage levels:
A task collection contains a group of tasks and manages settings, quotas, and restrictions that are common to all tasks in the collection. The collection of tasks is created by the owner of the subscription, it combines tasks together based on the consumption or boundaries of the application. The collection of tasks is limited to one region. It also allows you to set MaxJobs and MaxRecurrence quotas on the consumption metrics of all tasks in the collection.More information on quotas that can be used on both plans can be found at this link: http://msdn.microsoft.com/en-us/library/windowsazure/dn479786.aspx .
var schedulerServiceClient = new SchedulerManagementClient(credentials); var result = schedulerServiceClient.JobCollections.Create("sandrino-cs2", "jobcoll001", new JobCollectionCreateParameters() { Label = "jobcoll001", IntrinsicSettings = new JobCollectionIntrinsicSettings() { Plan = JobCollectionPlan.Standard, Quota = new JobCollectionQuota() { MaxJobCount = 100, MaxJobOccurrence = 100, MaxRecurrence = new JobCollectionMaxRecurrence() { Frequency = JobCollectionRecurrenceFrequency.Minute, Interval = 1 } } } }); Console.WriteLine(result.RequestId); Console.WriteLine(result.StatusCode); Console.ReadLine(); HTTP (S) and Store Queue Tasks
Now that we have a collection of tasks, we can start creating tasks for the scheduler. Task Scheduler currently supports three types of tasks: HTTP, HTTPS, and storage queues. Let's first look at http support:
var schedulerClient = new SchedulerClient(credentials, "sandrino-cs2", "jobcoll001"); var result = schedulerClient.Jobs.Create(new JobCreateParameters() { Action = new JobAction() { Type = JobActionType.Http, Request = new JobHttpRequest() { Body = "customer=sandrino&command=sendnewsletter", Headers = new Dictionary() { { "Content-Type", "application/x-www-form-urlencoded" }, { "x-something", "value123" } }, Method = "POST", Uri = new Uri("http://postcatcher.in/catchers/527af9acfe325802000001cb") } }, StartTime = DateTime.UtcNow, Recurrence = new JobRecurrence() { Frequency = JobRecurrenceFrequency.Minute, Interval = 1, Count = 5 } }); Console.WriteLine(result.RequestId); Console.WriteLine(result.StatusCode); Console.ReadLine(); This task is created in my “jobcoll001” task collection, it will send a POST request with a specific body and request headers. Please note that I specify the content type for the request, as it is required to perform HTTP (S) type tasks. As I use the paid plan of the scheduler, I am allowed to create tasks with repetition every minute. For this demonstration, I limited the task to five executions.
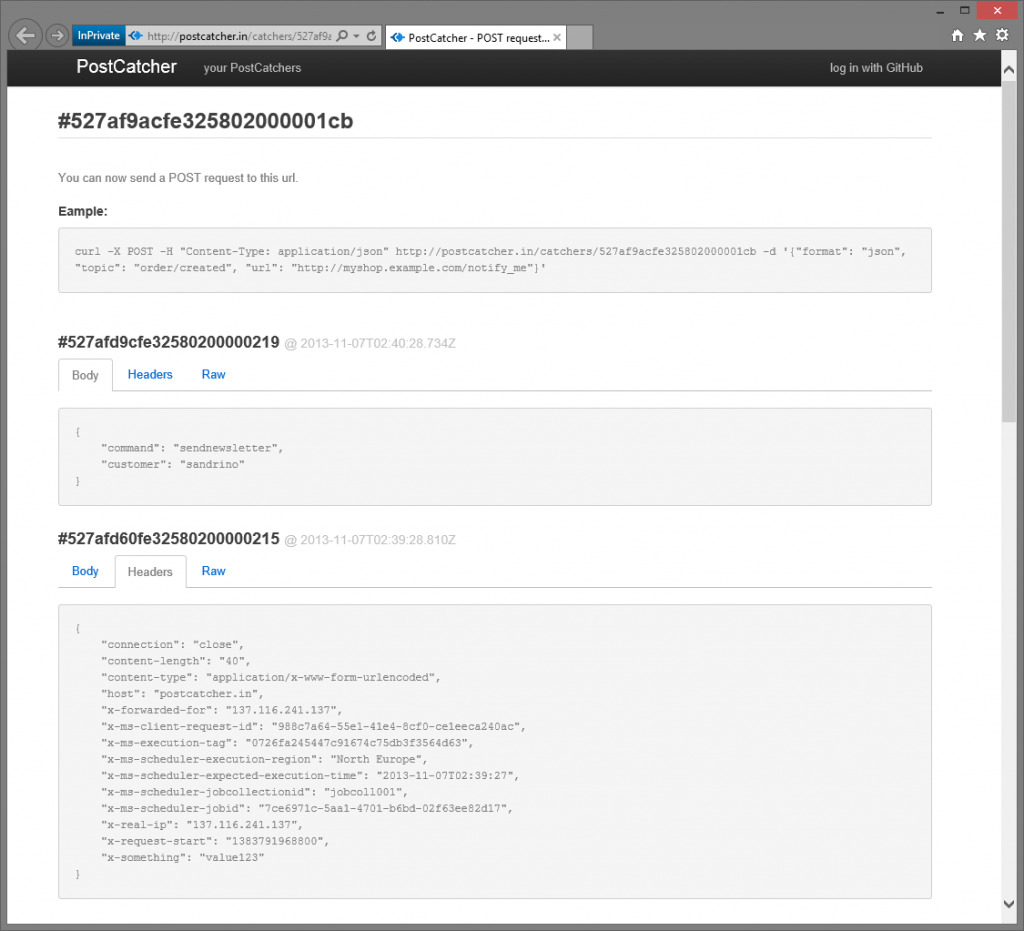
Finally, if you pay attention to the URI, you will notice that I use the service http://postcatcher.in . This is a free service that allows you to debug POST requests, which is exactly what I do. Let's take a look at what the task scheduler does:

As you can see, the scheduler sends the request body and the headers specified by me, including some other data. Additional headers contain information about where the task was performed and within which of the collections of tasks the implementation took place.
{ "connection": "close", "content-length": "40", "content-type": "application/x-www-form-urlencoded", "host": "postcatcher.in", "x-forwarded-for": "137.116.241.137", "x-ms-client-request-id": "988c7a64-55e1-41e4-8cf0-ce1eeca240ac", "x-ms-execution-tag": "0726fa245447c91674c75db3f3564d63", "x-ms-scheduler-execution-region": "North Europe", "x-ms-scheduler-expected-execution-time": "2013-11-07T02:39:27", "x-ms-scheduler-jobcollectionid": "jobcoll001", "x-ms-scheduler-jobid": "7ce6971c-5aa1-4701-b6bd-02f63ee82d17", "x-real-ip": "137.116.241.137", "x-request-start": "1383791968800", "x-something": "value123" } Now let's change the task type to the storage queue.
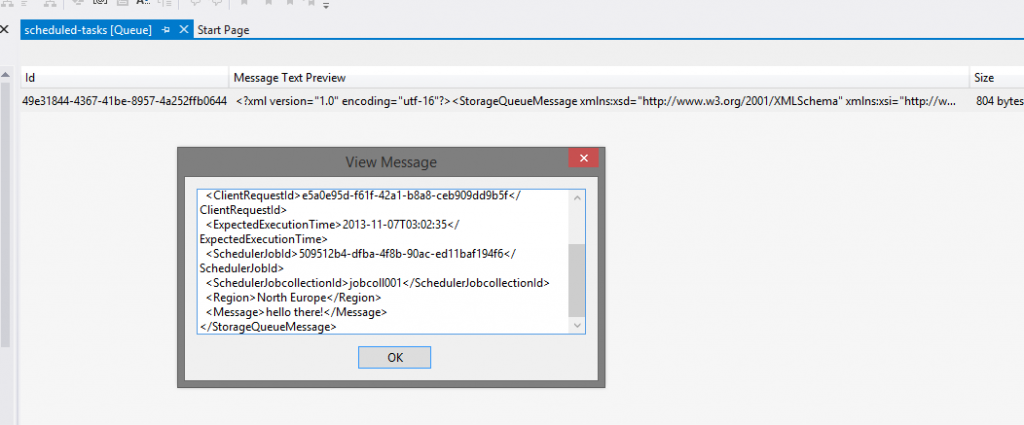
var storageAccount = new CloudStorageAccount(new StorageCredentials("labdrino", ""), true); var queueClient = storageAccount.CreateCloudQueueClient(); var queue = queueClient.GetQueueReference("scheduled-tasks"); queue.CreateIfNotExists(); var perm = new QueuePermissions(); var policy = new SharedAccessQueuePolicy { SharedAccessExpiryTime = DateTime.MaxValue, Permissions = SharedAccessQueuePermissions.Add }; perm.SharedAccessPolicies.Add("jobcoll001policy", policy); queue.SetPermissions(perm); var sas = queue.GetSharedAccessSignature(new SharedAccessQueuePolicy(), "jobcoll001policy"); var schedulerClient = new SchedulerClient(credentials, "sandrino-cs2", "jobcoll001"); var result = schedulerClient.Jobs.Create(new JobCreateParameters() { Action = new JobAction() { Type = JobActionType.StorageQueue, QueueMessage = new JobQueueMessage() { Message = "hello there!", QueueName = "scheduled-tasks", SasToken = sas, StorageAccountName = "labdrino" } }, StartTime = DateTime.UtcNow, Recurrence = new JobRecurrence() { Frequency = JobRecurrenceFrequency.Minute, Interval = 1, Count = 5 } }); Console.WriteLine(result.RequestId); Console.WriteLine(result.StatusCode); Console.ReadLine(); As you can see, to create a task of the type of storage queues we need some more work and code. First you need to create a queue, as well as policies for it with permission to add. For this policy, you need to create a Shared Access Signature signature, which will later be used by the scheduler to send messages to the queue.
The result of the code execution will be a message in the queue, which contains information about the task along with the text of the message “hello there!”:

Task history
After your tasks have been completed, you definitely want to know the results of the work of the scheduler. This can be done using the GetHistory method with passing the task ID parameter to it. After creating the task, the task ID is returned as a response. You can also scroll through all the tasks in the collection by calling the List method:
var schedulerClient = new SchedulerClient(credentials, "sandrino-cs2", "jobcoll001"); foreach (var job in schedulerClient.Jobs.List(new JobListParameters() { State = JobState.Enabled })) { Console.WriteLine("Job: {0} - Action: {1} - State: {2} - Status: {3}", job.Id, job.Action, job.State, job.Status); foreach (var history in schedulerClient.Jobs.GetHistory(job.Id, new JobGetHistoryParameters())) { Console.WriteLine(" > {0} - {1}: {2}", history.StartTime, history.EndTime, history.Message); } } Console.ReadLine(); By running this code, you will get a result similar to the following:
Job: 34851054-f576-48b8-8c77-73b62b502022 - Action: Microsoft.WindowsAzure.Scheduler.Models.JobAction - State: Faulted - Status: Microsoft.WindowsAzure.Scheduler.Models.JobStatusTask history can provide interesting information on task execution. If something goes wrong during the execution of a task, history is the first place where you should start looking for the source of the problem.
> 7/11/2013 2:52:18 - 7/11/2013 2:52:19: StorageQueue Action - The provided queue: "scheduled-tasks" to the given queue
> 7/11/2013 2:52:48 - 7/11/2013 2:52:50: StorageQueue Action - The provided queue: "scheduled-tasks" doesn’t have to be to the given queue
> 7/11/2013 2:53:19 - 7/11/2013 2:53:19: StorageQueue Action - The provided queue: "scheduled-tasks" does not exist to the given queue
> 7/11/2013 2:53:48 - 7/11/2013 2:53:50: StorageQueue Action - The provided queue: "scheduled-tasks" does not exist to the given queue
> 7/11/2013 2:54:20 - 7/11/2013 2:54:20: StorageQueue Action - The provided queue: "scheduled-tasks" does not exist to the given queue
> 7/11/2013 3:05:19 - 7/11/2013 3:05:19: StorageQueue Action - The provided queue: "scheduled-tasks" does not exist to the given queue
> 7/11/2013 3:05:49 AM - 7/11/2013 3:05:49 AM: StorageQueue Action - The provided queue: "scheduled-tasks" doesn’t have to be to the given queue
> 7/11/2013 3:06:18 - 7/11/2013 3:06:19: StorageQueue Action - The provided queue: "scheduled-tasks" doesn’t exist to the given queue
Job: 4db6da21-af4a-4703-b988-671cbb6d5fd5 - Action: Microsoft.WindowsAzure.Scheduler.Models.JobAction - State: Completed - Status: Microsoft.WindowsAzure.Scheduler.Models.JobStatus
> 7/11/2013 2:32:13 - 7/11/2013 2:32:15: Http Action - Response from host 'postcatcher.in': 'Created' Response Headers: Connection: keep-alive
X-Response-Time: 6ms
Date: Thu, 07 Nov 2013 02:32:14 GMT
Set-Cookie: connect.sid = 8SxhjZXandfZQc158Ng2tiYs.kyW9OSZGymzcIJW1eTJJ2MIACyhSyK6mfHVVqqj2r0E; path = /; expires = Thu, 07 Nov 2013 06:32:14 GMT; httpOnly
Server: nginx
X-Powered-By: Express
Body: Created
> 7/11/2013 2:33:14 - 7/11/2013 2:33:15: Http Action - Response from host 'postcatcher.in': 'Created' Response Headers: Connection: keep-alive
X-Response-Time: 18ms
Date: Thu, 07 Nov 2013 02:33:15 GMT
Set-Cookie: connect.sid = BJYkjeu3m26wBfr6G2SDgXZl.nhXEo24T3AVHEMYe4xJIm7gjDmhZvj69edIv4bui% 2Bzs; path = /; expires = Thu, 07 Nov 2013 06:33:15 GMT; httpOnly
Server: nginx
X-Powered-By: Express
Body: Created
Retries in case of errors (Retries)
Ok, suppose you send an HTTP request to your website, which is unavailable (bug, scheduled work, code update, etc.). In this case, you may want to repeat the task again after a few seconds. The good news is that you can do this by specifying the retry policy during task creation:
var schedulerClient = new SchedulerClient(credentials, "sandrino-cs2", "jobcoll001"); var result = schedulerClient.Jobs.Create(new JobCreateParameters() { Action = new JobAction() { Type = JobActionType.Http, Request = ..., RetryPolicy = new RetryPolicy() { RetryCount = 5, RetryInterval = TimeSpan.FromMinutes(1), RetryType = RetryType.Fixed } }, StartTime = DateTime.UtcNow, Recurrence = ... }); In this example, I specify to perform a maximum of five repetitions at intervals of once per minute between them.
Error processing
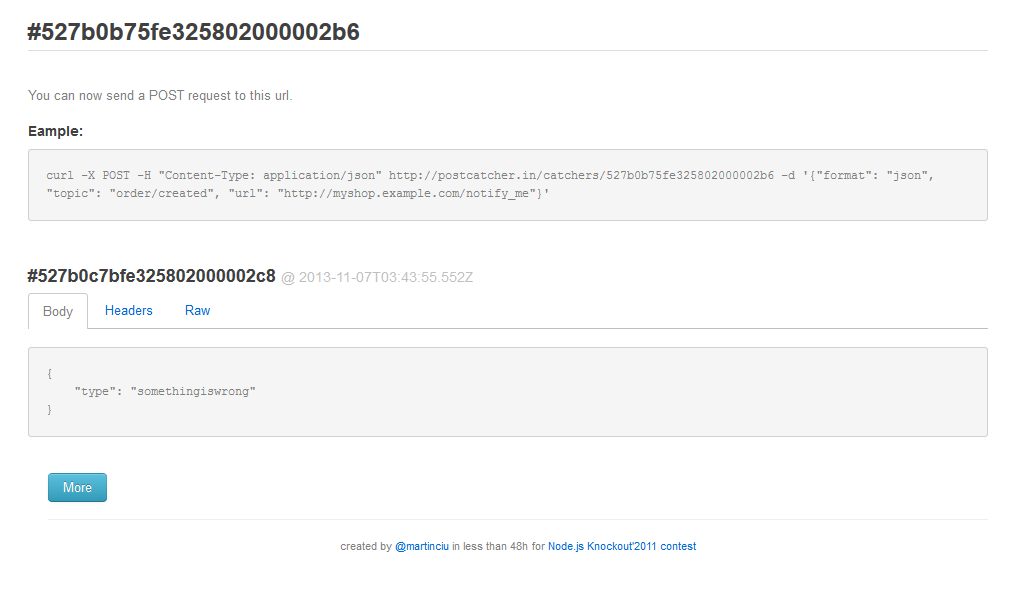
In the case when something went wrong, you may want to receive some kind of signal, for example, a message sent to another queue (or to another data center) or call another URL. All this is possible by specifying the parameters of the Error special section when creating a task. In the following example, I create a task for the StorageQueue storage queue, but specify an erroneous SAS signature. This will cause the scheduler to not be able to complete the task of sending a message to the queue and the ErrorAction section will be called (the code in which sends an error message to my page in postcatcher.in).
var schedulerClient = new SchedulerClient(credentials, "sandrino-cs2", "jobcoll001"); var result = schedulerClient.Jobs.Create(new JobCreateParameters() { Action = new JobAction() { Type = JobActionType.StorageQueue, QueueMessage = new JobQueueMessage() { Message = "hello there!", QueueName = "scheduled-tasks", SasToken = "not working", StorageAccountName = "labdrino" }, ErrorAction = new JobErrorAction() { Type = JobActionType.Http, Request = new JobHttpRequest() { Uri = new Uri("http://postcatcher.in/catchers/527b0b75fe325802000002b6"), Body = "type=somethingiswrong", Headers = new Dictionary() { { "Content-Type", "application/x-www-form-urlencoded" }, { "x-something", "value123" } }, Method = "POST" } } }, StartTime = DateTime.UtcNow, Recurrence = new JobRecurrence() { Frequency = JobRecurrenceFrequency.Minute, Interval = 1, Count = 5 } }); Console.WriteLine(result.RequestId); Console.WriteLine(result.StatusCode); Console.ReadLine(); After this, you can observe the error message in the postcatcher (the message header contains all the necessary information related to your task):

Periodic task repetition
The scheduler allows you to configure several types of periodic repetition of a task, for example, run a task every day, but a maximum of 10 times (Count property):
var schedulerClient = new SchedulerClient(credentials, "sandrino-cs2", "jobcoll001"); var result = schedulerClient.Jobs.Create(new JobCreateParameters() { Action = ..., Recurrence = new JobRecurrence() { Frequency = JobRecurrenceFrequency.Day, Interval = 1, Count = 10 } }); You can specify that the task should be executed every day before a specific date:
var schedulerClient = new SchedulerClient(credentials, "sandrino-cs2", "jobcoll001"); var result = schedulerClient.Jobs.Create(new JobCreateParameters() { Action = ..., Recurrence = new JobRecurrence() { Frequency = JobRecurrenceFrequency.Day, Interval = 1, EndTime = new DateTime(2013, 12, 31) } }); At the same time, you can specify more complex parameters of periodic repetition of tasks. For example, for the mailing list, you can specify the task to be performed weekly on Monday at 11:00 am.
var schedulerClient = new SchedulerClient(credentials, "sandrino-cs2", "jobcoll001"); var result = schedulerClient.Jobs.Create(new JobCreateParameters() { Action = new JobAction() { Type = JobActionType.Http, Request = new JobHttpRequest() { Body = "customers=Europe-West", Headers = new Dictionary() { { "Content-Type", "application/x-www-form-urlencoded" }, }, Method = "POST", Uri = new Uri("http://postcatcher.in/catchers/527af9acfe325802000001cb") } }, StartTime = DateTime.UtcNow, Recurrence = new JobRecurrence() { // Frequency = JobRecurrenceFrequency.None, Schedule = new JobRecurrenceSchedule() { Days = new List() { JobScheduleDay.Monday }, Hours = new List() { 9 }, Minutes = new List() { 11 } } } }); Note. To date, the control library contains a small bug that does not allow you to set the frequency (Frequency) to None (or Schedule). Because of this, you will not be able to create tasks with this type of frequency.
Conclusion
Windows Azure Scheduler has a simple API, support for storage queues, retry policies, error handling. This makes the new service a great tool for performing your scheduled tasks. In addition, the new service opens up a lot of scenarios: scheduling tasks for your Windows Azure Web Site website (without the need to raise worker roles); sending data to your worker role; use of the scheduler in your applications for PHP, Node.js, etc .; building your own agent for Windows Azure SQL Database, etc.
More information can be found at the following links:
- Windows Azure Scheduler service home page: http://www.windowsazure.com/en-ru/services/scheduler/ ;
- Information about prices: http://www.windowsazure.com/ru-ru/pricing/details/scheduler/ (do not forget to read the FAQ);
- Information about quotas http://msdn.microsoft.com/en-us/library/windowsazure/dn479786.aspx
- Information on the use of Windows Azure Management Libraries http://habrahabr.ru/company/microsoft/blog/201566/
Enjoy!
Source: https://habr.com/ru/post/201840/
All Articles