An example of using WxPython to create a node interface. Part 1: Learning to draw
In a small series of articles will be described the use of WxPython to solve a very specific task of developing a user interface, and even how to make this solution universal. This tutorial is designed for those who have already begun to study this library and want to see something more complex and holistic than the simplest examples (although everything will start from relatively simple things).
It all started like this: it took me for one project to make a UI, where I need to edit the message processing sequence. Something like Simulink. Accordingly, it is useful to look for ready-made frameworks / frameworks. At first I thought that the problem was popular and someone had already done this bike, looked, looked and ... did not find it. More precisely found a lot of antique bicycles, but who will use someone else's old bike, if you can make your new one. But since to make a new bike, why not make it universal, you never know, where else is useful.
So I will try in several articles to describe the development process from scratch to a working example. Well, so that it was interesting, and the fermwork was universal, the first task for him would not be Simulink's similarity, but a software for drawing flowcharts à la Visio, but with his blackjack and other participants :)
')
Part 1: Learning to draw
Part 2: Handling Mouse Events
Part 3: We continue to add features + keyboard handling
Part 4: Implementing Drag & Drop
Part 5: We connect nodes
Who cares, welcome under the cat…
A small comment: I will use English names in the code and will often use transliteration, i.e. instead of writing “canvas” or “canvas”, I will write “canvas”. Yes, I know that this may look bad and wrong, but there is no perfect way to mix Russian and English, all methods have their drawbacks (my personal opinion).
Let's start with simple banal things. Since this is a framework, then someone will be based on it to make applications or parts of applications that will do. Those. for the simplest test, we need to make the simplest application. Without thinking too long, I decided that I would draw connected rectangles and started with this code (it will live in the file “ConnectedBoxes.py”):
Everything is rather trivial and obvious, except for a couple of moments: MoveMe is the name of our framework, and Canvas is the main class of our framework responsible for rendering the whole thing.
Actually our framework starts with canvas. It is responsible for storing objects (we will call them nodes), their rendering and handling user interaction. Accordingly, let's start with a simple drawing.
Here everything becomes a little more interesting:
iPhones of rectangles with rounded corners in the window that can be scrolled.
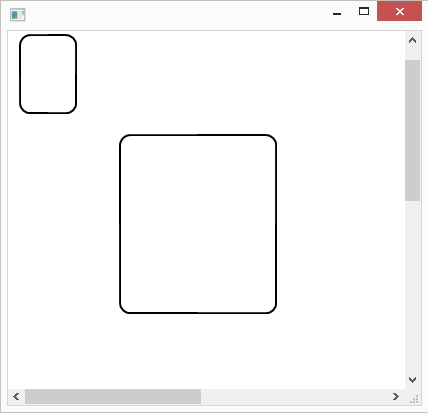
With the simplest drawing figured out, it's time to somehow streamline this process and introduce the concept of an object on the stage. All visible objects will be stored in the list, which will determine the order of the objects. To support this, we will add the "_canvasObjects" field to the canvas class and slightly modify the rendering process, i.e. instead of drawing directly, we will call the "Render" method of all objects on the scene. Now the code looks like this:
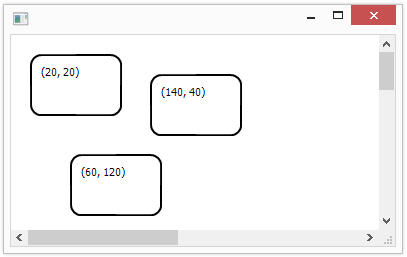
By the way, the list of scene objects at once contains several objects of the class “SimpleBoxNode”, which for now will simply draw rectangles with the coordinates of the objects.
Here everything seems to be rather trivial. Unless it is necessary to specify the font, as the "GraphicsContext" does not have default settings (we will return to this fact and its correction). At the moment, our code draws just such a picture:
No miracles, but enough for a start. This concludes the first part, and in the next part we add the handling of mouse and keyboard events and let the user move our rectangles, join and delete.
To be continued…
PS1: Code can be found on GitHub
PS2: Write about typos in PM.
It all started like this: it took me for one project to make a UI, where I need to edit the message processing sequence. Something like Simulink. Accordingly, it is useful to look for ready-made frameworks / frameworks. At first I thought that the problem was popular and someone had already done this bike, looked, looked and ... did not find it. More precisely found a lot of antique bicycles, but who will use someone else's old bike, if you can make your new one. But since to make a new bike, why not make it universal, you never know, where else is useful.
So I will try in several articles to describe the development process from scratch to a working example. Well, so that it was interesting, and the fermwork was universal, the first task for him would not be Simulink's similarity, but a software for drawing flowcharts à la Visio, but with his blackjack and other participants :)
')
Part 1: Learning to draw
Part 2: Handling Mouse Events
Part 3: We continue to add features + keyboard handling
Part 4: Implementing Drag & Drop
Part 5: We connect nodes
Who cares, welcome under the cat…
A small comment: I will use English names in the code and will often use transliteration, i.e. instead of writing “canvas” or “canvas”, I will write “canvas”. Yes, I know that this may look bad and wrong, but there is no perfect way to mix Russian and English, all methods have their drawbacks (my personal opinion).
1. First test
Let's start with simple banal things. Since this is a framework, then someone will be based on it to make applications or parts of applications that will do. Those. for the simplest test, we need to make the simplest application. Without thinking too long, I decided that I would draw connected rectangles and started with this code (it will live in the file “ConnectedBoxes.py”):
import wx from MoveMe.Canvas.Canvas import Canvas class CanvasWindow(wx.Frame): def __init__(self, *args, **kw): wx.Frame.__init__(self, *args, **kw) s = wx.BoxSizer(wx.VERTICAL) s.Add(Canvas(self), 1, wx.EXPAND) self.SetSizer(s) if __name__ == '__main__': app = wx.PySimpleApp() CanvasWindow(None).Show() app.MainLoop() Everything is rather trivial and obvious, except for a couple of moments: MoveMe is the name of our framework, and Canvas is the main class of our framework responsible for rendering the whole thing.
2. Learn to draw
Actually our framework starts with canvas. It is responsible for storing objects (we will call them nodes), their rendering and handling user interaction. Accordingly, let's start with a simple drawing.
import wx class Canvas(wx.PyScrolledWindow): """ Canvas stores and renders all nodes and node connections. It also handles all user interaction. """ def __init__(self, *args, **kw): super(Canvas, self).__init__(*args, **kw) self.scrollStep = kw.get("scrollStep", 10) self.canvasDimensions = kw.get("canvasDimensions", [800, 800]) self.SetScrollbars(self.scrollStep, self.scrollStep, self.canvasDimensions[0]/self.scrollStep, self.canvasDimensions[1]/self.scrollStep) self._dcBuffer = wx.EmptyBitmap(*self.canvasDimensions) self.Render() self.Bind(wx.EVT_PAINT, lambda evt: wx.BufferedPaintDC(self, self._dcBuffer, wx.BUFFER_VIRTUAL_AREA) ) def Render(self): """Render all nodes and their connection in depth order.""" cdc = wx.ClientDC(self) self.PrepareDC(cdc) dc = wx.BufferedDC(cdc, self._dcBuffer) dc.Clear() gc = wx.GraphicsContext.Create(dc) gc.SetPen(wx.Pen('#000000', 2, wx.SOLID)) gc.DrawRoundedRectangle(12, 34, 56, 78, 10) gc.DrawRoundedRectangle(112, 134, 156, 178, 10) Here everything becomes a little more interesting:
- First, we inherit “wx.PyScrolledWindow” so that our window can be scrolled and set the parameters of scrolling in “self.SetScrollbars”.
- Secondly, we will not be drawing directly, but in the buffer, so that all this happens faster and without flickering. To do this, use "wx.BufferedDC" and a buffer that is a bitmap.
- And thirdly, we will use “wx.GraphicsContext” for convenient state saving. It has “PushState” and “PopState” methods that save settings for brushes, fonts, and so on, which is especially useful, since the user code will draw blocks on the screen and no one guarantees that the user will return everything to the place.
3. Arrange the scene
With the simplest drawing figured out, it's time to somehow streamline this process and introduce the concept of an object on the stage. All visible objects will be stored in the list, which will determine the order of the objects. To support this, we will add the "_canvasObjects" field to the canvas class and slightly modify the rendering process, i.e. instead of drawing directly, we will call the "Render" method of all objects on the scene. Now the code looks like this:
import wx from MoveMe.Canvas.Objects.SimpleBoxNode import SimpleBoxNode class Canvas(wx.PyScrolledWindow): """ Canvas stores and renders all nodes and node connections. It also handles all user interaction. """ def __init__(self, *args, **kw): super(Canvas, self).__init__(*args, **kw) self.scrollStep = kw.get("scrollStep", 10) self.canvasDimensions = kw.get("canvasDimensions", [800, 800]) self.SetScrollbars(self.scrollStep, self.scrollStep, self.canvasDimensions[0]/self.scrollStep, self.canvasDimensions[1]/self.scrollStep) self._canvasObjects = [SimpleBoxNode([20,20]), SimpleBoxNode([140,40]), SimpleBoxNode([60,120])] self._dcBuffer = wx.EmptyBitmap(*self.canvasDimensions) self.Render() self.Bind(wx.EVT_PAINT, lambda evt: wx.BufferedPaintDC(self, self._dcBuffer, wx.BUFFER_VIRTUAL_AREA) ) def Render(self): """Render all nodes and their connection in depth order.""" cdc = wx.ClientDC(self) self.PrepareDC(cdc) dc = wx.BufferedDC(cdc, self._dcBuffer) dc.Clear() gc = wx.GraphicsContext.Create(dc) for obj in self._canvasObjects: gc.PushState() obj.Render(gc) gc.PopState() By the way, the list of scene objects at once contains several objects of the class “SimpleBoxNode”, which for now will simply draw rectangles with the coordinates of the objects.
import wx class SimpleBoxNode(object): """ SimpleBoxNode class represents a simplest possible canvas object that is basically a rectangular box. """ def __init__(self, pos): self.position = pos self.boundingBoxDimensions = [90, 60] def Render(self, gc): gc.SetPen(wx.Pen('#000000', 2, wx.SOLID)) gc.DrawRoundedRectangle(self.position[0], self.position[1], self.boundingBoxDimensions[0], self.boundingBoxDimensions[1], 10) gc.SetFont(wx.SystemSettings.GetFont(wx.SYS_DEFAULT_GUI_FONT)) gc.DrawText("(%d, %d)"%(self.position[0], self.position[1]), self.position[0]+10, self.position[1]+10) Here everything seems to be rather trivial. Unless it is necessary to specify the font, as the "GraphicsContext" does not have default settings (we will return to this fact and its correction). At the moment, our code draws just such a picture:
No miracles, but enough for a start. This concludes the first part, and in the next part we add the handling of mouse and keyboard events and let the user move our rectangles, join and delete.
To be continued…
PS1: Code can be found on GitHub
PS2: Write about typos in PM.
Source: https://habr.com/ru/post/201336/
All Articles