FileAPI 2.0: Uploading files to the server a year later
 Hi Habr! About a year ago, I presented to you the first version of the open-source FileAPI library , designed to work with files on the client and then upload to the server.
During this time a long way has been traveled. The library earned 670+ stars and 90+ forks. With the help of the github-community, we managed to fix many "childish" problems and make a number of improvements. More than 100 tasks were closed, and thanks to Ilya Lebedev, file downloads were made in parts. Today, I am proud to present you FileAPI 2.0 .
So, the first version had the following features:
- multiple file selection;
- getting information (name, size and mime type);
- generation of preview before loading;
- scaling, cropping and rotation on the client;
- upload all that happened to the server + CORS;
- support for all of the above in older browsers, including IE6.
')
Flash is used to support older browsers. Unlike other similar solutions, where you need to explicitly set the element that will be the "Select files" button, FileAPI does not impose such restrictions. The developer does not need to think about which technology the library is currently using. At the same time, the written code is as close as possible to the native one, i.e. HTML5:
<span class="js-fileapi-wrapper"> <input id="file" type="file" multiple /> </span> <script> var input = document.getElementById("file"); FileAPI.event.on(input, "change", function (){ var list = FileAPI.getFiles(input); // // FileAPI.upload({ url: "./ctrl.php", files: { userFiles: list }, complete: function (err, xhr){ /*...*/ } }); }); </script> The library will determine the capabilities of the browser and, if something is missing, switches to Flash.
Almost immediately after publication, I began to receive the first reviews and suggestions, I will give the most interesting ones.
Error during obfuscation
One user code did not work, at all. The problem was in the construction(api.expando + ++gid) . It turned out that his obfuscator did not understand it and simply removed spaces, which led to a syntax error, so the code had to be changed to (++gid, api.expando + gid) .Features integration with Amazon S3
When calling the FileAPI.upload method, the library adds a unique GET parameter to the url to which you need to make a request, in order to avoid caching the POST post request on mobile devices. When integrating with Amazon S3, it turned out that it does not allow GET parameters. Since it is impossible to accurately determine all mobile devices by the user-agent, a cache option has been added to the upload, with which you can influence the addition of a unique GET parameter.Work with images
All images were forcibly converted to png, which led to a drag on the size of the output file, and the original type also changed, which was critical for many tasks. In addition, it is often necessary to add a watermark to the uploaded image or to take a picture of "yourself" using WebCam."Download" without files
Since the API was created for uploading files, theFileAPI.upload method gave an error when calling it without the files themselves. As it turned out, this is quite a frequent case. For example, when you have a form in which the "file" field is optional.In addition, weak documentation and the lack of uncompressed code (the source was, but compressed with the help of its “bicycle”) made it difficult to debug and make its own changes. The lack of unit tests greatly affected the speed and quality of development. It is not surprising, but many users do not need a low-level API and each of them starts writing some kind of wrapper, in most cases jQuery plugin. Therefore, it was necessary to offer a ready-made solution that would cover all the main tasks.
Having collected and analyzed reviews, an action plan was drawn up:
- Grunt is a tool for building code;
- QUnit - testing the basic functionality (Grunt + PhantomJS);
- Features - improved work with images and WebCam;
- jQuery plugin - super-duper plugin for typical tasks;
- Documentation - a detailed description of the methods and examples.
Grunt
As I said before, in the first version js was built using a primitive script that simply merged and obfuscated 6 files into one. In order to make changes or debug the code, it was necessary to connect 6 source codes in a certain order. This is inconvenient, so a tool for building the project was required. Grunt was chosen as such a tool, which is the de facto standard in the design and build of a project. With it, we not only collect FileAPI, but also run its code through JSHint and QUnit- tests, which I will discuss next. To start using Grunt, it’s enough to create two files: package.json with a description of the package and Gruntfile.js with a list of the necessary tasks and their options.
Let's take a closer look at Gruntfile.js . It consists of 5 main tasks:
jshint
This is a branch from JSLint , a validator to validate JavaScript code. In contrast, JSHint can be configured under your code in order to keep track of a single design style, check for missing semicolons, extra commas at the end of an array or an object, unused variables and parts of code.concat
Collects files in one. In FileAPI, this section consists of two parts, `all` and` html5`, which corresponds to two assemblies: with and without flash support, for example, for mobile projects.uglify
Obfuscation of the code, in our case it compresses the files received after the concat.watch
Since Since the library consists of several files, and only one is connected, then this task monitors changes to js files and runs the task concat .qunit
Using PhantomJS performs QUnit tests, which allows you to test the basic functionality.Using grunt is very simple, but before you begin, you need to install the necessary dependencies. This is done once, using the
npm install command.Now we can run the task:
$ /FileAPI/ > grunt - execute default task (jshint + build)$ /FileAPI/ > grunt build - build and obfuscation (concat + uglify + qunit)$ /FileAPI/ > grunt watch - monitor changes and, if they are found, run concatTesting
As you already understood, QUnit is used for testing, I always liked it for its brevity and simplicity. In addition, for him there is a ready grunt-task . Tests are run through PhantomJS , and during development you can simply refresh the page and wait for the test results.

But, as it turned out, in the standard grunt-task it is impossible to bind files to the inputs I need for the test. So I had to modify it a bit:
qunit: { options: { // : — , — files: { one: ["foo.jpeg"], multiple: ["bar.txt", "baz.png", "qux.zip"] } }, all: ["tests/*.html"] } The first test methods for working with files. Such as obtaining meta information (name, type, size, exif), reading the contents (DataURL, BinaryString and Text). Further loading, during which events and the response from the server are checked.
But the most interesting thing is testing of work with images, everything is sly. Since FileAPI “out of the box” is able to transform images according to specified rules, it is necessary to check that the image received by the server is exactly the one you need. To do this, use two sets of images: the source, which loads the library, and the reference, with which the result is compared. How does this happen? FileAPI loads the image with the transformation parameters being tested and receives dataURL in response. The data is transferred to the assert-function, converted to canvas and pixel-by-pixel compared with the reference image. If the discrepancy is less than <1%, then the test is passed.
function imageEqual(actual/**Image*/, expected/**Image*/, message/**String*/){ actual = toCanvas(actual); expected = toCanvas(expected); if( actual.width != expected.width ){ ok(false, message + ' (width: ' + actual.width + ' != ' + expected.width + ')'); } else if( actual.height != expected.height ){ ok(false, message + ' (height: ' + actual.height + ' != ' + expected.height + ')'); } else { var actualData = actual.getContext('2d').getImageData(0, 0, actual.width, actual.height); var expectedData = expected.getContext('2d').getImageData(0, 0, expected.width, expected.height); var pixels = 0, failPixels = 0; for( var y = 0; y < actualData.height; y++ ){ for( var x = 0; x < actualData.width; x++ ){ var idx = (x + y * actualData.width) * 4; pixels++; if( !pixelEqual(actualData.data, expectedData.data, idx) ){ failPixels++; } } } ok(failPixels / pixels < .01, text + ' (fail pixels: ' + (failPixels / pixels) + ')'); } } function pixelEqual(actual, expected, idx){ var delta = 3; // return (Math.abs(actual[idx] - expected[idx]) < delta) && (Math.abs(actual[idx+1] - expected[idx+1]) < delta) && (Math.abs(actual[idx+2] - expected[idx+2]) < delta); } The peculiarity of this method is that the reference image should be made for each browser (Phantom, Firefox, Chrome). This is due to the fact that the color rendition and compression algorithms in each browser are different. A funny situation happened with Safari. Initially, I saved reference images using the browser, not on the server side. So, in Safari, the image built on the basis of dataURL and the saved disk do not match what you see on the screen, the colors are distorted.
Alas, this is only functional testing, which helps a lot, but cannot replace manual testing where Flash is used. In addition, there is an idea to create a grunt-task, which will run QUnit tests through Selenium, then we will live.
Features
Grunt, testing is, of course, good, but in no way pulls up on version 2.0, I wanted something.
Image overlay
About a month after publication, I was asked how, using the library, to put a watermark on the image and upload the result to the server? This task could be solved by providing direct access to the canvas, through which transformations take place (as was done in jQuery FileUpload ). But, alas, there are IE below version 10, where all the transformations go through Flash, so it was decided to create a method that would allow you to make any number of overlays with a flexible positioning system: FileAPI.Image(file) .overlay([ { x: 10, y: 5, // rel: FileAPI.Image.RIGHT_BOTTOM, // opacity: 0.7, // , 0 1 src: "watermark.png" // } ]) .get(err/**Mixed*/, img/**HTMLElement*/){ /*__*/ }) ; Also, the property of the same name is supported in imageTransform:
FileAPI.upload({ imageTransform: { overlay: { x: 5, y: 5, rel: FileAPI.Image.CENTER_TOP, src: "watermark.png" // } } }); As you can see, the method turned out to be simple, but flexible.
Webcam
The main innovation was the work with a webcam. For this, the navigator.getUserMedia method has been introduced in HTML5. Working with him is very simple:
http://jsfiddle.net/RubaXa/uZhRp/
function setWebCam(video/**HTMLVideo*/, doneFn/**Function*/) { var navigator = window.navigator; var getMedia = navigator.getUserMedia || navigator.webkitGetUserMedia || navigator.mozGetUserMedia || navigator.msGetUserMedia; getMedia.call(navigator, { video: true // - }, function (stream) { var URL = window.URL || window.webkitURL || window.mozURL; video.addEventListener('loadedmetadata', function () { doneFn(); }, false); video.src = URL.createObjectURL(stream); video.play(); }, function () { /* */ }); } setWebCam(videoEl, function () { // }); It seems that everything works, but if you open this example in FireFox, you will see that the callback is triggered before the image appears. Therefore it was necessary to make the definition of a signal through canvas:
http://jsfiddle.net/RubaXa/uZhRp/
Listing
function setWebCam(video/**HTMLVideo*/, doneFn/**Function*/) { function _detectVideoSignal() { var canvas = document.createElement('canvas'), ctx, res = false; try { ctx = canvas.getContext('2d'); ctx.drawImage(video, 0, 0, 1, 1); res = ctx.getImageData(0, 0, 1, 1).data[4] != 255; } catch (e) {} return res; } var navigator = window.navigator; var getMedia = navigator.getUserMedia || navigator.webkitGetUserMedia || navigator.mozGetUserMedia || navigator.msGetUserMedia; getMedia.call(navigator, { video: true }, function (stream) { var pid, URL = window.URL || window.webkitURL || window.mozURL; pid = setInterval(function () { if (_detectVideoSignal()) { clearTimeout(pid); doneFn(); } }, 100); // ... }, function () { /* */ }); } setWebCam(videoEl, function () { // }); Alas, at the time of this writing, the
navigator.getUserMedia method only supports FireFox and Chrome, which is good, but not enough. Therefore, we did a fallback in Flash, which allowed us to use all other browsers. The result was the following API for working with the camera: var el = document.getElementById('container'); // FileAPI.Camera.publish(el, { width: 320, height: 240 }, function (err, cam/**FileAPI.Camera*/){ var btn = document.getElementById('shot') // btn — , FileAPI.event.on(btn, 'click', function (evt){ var shot = cam.shot(); // FileAPI.Image FileAPI.upload({ url: './ctrl.php', files: { photo: shot } }); }); }); FileAPI.Camera
- publish (el, options, callback) - static method for camera publishing;
- start (callback) - start broadcasting;
- shot () - create a screenshot, returns the heir to FileAPI.Image;
- stop () - stop the camera.
Filters
Having made two features, I thought that something else was needed, there was not enough wow effect. But nothing came to mind. After some time, I accidentally stumbled upon the wonderful library of CamanJS , which allows not only to make color correction, but also to use complex image blending modes, as well as powerful filters - I strongly advise. That was what you need: there is a camera, work with images too, it remains to add CamanJS - and your “instagram” with FileAPI, WebCam and filters is ready.
It is very simple to use all this, as part of CamanJS there are 10 pre-installed filters, you can see them in work here and here .
FileAPI.Image(file) .filter('hazyDays') // CamanJS .get(function (err, img/**Image*/){ /* ... */ }) ; In addition, you can transfer a function and implement more complex transformations in it. A reference to the canvas and a callback function will be passed to the input.
FileAPI.Image(file) .filter(function (canvas, callback){ // canvas callback(); }) .get(function (err, img/**Image*/){ /* ... */ }) ; Alas, it all works only with the support of HTML5. To be honest, I really wanted to make support for the above functionality through Flash, and this is even possible: all you need to do is implement the necessary methods for working with canvas in Flash. Another time somewhere in the future somehow another time sometime later.
jQuery.FileAPI
The final innovation was the full plugin for jQuery. In it, I tried to take into account the most common features of downloading files, such as:
- “One button” - select and automatically download the file;
- "Restrictions" - the minimum / maximum size of both the file and the image, in width and height;
- "Work with the queue" - sorting and filtering the file upload queue;
- "Images" - preview, rotate and crop;
- “Interface” - flexible and transparent interface setting;
- As well as Drag'n'Drop and WebCam .
You can evaluate the features on the demo page , github or by looking under the spoiler.
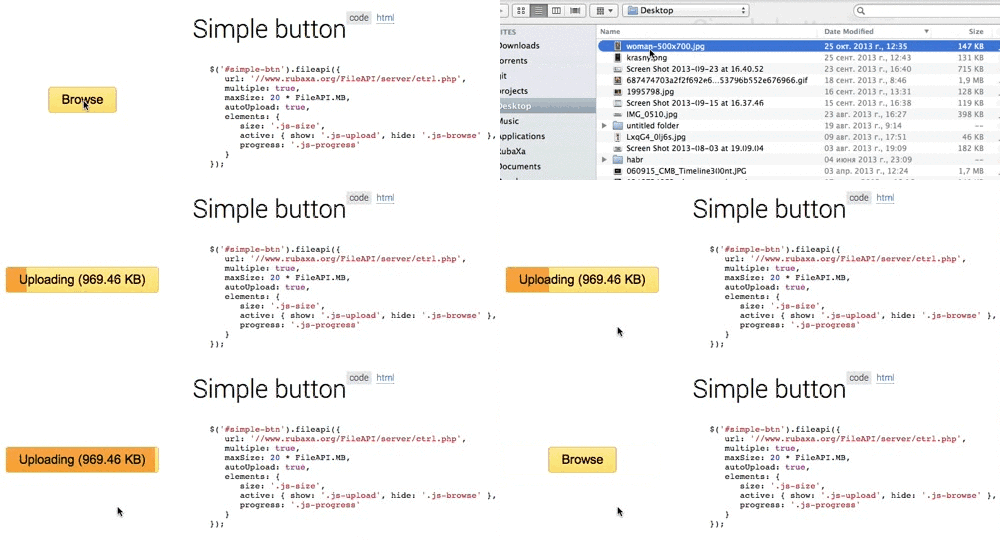
"One button"

Loading avatars

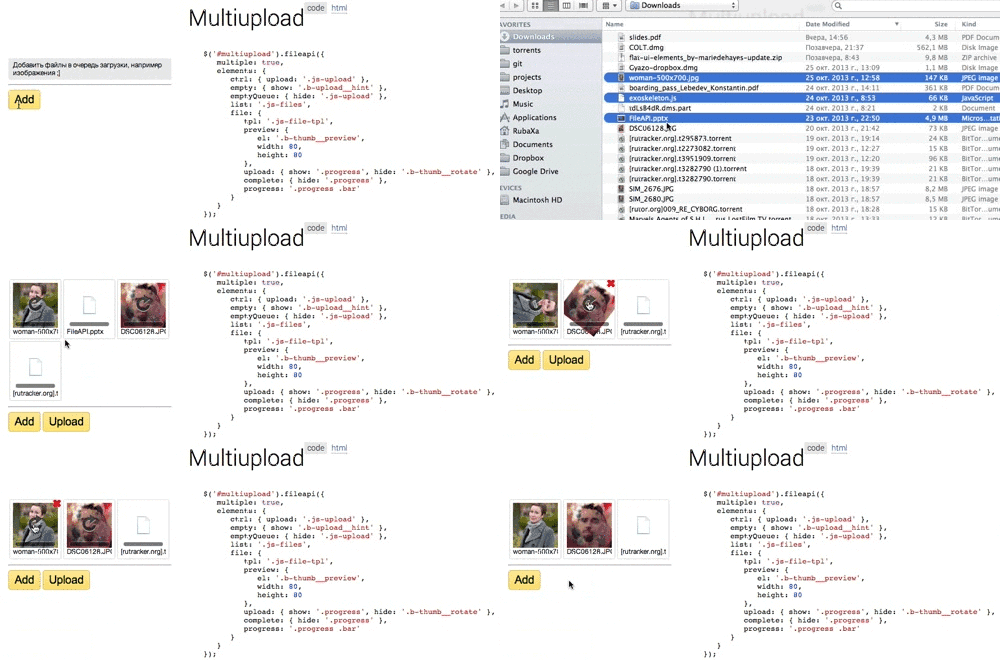
Multiple loading

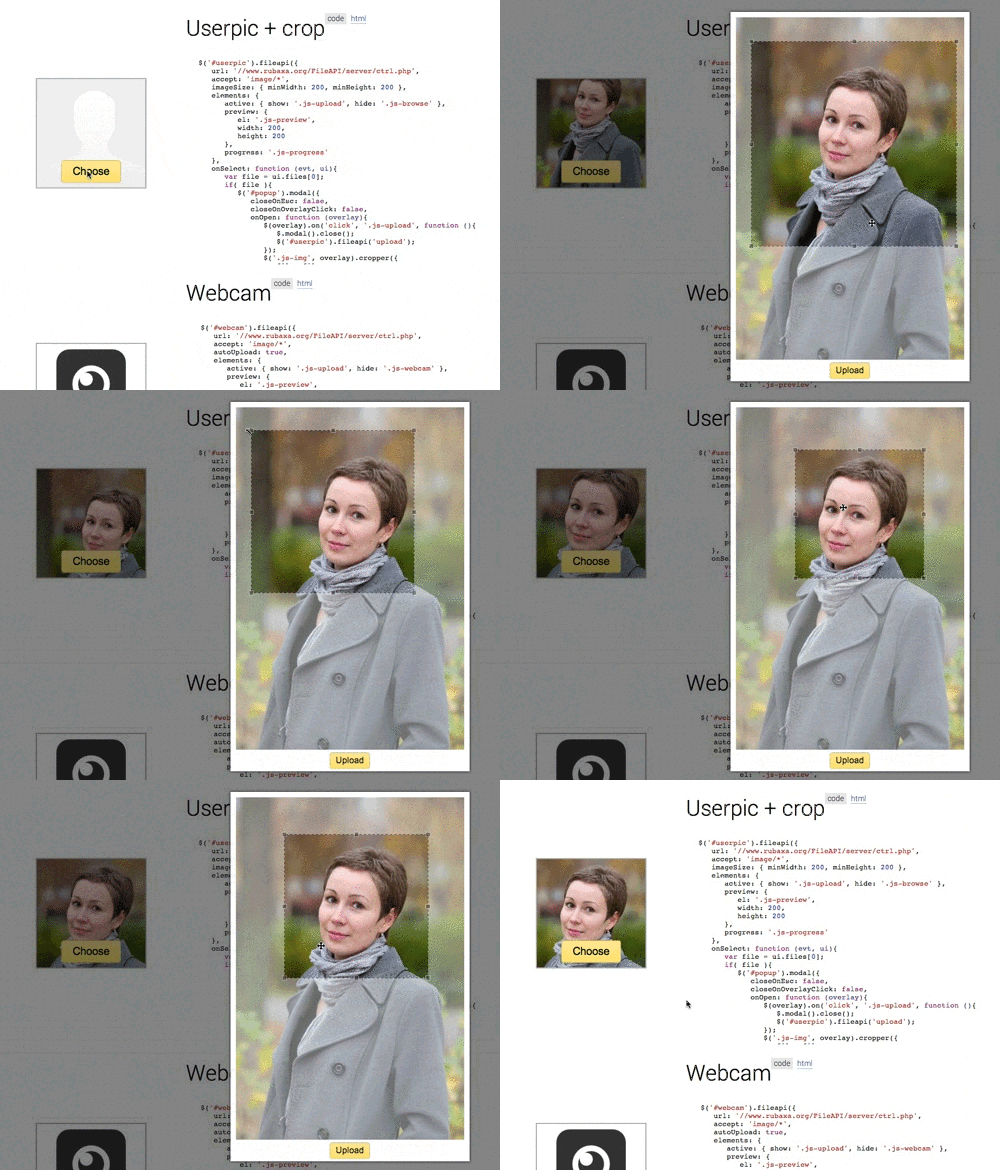
Here I will analyze only one example, the loading of an avatar, namely: the choice of a photo, cropping and subsequent upload to the server. Surprisingly, none of the popular solutions provides such an opportunity. For this reason, this case was implemented first:
Layout
<div id="userpic" class="userpic"> <div class="js-preview userpic__preview"></div> <div class="btn btn-success js-fileapi-wrapper"> <div class="js-browse"> <span class="btn-txt">Choose</span> <input type="file" name="filedata"> </div> <div class="js-upload" style="display: none;"> <div class="progress progress-success"><div class="js-progress bar"></div></div> <span class="btn-txt">Uploading</span> </div> </div> </div> $("#userpic").fileapi({ url: "./ctrl.php", accept: "image/*", imageSize: { minWidth: 200, minHeight: 200 }, elements: { // ( ), active: { show: ".js-upload", // hide: ".js-browse" // }, // preview: { el: ".js-preview", width: 200, // height: 200 }, // progress: ".js-progress" }, onSelect: function (evt, ui){ var image = ui.files[0]; if( image ){ createModal(function (overlay){ $(overlay).on("click", ".js-upload", function (){ closeModal(); $("#userpic").fileapi("upload"); // }); $(".js-img", overlay).cropper({ // file: image, // bgColor: "#fff", // , maxSize: [$(window).width() - 100, $(window).height() - 100], // - minSize: [130, 130], // -: Math.min(width*.9, height*.9) selection: 0.9, // "90%" // - aspectRatio: 1, // - onSelect: function (coords/**Object*/){ $("#userpic").fileapi("crop", image, coords); } }); }); } } }); In addition, the plugin has very flexible appearance settings, which allows you to adjust to most tasks. Well, if something is missing or you find a bug, then you can always leave a ticket on github, or write to me - I will be happy to help.
In addition to the library itself and the plugin, the documentation has been greatly reworked. Now these are two full sites:
- FileAPI : examples | source code | issues
- jQuery.FileAPI : examples | source code | issues
You can also follow our projects through:
github.com/mailru - FileAPI, Tarantool, Fest and moregithub.com/rubaxa - my github
@ibnRubaXa
Source: https://habr.com/ru/post/201010/
All Articles