Detailed AngularJS Mobile Application Development Guide
Mobile applications, this is not the future of development, it is already present. Currently, there are already 1.2 billion users of mobile applications, and this number is constantly growing ( Wikipedia ). Soon the number of mobile devices will surpass the number of people on the planet. If the growth rate of the number of mobile devices remains unchanged, then by 2017 they will be used by 5.1 billion people.
For us, as an application developer, it is important to develop our own application for mobile users, if we want them to be in demand. AngularJS supports mobile devices, written by both the AngularJS team and the community.
In this article, we will work with two different ways to give readers experience in developing mobile applications.
The easiest way to create mobile applications with AngularJS is to use familiar and favorite tools, HTML and CSS, to create fully functional mobile applications using AngularJS. AngularJS applications are already based on HTML, which leaves us with a choice of architecture for interacting with various devices for our projects.
Interaction with the application via the
Starting with AngularJS version 1.2.0 and higher, we now have the ability to interact with mobile devices, thanks to the new module -
ngTouch can be installed in several ways. The easiest way to install this module is to download it from angular.org .
Find the extras in the download dialog and go to the download page, download the ng-touch.js file to any location available for your application.
Instead, you can use Bower to install
In any case, we need to add a link to this library to the index.html file:
And at the end, you need to connect
Now you can use the ngTouch library.
')
Mobile browsers work somewhat differently from their desktop counterparts when they trigger click-based events. Mobile browsers, having detected the action of pressing, wait 300 ms., Or something like that, before deciding which event to initiate, for example, by double tapping the screen. After this delay, the browser raises the
This delay can make your application lagging behind. Instead of working with the
After the first click occurs, the browser delays the triggering of the
As a result, the
The
One of the nice features of ngSwipe * directives is that they work with touch devices, as well as mouse events, such as clicks or movements.
Using the
We can easily implement this functionality using swipe directives along with our message list. When we display a list of our messages, we include tracking the user's gestures in a certain direction to show possible actions for this email message.
When we show actions for an email message, we enable tracking of user gestures directed to the other side in order to hide previously displayed actions in this case.
You can see a live example on the site with the original article .
The
The
These event handlers will be called with a parameter containing the coordinates of the object, such as
Through these four event handlers, event handlers are defined:
The
As soon as the total distance traveled exceeds this minimum, one of two actions is performed:
The
The
The
Using this, for example, you can create a directive that allows you to control the slider with gestures, allowing you to control the slide displayed on the screen. To process gestures on mobile devices, we will use the
The hammer.js libraries provide us with a variety of events that are common touchscreen events:
The
To install the
You can download the gestures.js file directly from the GitHub repository, or use Bower for this.
To install
In the end, we need to set Angular's dependence on
In addition, Angular gestures are really easy to use. Gestures are just Angular directives that can be used just like any other directive in your application.
Suppose we need to allow the user to rotate, zoom out and zoom in on photos in the photo gallery. We can use the Hammer.js library to process the required gestures.
In this example, we set a random shift in response to tapping the screen. To do this, we wrote the following HTML code, this time using the
In this HTML you will not find anything new for yourself, perhaps, except that the
In the example above, we called a function that was defined in our
The
You can see a live example on the site with the original article .
Cordove is a free to use, open source framework that allows you to create mobile applications using the standard web API, instead of native code. This gives us the opportunity to write mobile applications using HTML, JavaScript, CSS, and AngularJS instead of writing them in Objective-C or Java (for iOS or Android, respectively).
Cordova provides access to native devices through the JavaScript API, which allows us to perform device-specific operations, such as retrieving data from a device or using its camera. It is built with plug-in support so that you can take advantage of the capabilities of various Cordova plug-ins created by experts, such as plug-ins to access an audio device or scan barcodes.
One of the advantages of using Cordova is that we have the opportunity to reuse the code AngularJS, written to support the mobile environment. Of course, when using it, some issues arise that we will encounter, such as performance and direct access to the native components.
The Cordova distribution is distributed as an
If you do not have
The Cordova package includes a generator for creating an application and makes it available to Cordova.
Getting started with Cordova is easy. We will use the generator to create the starting point of our Cordova application. We will call our app GapApp.
The generator works with three parameters:
This line will create a
The Cordova team has broken it into plug-ins, so we don’t need to connect platforms for which we will not develop (which makes it easier to develop to support other platforms). This means that we need to explicitly add to our project any platforms that we plan to support.
To continue working with our project, you need to go to its directory, because Further commands should be executed from it:
We will build our applications for iOS (although the process is the same for other platforms). To add the iOS platform, you just need to add its support in the project using the following Cordova command:
For the next command to work, you need to make sure that you have the iOS SDK and Xcode installed. You can download the iOS SDK and Xcode from developer.apple.com .
After everything necessary has been installed, you can build a simple application:
Now, there are some difficulties with the Apple developer tools, and we need to customize the application to make it work on our local iOS simulator.
Let's move to the directory of our application, where we find the
In Xcode, open a previously created project. Make sure your simulator is listed in the platform ID at the top of the Xcode.
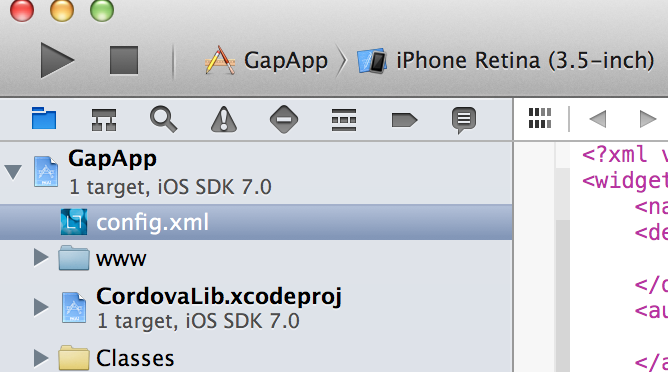
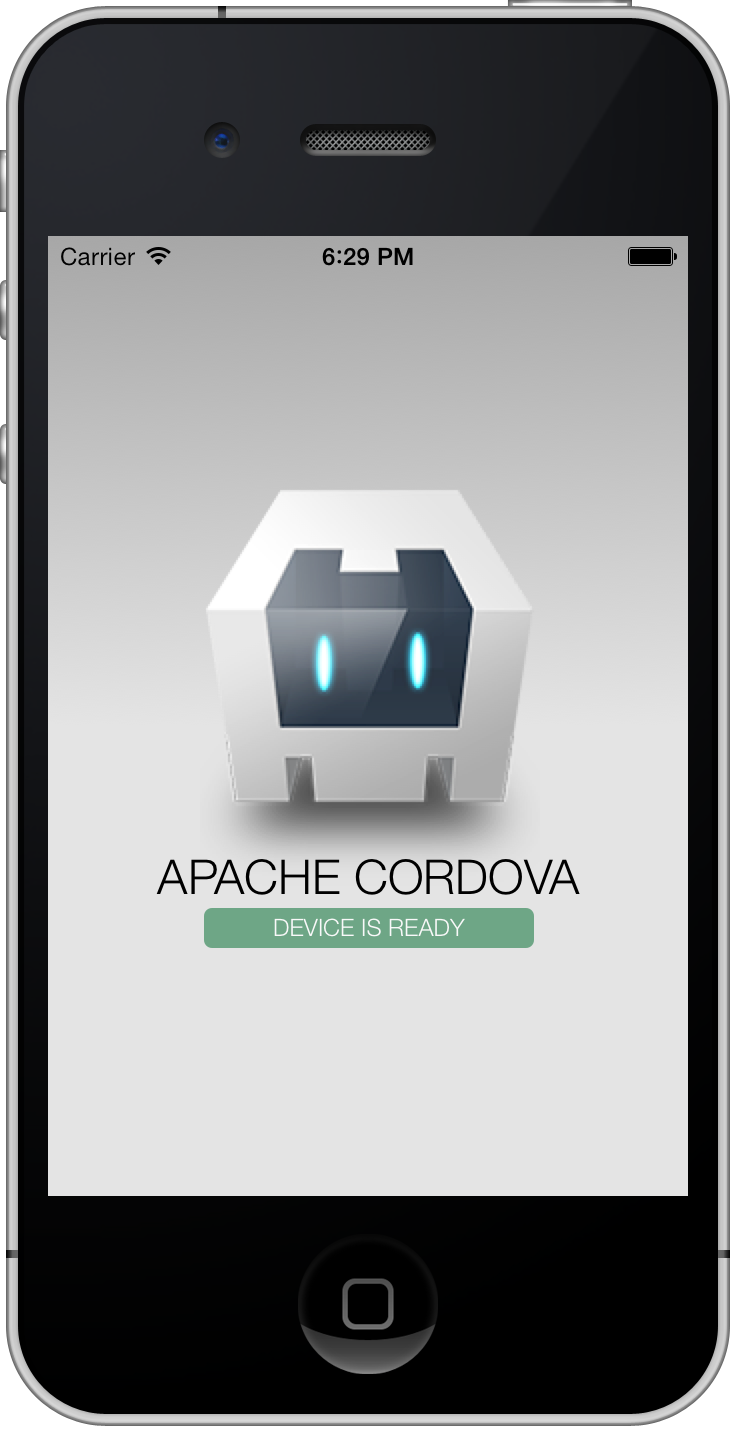
Click run.
After that, you should see in your simulator the start of the Cordova application.
Cordova includes the PhoneGap project, which was approved by the Apache Foundation. This project includes a command line tool that we will use to interact with our application, from its creation to deployment.
At this moment we have created an application and added a platform to it (in our case, iOS).
For Cordove applications, the list of available platforms depends on the development environment. On Mac, the following platforms are available:
On Windows, we can develop for the following platforms:
If you want to know which platforms are available and installed, you need to run the
To add a platform, you can use the
To remove one of the platforms, you can use the
Cordova is based on modules, which makes it possible to add any additional functionality using the plugin system. To add a plugin to a project, we will use the
We can view a list of installed plugins using the
And finally, you can remove any plugin using the
By default, Cordova creates the project framework in the web files folder
To build an application, you need to run another command Cordova,
Without specifying a platform for building, this command will build the application for all platforms available in our project. You can limit its scope to the construction of the project, only for specified platforms.
Running the
Cordova also has the ability to run an emulator to simulate the launch of an application on a device. Of course, this can only be done if the required emulator is installed and configured in the development environment.
Suppose that the required emulator is configured in the development environment, then we can run it through Cordova, and install our application in it.
For iOS, you may have to configure the project (as we did before) using Xcode if the environment emulator is not configured in your development environment.
It is also possible to run the application on a specific device using the
The
Making changes to an application can be quite cumbersome, and making changes to any part of the application requires recompiling it in order to see these changes in action. To speed up the development of a web application, we can use the
Now, using a web browser, go to the following URL:
After you make changes in the application, you just need to rebuild it:

When our Cordova application is ready, the device is connected and everything is ready for work, Cordova raises the
In Angular, after the
To start the application after the
We prefer to use an alternative method of listening to a
We created the Angular module, which is responsible for listening to the
Now you need to set
We can use
Cordova’s “bare” application has support for pure
The inclusion of Angular in this process is very simple. Until we finish the application, we will include the necessary components directly into it, instead of using the CDN, which can cause unnecessary problems during the design process.
We can use Bower for a more complex installation process, but for now, we simply add the
Angular, angularjs.org , , .
, Angular. javascript
, :
, , , .
Cordova, , ( ). , , .
ng-book: The Complete Book on AngularJS .
, , angular , .
, , AngularJS.
For us, as an application developer, it is important to develop our own application for mobile users, if we want them to be in demand. AngularJS supports mobile devices, written by both the AngularJS team and the community.
In this article, we will work with two different ways to give readers experience in developing mobile applications.
Responsive Web Applications
The easiest way to create mobile applications with AngularJS is to use familiar and favorite tools, HTML and CSS, to create fully functional mobile applications using AngularJS. AngularJS applications are already based on HTML, which leaves us with a choice of architecture for interacting with various devices for our projects.
Interaction
Interaction with the application via the
ng-click directive and similar ones is already available for desktop applications.Starting with AngularJS version 1.2.0 and higher, we now have the ability to interact with mobile devices, thanks to the new module -
ngTouch . This library is not built into the AngularJS core, it must be installed.Installation
ngTouch can be installed in several ways. The easiest way to install this module is to download it from angular.org .
Find the extras in the download dialog and go to the download page, download the ng-touch.js file to any location available for your application.
Instead, you can use Bower to install
angular-touch : $ bower install angular-touch --save In any case, we need to add a link to this library to the index.html file:
<script src="/bower_components/angular-touch/angular-touch.js"></script> And at the end, you need to connect
ngTouch , as a dependency for our application: angular.module('myApp', ['ngTouch']); Now you can use the ngTouch library.
')
ngTouch
Mobile browsers work somewhat differently from their desktop counterparts when they trigger click-based events. Mobile browsers, having detected the action of pressing, wait 300 ms., Or something like that, before deciding which event to initiate, for example, by double tapping the screen. After this delay, the browser raises the
click event.This delay can make your application lagging behind. Instead of working with the
click event, we should work with the touch event to avoid this.After the first click occurs, the browser delays the triggering of the
click event, waiting for the next action. ngTouch care of handling this action for you.As a result, the
ng-click directive works on mobile browsers in the same way as desktop ones. <button ng-click="save()">Save</button> ngTouch also adds two new directives: swipe directives. These directives allow us to track the movement of a user's finger pointing to the left or right edge of the screen. They are useful when we want to track user gestures, which should lead to scrolling to the next photo in the gallery, or to the next part of our application.The
ngSwipeLeft directive tracks the movement of a user's finger from right to left, and the ngSwipeRight directive tracks movement that ngSwipeRight from left to right.One of the nice features of ngSwipe * directives is that they work with touch devices, as well as mouse events, such as clicks or movements.
Using the
ngSwipeLeft and ngSwipeRight pretty easy. For example, suppose we have a list of emails, and we want to show available actions for each letter, as in the popular mobile email client MailboxApp.We can easily implement this functionality using swipe directives along with our message list. When we display a list of our messages, we include tracking the user's gestures in a certain direction to show possible actions for this email message.
When we show actions for an email message, we enable tracking of user gestures directed to the other side in order to hide previously displayed actions in this case.
<ul> <li ng-repeat="mail in emails"> <div ng-show="!mail.showActions" ng-swipe-left="mail.showActions=true"> <div class="from"> : <span>{{ mail.from }}</span> </div> <div class="body"> {{ mail.body }} </div> </div> <div ng-show="mail.showActions" ng-swipe-right="mail.showActions=false"> <ul class="actions"> <li><button></button></li> <li><button></button></li> </ul> </div> </li> </ul> You can see a live example on the site with the original article .
$ Swipe service
The
$swipe can be used to fine tune the touch animation process. The $swipe allows you to abstract away hold and drag events to higher level behavior.The
$swipe has a single bind() method. The bind() method accepts an object to which the action will be bound, as well as an object with four event handlers.These event handlers will be called with a parameter containing the coordinates of the object, such as
{ x: 200, y: 300 } .Through these four event handlers, event handlers are defined:
start
The
start event occurs when the mousedown or touchstart event is touchstart . After this event, the $swipe service installs handlers for the touchmove and mousemove . To prevent false alarms, this event is fired only after the total distance traveled is greater than a certain minimum value.As soon as the total distance traveled exceeds this minimum, one of two actions is performed:
- If the vertical offset is more horizontal, the browser raises the
scrollevent (scrolling) - If the horizontal offset is more vertical, the action is treated as a touch gesture, and the
moveandendevents are used to further track the gesture.
move
The
move event occurs after a mousemove or touchmove only after the $swipe service has determined that the user's actions are a gesture, and this gesture has not finished yet.end
The
end event is raised after the touchend or mouseup event is touchend , after the previously raised move event.cancel
The
cancel event is raised after the touchcancel event is touchcancel , or when the page starts scrolling after the start event is start .Using this, for example, you can create a directive that allows you to control the slider with gestures, allowing you to control the slide displayed on the screen. To process gestures on mobile devices, we will use the
$swipe service to display the user interface layer through our own logic. angular.module('myApp') .directive('mySlideController', ['$swipe', function($swipe) { return { restrict: 'EA', link: function(scope, ele, attrs, ctrl) { var startX, pointX; $swipe.bind(ele, { 'start': function(coords) { startX = coords.x; pointX = coords.y; }, 'move': function(coords) { var delta = coords.x - pointX; // ... }, 'end': function(coords) { // ... }, 'cancel': function(coords) { // ... } }); } } }]); Angular-gestures and touch screen gestures
Angular-gestures is a separate angular module that allows us to process touch gestures in our AngularJS application. It is based on the very popular and proven hammer.js library.The hammer.js libraries provide us with a variety of events that are common touchscreen events:
- Tap
- DoubleTap
- Swipe
- Drag
- Pinch
- Rotate
The
angular-gestures library allows you to use these events through AngularJS directives. For example, all these directives become available for use:- hmDoubleTap
- hmDragStart
- hmDrag
- hmDragUp
- hmDragDown
- hmDragLeft
- hmDragRight
- hmDragEnd
- hmHold
- hmPinch
- hmPinchIn
- hmPinchOut
- hmRelease
- hmRotate
- hmSwipe
- hmSwipeUp
- hmSwipeDown
- hmSwipeLeft
- hmSwipeRight
- hmTap
- hmTouch
- hmTransformStart
- hmTransform
- hmTransformEnd
Install angular-gestures
To install the
angular-gestures library, on the main page of your application you just need to include the file gestures.js (or gestures.min.js).You can download the gestures.js file directly from the GitHub repository, or use Bower for this.
To install
angular-gestures with Bower, use the following command: $ bower install --save angular-gestures In the end, we need to set Angular's dependence on
angular-gestures for our application: angular.module('myApp', ['angular-gestures']); Using angular-gestures
In addition, Angular gestures are really easy to use. Gestures are just Angular directives that can be used just like any other directive in your application.
Suppose we need to allow the user to rotate, zoom out and zoom in on photos in the photo gallery. We can use the Hammer.js library to process the required gestures.
In this example, we set a random shift in response to tapping the screen. To do this, we wrote the following HTML code, this time using the
hm-tap directive. <div id="photowrapper"> <div class="cardProps" hm-tap="tapped($event)"> <div class="tradingcard"> <img src="/img/ari.jpeg" alt="" /> <span>Ari</span> </div> <div class="tradingcard"> <img src="/img/nate.jpeg" alt="" /> <span>Nate</span> </div> </div> </div> In this HTML you will not find anything new for yourself, perhaps, except that the
hm-tap directive is used here. This angular-gestures directive will work when knocking on an image.Hammer.js directives can work with angular expressions, so you can call functions and perform various actions inside them (for example, just like in ng-click ) and besides they can work with Hammer.js settings.In the example above, we called a function that was defined in our
$scope as tapped() . You can see the code for this function below: $scope.tapped = function($event) { var ele = $event.target; var x = Math.floor(Math.random() * 200) + 1, y = Math.floor(Math.random() * 100) + 1, z = Math.floor(Math.random() * 6) + 1, rot = Math.floor(Math.random()*360)+1; $(ele).css({ 'transform': "translate3d("+x+"px,"+y+"px,"+z+"px)" + "rotate("+rot+"deg)" }); } The
angular-gestures library provides access to an event object through a special $event argument. We use the target event property ( $event.target ) to determine which element our user clicked on and when we can go crazy doing various foci with our element.You can see a live example on the site with the original article .
Native apps with Cordova
Cordove is a free to use, open source framework that allows you to create mobile applications using the standard web API, instead of native code. This gives us the opportunity to write mobile applications using HTML, JavaScript, CSS, and AngularJS instead of writing them in Objective-C or Java (for iOS or Android, respectively).
Cordova provides access to native devices through the JavaScript API, which allows us to perform device-specific operations, such as retrieving data from a device or using its camera. It is built with plug-in support so that you can take advantage of the capabilities of various Cordova plug-ins created by experts, such as plug-ins to access an audio device or scan barcodes.
One of the advantages of using Cordova is that we have the opportunity to reuse the code AngularJS, written to support the mobile environment. Of course, when using it, some issues arise that we will encounter, such as performance and direct access to the native components.
Installation
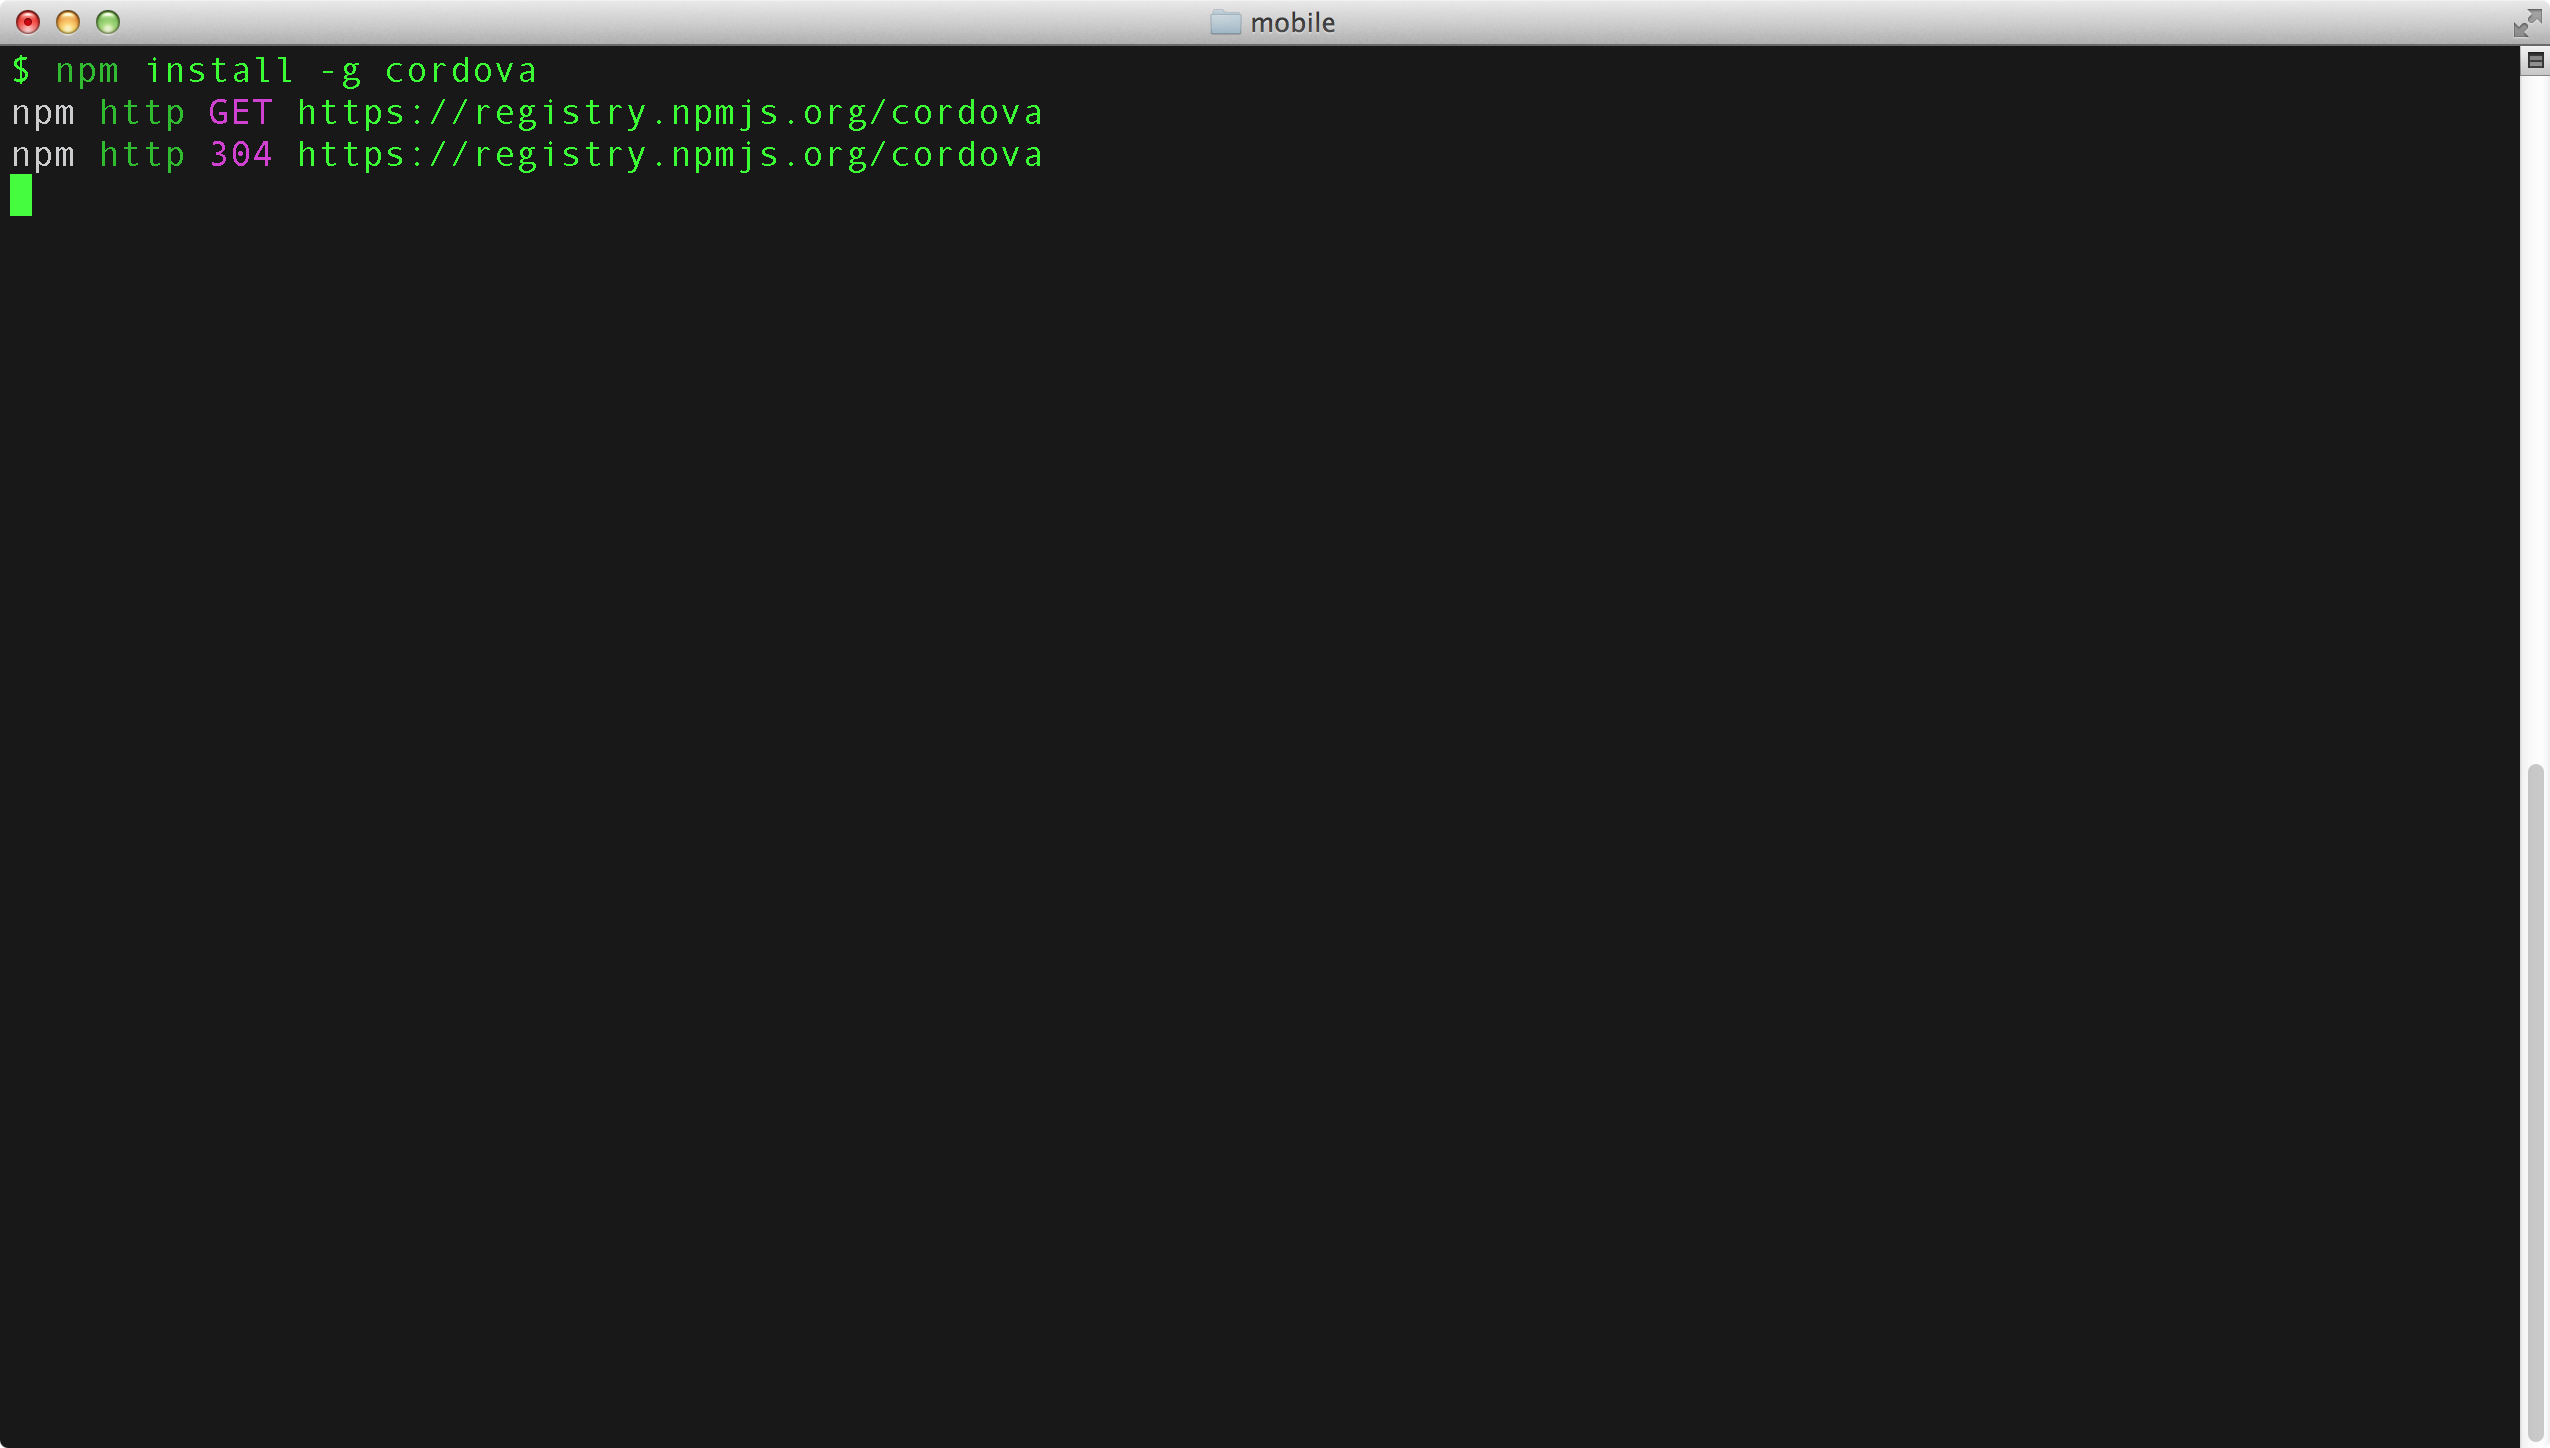
The Cordova distribution is distributed as an
npm package, so you need to use npm to install it.If you do not have
npm installed, check if you have a node installed. For information on installing NodeJS, read the “Next Steps” chapter . $ npm install -g cordova The Cordova package includes a generator for creating an application and makes it available to Cordova.
Getting Started with Cordova
Getting started with Cordova is easy. We will use the generator to create the starting point of our Cordova application. We will call our app GapApp.
The generator works with three parameters:
- project-directory (Required) - The directory in which the application will be created.
- package-id - project ID (the name of the package in the reverse domain style)
- name - package name (application name)
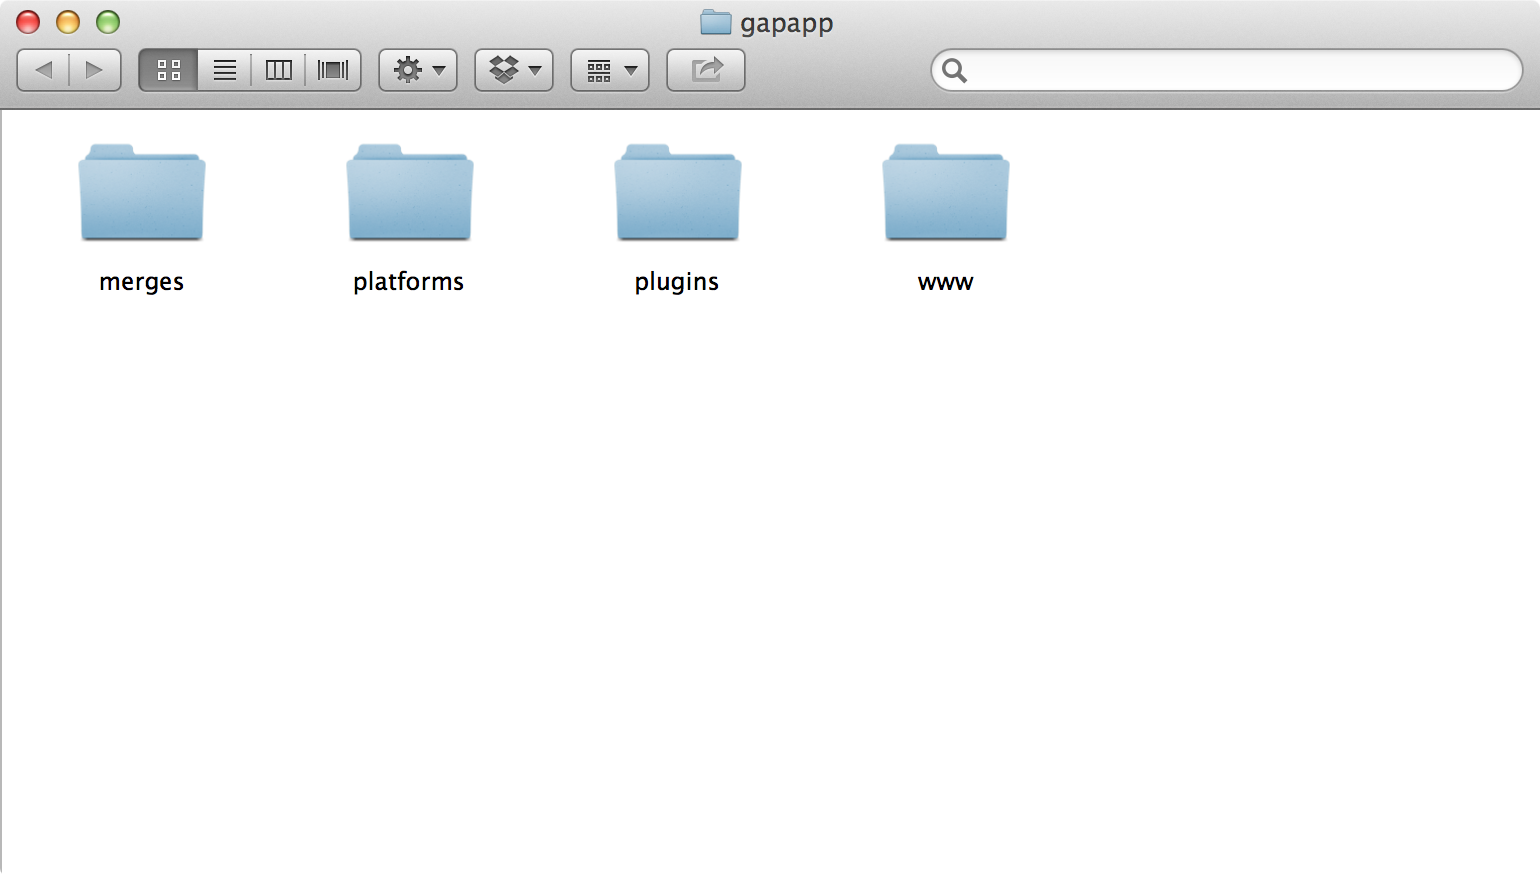
$ cordova create gapapp io.fullstack.gapapp "GapApp" This line will create a
gapapp directory (defined by the first parameter) with the package identifier io.fullstack.gapapp and the project name GappApp .The Cordova team has broken it into plug-ins, so we don’t need to connect platforms for which we will not develop (which makes it easier to develop to support other platforms). This means that we need to explicitly add to our project any platforms that we plan to support.
To continue working with our project, you need to go to its directory, because Further commands should be executed from it:
$ cd gapapp/ We will build our applications for iOS (although the process is the same for other platforms). To add the iOS platform, you just need to add its support in the project using the following Cordova command:
$ cordova platform add ios For the next command to work, you need to make sure that you have the iOS SDK and Xcode installed. You can download the iOS SDK and Xcode from developer.apple.com .
After everything necessary has been installed, you can build a simple application:
$ cordova build ios Now, there are some difficulties with the Apple developer tools, and we need to customize the application to make it work on our local iOS simulator.
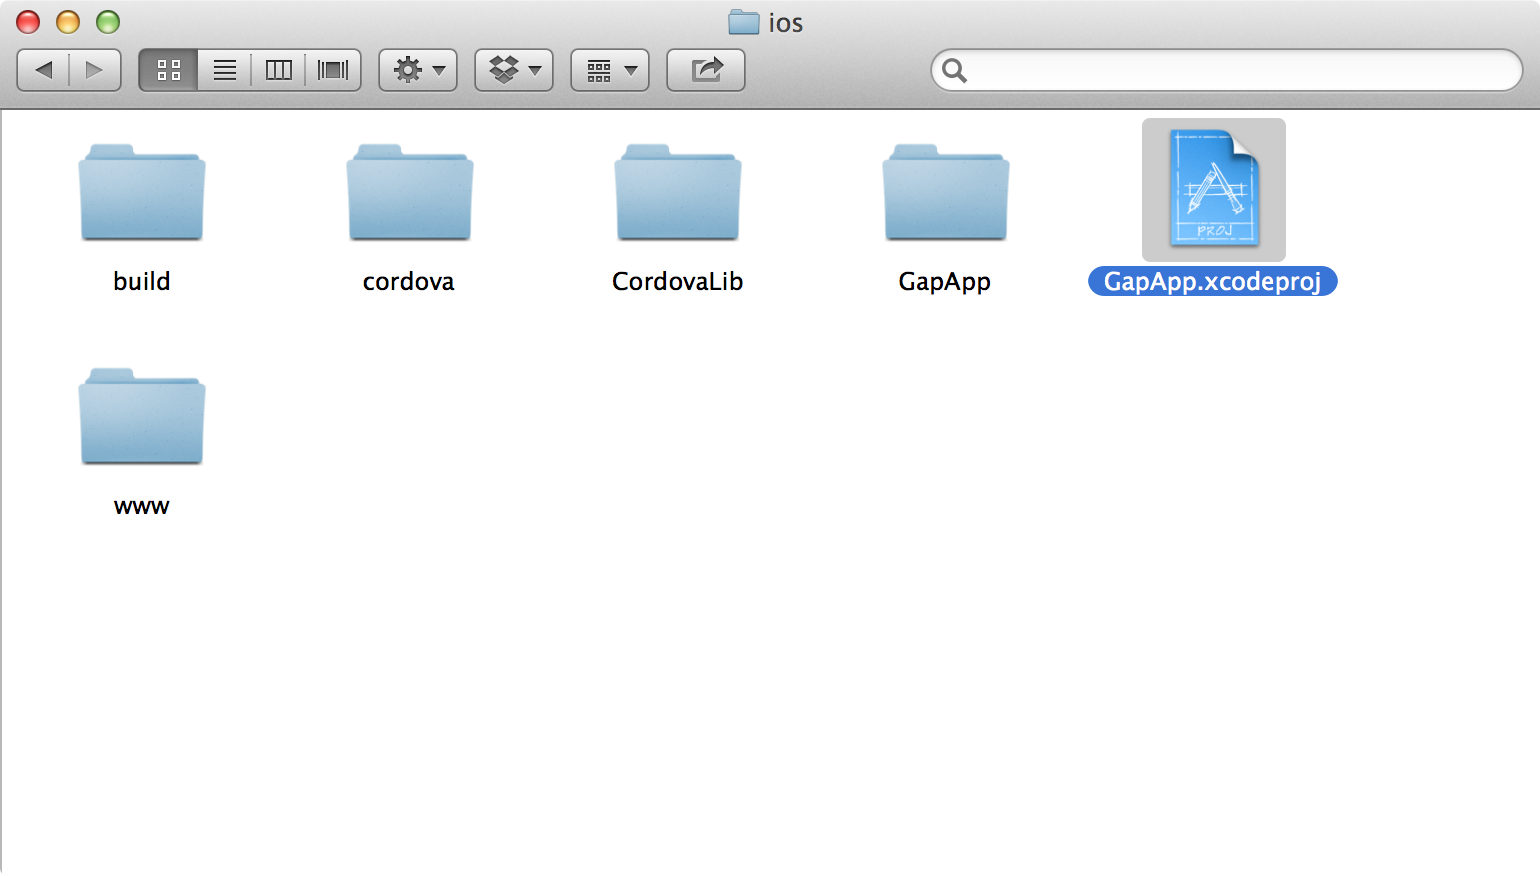
Let's move to the directory of our application, where we find the
platforms directory. Inside it we will find the ios directory, which was created by the platform add command, called earlier.In Xcode, open a previously created project. Make sure your simulator is listed in the platform ID at the top of the Xcode.
Click run.
After that, you should see in your simulator the start of the Cordova application.
Development process with Cordova
Cordova includes the PhoneGap project, which was approved by the Apache Foundation. This project includes a command line tool that we will use to interact with our application, from its creation to deployment.
Platforms
At this moment we have created an application and added a platform to it (in our case, iOS).
For Cordove applications, the list of available platforms depends on the development environment. On Mac, the following platforms are available:
- iOS
- Android
- Blackberry10
- Firefox os
On Windows, we can develop for the following platforms:
- Android
- Windows Phone 7
- Windows Phone 8
- Windows8
- Blackberry10
- Firefox os
If you want to know which platforms are available and installed, you need to run the
platforms command to check: $ cordova platforms ls To add a platform, you can use the
platform add command (as we did above). $ cordova platform add android To remove one of the platforms, you can use the
rm or remove command. $ cordova platform rm blackberry10 Plugins
Cordova is based on modules, which makes it possible to add any additional functionality using the plugin system. To add a plugin to a project, we will use the
plugin add command: $ cordova plugin add https://git-wip-us.apache.org/repos/asf/cordova-plugin-geolocation.git We can view a list of installed plugins using the
plugins ls : $ cordova plugins ls [ 'org.apache.cordova.geolocation' ] And finally, you can remove any plugin using the
plugin rm command: $ cordova plugins rm org.apache.cordova.geolocation Build the project
By default, Cordova creates the project framework in the web files folder
www , which is located in the project's home directory. When Cordova builds the project, it copies these files to the platform-dependent directories.To build an application, you need to run another command Cordova,
build : $ cordova build Without specifying a platform for building, this command will build the application for all platforms available in our project. You can limit its scope to the construction of the project, only for specified platforms.
$ cordova build ios $ cordova build android Running the
build command is guaranteed to install the code required for a specific platform, so that after this our application can be compiled. In essence, with this method we do the same as the preparatory methods cordova prepare && cordova compile .Emulation and execution
Cordova also has the ability to run an emulator to simulate the launch of an application on a device. Of course, this can only be done if the required emulator is installed and configured in the development environment.
Suppose that the required emulator is configured in the development environment, then we can run it through Cordova, and install our application in it.
$ cordova emulate ios For iOS, you may have to configure the project (as we did before) using Xcode if the environment emulator is not configured in your development environment.
It is also possible to run the application on a specific device using the
run command, instead of the above.The
run command causes the application to run on the device, or on the emulator, in case the device is not found or not available. $ cordova run ios In developing
Making changes to an application can be quite cumbersome, and making changes to any part of the application requires recompiling it in order to see these changes in action. To speed up the development of a web application, we can use the
serve command to set up a local server to share the local version of our application from the www folder to the browser. $ cordova serve ios Static file server running at => http://0.0.0.0:8000/ CTRL + C to shutdown Now, using a web browser, go to the following URL:
localhost:8000/ios/www/index.html localhost:8000/ios/www/index.html . The contents of your www folder will be given to the server via HTTP, so now you can build the application and track all changes made in it.After you make changes in the application, you just need to rebuild it:
$ cordova build ios Angular service for Cordova
When our Cordova application is ready, the device is connected and everything is ready for work, Cordova raises the
deviceready event in the browser.In Angular, after the
deviceready event has been deviceready , we can either start the angular application, or work with promise objects in the logic of your application for this.To start the application after the
deviceready event, we need to set up a handler for it, where to start its work manually: ngular.module('myApp', []); var onDeviceReady = function() { angular.bootstrap( document, ['myApp']); } document.addEventListener('deviceready', onDeviceReady); We prefer to use an alternative method of listening to a
deviceready event, using promises, to launch an application after a deviceready event has deviceready .We created the Angular module, which is responsible for listening to the
deviceready event. We will use the service that will listen for the deviceready event and resolve our promises after this event is deviceready . angular.module('fsCordova', []) .service('CordovaService', ['$document', '$q', function($document, $q) { var d = $q.defer(), resolved = false; var self = this; this.ready = d.promise; document.addEventListener('deviceready', function() { resolved = true; d.resolve(window.cordova); }); // , // ( ) setTimeout(function() { if (!resolved) { if (window.cordova) d.resolve(window.cordova); } }, 3000); }]); Now you need to set
fsCordova as a dependency for your module. angular.module('myApp', ['fsCordova']) // ... We can use
CordovaService to determine the availability of Cordova, and execute our logic, which depends on it: angular.module('myApp', ['fsCordova']) .controller('MyController', function($scope, CordovaService) { CordovaService.ready.then(function() { // Cordova is ready }); }); Enable angular
Cordova’s “bare” application has support for pure
javascript only, which hides and displays the javascript view located in js/index.js .The inclusion of Angular in this process is very simple. Until we finish the application, we will include the necessary components directly into it, instead of using the CDN, which can cause unnecessary problems during the design process.
We can use Bower for a more complex installation process, but for now, we simply add the
angular.js file to the project.Angular, angularjs.org , , .
www/js/vendor/angular.js ., Angular. javascript
www/index.html . <script type="text/javascript" src="js/vendor/angular.js"></script> js/index.js , Angular, .Development process
, :
- (
cordova serve [platform]) - (
cordova build [platform])
, , , .
Cordova, , ( ). , , .
ng-book: The Complete Book on AngularJS .
, , angular , .
, , AngularJS.
Source: https://habr.com/ru/post/200754/
All Articles