Ubuntarium → Goodies: wallpaper schedule
Perhaps I'll start with a small preface. This is my first post, so do not scold too much and do not kick with your feet (at least in the kidneys). This post I want to start a new series of articles in the blog Ubuntarium , but so far I have not yet reached him. I hope to write one article per week, revealing certain possibilities of ubuntu . All comments and suggestions you can send xxxYURAxxx to me in any way accessible from the profile.
Yes, yes, all this will be done not by a self-made script on the bash, but by the wallpapoz program.
To do this, we need to install the python-imaging package. For those who do not know, this is done like this:
sudo apt-get install python-imaging .
Next, download the latest version . For those who do not know, this is done like this:
wget wallpapoz.akbarhome.com/files/wallpapoz-0.4.1.tar.bz2 .
Unpack the archive in the wallpapoz-0.4.1 folder. We do it like this:
tar -jxvf wallpapoz-0.4.1.tar.bz2 .
And we go into it:
cd wallpapoz-0.4.1 .
But actually the installation:
sudo python setup.py install .
You can congratulate us, half done.
Let's launch the program itself with the magic of hotkeys: Alt + F2. Enter the name wallpapoz . And look what came out of it.
This is the main program window:
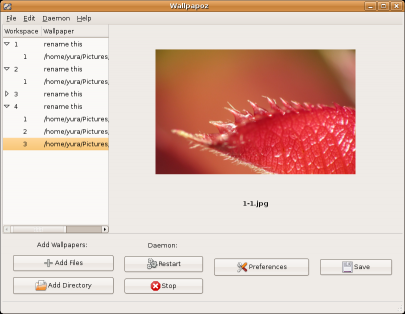
There is nothing difficult in it. On each of our desktops add different wallpapers.
Click Preferences and see the following window:

We set the time for changing the wallpaper, in a random order (for those who wish).
You can see the result right now, just click on Restart .
But after all, we also want to watch the automatic wallpaper change after the reboot.
Go to the menu System -> Settings -> Sessions and add a new item:
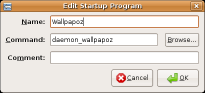
Team: daemon_wallpapoz
That's all.
Wallpapoz installation
Yes, yes, all this will be done not by a self-made script on the bash, but by the wallpapoz program.
To do this, we need to install the python-imaging package. For those who do not know, this is done like this:
sudo apt-get install python-imaging .
Next, download the latest version . For those who do not know, this is done like this:
wget wallpapoz.akbarhome.com/files/wallpapoz-0.4.1.tar.bz2 .
Unpack the archive in the wallpapoz-0.4.1 folder. We do it like this:
tar -jxvf wallpapoz-0.4.1.tar.bz2 .
And we go into it:
cd wallpapoz-0.4.1 .
But actually the installation:
sudo python setup.py install .
You can congratulate us, half done.
Mood
Let's launch the program itself with the magic of hotkeys: Alt + F2. Enter the name wallpapoz . And look what came out of it.
This is the main program window:
There is nothing difficult in it. On each of our desktops add different wallpapers.
Click Preferences and see the following window:
We set the time for changing the wallpaper, in a random order (for those who wish).
Autostart
You can see the result right now, just click on Restart .
But after all, we also want to watch the automatic wallpaper change after the reboot.
Go to the menu System -> Settings -> Sessions and add a new item:
Team: daemon_wallpapoz
That's all.
')
Source: https://habr.com/ru/post/20046/
All Articles