How does the automatic selection of the document on the image in the program ABBYY FineScanner?

What is ABBYY FineScanner
ABBYY FineScanner is a program for iOS devices that can photograph documents and process images so that the resulting electronic copies (in fact, scans) are convenient for work - reading, printing or storing / sending in a readable form. About the release of the first version we wrote here .
Photos of documents obtained on mobile devices have different distortions compared to images obtained from a conventional scanner. Such distortions include: digital noise, geometric distortions caused by the rotation of the document or the presence of perspective, unevenness in illumination, defocusing, blur. Next, we describe an algorithm that automatically corrects the geometric distortion of the document in the image.
The whole process can be divided into several main stages:
1) Reducing the original image
2) Selection of the most informative channel
3) Image preprocessing, contour selection
4) Detection of borders and determination of document angles
5) Verifying hypotheses
6) Refinement of the coordinates of the corners of the document
')
Consider each of the stages in more detail.
1. Reduce the original image
The purpose of this stage is to obtain a greatly reduced copy of the image, such that max (w, h) is about 200 pixels, where w is the width and h is the height of the resulting image. It is impossible to reduce the original image so many times (having a size of about 2-3 thousand pixels in width and height)! Even if we use bilinear or bicubic interpolation algorithms, we will get an image with a strong “beat” effect on contours, also called aliasing (see Fig. 1, left). Therefore, we reduce the image by several iterations, each time changing the size by 2 times. As a result, we get a smoother image (Fig. 1, right). It would be possible to use Gaussian smoothing and reduce it at once the necessary number of times, but, firstly, Gaussian smoothing is a resource-intensive procedure for imaging of several megapixels, and secondly, bilinear interpolation is implemented using integrated OpenGL ES tools; we only need to gradually change the size textures.
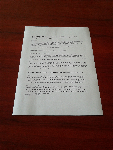
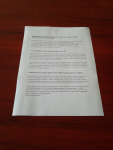
Figure 1. Image obtained by reducing the original to a size of 150 pixels in different ways. On the left you can see the effect of “beating” on the contours, on the right - a more “smooth” result of successive decrease by 2 times.
2. Selection of the most informative channel
First of all, we note that the document may differ from the surrounding background not only in brightness, but also in color. Therefore, no matter how we would like to reduce the search space, we can not just get rid of the color channels in the image. Let's see which one is most suitable for further analysis. To do this, we calculate the histograms of 4 channels: R, G, B and brightness. Further, from the histograms we calculate the average values and the variance of the channels. If the maximum dispersion of one of the color channels is greater than that of the brightness channel by a certain coefficient K> 1 (algorithm parameter), then we will use it, otherwise we will use the brightness channel.
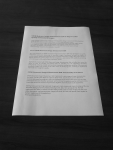



Figure 2. Top down: images of R, G, B and brightness channels and their corresponding histograms.
3. Image preprocessing, contour selection
Over the channel of the reduced image received in the previous stage it is necessary to work a little. Some elements inside the document still hinder us (lines of text, headings, separators retain their visibility even at this scale), so we will conduct a median image filtering with radii R1 = 3 and R2 = 5 pixels, 3 iterations for each radius. Save the resulting images (see Fig. 2). The first of them is used to highlight borders using the well-known algorithm of Canny edge detection , and the second will be used when testing the obtained hypotheses on the sides. The first stage of the Canny edge detection algorithm (image filtering) can be skipped, since we have already done this taking into account the properties of our signal. The values of the “upper” and “lower” thresholds for the Canny edge detection algorithm should be configured, as well as the other parameters of our algorithm, but more on that later.



Figure 3. From left to right: the original image of one of the channels, after 1, 2, 3 iterations of the median filtering with a radius of R = 3, the result of contour extraction using the Canny edge detection algorithm.
4. Border detection and document angle determination
So, at the previous stage, we got a contour view of our image; we can only find the borders of our document on it. To do this, use another, well-known algorithm - Hough transform ( Hough transform ). Strictly speaking, for each of the parties, one can use “one's own” Hough subspace, with the most appropriate parametrization, which can be calculated much faster than the full Hough space. Using these subspaces, we find the lines with the maximum response for each of the sides of the document. The intersection points of these lines define the angles of the document. Go to the next step.




Figure 4. From left to right: a contour representation of the image, the Hough subspaces, the result of the detection of boundaries in the image.
5. Verification of hypotheses
We would like to test the hypotheses obtained for the boundaries of the document, since the algorithm, because of its simplicity, quite often makes mistakes in complex situations. The most gross mistakes can be avoided by translating (when testing hypotheses) the algorithm from automatic to semi-automatic, or even manual, when the user is asked to correct the result, or select the document yourself.
To test the hypothesis obtained on the contour, we use an image obtained as a result of median filtering with a radius of R2 = 5 pixels (see the 3rd stage). For each of the borders, we will iterate the positions spaced at + -1, + - 2, ..., + - 10 pixels, and calculate the contour energy (integral along the contour from the gradient) in each of the positions. We choose the position with the maximum energy of the circuit, according to the energy value, we decide whether the boundary is suitable for an automatic algorithm, for a semi-automatic one, or it should be discarded and switch to manual mode. Thus, any of the boundaries of the document may affect the transfer of the algorithm to another mode.
The check on geometry for the obtained boundaries includes several rules:
1) The ratio of the lengths of all opposite boundaries should be, for example, 0.5 <a <2.
2) The angles on the common side should not differ by more than 12 - 15 degrees.
3) The area of the resulting quadrilateral must be at least 15 - 25% of the image.
4) The shift of the document relative to the center of the image is not more than 5 - 10% of the width or height of the image.
6. Refining the coordinates of the corners of the document
The solution obtained in this way is approximate in a geometrical sense; you can try to clarify the coordinates of the document. Around each corner of the document, we define a square region in which we search for a point for which the value of the median filter differs from the signal (the image channel we have chosen, see step 2) by an amount exceeding a certain threshold T = 12. The difference sign can also define the angle as “normal” or “inverted”, i.e. belonging to a document that is lighter or darker than its surroundings. As a result, we have to make a decision regarding the entire document as a whole.
Of course, the specific values of the parameters of the method may be different, their adjustment should be carried out over a large database of images containing various types of documents taken under different conditions.
After determining the coordinates of all 4 corners of the document, you can perform a perspective transformation that corrects geometric distortions in the image. In this case, you can automatically determine the proportions of the original document, using only the coordinates of the corners. However, the consideration of this problem is beyond the scope of this article.
Ivan logicview zagainov ,
technology development department
Source: https://habr.com/ru/post/200448/
All Articles