Automatic tests in the cloud
 If you test at least a little, then you know how it is not easy to create an environment with a new build for testing. If the solution is not complicated, then you can do it all by hand - erase old files, clean the registry, database, copy the new build. But if you have a serious multilink solution, then it is better that all operations be automated. So you can reduce the influence of the human factor. If you find a problem, it is enough to correct the scripts in order to eliminate the errors and start everything anew. Team Foundation Server includes a complete set of tools for organizing Lab Management - a test environment management environment. The interesting thing is that you can organize a testing laboratory without any infrastructure investments. All that is needed for this is already in Azure and Team Foundation Service. This is the case of the new-minded IaaS when you can safely take part of the infrastructure to the cloud.
Scenario.
Our developers will store code and manage tasks in cloud-based TFS , and they will have the ability to create builds in the cloud, as well as deploy these builds on virtual machines for automated testing.
Automated tests mean a test that starts the program itself, clicks buttons, generally repeats the interactive actions of a real tester.
Training
We register on http://tfs.visualstudio.com and create a project. After that, we design our test bench. It will consist of two virtual machines.
')
- Desktop client : the machine on which our desktop application will run and interactive tests will be performed.
- Server : the machine on which the services for our desktop client are running, maybe this is a database, maybe a web application.
In addition, we need a build server: the virtual machine on which the project will be compiled from source, and the run of unit tests.
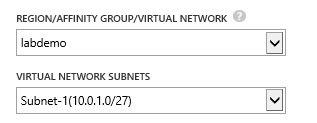
In order for these machines to communicate with each other, the first step in the Azure Management Portal is to create a virtual network:

Then we create two virtual machines for the stand and one machine for the build server:
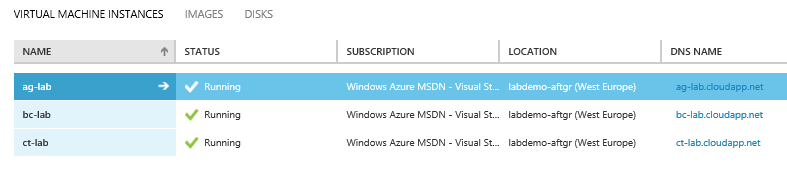
When creating machines, it is necessary to specify the virtual network that was created a step earlier.
For convenience, you can take a ready-made virtual machine for the build server, the library has a machine with Visual Studio 2013 Ultimate pre-installed. The remaining machines are empty, this is Windows Server 2012 or 2008 R2.
In order for our entire cloud infrastructure to function correctly, we need to add additional endpoints for connections between clients (Visual Studio, Microsoft Test Manager), the TFS server, and the machines themselves.

Accordingly, for the remaining machines should specify:
- ct -lab : 137,138,139,6901,6910
- ag -lab : 137,138,139,6910
Additionally, it is necessary to ensure the visibility of the names between these virtual computers in the virtual network. To do this, you need to create (or use an existing) DNS server and register it in our virtual network. For the needs of my script, editing the hosts is enough. You can read more about setting up DNS on the Azure portal . If there is no DNS server, then when you configure Test Controller and Test Agent you may encounter the error CreateControllerObject: attempt 0, System.Net.Sockets.SocketException (0x80004005): No such host is known. For its resolution, we write in the adapters of the DNS machines the suffix cloudapp.net .
Configuration
Test Controller and Test Agent must be installed on the ct-lab and ag-lab machines. In general, it is not recommended to install the Test Controller on the machine also the Test Agent, but this is not forbidden. The entire scenario, which is shown here for the infrastructure of three computers, can be installed on one virtual machine (this simplifies dances with DNS and endpoints).
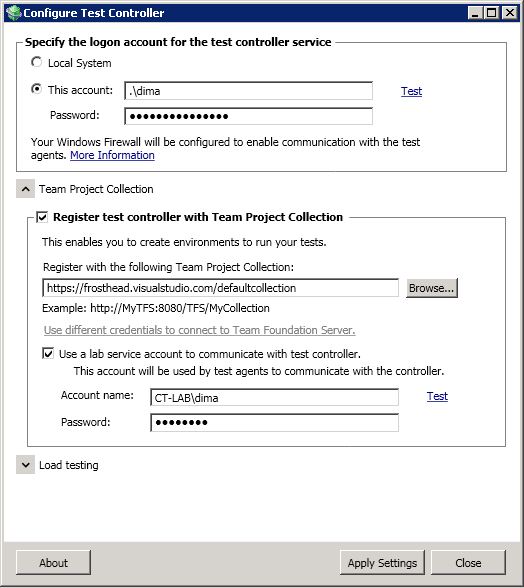
Computer ct-lab, we will have first Test Controller. After a brief installation of files from the distribution, the configuration step will occur:
Accordingly, we further install and configure the Test Agent on the ag-lab machine:
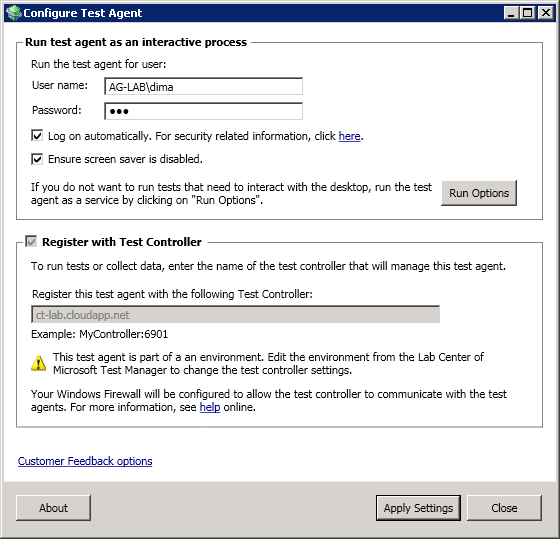
If you did everything correctly, the preliminary checks before the configuration will show green marks on all items.
Test Manager Configuration
After you have created the environment infrastructure, you must configure the Lab Environment in Microsoft Test Manager.
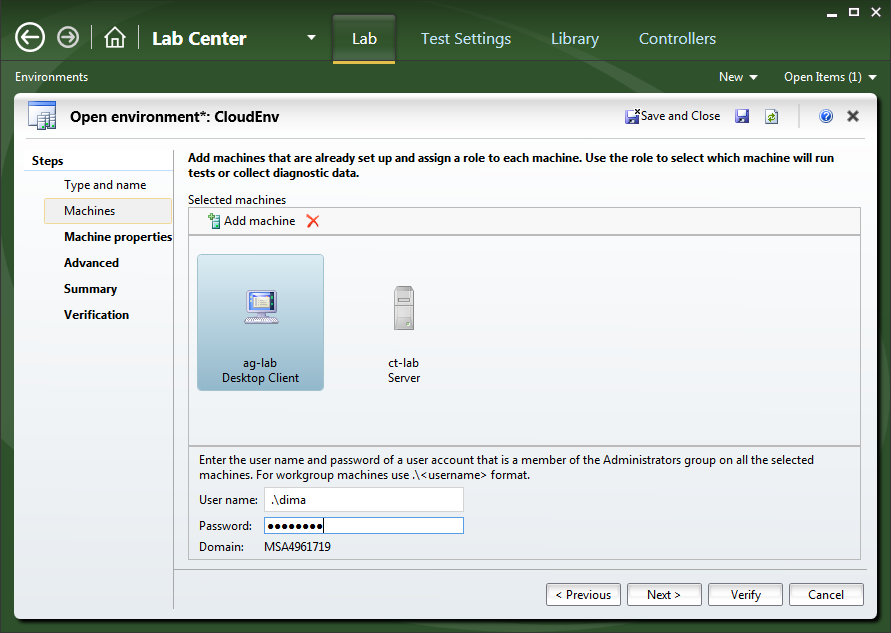
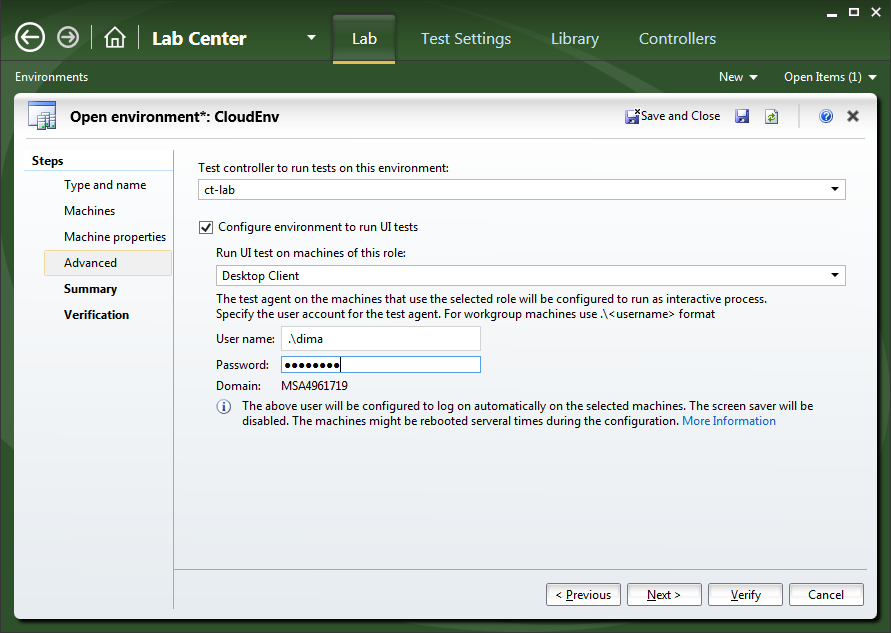
We add our virtual computers there (with full names - ag-lab.cloudapp.net), we specify the roles from the drop-down menu (Desktop Client, Server) and configure the controller:
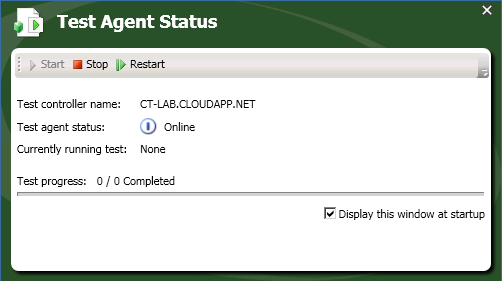
After the configuration verification procedure, after some time (3-5 minutes) the Ready status in your environment should turn on. The ag-lab machine is configured interactively and the test agent should start there:
Configuration of the build server.
The ready-made Visual Studio 2013 Ultimate virtual machine from the Azure library does not contain Team Foundation Server 2013, so we download the web installer from the MSDN website and install TFS on the bc-lab machine. Next, we skip the server configuration steps and select only the Build Server configuration item.
In it we specify the necessary parameters and run the build controller and build agents on the bc-lab machine. Unfortunately, the Lab Management infrastructure only works with dedicated build controllers, a virtual controller that is included in the Team Foundation Service for this purpose will not work (you cannot create more than one build agent).
Build configurations
In order for our script to work, you need to create two definitions of the build associated with the bc-lab controller.
- Actually build build : this build takes the latest version of our project, compiles, and runs unit tests.
- Build deployment and run tests : Next, this build picks up the baton, copies binary files to test machines, and runs automated tests.
I think you will not have any problems with the configuration of the first version, we will dwell on the second one in more detail. After filling in the standard parameters (where to get the sources, who is the build controller), you should change the build template on the Process tab:
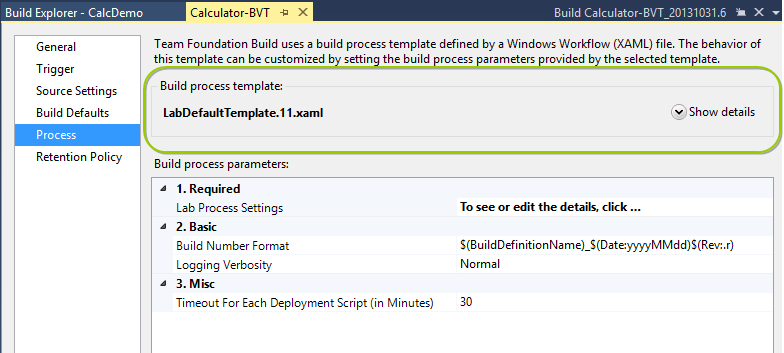
Click on the Lab Process Settings configuration button and then step through the wizard. We specify as the name of the environment CloudEnv (we created it at the step of working with Microsoft Test Manager) and our build compilation. Next is the crucial step where you should specify the deployment scripts:
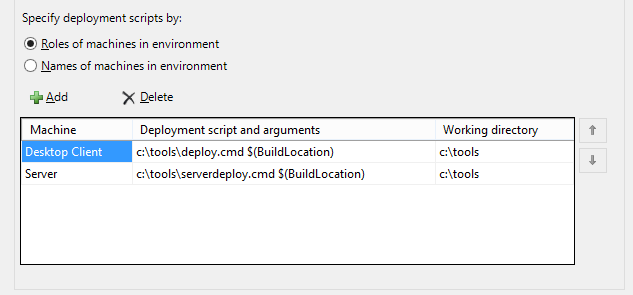
The first script will be launched on the Desktop Client role (ag-lab computer), the second, respectively, on the Server role (this is t-lab). Scripts should be placed in the c: \ tools directory on these machines. The first script takes the $ (BuildLocation) parameter and copies the build binaries from the network drive:
SET "inputpath =% 1"
xcopy% inputpath% c: \ Calculator / E / R / Y
The second does nothing, just the Echo parameter, and is here as an illustration. In fact, we do not deploy anything on the Server.
The user on behalf of whom the deployment script runs by default is the system account. On the one hand, this allows you to do anything inside the script without fear of access violation, but on the other hand, it limits network interaction somewhat.
So that you do not have to manually attach the network drive where the build is located, by registering passwords in cmd, the easiest way is to redo the “Visual Studio Lab Agent Service” service settings on the machines where the build agent is installed:

The last step of the wizard is the configuration of which tests should be run:

Test plan, test configuration and test settings must be created in Microsoft Test manager.
Create an automatic test
The final step is the creation and configuration of tests. Add a new Coded UI Test to your test project. It can be created from scratch, or it can be based on what Testers recorded as Action Recording. After the test is created, it needs to be tied to the test case, this is done in Visual Studio:

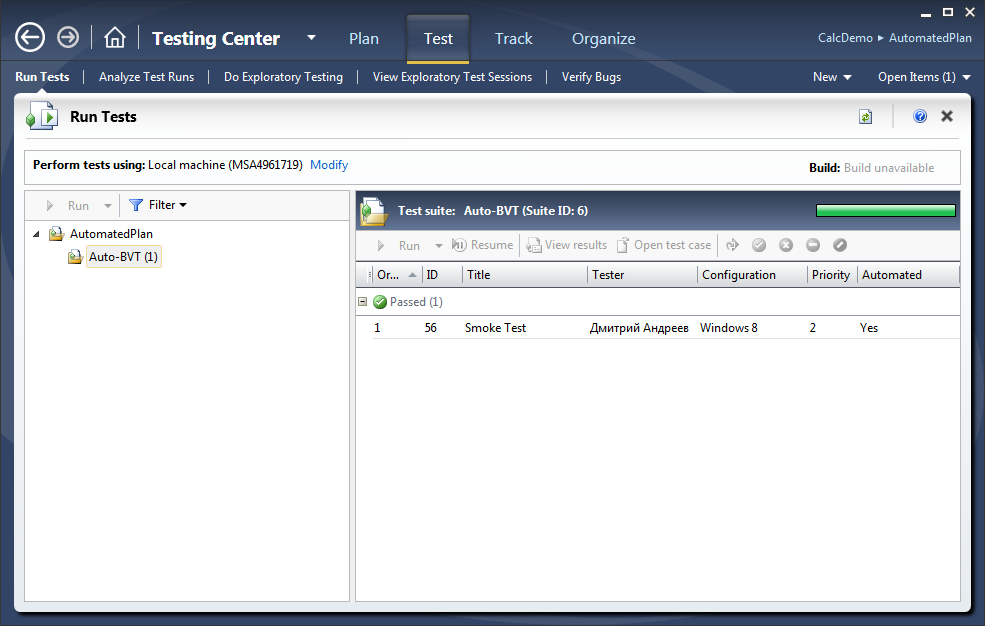
Then this test case is added to the test suite (in our case it is called Auto-BVT):
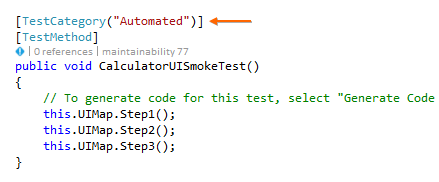
In order for CodedUITest not to run during unit testing, you can use test categories. Just add the attribute directly in the test code:
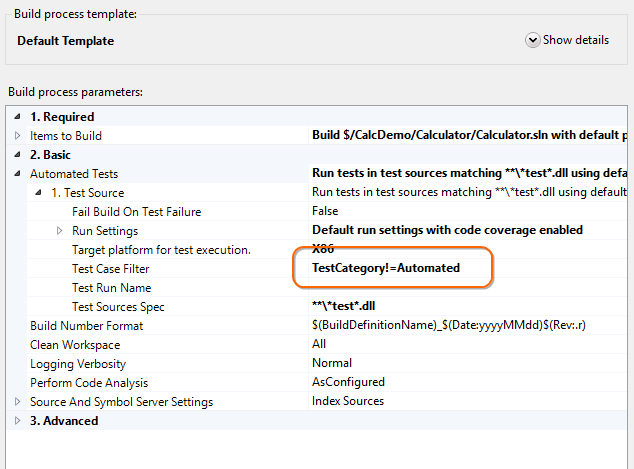
And then we filter in the build parameters:
How it all works together.
Now it is enough for the developer to initiate the build of the Calculator-BVT build and the following will happen:
- Build Calculator-BVT will cause a build Calculator
- Build Calculator on bc-lab controller will get the latest sources of our project from cloud TFS
- Further the project will be compiled
- Conducted unit tests
- If everything is ok, then control is returned to the Calculator-BVT build.
- This build runs deployment scripts.
- And then the automatic tests from the test plan.
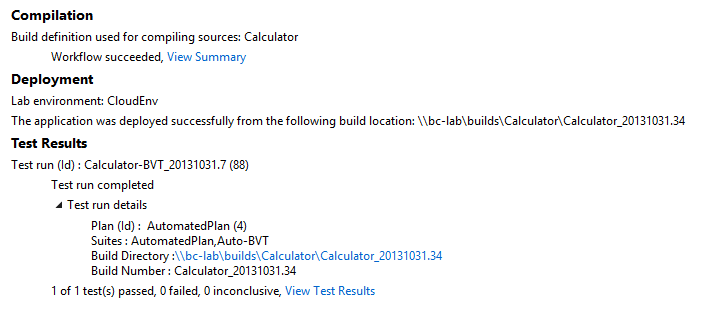
If everything went fine, then the build report will list all these steps:
What's next.
There are many options for how projects are collected and tests are conducted. For example, your build can build a project for an Azure web role and automatically deploy it. And then you can conduct automated tests for web projects. In a test environment, there may be more or fewer machines. In this case, some of them may even be in the network of your organization. You can also keep the “build” server with the controller. In general, there are a lot of configuration options, which allows you to get the necessary level of flexibility.
The most important thing is the ability to reduce the cost of testing environment configuration. The more steps are automated, the more tests you can conduct, the less chance there are of human errors, and therefore your decisions will be better.
Source: https://habr.com/ru/post/200446/
All Articles