Cooking NSA SELinux
 Hi Habr! With this post, I want to divert the respected community from the NSA on the topic a little bit, and instead fill in the gap in the description of one of their technologies, writing something between “turn off SELinux” and “devote the best years to it to understand a small part”. In fact, both of these points of view are equally far from the truth - the technology is quite simple, transparent and allows you to do a lot. However, I want to warn about the huge number of letters, and rather narrow target audience, because The following will be interesting not for everyone. If you have long wanted to understand what SELinux is, but did not know which side to go for - this article is for you. If you know all this for a long time and successfully apply it, then I made enough inaccuracies so that we could discuss it in the comments. Well, world-class information security experts can boldly go to the very end and start playing, I have plans to continue :-)
I will not deal in this article with topics related to the NSA as a whole, the ability to decipher RSA, wiretapping and other media aspects - no hype, no FUD, only technology. We will, with varying degrees of activity, climb into different sources, add our own conditions to the very heart of the MLS, possibly introducing our vulnerabilities (we also make mistakes), and after that
So, if you are still interested, and you are not afraid to spend a week in one of the many spoilers, then
Preliminary readings
I mean that you already have enough experience with Linux to deploy your favorite distribution in a virtual environment. I will do everything with the example of Debian, but if you decide to repeat this path, then all this can be (and very much needed) done on the most convenient and familiar distribution kit - in the process you will learn a lot about it. I tried to write this article as a teaching material so that anyone could repeat it step by step. I also mean that it will not be difficult for you to read technical documentation in English - information on SELinux in Russian is so far extremely scarce.General technology information
There are so many rumors around SELinux that you will be surprised how small the introductory volume is, just three links:- RH Guide : if any command is incomprehensible, you will most likely find a description in it. Open it in a separate tab, useful.
- Summary of the lecture by Eli Billauer: consider it as the main collection of facts. On it you can quickly understand what's what, and know what to ask Google.
- Writing a politician . Despite the document’s ten years ago, it describes enough key points to understand the internal structure of SELinux, and how to pick it.
This is the main thing that I recommend reading before setting up, otherwise you will constantly return to these documents. There are many other resources , but you will definitely get to them if you want to do something different from turning on / off boolean variables.
So, when you read all this, we can check ourselves with simple questions:
- What is unconfined_t / unconfined_u, and why SELinux cannot be tested on it?
- What is a special case, MLS or MCS?
- What is the difference between * .te and * .if and * .fc?
Answers
- Unlimited domain / user. With the same success, you can configure SELinux on another machine.
- MCS. MLS == MCS with MLS_SENS = 1.
- Basically - nothing. Although in txt write, do not forget to fix the main Makefile.
Task setting and pre-setting
Now that we already know what we want, but don’t know how we will implement it, we can formulate the objectives of the experiment:- We want to set up SELinux MLS (since they took it, let's get to the maximum, and not ready from the repository
next-> next-> agree); - We want to take RefPolicy as a basis ;
- Well, after that we want to check the worst case scenario - we were broken, and not just broken, but received UID = 0, and not just received, but with constant shell access, and we forgot to root user_u and remap. I intentionally make a number of similar assumptions, we will consider the worst-case scenario;
- We will set up the minimum required copy, otherwise it will not be an article, but a saga about five hundred pages;
Server
With your permission, I will remove it under the spoiler. YMMV, you may not be Debian, and the installation in KVM is no different. Any distribution kit installed in the minimum configuration in a virtual environment will do. Virtual - because it is more convenient, minimal - because it is faster.Details
We believe that the basis for the experiments is ready.A typical Debian expert install, small details: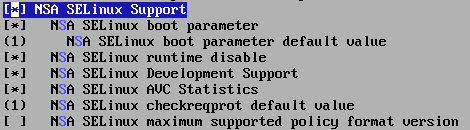
- Disk layout (as many as 4GB!):
- / dev / vda1 64MB as / boot, ext2.
- rest as LUKS: aes256: cbc-essiv: passphrase, all settings as default as possible.
- inside the remainder - all under LVM.
- Here at once fstab
root@sandbox:~# cat /etc/fstab # /etc/fstab: static file system information. # <file system> <mount point> <type> <options> <dump> <pass> /dev/vda1 /boot ext2 defaults 0 2 /dev/mapper/vg0-root / btrfs defaults 0 1 /dev/mapper/vg0-usr /usr btrfs defaults 0 2 /dev/mapper/vg0-var /var btrfs defaults 0 2 /dev/mapper/vg0-tmp /tmp btrfs defaults 0 2 /dev/mapper/vg0-rhome /root btrfs defaults 0 2 /dev/mapper/vg0-swap none swap sw 0 0 - Separate sections rendered for further convenience testing.
- We put a minimal system with an SSH server, nothing else.
- Before completing the installation, we immediately call the shell, and remember the system key:
root@sandbox:~# ssh-keygen -l -f /etc/ssh/ssh_host_ecdsa_key 256 f6:9b:ad:dd:93:cb:3d:c2:83:76:45:c3:02:e8:6a:1d root@sandbox (ECDSA)
sed -i 's/wheezy/jessie/g' /etc/apt/sources.list # that's no bloody enterprise aptitude update && aptitude dist-upgrade -VR # let's go testing, it's stable enough aptitude install vim bash-completion deborphan -VR # a little comfort couldn't hurt aptitude install policycoreutils auditd setools selinux-basics -VR # last is just helper scripts, optional vim /etc/network/interfaces # make interfaces static aptitude purge isc-dhcp-client console-setup console-setup-linux kbd iproute module-init-tools $(deborphan) Create keys for ssh, register them on the server for root: @local$ ssh-keygen -b 521 -t ecdsa -f selinux-test @remote# mkdir /root/.ssh && cat selinux-test.pub > /root/.ssh/authorized_keys2 && chown && chmod Well, by the end of the day, we assemble and install our core - we want support for the latest version of the policy, the minimum required set of modules, experiment with the PaX and GRSecurity patches (which, by the way, get on well with SELinux, but I’ll probably describe this later). In general, the vanilla kernel is best suited for us at the current stage. Yes, I can hear you a voice from the audience talking about the Debian way - but today the samurai’s way is not limited to such a framework. In this experiment, we still have UID = 0 without restrictions, and we are doing everything we want. So, let's heat up a little Arizona (or local virtual machine): mkdir src && cd src && wget -c http://kernel.org/pub/linux/kernel/v3.0/linux-3.10.18.tar.bz2 && tar jxf linux*tar.bz2 && cd linux* && make menuconfig && make -j$((2* $(grep processor /proc/cpuinfo | wc -l))) deb-pkg && make clean At the configuration stage, we enable SELinux (yes, this pun is intended!): .config
# if you are lazy to configure yourself, here's my .config, usable on KVM+libvirt wget -O - $aboveimage | dd bs=1 skip=3991 | xzcat Automating policy assembly
It was more convenient for me to build policies on a local machine and, in the form of a deb package, already installed on the server. Therefore, I took the path of least resistance.up'n'enter style
wget http://oss.tresys.com/files/refpolicy/refpolicy-2.20130424.tar.bz2 tar jxf refpolicy-2.20130424.tar.bz2 cp -rp refpolicy custom #all our modifications asroot# mkdir /usr/share/selinux/custom # so we can 'make install' here asroot# mkdir /etc/selinux/custom asroot# chown $USER:$USER /etc/selinux/custom /usr/share/selinux/custom asroot# touch /etc/selinux/custom/setrans.conf && chown $USER:$USER /etc/selinux/custom/setrans.conf # we'll need it later asroot# aptitude install selinux-utils python-selinux policycoreutils checkpolicy # these are for policy build Next, the package build script: #!/bin/bash # sample deb build for custom selinux policy # harvests policy from local system version='0.0.1' name='selinux-policy-custom' description='Custom MLS SELinux policy' cf="${name}-control" cc="${name}-Copyright" # depends and conflicts shamessly ripped from selinux-policy-mls read -d '' cheader << EOF Section: non-free Priority: optional Homepage: http://selinux/ Standards-Version: 3.9.2 Package: ${name} Version: ${version} Maintainer: secadm_r <here.can+be@your.email> Pre-Depends: Depends: policycoreutils (>= 2.1.0), libpam-modules (>= 0.77-0.se5), python, libselinux1 (>= 2.0.35), libsepol1 (>= 2.1.0) Conflicts: cron (<= 3.0pl1-87.2sel), fcron (<= 2.9.3-3), logrotate (<= 3.7.1-1), procps (<= 1:3.1.15-1), selinux-policy-refpolicy-strict, selinux-policy-refpolicy-targeted, sysvinit (<= 2.86.ds1-1.se1) Architecture: all Copyright: ./selinux-policy-custom-Copyright Description: ${description} EOF read -d '' postinst << "EOF" File: postinst 755 #!/bin/sh -e set -e if [ "$1" = configure ]; then /usr/sbin/semodule -s custom -b /usr/share/selinux/custom/base.pp $(find /usr/share/selinux/custom/ -type f ! -name base.pp | xargs -r -n1 echo -n " -i") fi #DEBHELPER# exit 0 EOF function make_policy() { cd custom make clean rm -rf /usr/share/selinux/custom/* make install cd .. } function make_files() { echo 'SELinux custom policy copyright:TODO' > ${cc} echo -e "$cheader" > ${cf} echo -e "$postinst" >> ${cf} echo -en "\nFiles: " >> ${cf} # our setrans file echo -e " /etc/selinux/custom/setrans.conf /etc/selinux/custom" >> ${cf} # /etc/selinux dir find /etc/selinux/custom -type f ! -name \*LOCK | xargs -r -n1 -If -- sh -c 'echo " f $(dirname f)"' >> ${cf} # /usr/share/selinux/custom dir find /usr/share/selinux/custom -type f | xargs -r -n1 -If -- sh -c 'echo " f $(dirname f)"' >> ${cf} } function cleanup() { rm -f ${cc} ${cf} } function build_deb() { equivs-build ${cf} [ $? -eq 0 ] && cleanup } rm ./${name}*deb # glob is ok make_policy make_files build_deb scp -P 22 -i ~/.ssh/selinux-test selinux*deb root@selinux:/tmp/ The complete reassembly time turned out to be ~ 30 seconds, so the general principle of the script is chosen - “head-on,” which is called, I think, to adapt for assembling rpm work will not be:- Make all
- We collect and set policies (make install)
- We find everything that is established (we know where to look), we collect the package
- Fill the server in / tmp
- In postinst, he himself will find what he has updated, pull semodule and reload policies
SELinux, the first acquaintance.
The server is ready, the build system is ready, the reference policy is loaded, now you can get down to the most interesting. (Approximately at this stage, assessing the already existing volume of the article, a seditious thought crept in to divide it byFor the first build, we define the parameters, I chose these:
$ sed '/^#/d;/^$/d' build.conf TYPE = mls NAME = custom DISTRO = debian UNK_PERMS = reject DIRECT_INITRC = n MONOLITHIC = n UBAC = y CUSTOM_BUILDOPT = MLS_SENS = 4 MLS_CATS = 32 MCS_CATS = 32 QUIET = n The differences from upstream are minimal: MLS is enabled (this means that all the parameters from policy / mls and config / appconfig-mls will be included during the build); included distro-specific debian macros, which is not really necessary; the policy will not load if permissions that are not reflected in the policy are defined in the kernel — what if we have a much newer kernel; Well, I have significantly reduced the number of levels and categories - we will have only 4 levels of secrecy, each with 32 categories. For now, that's enough for us.essence numbered uno
As an experiment, try setting MONOLITHIC = y and building a policy without setting it - make policy. The result will be policy.conf, a textual representation of the policy. That's just here, in a simple form, courtesy of the unfolded m4 of all the clutter of macros, described everything that SELinux will allow. In other words (Warning: bad analogy time!): If secadm_r is like a SAT chief approving access levels and tolerances, then SELinux is an ordinary security officer who checks these lists, and in policy.conf, in fact, lists with fields:
1. who (scontext) - where (tcontext) - to whom (class) - why (call) (plus, in the case of MLS: show your tolerance level as well, and if it is less than expected, I will not even look at the rules .)
1. who (scontext) - where (tcontext) - to whom (class) - why (call) (plus, in the case of MLS: show your tolerance level as well, and if it is less than expected, I will not even look at the rules .)
We create all the necessary configs, which we will edit to fit our needs: make conf . At first, we’re correcting the policy / modules.conf that appeared - I turned off (modulename = off) almost all modules in the contrib group. Plus - faster assembly, fewer modules. Minus - the possible underdefinition of contexts. Let me explain with an example:
- The context of / dev / xconsole, although related more to logging, is defined in the xserver module;
- Disabling it, the context was inherited from the / dev / directory;
- And most likely, everything that I wanted to write in / dev / xconsole, and was taken into account in RefPolicy, immediately broke. To correct - at your choice: either we include the xserver module, or we redefine the context in any of our local modules.
contrib_off
As soon as we started to edit modules.conf , we passed the point of no return, after which we should understand what we are doing and why. Possible underdetermining of contexts is just the first example of how our actions affect the system. grep -A5 contrib policy/modules.conf | grep "= module$" | wc -l # total number grep -A5 contrib policy/modules.conf | grep "= module$" | sed 's/ = module//' | xargs -r -n1 -I__n -- sh -c 'sed -i "s/^__n = module$/__n = off/" policy/modules.conf' # kekeke # turn some servicess off too (xserver + postgresql) # turn _on_ logrotate,mta,postfix,ulogd, and whatever you think you need Looking ahead, I’ll immediately say a little about the wonderful audit2allow utility: it eats audit.log, and in a fairly clear form (especially with the -Rev keys) gives us what we need to add in the policy so that these messages no longer appear in the log. So, if you are somewhere (and this is almost everywhere) on the Internet, you will find a recommendation
grep something-something /var/log/audit/audit.log | audit2allow -M mymegamodule semodule -i mymegamodule then follow it only if you are aware of what you are doing now - this set of commands means that SELinux will resolve everything that (potentially greedy) something-something has asked for access, and even a little more. Moreover, in the case of MLS, this method does not work at all - because in MLS it is not enough to create an allow rule, it is necessary that the access satisfies all the restrictions imposed on tolerances and categories. Such actions are equivalent to frank confession: “Yes, today I don’t want to think at all with my head, it’s easier for me to allow everything.” Do not make a theater out of your system, and do not tune SELinux in this way - it’s like catching all the packages on a firewall and turning them into permissive rules with a script.')
Now it's time to run make install , and if everything is fine, then build our package and put it on the server:
dpkg -i /tmp/selinux-policy-custom*deb sed -i 's/^SELINUX=.*$/SELINUX=enforcing/;s/^SELINUXTYPE=.*$/SELINUXTYPE=custom/' /etc/selinux/config selinux-activate # if you installed helper package selinux-basics # if not: touch /.autorelabel # add 'selinux=1 security=selinux' to cmdline reboot # let's rock! The system will reboot, apply contexts as defined in the established policy ( / etc / selinux / custom / contexts / files / * ), reboot again and kindly offer to go.When is rocking "rocking" and when is it "shaking" *
Chef, it's all gone. Nothing works. We can't even log in via ssh - connection closed by host. Meet SELinux. As Eli Billauer remarkably articulated:What is SELinux?Nevertheless, it is good if you have reached this point. This is exactly the behavior that we need, and now we will begin to understand why we are not allowed to.
In a nutshell: denied.
the essence of numerically duo, this time without bad analogies
Oh yeah, I forgot to say that from now on, you will need access to the server not only via ssh, it may not work. Fortunately, in our case it is a virtual server, there is always VNC / SPICE / etc (link special for FSKN). We try to enter locally - it does not allow. Excellent situation to immediately illustrate how from itIf you carefully read the preliminary documentation, you will surely remember the decision-making procedure:
- First DAC. If it is forbidden, then it will not even get to SELinux, permission denied will be the usual, unix, familiar to all of us at times when we just got acquainted with our first * nix system.
- Then MAC. If no matching rules are found, permission denied will already be from SELinux. In some distributions (RH), lines containing " SELinux is preventing " will appear in the logs, some will not, but there will be something in all in audit.log.
go out
At this stage, audit.log contains all the reasons for - Don't panic.
- Reboot - for example, by sending Ctrl + Alt + Del, acpid will do everything for us.
- We catch grub at the boot stage, change selinux = 1 to selinux = 0
- Log in, log in as root.
cp /var/log/audit/audit.log /root wc -l /root/audit.log 195 The scale of the disaster is small, two hundred lines. It is time to slowly descend from the mountain:- How to read logs
type=DAEMON_START msg=audit(1383338997.597:1957): auditd start, ver=2.3.2 format=raw kernel=3.10.17-vm-slnx auid=4294967295 pid =1319 subj=system_u:system_r:auditd_t:s3:c0.c31 res=successI was asked to remain silentabout this further.type=SYSCALL msg=audit(1383338997.620:219): arch=40000003 syscall=102 success=no exit=-13 a0=3 a1=afbe1c10 a2=a779b000 a3=ffffffc8 items=0 ppid=1338 pid=1346 auid=4294967295 uid=0 gid=0 euid=0 suid=0 fsuid=0 egid=0 sgid=0 fsgid=0 ses=4294967295 tty=(none) comm="acpid" exe="/usr/sbin/acpid" subj=system_u:system_r:initrc_t:s0-s3:c0.c31 key=(null)
Riddle for inquiring minds - which socket did he turn to? *type=AVC msg=audit(1383338997.810:233): avc: denied { search } for pid=1470 comm="restorecond" name="/" dev="tmpfs" ino=376 scontext=system_u:system_r:restorecond_t:s0-s3:c0.c31 tcontext=system_u:object_r:var_run_t:s3:c0.c31 tclass=dir
And so on. As you can see, there is nothing difficult in these logs. SELinux is not difficult qualitatively , it is difficult quantitatively , and at first it is unusual, but no more. Again, if something is not clear, you can always drive an impersonal line into Google or search here . So, we believe that we now know how to read and understand logs.
* I will not give a hint, write in the comments. - How to fixThere are two main options you may encounter:
- Invalid context
- No allow rule
The third option, which is rarely seen but the most unobvious, is a violation of MLS restrictions (policy constraint violation), and adding a permitting rule in this case will not help, you will have to go to the very heart of the MLS and edit the restrictions. Here every change should be made with full understanding of why it is being done and what exactly it should solve. Thoughtless changes are guaranteed to reduce your security level. You have been warned (again).
Now the canvases are about the solution methods, rolled up in a tackle due to the size:- solution for invalid contextExample of invalid context:
root@sandbox:~# ls -laZ /lib/systemd/systemd-udevd -rwxr-xr-x. 1 root root system_u:object_r:bin_t:s0 210380 Sep 23 12:24 /lib/systemd/systemd-udevd @local$ grep systemd-udevd custom/policy/ -R custom/policy/modules/system/udev.fc:/usr/lib/systemd/systemd-udevd -- gen_context(system_u:object_r:udev_exec_t,s0)root@sandbox:~# semanage fcontext -m -t udev_exec_t /lib/systemd/systemd-udevd # try to modify /usr/sbin/semanage: File context for /lib/systemd/systemd-udevd is not defined root@sandbox:~# semanage fcontext -a -t udev_exec_t /lib/systemd/systemd-udevd # ok, add root@sandbox:~# grep udev /etc/selinux/custom/contexts/files/file_contexts.local /lib/systemd/systemd-udevd system_u:object_r:udev_exec_t:s0 - solution for the absence of an allow ruleLet's take this line, for example:
type=AVC msg=audit(1383338997.860:251): avc: denied { module_request } for pid=1524 comm="sshd" kmod="net-pf-10" scontext=system_u:system_r:sshd_t:s0-s3:c0.c31 tcontext=system_u:system_r:kernel_t:s3:c0.c31 tclass=systemroot@sandbox:~# audit2allow -Rev -i /root/log require { type kernel_t; type sshd_t; class system module_request; } #============= sshd_t ============== # audit(1383338997.860:251): # scontext="system_u:system_r:sshd_t:s0-s3:c0.c31" tcontext="system_u:system_r:kernel_t:s3:c0.c31" # class="system" perms="module_request" # comm="sshd" exe="" path="" # message="type=AVC msg=audit(1383338997.860:251): avc: denied { # module_request } for pid=1524 comm="sshd" kmod="net-pf-10" # scontext=system_u:system_r:sshd_t:s0-s3:c0.c31 # tcontext=system_u:system_r:kernel_t:s3:c0.c31 tclass=system " allow sshd_t kernel_t:system module_request;- What's happening? sshd asked to load the module into the kernel. Ok, net-pf-10 is not much needed, because ipv6 we have not.
- What have we been offered? Allow the sshd_t domain to load modules into the kernel. Of course, if we resolve, there will be no such error. And if he asks for an enemy module?
- What do they write on the Internet? Hehe . Thank you, but no, we don’t need the presence of a Boolean variable to resolve this functionality either.
- What are we doing? Yes, we prohibit sshd to beg in this direction, let him work on what was given. When we need ipv6, we will load it ourselves, even before ssh starts.
mkdir policy/modules/local && cd policy/modules/local echo '<summary>Local layer -- differences from reference policy.</summary>' > metadata.xml echo '## <summary>sshd local policy</summary>' > sshd_local.if echo '## no file contexts redefined here' > sshd_local.fc cat > sshd_local.te <<EOF > policy_module(sshd_local, 0.0.1) > ################################################################## > require { > type kernel_t; > type sshd_t; > class system module_request; > } > #============= sshd_t ============== > # dont audit requests for module load > # NOTE: this may hide some denials in the future > dontaudit sshd_t kernel_t:system module_request; > > EOF
We specify our module in modules.conf, we collect policy, we fill in on the server, we look:root@sandbox:/tmp# sesearch --allow -s sshd_t -t kernel_t | grep system root@sandbox:/tmp# sesearch --dontaudit -s sshd_t -t kernel_t | grep system root@sandbox:/tmp# dpkg -i selinux-policy-custom_0.0.1_all.deb (Reading database ... 20371 files and directories currently installed.) Preparing to replace selinux-policy-custom 0.0.1 (using selinux-policy-custom_0.0.1_all.deb) ... Unpacking replacement selinux-policy-custom ... Setting up selinux-policy-custom (0.0.1) ... root@sandbox:/tmp# sesearch --dontaudit -s sshd_t -t kernel_t | grep system dontaudit sshd_t kernel_t : system module_request ; root@sandbox:/tmp# semodule -l | grep sshd_local sshd_local 0.0.1 - solution for MLS restrictionsHere’s the problem (the level of spoilers is over nine thousand !! 1one):the problemHere is a description:
type=AVC msg=audit(1383338997.630:221): avc: denied { sendto } for pid=1351 comm="acpid" path="/dev/log" scontext=system_u:system_r:initrc_t:s0-s3:c0.c31 tcontext=system_u:system_r:syslogd_t:s3:c0.c31 tclass=unix_dgram_socket type=SYSCALL msg=audit(1383338997.630:221): arch=40000003 syscall=102 success=no exit=-13 a0=3 a1=afbe15d0 a2=a779b000 a3=ffffffc8 items=0 ppid=1 pid=1351 auid=4294967295 uid=0 gid=0 euid=0 suid=0 fsuid=0 egid=0 sgid=0 fsgid=0 ses=4294967295 tty=(none) comm="acpid" exe="/usr/sbin/acpid" subj=system_u:system_r:initrc_t:s0-s3:c0.c31 key=(null)the decriptionHere are the existing rules:root@sandbox:~# audit2allow -Rev -i /tmp/x require { type syslogd_t; type initrc_t; class unix_dgram_socket sendto; } #============= initrc_t ============== # audit(1383338997.630:221): # scontext="system_u:system_r:initrc_t:s0-s3:c0.c31" tcontext="system_u:system_r:syslogd_t:s3:c0.c31" # class="unix_dgram_socket" perms="sendto" # comm="acpid" exe="" path="" # message="type=AVC msg=audit(1383338997.630:221): avc: denied { sendto } for # pid=1351 comm="acpid" path="/dev/log" # scontext=system_u:system_r:initrc_t:s0-s3:c0.c31 # tcontext=system_u:system_r:syslogd_t:s3:c0.c31 tclass=unix_dgram_socket "#!!!! This avc is a constraint violation. You will need to add an attribute to either the source or target type to make it work. #Constraint rule: # Possible cause source context and target context 'level' differ allow initrc_t syslogd_t:unix_dgram_socket sendto;the sesearchAs we see, the resolving rule is already there. Moreover, in the MLS version, this access would be allowed.root@sandbox:~# sesearch --allow -s initrc_t -t syslogd_t -c unix_dgram_socket Found 2 semantic av rules: allow initrc_t syslogd_t : unix_dgram_socket sendto ; allow unconfined_domain_type domain : unix_dgram_socket { ioctl read write create getattr setattr lock relabelfrom relabelto append bind connect listen accept getopt setopt shutdown recvfrom sendto recv_msg send_msg name_bind } ;offtopicDecision. We find the desired restriction, we read:At the same time you can appreciate the beauty of the unconfined domain. Everything is possible, then he is “unlimited”. That is why SELinux testing on something other than strict doesn't make much sense. And even if you have strict, but the object being tested is unconfined, then, in general, it is a bit early to make conclusions about the usefulness and reliability of SELinux, even if you really want to :-)mlsconstrain unix_dgram_socket sendto (( l1 eq l2 ) or (( t1 == mlsnetwriteranged ) and ( l1 dom l2 ) and ( l1 domby h2 )) or (( t1 == mlsnetwritetoclr ) and ( h1 dom l2 ) and ( l1 domby l2 )) or ( t1 == mlsnetwrite ) or ( t2 == mlstrustedobject )); # scontext=system_u:system_r:initrc_t:s0-s3:c0.c31 # tcontext=system_u:system_r:syslogd_t:s3:c0.c31- the lower access level t1 is equal to that of t2 (s0! = s3), or
- t1 mlsnetwriteranged (, seinfo -amlsnetwriteranged -x ), ,
- t1 mlsnetwritetoclr (, ),
- t1 mlsnetwrite (, setrans_t),
- t2 mlstrustedobject (, syslogd_t , devlog_t)
root@sandbox:~# ls -laZ /dev/log srw-rw-rw-. 1 root root system_u:object_r:devlog_t:s3:c0.c31 0 Nov 1 23:06 /dev/logroot@sandbox:~# ps -auxZ | grep [r]syslog system_u:system_r:syslogd_t:s3:c0.c31 root 1338 0.0 0.3 30784 972 ? Ssl Nov01 0:00 /usr/sbin/rsyslogd$ grep '' syslogd_local.* syslogd_local.fc:# no file contexts redefined here syslogd_local.if:## <summary>syslogd local policy</summary> syslogd_local.te:policy_module(syslogd_local, 0.0.1) syslogd_local.te:################################################################## syslogd_local.te:require { syslogd_local.te: type syslogd_t; syslogd_local.te:} syslogd_local.te: syslogd_local.te:#============= syslogd_t ============== syslogd_local.te:# mark syslogd_t as mlstrustedobject syslogd_local.te:# this is possible security hole, TODO: get some heavy brain augmentation and investigate syslogd_local.te:mls_trusted_object(syslogd_t);
- What to fix, . , permissive (/etc/selinux/config), , audit.log c , , newrole, ssh. enforcing, . auditd ssh:
root@sandbox:~# sestatus SELinux status: enabled SELinuxfs mount: /sys/fs/selinux SELinux root directory: /etc/selinux Loaded policy name: custom Current mode: enforcing Mode from config file: enforcing Policy MLS status: enabled Policy deny_unknown status: denied Max kernel policy version: 28 root@sandbox:~# cat /var/log/audit/audit.log type=DAEMON_START msg=audit(1383360996.062:2774): auditd start, ver=2.3.2 format=raw kernel=3.10.17-vm-slnx auid=4294967295 pid=1278 subj=system_u:system_r:auditd_t:s3:c0.c31 res=success type=CONFIG_CHANGE msg=audit(1383360996.180:20): audit_backlog_limit=320 old=64 auid=4294967295 ses=4294967295 subj=system_u:system_r:auditctl_t:s0-s3:c0.c31 res=1 type=LOGIN msg=audit(1383361036.430:21): login pid=1568 uid=0 old auid=4294967295 new auid=0 old ses=4294967295 new ses=1 type=LOGIN msg=audit(1383361038.410:22): login pid=1571 uid=0 old auid=4294967295 new auid=0 old ses=4294967295 new ses=2 root@sandbox:~# id -Z root:secadm_r:secadm_t:s0-s3:c0.c31
So, we have all configured, the system boots in enforcing mode. At this point, as a rule, the attentive reader already has extensive knowledge of modifying the modules, is fluent in the policy structure, sincerely loves (or at least sincerely hates) the m4 syntax, subscribes to the NSA newsletter, knows two dozen sources of information on SELinux and a dozen developers. .
It is time to climb a little deeper, on the territory, not much described in the documentation.
Mls
If you are somewhat familiar with all sorts of criteria for evaluation of security , then you already know that they are, first, the big set (c individual (PDF) profiles (PDF), most of which have developed various kinds of paramilitary organizations), and that the output is a certain the number of parrots , which characterizes the rigidity of the requirements during the passage. Mlsadds to the existing SELinux restrictions two more levels of control, vertical (levels) and horizontal (categories). The first is nothing more than “tolerances”, where the superior permit implies access to a lower level (“top secret” can read documents classified as “secret”), and the second is different categories of the same level, where permission to read one category does not mean permission to read the rest.Since both of these levels of control can be assigned to any objects that SELinux works with, this allows you to implement almost any requirements for classifying information and its flows:
- Hierarchical access, TopSecret -> Secret -> Unclassified, for any objects. The full list is in the flask directory;
- Marking of both files and, for example, network connections or tables in the database;
- Prevention of information leakage to lower levels, regardless of the user's rights in the system;
- Restriction of access by default for any users (including root), with further differentiation of roles depending on authentication.
- And other overkill for 99% of systems.
For this experiment, I used these levels and categories:
root@sandbox:~# cat /etc/selinux/custom/setrans.conf Domain=Playbox # levels s0=SystemLow s3:c0.c31=SystemHigh s0-s3:c0.c31=SystemLow-SystemHigh s1=Confidential s2=Secret # employee categories s1.c0=Ninjas s1.c1=Pirates s1.c2=Jesuses # secret stuff s2.c0=Aliens s2.c1=BigBrother Now we set up our web server, as if it were designed exclusively for internal access, i.e. works strictly at the level of s1 (Confidential). It is not necessary for demonstration, but useful for general development. Of course, we will not configure IPSec and packet marking, otherwise no one will see it, we restrict ourselves to the local context. Since we now only have ssh configured on the test machine, let's choose a server that is not described in RefPolicy:nginx
We get users and roles, for example so:nginx, , MCS ( s0). NIH . , , dpkg -L lsof , :
, , (grep nginx /var/log/audit/audit.log | grep 'sysctl'), , , sysctl:
/usr/sbin/nginx -- gen_context(system_u:object_r:nginx_exec_t,s1:c0.c2) /etc/init.d/nginx gen_context(system_u:object_r:nginx_initrc_exec_t,s1:c0.c2) /etc/nginx(/.*)? gen_context(system_u:object_r:nginx_etc_t,s1:c0.c2) /var/log/nginx(/.*)? gen_context(system_u:object_r:nginx_var_log_t,s1:c0.c2) /var/run/nginx(/.*)? gen_context(system_u:object_r:nginx_var_run_t,s1:c0.c2) /var/www(/.*)? gen_context(system_u:object_r:nginx_var_www_t,s1:c0.c2) /var/lib/nginx(/.*)? gen_context(system_u:object_r:nginx_var_lib_t,s1:c0.c3) , , (, , ..), . s1 (Confidential), . , . , , ( newrole -r secadm_r ), premissive ( setenforce 0 ), ( restorecon -RFvv / ), nginx sysadm_r ( run_init /etc/init.d/nginx start ). audit.log , . modname.if, , , «» : template(`web_server_template',` type $1_t, web_server; allow blah blah; # so we can call web_server_template(nginxN) in modname.te ') modname.if , «» . . , , : root@sandbox:~# cat nginx_local.te policy_module(nginx_local, 0.0.1) ################################################################## type nginx_t; type nginx_exec_t; type nginx_initrc_exec_t; type nginx_etc_t; type nginx_var_log_t; type nginx_var_run_t; type nginx_var_www_t; type nginx_var_lib_t; corecmd_executable_file(nginx_exec_t); init_script_file(nginx_initrc_exec_t) files_type(nginx_etc_t) logging_log_file(nginx_var_log_t) files_pid_file(nginx_var_run_t) files_type(nginx_var_www_t) files_type(nginx_var_lib_t) init_ranged_daemon_domain(nginx_t, nginx_exec_t, s1:c0.c2) corecommands.if, . — , MLS, , nginx ., , (grep nginx /var/log/audit/audit.log | grep 'sysctl'), , , sysctl:
# /read kernel sysctl values require { type sysctl_kernel_t; class dir { search }; class file { open read }; } allow nginx_t sysctl_kernel_t:dir { search }; allow nginx_t sysctl_kernel_t:file { open read }; socket: # socket bind require { type node_t; type http_port_t; class tcp_socket { name_bind setopt bind create listen node_bind }; class capability { net_bind_service setuid setgid }; } allow nginx_t http_port_t:tcp_socket { name_bind }; allow nginx_t node_t:tcp_socket { node_bind }; allow nginx_t self:tcp_socket { bind create setopt listen }; allow nginx_t self:capability { net_bind_service setuid setgid }; And so on. audit2allow, MLS. require , , , . , -such a
, . policy_module(nginx_local, 0.0.1) ################################################################## type nginx_t; type nginx_exec_t; type nginx_initrc_exec_t; type nginx_etc_t; type nginx_var_log_t; type nginx_var_run_t; type nginx_var_www_t; type nginx_var_lib_t; corecmd_executable_file(nginx_exec_t); init_script_file(nginx_initrc_exec_t) files_type(nginx_etc_t) logging_log_file(nginx_var_log_t) files_pid_file(nginx_var_run_t) files_type(nginx_var_www_t) files_type(nginx_var_lib_t) init_ranged_daemon_domain(nginx_t, nginx_exec_t, s1:c0.c2) # rules # /sys and /sys/devices/systemcpu/online require { type sysfs_t; class dir { search }; class file { read open }; } allow nginx_t sysfs_t:dir { search }; allow nginx_t sysfs_t:file { read open }; # /read kernel sysctl values require { type sysctl_kernel_t; type sysctl_t; class dir { search }; class file { open read }; } allow nginx_t sysctl_kernel_t:dir { search }; allow nginx_t sysctl_kernel_t:file { open read }; allow nginx_t sysctl_t:dir search; # self configs and symlinks require { type nginx_etc_t; class dir { open read search }; class file { open read getattr }; class lnk_file { read }; } allow nginx_t nginx_etc_t:dir { open read search }; allow nginx_t nginx_etc_t:file { open read getattr }; allow nginx_t nginx_etc_t:lnk_file { read }; # /etc/localtime, /etc/passwc, etc (no pun intended) require { type locale_t; type etc_t; class file { read open getattr }; } allow nginx_t locale_t:file { read open getattr }; allow nginx_t etc_t:file { read open getattr }; # pid file require { type var_run_t; class dir { search write add_name remove_name } ; class file { write read create open unlink }; } allow nginx_t var_run_t: dir { search }; allow nginx_t nginx_var_run_t: file { read write create open unlink }; allow nginx_t nginx_var_run_t: dir { search write add_name remove_name }; # libs require { type var_lib_t; class dir { search getattr }; } allow nginx_t var_lib_t:dir search; allow nginx_t nginx_var_lib_t: dir { search getattr }; # socket bind require { type node_t; type http_port_t; class tcp_socket { name_bind setopt bind create listen node_bind }; class capability { net_bind_service setuid setgid }; } allow nginx_t http_port_t:tcp_socket { name_bind }; allow nginx_t node_t:tcp_socket { node_bind }; allow nginx_t self:tcp_socket { bind create setopt listen }; allow nginx_t self:capability { net_bind_service setuid setgid }; # socket accept require { class tcp_socket { read write accept }; } allow nginx_t self:tcp_socket { read write accept }; # logs require { type var_log_t; class dir { search }; class file { open append }; } allow nginx_t var_log_t:dir { search }; allow nginx_t nginx_var_log_t:dir { search }; allow nginx_t nginx_var_log_t:file { open append }; # www require { class dir { search getattr }; class file { read getattr open }; } allow nginx_t nginx_var_www_t:dir { search getattr }; allow nginx_t nginx_var_www_t:file { read getattr open }; root/sysadm_r@sandbox:~# adduser alice ...skipped... root/sysadm_r@sandbox:~# adduser bob ...skipped... root/secadm_r@sandbox:~# semanage user -a -R user_r -L s1 -r s1-s1:c0 ninjas root/secadm_r@sandbox:~# semanage user -a -R user_r -L s2 -r s2-s2:c0 aliens root/secadm_r@sandbox:~# semanage login -a -s ninjas alice root/secadm_r@sandbox:~# semanage login -a -s aliens bob # or, ninjas to supervise alice root/secadm_r@sandbox:~# restorecon -RFvv /home/ # thats all, folks. Total, we get:- Both users cannot write data in the directory below their minimum level;
- Both users cannot read from objects above their tolerance level;
- Both users are limited to their category. When adding permissive rules for reading other domains, they can only read files with the category c0;
- root , ;
- - SELinux ID, alice, ( DAC ) ;
- , , core — s0, — s1.
Funky time
Well, now, finally, there will be slides. For a full-fledged demonstration, I bought a small Vspku under this article, next to the NSA, and I quickly unfolded everything I had done on it. Directly on this system, you can see what SELinux is, go under the root and type rm -rf / * first of all, without fail, start all sorts of scripts / sploits and rootkits, in general, show this to the NSA motherboard. But before you do this exciting thing, let's go through both assumptions and limitations:As part of this training course, we:
- We believe that root access to the server was given to anyone.
- We believe that it can log in via ssh and run an interactive shell.
- We believe that root is not nezaplen on user_u, as Russell Coker did in his play machine . Of course, this assumption is not recommended in production (like all previous ones, of course :-)
- We believe that we did not customize the kernel (no grsec, I decided not to include it in the article and tests)
- We believe that we have almost no firewall.
But also, there is something for which SELinux is not intended, namely:
- SELinux . :(){ :|:& };: . fork bombs, - — ; , , — — , .
- SELinux . . , SELinux iptables — , . , SELinux, :-)
- We consider the server in a minimal configuration, there are no compilers / debuggers and everything that is usually not available on the market. The full version of the MLS Play Machine will be later, when I deploy it not on a VPS, but on a more controlled infrastructure. But there is scp - you can copy the interesting.
- And yes, in the best traditions of the organization that developed SELinux, the recording of console sessions is also tested on the server at the same time :-) And you know, the NSA, Arizona, Area51 is not far, and here is the root access. It is necessary to write, all of a sudden I get a car there for the central processors. Remove the record - you are also a great fellow, and also write in the comments.
- 0day - at your discretion. If it comes up, I will certainly be flattered. Although, to whom I tell :-)
I did not start a domain, this is for toy version 0.0.2. Version 0.0.1
here
And yes, a separate request - please behave. It is not necessary to kill all root processes and interfere with others, the user is one for all.: http://162.213.198.69
Notes
* Tim Minchin, LullabySource: https://habr.com/ru/post/199202/
All Articles