Part 2. We divide our "pod" into modules. Use someone else's "pod" to develop your
Introduction
Continuing to develop "pod" at a certain point comes the understanding that the project becomes large and
Test project
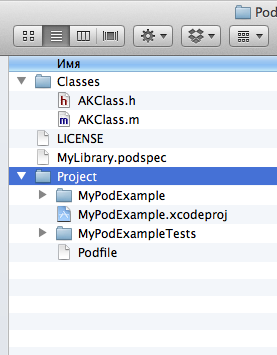
Developing a “pod” is a strange thing at least in itself. Usually its development is carried out in the context of a project. And even better, when a special project is being developed for the development of “pod”, covered with tests and with useful examples of use in the code. Let's create our test project “Single View Application” in the ~ / Documents / PodSample / Project directory . Then we connect our “pod” to it. To do this, create a Podfile file in the same directory. The result should look something like this:
Fill the Podfile :
platform :ios, '7.0' pod 'MyLibrary', :path => '~/Documents/PodSample/MyLibrary.podspec' Being a developer of “pod” 'and we can simplify our lives and after the name we can clearly indicate the path to the specification - the .podspec file. As a result, the installer will not enter the “spec” 's repositories, but will take the explicitly specified specification along the specified path. In principle, you can leave out the name of the file MyLibrary.podspec - it is enough to specify the directory where the specification file of your “pod” is located, the installer will find it himself. Also, nothing prevents the use of relative paths, for example:
platform :ios, '7.0' pod 'MyLibrary', :path => '..' Next, close the Xcode, or at least the test project MyPodExample.xcodeproj .
Install our "pod":
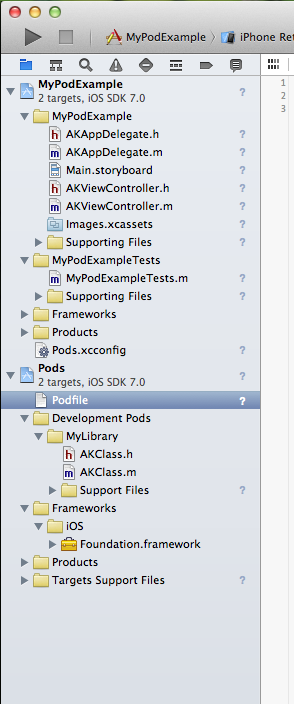
$ cd ~/Documents/PodSample/Project/ $ pod install Analyzing dependencies Fetching podspec for `MyLibrary` from `~/Documents/PodSample/MyLibrary.podspec` Downloading dependencies Using MyLibrary (0.0.1) Generating Pods project Integrating client project The installer generates a “workspace” for us, where it adds a test project and a new project “Pods”. Open the workspace MyPodExample.xcworkspace and see something similar:
Select the modules
Suppose our useful "pod" already knows how to connect to the server, handle JSON, and store some data in its internal storage. Create a set of classes and declare some methods in their public interfaces. The result is on GitHub with the mixed tag.
The division of "pod" 'into modules takes place in two stages. First, the code is put in order, for which we distribute various entities into our own files. After that, we update “spec” - we describe the resulting modules in the “subspec” blocks and put their dependencies on each other with the “dependency” parameter:
Pod::Spec.new do |s| s.name = "MyLibrary" s.version = "0.0.2" s.summary = "Example of creating own pod." s.homepage = "https://github.com/username/MyCustomPod" s.license = { :type => 'MIT', :file => 'LICENSE' } s.author = { "Username" => "username@mail.domain" } s.platform = :ios, 7.0 s.source = { :git => "https://github.com/username/MyCustomPod.git", :tag => s.version.to_s } s.framework = 'Foundation' s.requires_arc = true s.default_subspec = 'Core' # Core s.subspec 'Core' do |core| core.source_files = 'Classes/AKClass.{h,m}' core.public_header_files = 'Classes/*.h' core.dependency 'MyLibrary/Connection' core.dependency 'MyLibrary/Provider' end s.subspec 'Provider' do |provider| provider.source_files = 'Classes/AKProvider.{h,m}' provider.frameworks = 'MapKit', 'CoreData' # provider.platform = :ios, 5.0 # iOS 5.0 end s.subspec 'AccessToken' do |access_token| access_token.source_files = 'Classes/AKAccessToken.{h,m}' access_token.libraries = 'xml2' # access_token.xcconfig = { 'HEADER_SEARCH_PATHS' => '$(SDKROOT)/usr/include/libxml2' } # end s.subspec 'Parser' do |parser| parser.source_files = 'Classes/AKParser.{h,m}' end s.subspec 'Storage' do |storage| storage.source_files = 'Classes/AKStorage.{h,m}' storage.dependency 'MyLibrary/AccessToken' end s.subspec 'Connection' do |connection| connection.source_files = 'Classes/AKConnection.{h,m}' connection.dependency 'MyLibrary/Storage' connection.dependency 'MyLibrary/Parser' end end For the “Provider” module, we indicate the need to connect two frameworks - “MapKit” and “CoreData”. And for the “AccessToken” module, you need to connect the “xml2” library, search for header files in the specified path: $ (SDKROOT) / usr / include / libxml2
It is said that since the CocoaPods v0.17 version, modules no longer inherit implicitly the source_files values from the base “spec”. To return this feature, you need to have a “Core” module that includes the basic sources needed by the created modules.
It is also possible to split modules into submodules:
… s.subspec 'Connection' do |onnection| onnection.source_files = 'Classes/AKConnection.{h,m}' onnection.dependency 'MyLibrary/Storage' onnection.dependency 'MyLibrary/Parser' onnection.subspec 'Cache' do |cache| cache.source_files = 'Classes/AKCache/*.{h,m}' end end … You can also specify the platform and its version on which the module can work. In this case, we have indicated that the Provider module will launch even on “iOS 5.0”.
Check the syntax:
$ pod spec lint ~/Documents/PodSample/MyLibrary.podspec --quick -> MyLibrary (0.0.2) Analyzed 1 podspec. MyLibrary.podspec passed validation. And commit changes to git, put a tag and send it to GitHub:
$ git add MyLibrary.podspec && git commit -m "Spec sliced on subspecs" $ git add -A && git commit -m "Sliced code" $ git tag "0.0.2" $ git push origin master --tags Check the whole project:
$ pod spec lint ~/Documents/PodSample/MyLibrary.podspec -> MyLibrary (0.0.2) Analyzed 1 podspec. MyLibrary.podspec passed validation. ')
Use of the module
To use only the necessary modules, it is enough to list them in a Podfile :
platform :ios, '7.0' pod 'MyLibrary/Storage' pod 'MyLibrary/Parser' If you do not specify a single module:
platform :ios, '7.0' pod 'MyLibrary' then install install installs the source for all modules. If in this case it is necessary to install only the source code of the “Core” module, then its name is specified in the spec in the “default_subspec” parameter - see the example above.
We indicate in our Podfile the dependence of the test project on the Provider module and at the same time we indicate the version we need now - “0.0.2”:
platform :ios, '7.0' pod 'MyLibrary/Provider', :path => '..' pod 'MyLibrary/Connection', :path => '..' And update the project dependencies:
$ cd ~/Documents/PodSample/Project/ $ pod update Analyzing dependencies Fetching podspec for `MyLibrary` from `..` Fetching podspec for `MyLibrary` from `..` Downloading dependencies Installing MyLibrary (0.0.2) Generating Pods project Integrating client project Connect a third-party "pod" '
Sometimes it happens that the development of "pod" 'comes to the point when you want to
Pod::Spec.new do |s| s.name = "MyLibrary" s.version = "0.0.3" s.summary = "Example of creating own pod." s.homepage = "https://github.com/username/MyCustomPod" s.license = { :type => 'MIT', :file => 'LICENSE' } s.author = { "Username" => "username@mail.domain" } s.platform = :ios, 7.0 s.source = { :git => "https://github.com/username/MyCustomPod.git", :tag => s.version.to_s } s.framework = 'Foundation' s.requires_arc = true s.default_subspec = 'Core' # Core s.subspec 'Core' do |core| core.source_files = 'Classes/AKClass.{h,m}' core.public_header_files = 'Classes/*.h' core.dependency 'MyLibrary/Connection' core.dependency 'MyLibrary/Provider' end s.subspec 'Provider' do |provider| provider.source_files = 'Classes/AKProvider.{h,m}' provider.frameworks = 'MapKit', 'CoreData' # provider.platform = :ios, 5.0 # iOS 5.0 end s.subspec 'AccessToken' do |access_token| access_token.source_files = 'Classes/AKAccessToken.{h,m}' access_token.libraries = 'xml2' # access_token.xcconfig = { 'HEADER_SEARCH_PATHS' => '$(SDKROOT)/usr/include/libxml2' } # end s.subspec 'Parser' do |parser| parser.source_files = 'Classes/AKParser.{h,m}' end s.subspec 'Storage' do |storage| storage.source_files = 'Classes/AKStorage.{h,m}' storage.dependency 'MyLibrary/AccessToken' end s.subspec 'Connection' do |connection| connection.source_files = 'Classes/AKConnection.{h,m}' connection.dependency 'MyLibrary/Storage' connection.dependency 'MyLibrary/Parser' connection.dependency 'AFNetworking' # "pod"' end end Integration can cause problems with the versions of the platforms used by you and the external pods. Successfully deciding to update their dependencies (highly desirable with closed XCode or project):
$ cd ~/Documents/PodSample/Project/ $ pod update Analyzing dependencies Fetching podspec for `MyLibrary` from `..` Fetching podspec for `MyLibrary` from `..` Downloading dependencies Installing AFNetworking (2.0.1) Installing MyLibrary (0.0.3) Generating Pods project Integrating client project The required pods will be downloaded and connected, the workspace will be configured. Now you can in your "pod" 'e use the power of all the other
To be continued.
Scheduled:
Part 3. Publishing your "pod" 'a. Shared repository and personal.
Source: https://habr.com/ru/post/198904/
All Articles