Writing an HTML5 game in 20 minutes, or an introduction to the Phaser framework
This article is devoted to the development of stylish, fashionable and youth HTML5 applications using the new Phaser framework. It describes the process of installing the library and the creation of the classic game Pong.
Phaser is an HTML5 mobile and desktop development engine based on the PIXI.js library. Supports rendering in Canvas and WebGL, animated sprites, particles, audio, various input methods and object physics. Sources are available for both viewing and free modification. It was created by Richard Davey, known for his active participation in the community of programmers using the Flixel framework . Richard does not hide the fact that he was inspired by Fliksel, so some things in Phaser will be familiar to experienced flashers. The first version of the new engine was released on September 13 of this year, now not only is active development of the library, but also writing documentation, so at the moment there are not many lessons on it, to put it mildly. That, in my humble opinion, should be corrected, and right now.
So, let's begin. To run and test applications, we need to install a local web server. All the examples from the library kit use PHP, so the server is needed accordingly. I used MAMP for MacOS, for Windows the domestic Denwer or any other analogue will do.
After installing the web server, you need to download the latest version of Phaser from GitHub: https://github.com/photonstorm/phaser . At the moment (October 13, 2013) I recommend downloading the dev branch, since this version contains a number of very useful changes compared to the main one, including a larger amount of documentation. For those who do not use GitHub, a direct link to the archive is available: https://github.com/photonstorm/phaser/archive/dev.zip .
')
To make sure everything is set up correctly, you can run a small Hello Phaser sample application. Create a folder hellophaser in the directory of your web server for sites, and copy there three files from the folder Docs / Hello Phaser :

Launch your favorite browser and open the URL with the copied files (in my case http: // localhost: 8888 / hellophaser / ). If everything is good, you will see a rotating cute logo, such as in the screenshot below:

Now you can start developing our first game. Create a phaser-pong folder for it on your web server and copy the phaser.js file from the build folder with the framework sources there. Also create an assets folder in it, where we will store all the resources related to the game, and the index.html file (in fact, this is where our game will be).
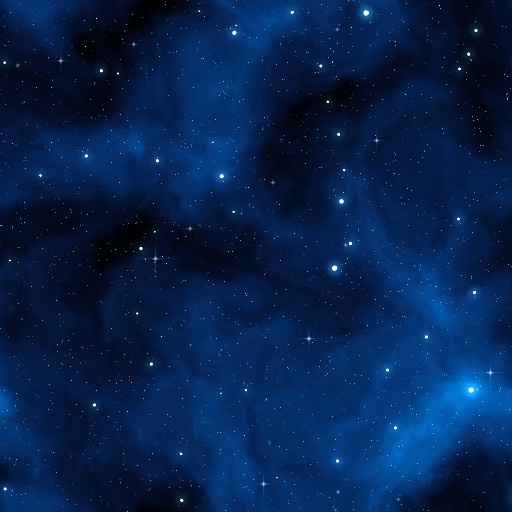
Copy the image of the ball, racket and background into the assets folder. You can take the following files (I took the starry sky from Fazer's examples as a background), or you can draw something of your own. The main thing is to make sure that you load the necessary images into the game with the correct names and appropriate sizes. Also, do not choose too large images, with their drawing problems may arise. Therefore, before using a photo of your cat, reduce it to, say, 480x640 (the resolution of our game), and everything will be fine.


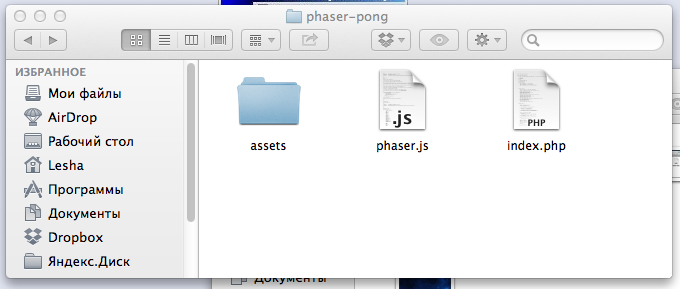
As a result, the contents of the phaser-pong folder will be as follows:
And in the assets folder there will be three pictures:

Finally, all the preparatory stages are completed, and the actual development begins. Open index.html and paste the following code there:
Open in the browser the address of the new game (I have it http: // localhost: 8888 / phaser-pong / ) and you will see its window with the drawn background

What happens in the written code? First we import the library. Then we create an object of the
The fifth parameter lists the main functions of the game.
In the
We now turn to the most interesting - let's fill our game with logic. After declaring the
To create racquets, we write the function
The method creates a sprite with the specified coordinates and adds it to the game. The
Add two calls to this function in create () immediately after creating the background. Rackets will be added to the game after the background image, so we will see them on the screen:
Similarly, create a ball by adding the following code immediately after the calls to the
As a result, we will see that in our game there appeared two rackets and a ball, while stills:

The picture turned out pretty, but I think it is worth it to slightly revive.
Add a variable responsible for the state of the ball and the function that will launch it:
The function checks that the ball is not yet started, and in this case sets the velocity to it using the velocity field.
We call the function call at the click of a mouse button by writing the following line to create () :
Now click the mouse starts the ball, and it bounces off the boundaries of the game. Add motion and rackets by editing the
The player’s racket follows the mouse pointer, the computer’s racket follows the ball. For the player’s racket, we also added a limit on the maximum and minimum
The whole essence of the game is to beat the ball with rackets, so you need to organize a check for ball collisions with rackets. Fortunately, the corresponding functionality is already in Fazer, so we just need to use it.
We add the following three lines to the end of
The
In a collision, the ball changes its direction of movement depending on which part of the racket it hits.
It remains only to add a check for a missed goal. If someone missed it, put the ball in its original position in the center of the field.
Everything! Open the browser, enjoy the fantastic and modern gameplay of our game, enjoy life and freshly acquired programming skills.
Naturally, the game still lacks much, at least scoring and determining the winners. But it seems to me that for the introduction to the development with Phaser enough things shown. The engine supports many other cool features that I am going to show with the example of a new game, a bit more complex and directly related to Habr, to make it more interesting.
STAY TUNED.
During development, I actively used the code from the example breakout.php . In addition to this example, there are other games in the folder with Phaser, so for those who can not wait to use the new framework, I recommend first of all to look at the contents of the examples folder.
Useful links:
1. English introduction to Phaser
2. Engine dedicated forum
3. Twitter Richard Davey
Update: following the advice of comrade hell0w0rd, I put the example on the githab and created a page so that you can try out the game:
https://github.com/nononononono/phaser-pong
http://nononononono.imtqy.com/phaser-pong/
Update on 10/20/2013: fessnecro added particles when a ball collided with rackets and new levels, for which he thanks. These changes are mostly stranger. The original version described in the article is in the gh-pages thread.
Introduction
Phaser is an HTML5 mobile and desktop development engine based on the PIXI.js library. Supports rendering in Canvas and WebGL, animated sprites, particles, audio, various input methods and object physics. Sources are available for both viewing and free modification. It was created by Richard Davey, known for his active participation in the community of programmers using the Flixel framework . Richard does not hide the fact that he was inspired by Fliksel, so some things in Phaser will be familiar to experienced flashers. The first version of the new engine was released on September 13 of this year, now not only is active development of the library, but also writing documentation, so at the moment there are not many lessons on it, to put it mildly. That, in my humble opinion, should be corrected, and right now.
Install Library and Local Web Server
So, let's begin. To run and test applications, we need to install a local web server. All the examples from the library kit use PHP, so the server is needed accordingly. I used MAMP for MacOS, for Windows the domestic Denwer or any other analogue will do.
After installing the web server, you need to download the latest version of Phaser from GitHub: https://github.com/photonstorm/phaser . At the moment (October 13, 2013) I recommend downloading the dev branch, since this version contains a number of very useful changes compared to the main one, including a larger amount of documentation. For those who do not use GitHub, a direct link to the archive is available: https://github.com/photonstorm/phaser/archive/dev.zip .
')
To make sure everything is set up correctly, you can run a small Hello Phaser sample application. Create a folder hellophaser in the directory of your web server for sites, and copy there three files from the folder Docs / Hello Phaser :
Launch your favorite browser and open the URL with the copied files (in my case http: // localhost: 8888 / hellophaser / ). If everything is good, you will see a rotating cute logo, such as in the screenshot below:
Game development
Preparing the necessary files
Now you can start developing our first game. Create a phaser-pong folder for it on your web server and copy the phaser.js file from the build folder with the framework sources there. Also create an assets folder in it, where we will store all the resources related to the game, and the index.html file (in fact, this is where our game will be).
Copy the image of the ball, racket and background into the assets folder. You can take the following files (I took the starry sky from Fazer's examples as a background), or you can draw something of your own. The main thing is to make sure that you load the necessary images into the game with the correct names and appropriate sizes. Also, do not choose too large images, with their drawing problems may arise. Therefore, before using a photo of your cat, reduce it to, say, 480x640 (the resolution of our game), and everything will be fine.
As a result, the contents of the phaser-pong folder will be as follows:
And in the assets folder there will be three pictures:
Creating the main object of the game, loading resources
Finally, all the preparatory stages are completed, and the actual development begins. Open index.html and paste the following code there:
<script src="phaser.js"></script> <script type="text/javascript"> var game = new Phaser.Game(480, 640, Phaser.AUTO, '', { preload: preload, create: create, update: update }); function preload() { game.load.image('bet', 'assets/bet.png'); game.load.image('ball', 'assets/ball.png'); game.load.image('background', 'assets/starfield.jpg'); } function create() { game.add.tileSprite(0, 0, 480, 640, 'background'); } function update () { } </script> Open in the browser the address of the new game (I have it http: // localhost: 8888 / phaser-pong / ) and you will see its window with the drawn background
What happens in the written code? First we import the library. Then we create an object of the
Game type, setting the resolution of our application, in this case, the width is 480 and the height is 640 pixels. Phaser.AUTO means that the render type will be selected automatically. If desired, you can specify a Canvas or WebGL. The fourth parameter sets the parent DOM object for the game, we do not specify it.The fifth parameter lists the main functions of the game.
preload() contains the code for loading resources, create() - initializing the game, and update() - commands that are executed when updating the application. On the desktop, update() is called approximately 60 times per second. This function will contain the main game logic.In the
create() function, we add a static sprite with the background of our game. The sprite fills the space specified in the first four parameters of tileSprite .Game objects
We now turn to the most interesting - let's fill our game with logic. After declaring the
game variable and before the preload() function, preload() declare objects with the player’s and computer’s racket, a ball, and also indicate their speeds: var playerBet; var computerBet; var ball; var computerBetSpeed = 190; var ballSpeed = 300; To create racquets, we write the function
createBet(x, y) : function createBet(x, y) { var bet = game.add.sprite(x, y, 'bet'); bet.anchor.setTo(0.5, 0.5); bet.body.collideWorldBounds = true; bet.body.bounce.setTo(1, 1); bet.body.immovable = true; return bet; } The method creates a sprite with the specified coordinates and adds it to the game. The
anchor field is responsible for the reference point of the coordinates of the sprite, set it in the center of the image of the racket. body contains elements for working with physics. Here we restrict the movement of the racket to the limits of the playing space, assign the force of a “rebound” and indicate that when confronted with objects, the racket will not fly away.Add two calls to this function in create () immediately after creating the background. Rackets will be added to the game after the background image, so we will see them on the screen:
playerBet = createBet(game.world.centerX, 600); computerBet = createBet(game.world.centerX, 20); Similarly, create a ball by adding the following code immediately after the calls to the
createBet() function in create() : ball = game.add.sprite(game.world.centerX, game.world.centerY, 'ball'); ball.anchor.setTo(0.5, 0.5); ball.body.collideWorldBounds = true; ball.body.bounce.setTo(1, 1); As a result, we will see that in our game there appeared two rackets and a ball, while stills:
Logics
The picture turned out pretty, but I think it is worth it to slightly revive.
Add a variable responsible for the state of the ball and the function that will launch it:
var ballReleased = false; function releaseBall() { if (!ballReleased) { ball.body.velocity.x = ballSpeed; ball.body.velocity.y = -ballSpeed; ballReleased = true; } } The function checks that the ball is not yet started, and in this case sets the velocity to it using the velocity field.
We call the function call at the click of a mouse button by writing the following line to create () :
game.input.onDown.add(releaseBall, this); Now click the mouse starts the ball, and it bounces off the boundaries of the game. Add motion and rackets by editing the
update() function: function update () { // playerBet.x = game.input.x; var playerBetHalfWidth = playerBet.width / 2; if (playerBet.x < playerBetHalfWidth) { playerBet.x = playerBetHalfWidth; } else if (playerBet.x > game.width - playerBetHalfWidth) { playerBet.x = game.width - playerBetHalfWidth; } // if(computerBet.x - ball.x < -15) { computerBet.body.velocity.x = computerBetSpeed; } else if(computerBet.x - ball.x > 15) { computerBet.body.velocity.x = -computerBetSpeed; } else { computerBet.body.velocity.x = 0; } } The player’s racket follows the mouse pointer, the computer’s racket follows the ball. For the player’s racket, we also added a limit on the maximum and minimum
x coordinates so that she does not try to jump out of the playing field.The whole essence of the game is to beat the ball with rackets, so you need to organize a check for ball collisions with rackets. Fortunately, the corresponding functionality is already in Fazer, so we just need to use it.
We add the following three lines to the end of
update() : // game.physics.collide(ball, playerBet, ballHitsBet, null, this); game.physics.collide(ball, computerBet, ballHitsBet, null, this); The
collide method checks the collision of two objects (the first two parameters) and calls the function specified in the third to perform any actions on the encountered sprites. This function looks like this: function ballHitsBet (_ball, _bet) { var diff = 0; if (_ball.x < _bet.x) { // diff = _bet.x - _ball.x; _ball.body.velocity.x = (-10 * diff); } else if (_ball.x > _bet.x) { // diff = _ball.x -_bet.x; _ball.body.velocity.x = (10 * diff); } else { // , _ball.body.velocity.x = 2 + Math.random() * 8; } } In a collision, the ball changes its direction of movement depending on which part of the racket it hits.
It remains only to add a check for a missed goal. If someone missed it, put the ball in its original position in the center of the field.
function checkGoal() { if (ball.y < 15) { setBall(); } else if (ball.y > 625) { setBall(); } } function setBall() { if (ballReleased) { ball.x = game.world.centerX; ball.y = game.world.centerY; ball.body.velocity.x = 0; ball.body.velocity.y = 0; ballReleased = false; } } checkGoal() is constantly called, so we copy it to the end of update() : //, - checkGoal(); Everything! Open the browser, enjoy the fantastic and modern gameplay of our game, enjoy life and freshly acquired programming skills.
Conclusion
Naturally, the game still lacks much, at least scoring and determining the winners. But it seems to me that for the introduction to the development with Phaser enough things shown. The engine supports many other cool features that I am going to show with the example of a new game, a bit more complex and directly related to Habr, to make it more interesting.
STAY TUNED.
During development, I actively used the code from the example breakout.php . In addition to this example, there are other games in the folder with Phaser, so for those who can not wait to use the new framework, I recommend first of all to look at the contents of the examples folder.
Useful links:
1. English introduction to Phaser
2. Engine dedicated forum
3. Twitter Richard Davey
Update: following the advice of comrade hell0w0rd, I put the example on the githab and created a page so that you can try out the game:
https://github.com/nononononono/phaser-pong
http://nononononono.imtqy.com/phaser-pong/
Update on 10/20/2013: fessnecro added particles when a ball collided with rackets and new levels, for which he thanks. These changes are mostly stranger. The original version described in the article is in the gh-pages thread.
And, just in case, the full source code index.html:
<script src="phaser.js"></script> <script type="text/javascript"> var game = new Phaser.Game(480, 640, Phaser.AUTO, '', { preload: preload, create: create, update: update }); var playerBet; var computerBet; var ball; var computerBetSpeed = 190; var ballSpeed = 300; var ballReleased = false; function preload() { game.load.image('bet', 'assets/bet.png'); game.load.image('ball', 'assets/ball.png'); game.load.image('background', 'assets/starfield.jpg'); } function create() { game.add.tileSprite(0, 0, 480, 640, 'background'); playerBet = createBet(game.world.centerX, 600); computerBet = createBet(game.world.centerX, 20); ball = game.add.sprite(game.world.centerX, game.world.centerY, 'ball'); ball.anchor.setTo(0.5, 0.5); ball.body.collideWorldBounds = true; ball.body.bounce.setTo(1, 1); game.input.onDown.add(releaseBall, this); } function createBet(x, y) { var bet = game.add.sprite(x, y, 'bet'); bet.anchor.setTo(0.5, 0.5); bet.body.collideWorldBounds = true; bet.body.bounce.setTo(1, 1); bet.body.immovable = true; return bet; } function update () { // playerBet.x = game.input.x; var playerBetHalfWidth = playerBet.width / 2; if (playerBet.x < playerBetHalfWidth) { playerBet.x = playerBetHalfWidth; } else if (playerBet.x > game.width - playerBetHalfWidth) { playerBet.x = game.width - playerBetHalfWidth; } // if(computerBet.x - ball.x < -15) { computerBet.body.velocity.x = computerBetSpeed; } else if(computerBet.x - ball.x > 15) { computerBet.body.velocity.x = -computerBetSpeed; } else { computerBet.body.velocity.x = 0; } // game.physics.collide(ball, playerBet, ballHitsBet, null, this); game.physics.collide(ball, computerBet, ballHitsBet, null, this); //, - checkGoal(); } function ballHitsBet (_ball, _bet) { var diff = 0; if (_ball.x < _bet.x) { // diff = _bet.x - _ball.x; _ball.body.velocity.x = (-10 * diff); } else if (_ball.x > _bet.x) { // diff = _ball.x -_bet.x; _ball.body.velocity.x = (10 * diff); } else { // , _ball.body.velocity.x = 2 + Math.random() * 8; } } function checkGoal() { if (ball.y < 15) { setBall(); } else if (ball.y > 625) { setBall(); } } function setBall() { if (ballReleased) { ball.x = game.world.centerX; ball.y = game.world.centerY; ball.body.velocity.x = 0; ball.body.velocity.y = 0; ballReleased = false; } } function releaseBall() { if (!ballReleased) { ball.body.velocity.x = ballSpeed; ball.body.velocity.y = -ballSpeed; ballReleased = true; } } </script> Source: https://habr.com/ru/post/197416/
All Articles