PVS-Studio now works without a Visual Studio or C ++ Builder environment - we check preprocessed files for anything
In the recently released new version of the static code analyzer PVS-Studio 5.10, a small inconspicuous utility PVS-Studio Standalone appeared. As they say, a small step for humanity and a big step for PVS-Studio :). This utility now allows you to do (for now) two things:
- View analysis results (.plog-file) saved on another machine without starting the Visual Studio IDE.
- Analyze already preprocessed files (obtained in some way) without running the preprocessor and without project files or makefiles.
')
At the same time, full code navigation, all PVS-Studio settings, as well as a tabular presentation of the analysis results about which I wrote earlier are supported. This table view allows you to use a complete set of filters and diagnostic sorts in order to work as comfortably as possible with a large number of messages.
In this article I will show two useful scenarios for this utility.
Scenario One - viewing a .plog file on a machine without Visual Studio or C ++ Builder
Suppose you for some reason do not have either C ++ Builder (what else can be explained) or Visual Studio (which is generally beyond the limit!) On your working machine. But at the same time, there have been read articles about the fact that PVS-Studio is very cool and does not mind looking at the results of the code analysis. Since you do not have the development environments supported by PVS-Studio on your machine, you can ask a colleague to check the project in Visual Studio on another machine, save the scan results to a .plog file and bring it to your machine (preferably with the project sources, so that it is more convenient) it was to deal with errors). What is needed for this?
Preparing to check on the machine with the environment
- Deploy PVS-Studio on the machine where the project will still be checked and there is a development environment with PVS-Studio integrated there.
- Set the SourceTreeRoot variable in the PVS-Studio settings) so that it contains the path to the beginning of the files with the project code (the files to be checked). This is done to ensure that the .plog file contains relative paths, not absolute ones.
- Run a project check and save the report file.
View report on a machine without environment
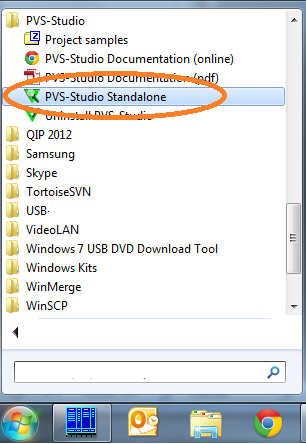
1. Install PVS-Studio Standalone (select the checkbox during installation).

2. Launch PVS-Studio Standalone from the Windows Start menu.
3. In the running program, open the .plog file.

4. Boot .plog:

5. The report can already be viewed, but if you click on the message, you will see a request to specify the source folder:

6. Do this:

7. And now you can view the log, work on filtering and sorting messages, and even edit the source code!

Of course, treat with understanding our “environment” - although it is built on Scientilla (like Notepad ++), but before the IDE level of Visual Studio it’s like before the Moon. The most important inconvenience is the lack of IntelliSence. We are trying to compensate for it with the search dialog. However:
- You can view the diagnostic messages of the analyzer and navigate through the code.
- You can hide messages, filter, disable individual diagnostics WITHOUT restarting the analysis.
- You can mark messages as false positives.
- In general, this is almost a full-fledged PVS-Studio, except without incremental analysis.
The second usage scenario is the verification of preprocessed files.
But the coolest thing in PVS-Studio Standalone is not the work with ready-made logs, but the ability to check preprocessed files. In general, what is the difficulty of integrating PVS-Studio into an arbitrary project? The fact is that for its work, the analyzer must perform file preprocessing. And if you have a project file .vcproj / .vcxproj (ie, you work in the Visual Studio environment) or even you work in C ++ Builder, then the creation of preprocessed files for PVS-Studio occurs automatically when you click the " Check". But if you suddenly work in a different mode (for example, through a Makefile), then you need to integrate the PVS-Studio call into the build system, which is not always easy for various reasons.
And here our new tool PVS-Studio Standalone is just in the topic. You can slip preprocessed files to him, and he will check them, find errors, and even compare them with the sources. That is, error messages will be on the source files with the code, and not ready-made preprocessed files. Let's see how this is done in practice?
I will test PVS-Studio Standalone on ... well, let's say zlib . No, no, this is not an article about errors found in zlib. Do not be surprised that there will be almost no warnings. There are no errors. Plus, PVS-Studio has tested the zlib code in other projects many times and we have long won all the false positives on zlib. This article should show how to use the new tool, and not what mistakes we found in any project. Therefore, I will use a relatively simple project for everyone to understand how to repeat this.
Build zlib
- We download the zip-file, unpack it in zlib-1.2.8, put the win32 \ Makefile.msc file in the root (in zlib-1.2.8).
- Configure the command line build environment using VS2012 x86 Native Tools Command Prompt (or something else).
- Run nmake –f Makefile.msc.
- Make sure everything compiles.
Getting preprocessed .i files
1. Open the file Makefile.msc for editing.
2. Add the / P switch to generate preprocessed files. That is, instead of the string
CFLAGS = -nologo -MD -W3 -O2 -Oy- -Zi -Fd "zlib" $ (LOC)
we get
CFLAGS = -nologo -MD -W3 -O2 -Oy- -Zi -Fd "zlib" / P $ (LOC)
3. Generate preprocessed files:
nmake –f Makefile.msc clean
nmake –f Makefile.msc
4. Make sure there are .i-files in the folder.
Scanning files in PVS-Studio Standalone
1. Run PVS-Studio Standlone.
2. Open the Tools menu, the Verify Preprocessed Files command ...

3. Fill in the fields as follows:

What is important here: the paths to the sources and to the .i-files (they coincide with us), the paths to the system include-folders (so as not to swear at the messages in these files), well, and some additional parameters.
Of interest is the list of supported preprocessors. Here it is in more detail:

A long-time reader of our articles immediately exclaims: “Is this what you finally support gcc?” We answer: “We support!”. We support both MinGW, Cygwin, and (Oh God, they did it!) Linux.
That is, now you can even check linux projects, although we are just starting to test this functionality to be honest. Who will have the desire to play and experiment - write about your problems, we will quickly rule if something comes out from someone.
4. Having filled the dialog box, press the Start button. After some time, we get a window with the results and navigation:

You can check and EDIT the code directly in PVS-Studio Standalone!
We have done a very cool thing that expands the scope of PVS-Studio and makes it very convenient for the user.
What's next?
And then everyone who asked us to check MinGW, Cygwin, gcc, and for some reason simply could not check their code using PVS-Studio, should download the new version and play with PVS-Studio Standalone.
PS And yes, this is the first article about PVS-Studio with so many screenshots :-).
Source: https://habr.com/ru/post/197162/
All Articles