Work with the touch screen on Arduino DUE
In the previous article “Working with a TFT display on the ARDUINO DUE” we discussed in detail the commands of the UTFT base library for working with TFT displays on the Arduino. In this article, we will look at Utouch , an add-on to the base library that allows you to work with a touch screen.
This add-on was developed by the same author as the base library. You can download the latest version here:
http://www.henningkarlsen.com/electronics/library.php?id=55
This addition is not independent and requires the connection of the base library UTFT.
So, let's take a closer look at the Utouch add-on, which is designed to work with a touch screen that most TFT displays are equipped with.
To work with the Utouch add-on, you need to load it into your program and perform initialization. Naturally, the UTFT base library should be loaded and initialized. We remind you that for our display, which was discussed in the previous article, initialization is as follows:
Now we load the add-on and create an object - a touch screen called myTouch. As parameters, the pin numbers to which the TCLK, TCS, TDIN, TDOUT and IRQ signals are connected are transmitted to the initialization team. These parameters should be obtained from the manufacturer of the display or nameplate, through which the display is connected to the controller.
')
In our model of the touch screen, the above-mentioned signals are connected, respectively, to pins 6, 5, 4, 3 and 2. We remind you that the nameplate with which the display is connected can be found here:
http://coldtears.lin3.siteonlinetest.com/files/CTE_DUE_shield.zip
and the diagram of the display module itself is here:
http://coldtears.lin3.siteonlinetest.com/files/3.2b.zip
So for our display we have to insert the following lines into the program:
Next, you need to initialize the display and touch screen in the void setup () procedure:
The InitTouch command, as well as the InitLCD command of the base library, sets the vertical or horizontal orientation of the display. The default orientation is horizontal. Everything, now it is possible to work with our touch screen. Consider a very simple example, with the help of which we will be able to make sure that the touch screen is working. Compile the following program and load it into the memory of the controller:
When the program starts, the display is painted in red. Now touch the screen at any point - and the display will turn green.
Before continuing to work, you must perform another important procedure - the calibration of the touch screen. In the examples of programs that come with the Utouch add-on there is one very important example called UTouch_Calibration .
To perform the calibration, you need to open this example through the menu:
"File-> Examples-> UTouch-> Arduino-> UTouch_Calibration".
ATTENTION! Before compiling, do not forget to replace the UTFT myGLCD (....) and UTouch myTouch (...) lines with those needed for our display.
Also, when calibrating, you must correctly select the TOUCH_ORIENTATION parameter. Information on the value of this parameter for the display model in use can be found in the UTouch_Supported_display_modules.pdf file that comes with the Utouch library and is located in its root folder. For our display, for example, the value of PORTRAIT should be set, despite the fact that the display itself is oriented horizontally.
ATTENTION! This value should be set only when calibrating the touch screen; in the future, the orientation of the screen should coincide with the orientation of the display module.
When you start the program displays an explanatory text and waits for a touch on the touch screen. Then the display shows 8 cross marks along the edges of the display and a red window with the word PRESS in the center. The developers' instruction informs that it is necessary to touch the highlighted cross and keep the touch until the backlight on it goes out, and the message “RELEASE” appears on the red field in the center. This simple operation must be repeated for all the crosses in turn.
By the way, the developers advise you to perform this operation with a stylus or a pointed wand, without using your fingers, this will improve the calibration accuracy. At the end of the calibration, three numbers will be displayed in hexadecimal format. For example, these are:
These three values must be placed in the file UTouch_CD.h, located in the root folder of the UTouch add-on, instead of the values CAL_X, CAL_Y and CAL_S that were specified there initially. After that, the display will work correctly.
Now let's take a closer look at the UTouch add-on commands:
UTouch - creates the base class of the touch screen with the specified name, specifies the connection method as a parameter.
The command is as follows:
where _NAME_ is an arbitrary name of the “touch screen” object that will be used as a prefix for any access to it, and TCLK, TCS, TDIN, TDOUT and IRQ are pin numbers with which the corresponding touch display signals are connected.
The string with this command is placed in the definition area and must precede any other UTouch commands. The specified object name should be used as a prefix to all subsequent UTouch commands.
InitTouch - initializes the touch screen and sets the horizontal or vertical orientation. The orientation identifier is specified as a parameter.
If in this command you specify PORTRAIT or 0, the vertical orientation will be selected, if you specify LANDSCAPE or 1 is horizontal. Please note that the orientation of the touch screen must match the orientation of the display. By default (without parameters) the command sets the horizontal orientation.
setPrecision - sets the accuracy of determining the coordinates of the point of touch on the touch screen. The precision identifier is passed as a parameter.
A total of four levels of accuracy are defined, coded by numbers from 1 to 4:
PREC_LOW - low accuracy;
PREC_MEDIUM - medium accuracy;
PREC_HI - high accuracy;
PREC_EXTREME - very high accuracy.
Naturally, the level of accuracy is inversely proportional to the time spent on determining the coordinates. The optimal level for most tasks is PREC_MEDIUM. Developers do not recommend using high and very high accuracy for operations that require quick response.
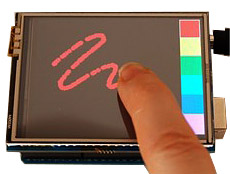
The difference between the accuracy levels can be illustrated by an example of UTouch_QuickDraw, supplied with the UTouch library. This program allows you to draw on the display using the touch screen:
Try compiling this example with different parameter values for the setPrecision command and you will immediately notice the difference.
dataAvailable is a function that returns a logical value of true, if at the time of its call the touch of the touch screen is fixed. The rest of the time, it returns false.
This function can be used to determine the moment of contact, and its duration. In our first example, which we gave in section 2, the construction:
contained a call to the function DataAvailable, which triggered a change in the color of the display, which remained for the entire duration of the touch. Consider another example — measuring touch time in milliseconds:
when you touch the touch screen, the program saves the current value of the millis function in the timeOld variable. Further, as long as the touch is saved, the program constantly updates the current millis value in the timeNew variable. As soon as the touch has stopped - the display shows the difference between these two variables, which will be equal to the touch time in milliseconds.
So, now we are able to work with the “touch screen” event, we can determine the moment of touch, its duration and the moment of release. It remains quite a bit - to get the coordinates of the touch point. The following commands are for this purpose:
read - starts the procedure for determining the coordinates of the touch point.
This command does not pass any parameters and returns no value. It should be run when the dataAvailable function is true. The coordinates obtained in “raw” form are stored in the internal variables TP_X and TP_Y. However, these data are not given to the size of the display and its resolution, so special functions getX and getY are used to obtain the coordinates of the touch point.
getX - returns the X-coordinate value of the touch point in pixels relative to the left edge of the display.
getY - returns the Y-coordinate value of the touch point in pixels relative to the top edge of the display.
Provided the calibration is performed correctly and the touch screen is of sufficient accuracy, the coordinates of the touch point must coincide with the coordinates of the particular pixel. The return type for these two functions is int.
The following example when touching the touch screen displays the coordinates of the touch point in pixels and in the "raw" format:
Now, in order to process, for example, pressing the on-screen button, it is enough to make sure that the obtained coordinates of the touch point are inside the area occupied by the given button. Here is another example:
The program draws a rectangle button on the display. When you touch the touch screen in the area of the button, the inscription “PRESSED” is displayed, when you touch the outside of the rectangle, the inscription goes out.
Another interesting example. This program draws a rectangular “window” on the display and allows you to resize it by dragging the lower right corner. Of course, this is not a full Drag & Drop but very similar:
So, now we are able to use the touch screen, we can determine the moment of touch and determine the coordinates of the touch point, work with simple controls displayed on the display. In the next article, we plan to consider another addition to the UTFT library - UTFT_Buttons, which allows you to organize work with text and graphic screen buttons.
1. General information
This add-on was developed by the same author as the base library. You can download the latest version here:
http://www.henningkarlsen.com/electronics/library.php?id=55
This addition is not independent and requires the connection of the base library UTFT.
So, let's take a closer look at the Utouch add-on, which is designed to work with a touch screen that most TFT displays are equipped with.
2. Getting started with the touch screen
To work with the Utouch add-on, you need to load it into your program and perform initialization. Naturally, the UTFT base library should be loaded and initialized. We remind you that for our display, which was discussed in the previous article, initialization is as follows:
#include <UTFT.h>UTFT myGLCD(CTE32HR,25,26,27,28);Now we load the add-on and create an object - a touch screen called myTouch. As parameters, the pin numbers to which the TCLK, TCS, TDIN, TDOUT and IRQ signals are connected are transmitted to the initialization team. These parameters should be obtained from the manufacturer of the display or nameplate, through which the display is connected to the controller.
')
In our model of the touch screen, the above-mentioned signals are connected, respectively, to pins 6, 5, 4, 3 and 2. We remind you that the nameplate with which the display is connected can be found here:
http://coldtears.lin3.siteonlinetest.com/files/CTE_DUE_shield.zip
and the diagram of the display module itself is here:
http://coldtears.lin3.siteonlinetest.com/files/3.2b.zip
So for our display we have to insert the following lines into the program:
#include <UTouch.h>UTouch myTouch(6,5,4,3,2);Next, you need to initialize the display and touch screen in the void setup () procedure:
void setup() {myGLCD.InitLCD();myTouch.InitTouch();}The InitTouch command, as well as the InitLCD command of the base library, sets the vertical or horizontal orientation of the display. The default orientation is horizontal. Everything, now it is possible to work with our touch screen. Consider a very simple example, with the help of which we will be able to make sure that the touch screen is working. Compile the following program and load it into the memory of the controller:
#include <UTFT.h> UTFT myGLCD(CTE32HR,25,26,27,28); #include <UTouch.h> UTouch myTouch(6,5,4,3,2); void setup() { myGLCD.InitLCD(); myTouch.InitTouch(); myGLCD.clrScr(); myGLCD.fillScr(255,0,0); } void loop() { if (myTouch.dataAvailable()) { myGLCD.fillScr(0,255,0); }else {myGLCD.fillScr(255,0,0);} } When the program starts, the display is painted in red. Now touch the screen at any point - and the display will turn green.
3. Touch Screen Calibration
Before continuing to work, you must perform another important procedure - the calibration of the touch screen. In the examples of programs that come with the Utouch add-on there is one very important example called UTouch_Calibration .
To perform the calibration, you need to open this example through the menu:
"File-> Examples-> UTouch-> Arduino-> UTouch_Calibration".
ATTENTION! Before compiling, do not forget to replace the UTFT myGLCD (....) and UTouch myTouch (...) lines with those needed for our display.
Also, when calibrating, you must correctly select the TOUCH_ORIENTATION parameter. Information on the value of this parameter for the display model in use can be found in the UTouch_Supported_display_modules.pdf file that comes with the Utouch library and is located in its root folder. For our display, for example, the value of PORTRAIT should be set, despite the fact that the display itself is oriented horizontally.
ATTENTION! This value should be set only when calibrating the touch screen; in the future, the orientation of the screen should coincide with the orientation of the display module.
When you start the program displays an explanatory text and waits for a touch on the touch screen. Then the display shows 8 cross marks along the edges of the display and a red window with the word PRESS in the center. The developers' instruction informs that it is necessary to touch the highlighted cross and keep the touch until the backlight on it goes out, and the message “RELEASE” appears on the red field in the center. This simple operation must be repeated for all the crosses in turn.
By the way, the developers advise you to perform this operation with a stylus or a pointed wand, without using your fingers, this will improve the calibration accuracy. At the end of the calibration, three numbers will be displayed in hexadecimal format. For example, these are:
CAL_X 0xBD95ECC8ULCAL_Y 0x5EBC8000ULCAL_S 0x0013F1DFULThese three values must be placed in the file UTouch_CD.h, located in the root folder of the UTouch add-on, instead of the values CAL_X, CAL_Y and CAL_S that were specified there initially. After that, the display will work correctly.
Now let's take a closer look at the UTouch add-on commands:
UTouch - creates the base class of the touch screen with the specified name, specifies the connection method as a parameter.
The command is as follows:
Utouch _NAME_ (TCLK, TCS, TDIN, TDOUT, IRQ);where _NAME_ is an arbitrary name of the “touch screen” object that will be used as a prefix for any access to it, and TCLK, TCS, TDIN, TDOUT and IRQ are pin numbers with which the corresponding touch display signals are connected.
The string with this command is placed in the definition area and must precede any other UTouch commands. The specified object name should be used as a prefix to all subsequent UTouch commands.
InitTouch - initializes the touch screen and sets the horizontal or vertical orientation. The orientation identifier is specified as a parameter.
If in this command you specify PORTRAIT or 0, the vertical orientation will be selected, if you specify LANDSCAPE or 1 is horizontal. Please note that the orientation of the touch screen must match the orientation of the display. By default (without parameters) the command sets the horizontal orientation.
setPrecision - sets the accuracy of determining the coordinates of the point of touch on the touch screen. The precision identifier is passed as a parameter.
A total of four levels of accuracy are defined, coded by numbers from 1 to 4:
PREC_LOW - low accuracy;
PREC_MEDIUM - medium accuracy;
PREC_HI - high accuracy;
PREC_EXTREME - very high accuracy.
Naturally, the level of accuracy is inversely proportional to the time spent on determining the coordinates. The optimal level for most tasks is PREC_MEDIUM. Developers do not recommend using high and very high accuracy for operations that require quick response.
The difference between the accuracy levels can be illustrated by an example of UTouch_QuickDraw, supplied with the UTouch library. This program allows you to draw on the display using the touch screen:
#include <UTFT.h> UTFT myGLCD(CTE32HR,25,26,27,28); #include <UTouch.h> UTouch myTouch(6,5,4,3,2); void setup() { myGLCD.InitLCD(); myGLCD.clrScr(); myTouch.InitTouch(PORTRAIT); myTouch.setPrecision(PREC_MEDIUM); } void loop() { long x, y; while (myTouch.dataAvailable() == true) { myTouch.read(); x = myTouch.getX(); y = myTouch.getY(); if ((x!=-1) and (y!=-1)) { myGLCD.drawPixel (x, y); } } } Try compiling this example with different parameter values for the setPrecision command and you will immediately notice the difference.
dataAvailable is a function that returns a logical value of true, if at the time of its call the touch of the touch screen is fixed. The rest of the time, it returns false.
This function can be used to determine the moment of contact, and its duration. In our first example, which we gave in section 2, the construction:
if (myTouch.dataAvailable()) {myGLCD.fillScr(0,255,0);}else {myGLCD.fillScr(255,0,0);}contained a call to the function DataAvailable, which triggered a change in the color of the display, which remained for the entire duration of the touch. Consider another example — measuring touch time in milliseconds:
#include <UTFT.h> UTFT myGLCD(CTE32HR,25,26,27,28); extern uint8_t BigFont[]; #include <UTouch.h> UTouch myTouch(6,5,4,3,2); void setup() { myGLCD.InitLCD(); myGLCD.setFont(BigFont); myTouch.InitTouch(); myGLCD.clrScr(); } void loop() { unsigned long timeOld; unsigned long timeNew; if (myTouch.dataAvailable() == true){ timeOld=millis(); while (myTouch.dataAvailable() == true) { timeNew=millis(); } myGLCD.clrScr(); myGLCD.printNumI(timeNew-timeOld, 100, 100); } } when you touch the touch screen, the program saves the current value of the millis function in the timeOld variable. Further, as long as the touch is saved, the program constantly updates the current millis value in the timeNew variable. As soon as the touch has stopped - the display shows the difference between these two variables, which will be equal to the touch time in milliseconds.
So, now we are able to work with the “touch screen” event, we can determine the moment of touch, its duration and the moment of release. It remains quite a bit - to get the coordinates of the touch point. The following commands are for this purpose:
read - starts the procedure for determining the coordinates of the touch point.
This command does not pass any parameters and returns no value. It should be run when the dataAvailable function is true. The coordinates obtained in “raw” form are stored in the internal variables TP_X and TP_Y. However, these data are not given to the size of the display and its resolution, so special functions getX and getY are used to obtain the coordinates of the touch point.
getX - returns the X-coordinate value of the touch point in pixels relative to the left edge of the display.
getY - returns the Y-coordinate value of the touch point in pixels relative to the top edge of the display.
Provided the calibration is performed correctly and the touch screen is of sufficient accuracy, the coordinates of the touch point must coincide with the coordinates of the particular pixel. The return type for these two functions is int.
The following example when touching the touch screen displays the coordinates of the touch point in pixels and in the "raw" format:
#include <UTFT.h> UTFT myGLCD(CTE32HR,25,26,27,28); extern uint8_t BigFont[]; #include <UTouch.h> UTouch myTouch(6,5,4,3,2); void setup() { myGLCD.InitLCD(); myGLCD.setFont(BigFont); myTouch.InitTouch(); myGLCD.clrScr(); } void loop() { int X_RAW; int Y_RAW; int X; int Y; if (myTouch.dataAvailable() == true){ myTouch.read(); X_RAW=myTouch.TP_X; Y_RAW=myTouch.TP_Y; X=myTouch.getX(); Y=myTouch.getY(); myGLCD.clrScr(); myGLCD.print("X", 100,80); myGLCD.print("Y", 200,80); myGLCD.print("PIX", 20,100); myGLCD.print("RAW", 20,120); myGLCD.printNumI(X, 100, 100); myGLCD.printNumI(Y, 200, 100); myGLCD.printNumI(X_RAW, 100, 120); myGLCD.printNumI(Y_RAW, 200, 120); } } Now, in order to process, for example, pressing the on-screen button, it is enough to make sure that the obtained coordinates of the touch point are inside the area occupied by the given button. Here is another example:
#include <UTFT.h> UTFT myGLCD(CTE32HR,25,26,27,28); extern uint8_t BigFont[]; #include <UTouch.h> UTouch myTouch(6,5,4,3,2); void setup() { myGLCD.InitLCD(); myGLCD.setFont(BigFont); myTouch.InitTouch(); myGLCD.clrScr(); } void loop() { int X; int Y; myGLCD.drawRect(100,100,150,150); if (myTouch.dataAvailable() == true){ myTouch.read(); X=myTouch.getX(); Y=myTouch.getY(); if (X>100 && X<150 && Y>100 && Y<150) { myGLCD.print("PRESSED", 100,200); }else{myGLCD.print(" ",100,200);} } } The program draws a rectangle button on the display. When you touch the touch screen in the area of the button, the inscription “PRESSED” is displayed, when you touch the outside of the rectangle, the inscription goes out.
Another interesting example. This program draws a rectangular “window” on the display and allows you to resize it by dragging the lower right corner. Of course, this is not a full Drag & Drop but very similar:
#include <UTFT.h> UTFT myGLCD(CTE32HR,25,26,27,28); extern uint8_t BigFont[]; #include <UTouch.h> UTouch myTouch(6,5,4,3,2); int X=100; int Y=100; void setup() { myGLCD.InitLCD(); myGLCD.setFont(BigFont); myTouch.InitTouch(); myTouch.setPrecision(PREC_EXTREME); myGLCD.clrScr(); myGLCD.drawRect(0,0,X,Y); } void loop() { if (myTouch.dataAvailable() == true){ myGLCD.setColor(0,0,0); myGLCD.drawRect(0,0,X,Y); myTouch.read(); X=myTouch.getX(); Y=myTouch.getY(); myGLCD.setColor(255,255,255); myGLCD.drawRect(0,0,X,Y); } } 4. Conclusion
So, now we are able to use the touch screen, we can determine the moment of touch and determine the coordinates of the touch point, work with simple controls displayed on the display. In the next article, we plan to consider another addition to the UTFT library - UTFT_Buttons, which allows you to organize work with text and graphic screen buttons.
Source: https://habr.com/ru/post/196864/
All Articles