Configuring Vim to work with Python code
Now there are a lot of posts and videos on how to make Vim Python IDE. I decided to write this article because I have been using this editor for a long time and I hope that my experience in setting it up, which I will write about in this article, will not hurt. I'm not going to make Vim a “combine”, stuffing it with a huge number of plug-ins, but I will try to get away with the means of the editor itself and several extensions that will help Python developers feel more comfortable. Let's get started.
Most web - developers in our time hardly represent their lives without this remarkable expansion. It is in such editors as WebStorm, Sublime Text and exists as a separate application for editors that do not support LiveReload. Unfortunately Vim refers to such editors. The extension is there, but it has long been outdated and does not support the latest LiveReload 2 protocol.
Fortunately, there is a great console utility called python-livereload. From the huge advantages of this utility - no need to install a plugin for Google Chrome, Firefox, etc., the utility is free. You can get the source code here github.com/lepture/python-livereload you can install it via pip or easy_install:
')
Before we start editing, we need to create a Guardfile, which is a regular Python script.
Then in the current directory we can start the LiveReload server with the command:
Python-livereload also supports less, coffee, uglifyjs and slimmer. It is enough to import the corresponding function from the livereload.compiler module, for example:
Now let's talk about the basic settings that will help us further work comfortably with the code. First, let's install the leader key.
set mapleader = ","
The leader key allows us to create our own combinations, while not spoiling the standard ones that are already present in the editor. As the leader key, I set the combination "," you can set any other.
From the editor, I tried to remove all unnecessary (except for tabs in the GUI). To do this, use the following settings.
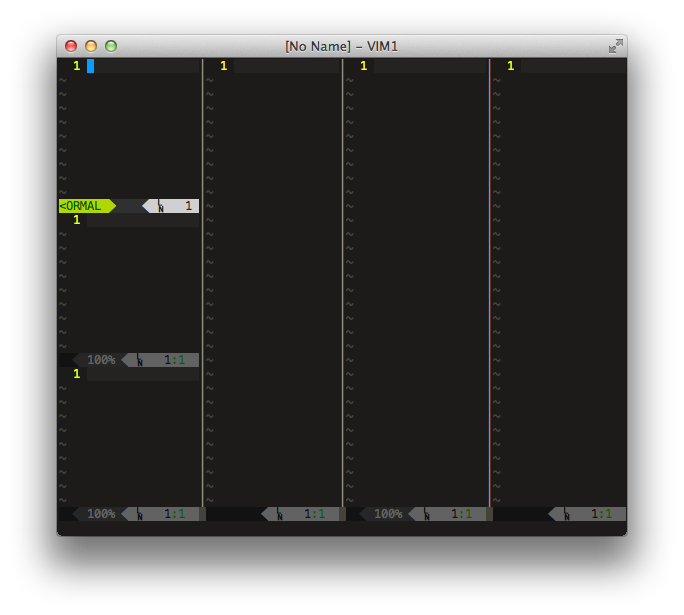
Notice the set guioptions- = e commented out line. If you enable it, the tabs will look like in the console window:
Indents between dashes separating the editor window can be removed so
Now we will configure not displayed characters, these include whitespace, line breaks and tabs. I use the following settings
I tied the leader + l combination to enable and disable non-displayed characters, since they are not always needed, and sometimes even interfere with editing.
Tip: sometimes when inserting text into the editor, the formatting is not saved and some sort of rubbish appears in the editor. To avoid this, add the set paste line to vimrc or enter the following command before pasting the text : set paste
Vundle makes it easy to install and update extensions. Further in the article we will use this plugin to install extensions. Installation on will take a lot of time, so let's install it right away:
Now you need to add the following lines to .vimrc:
To install extensions, use the following format
The status bar in vim looks dull and ugly. Fortunately, there is a plugin that makes it more informative and beautiful. An example of what my status bar looks like

Installation: Bundle 'Lokaltog / vim-powerline'
To display the branch of the current git repository, in the directory of which you are in, add and install Bundle 'tpope / vim-fugitive'. For Powerline to work correctly, you need to download the corrected fonts from here , install them and register in the editor. For example:
Command-T is an excellent extension that allows you to quickly open files by file name, switch between buffers or tags.
Installation: Bundle 'wincent / Command-T'
Next, go to the directory of the command-t extension and run rake make:
Keyboard shortcuts can be configured as follows:
Now Command-T opens on leader + f, leader + b opens a list of open buffers.
Python mode allows you to make the editor almost complete IDE. From what python-mode can do:
1. Error highlighting via pyflakes, pep8, pylint, mccable, pep257
2. Full Rope support (RopeCompletion, RopeGotoDefinition, RopeRename, RopeAutoImport, etc.)
3. Support virtualenv

Python-mode Settings Example
Keyboard combinations:
For Rope autocomplete, I set up a combination of leader + c. It turns on like this
My Vim configuration file with detailed comments can be viewed here github.com/aliev/vim
Matchtag
Bundle 'gregsexton / MatchTag'
Backlight paired html, xml tags
Endwise
Bundle 'tpope / vim-endwise'
Excellent rubist extension that allows you to automatically close blocks in Ruby
Emmet
Bundle 'mattn / emmet-vim'
I have been waiting for this extension for a long time. Emmet support (renamed Zen Coding)
T-Comment
Bundle 'tomtom / tcomment_vim'
Commenting on code blocks with automatic language detection
LiveReload
Most web - developers in our time hardly represent their lives without this remarkable expansion. It is in such editors as WebStorm, Sublime Text and exists as a separate application for editors that do not support LiveReload. Unfortunately Vim refers to such editors. The extension is there, but it has long been outdated and does not support the latest LiveReload 2 protocol.
Fortunately, there is a great console utility called python-livereload. From the huge advantages of this utility - no need to install a plugin for Google Chrome, Firefox, etc., the utility is free. You can get the source code here github.com/lepture/python-livereload you can install it via pip or easy_install:
pip install livereload ')
Before we start editing, we need to create a Guardfile, which is a regular Python script.
#!/usr/bin/env python from livereload.task import Task Task.add('css/*.css') Task.add('*.html') Then in the current directory we can start the LiveReload server with the command:
livereload -p 8000 Python-livereload also supports less, coffee, uglifyjs and slimmer. It is enough to import the corresponding function from the livereload.compiler module, for example:
#!/usr/bin/env python from livereload.task import Task from livereload.compiler import lessc, coffee Task.add('css/*.css') Task.add('*.html') Task.add('css/style.less', lessc('style.less', 'style.css') Task.add('js/main.coffee', coffee('main.coffee', 'main.js') Basic vim editor settings
Now let's talk about the basic settings that will help us further work comfortably with the code. First, let's install the leader key.
set mapleader = ","
The leader key allows us to create our own combinations, while not spoiling the standard ones that are already present in the editor. As the leader key, I set the combination "," you can set any other.
From the editor, I tried to remove all unnecessary (except for tabs in the GUI). To do this, use the following settings.
if has('gui_running') " GUI Vim set guioptions-=m " " set guioptions-=e " GUI set guioptions-=T " set guioptions-=r " set guioptions-=L " set background=light " set guioptions-=R set guioptions-=l endif Notice the set guioptions- = e commented out line. If you enable it, the tabs will look like in the console window:
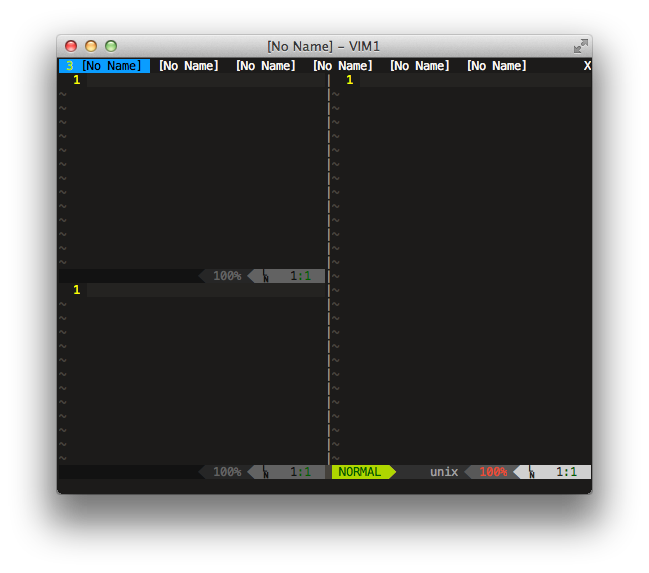
Indents between dashes separating the editor window can be removed so
set fillchars=stl:\ ,stlnc:\ ,vert:│ Now we will configure not displayed characters, these include whitespace, line breaks and tabs. I use the following settings
if has('multi_byte') if version >= 700 " set listchars=tab:»\ ,trail:·,eol:¶,extends:→,precedes:←,nbsp:× set listchars=tab:▸\ ,eol:¬ # TextMate else set listchars=tab:»\ ,trail:·,eol:¶,extends:>,precedes:<,nbsp:_ endif endif nmap <leader>l :set list!<CR> I tied the leader + l combination to enable and disable non-displayed characters, since they are not always needed, and sometimes even interfere with editing.
Tip: sometimes when inserting text into the editor, the formatting is not saved and some sort of rubbish appears in the editor. To avoid this, add the set paste line to vimrc or enter the following command before pasting the text : set paste
Vundle
Vundle makes it easy to install and update extensions. Further in the article we will use this plugin to install extensions. Installation on will take a lot of time, so let's install it right away:
git clone https://github.com/gmarik/vundle.git ~/.vim/bundle/vundle Now you need to add the following lines to .vimrc:
set nocompatible filetype off set rtp+=~/.vim/bundle/vundle/ call vundle#rc() " filetype plugin indent on " vim To install extensions, use the following format
Bundle 'tpope/vim-fugitive' " Github Bundle 'FuzzyFinder' " vim-scripts Bundle 'git://git.wincent.com/command-t.git' " Git Powerline
The status bar in vim looks dull and ugly. Fortunately, there is a plugin that makes it more informative and beautiful. An example of what my status bar looks like
Installation: Bundle 'Lokaltog / vim-powerline'
To display the branch of the current git repository, in the directory of which you are in, add and install Bundle 'tpope / vim-fugitive'. For Powerline to work correctly, you need to download the corrected fonts from here , install them and register in the editor. For example:
set guifont=Menlo\ Regular\ for\ Powerline:h12 Command-t
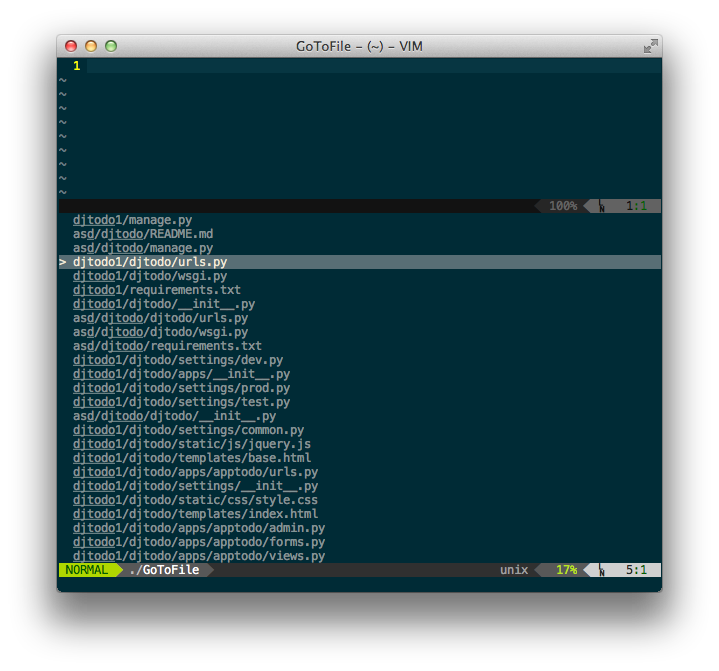
Command-T is an excellent extension that allows you to quickly open files by file name, switch between buffers or tags.
Installation: Bundle 'wincent / Command-T'
Next, go to the directory of the command-t extension and run rake make:
cd .vim/bundle/command-t rake make Keyboard shortcuts can be configured as follows:
map <leader>f :CommandT<CR> map <leader>b :CommandTBuffer<CR> Now Command-T opens on leader + f, leader + b opens a list of open buffers.
Pyhton mode
Python mode allows you to make the editor almost complete IDE. From what python-mode can do:
1. Error highlighting via pyflakes, pep8, pylint, mccable, pep257
2. Full Rope support (RopeCompletion, RopeGotoDefinition, RopeRename, RopeAutoImport, etc.)
3. Support virtualenv
Python-mode Settings Example
" Rope let g:pymode_rope = 1 " linting let g:pymode_lint = 1 " let g:pymode_lint_checker = "pyflakes,pep8" " , let g:pymode_lint_cwindow = 0 " virtualenv let g:pymode_virtualenv = 1 " let g:pymode_syntax = 1 let g:pymode_syntax_all = 1 let g:pymode_syntax_indent_errors = g:pymode_syntax_all let g:pymode_syntax_space_errors = g:pymode_syntax_all " let g:pymode_folding = 0 " let g:pymode_breakpoint = 1 " leader + e let g:pymode_breakpoint_key = '<leader>e' Keyboard combinations:
| Combination | Description |
|---|---|
| Ccg | Go to definition |
| C-space | Rope autocomplete |
| Ccd | Rope show documentation |
| Ccf | Rope find occurrences |
For Rope autocomplete, I set up a combination of leader + c. It turns on like this
imap <leader>c <CR>=RopeCodeAssistInsertMode()<CR> My Vim configuration file with detailed comments can be viewed here github.com/aliev/vim
Other useful vim extensions
Matchtag
Bundle 'gregsexton / MatchTag'
Backlight paired html, xml tags
Endwise
Bundle 'tpope / vim-endwise'
Excellent rubist extension that allows you to automatically close blocks in Ruby
Emmet
Bundle 'mattn / emmet-vim'
I have been waiting for this extension for a long time. Emmet support (renamed Zen Coding)
T-Comment
Bundle 'tomtom / tcomment_vim'
Commenting on code blocks with automatic language detection
Source: https://habr.com/ru/post/196550/
All Articles