One of the easiest options for VoIP security
About IP telephony a lot has been written and said. And in particular about security, when using VoIP. But, nevertheless, from time to time I heard “scary” stories from one friend or another friend, like someone broke a VoIP server and they received a bill for a phone with a lot of zeros ...
Here is one of the latest cases: In a small organization, the novice admin decided to study the more unfamiliar VoIP technologies and for this he started a user with the login “test” and guess what password? ;)
The system has been working for more than one year, the external protection has been debugged, the server port 5060 is lit "out". But those who set up and set up the system did not include protection against a weak password for some reason. It was necessary to see the face of the director of this organization, when, having come to work in the morning, he saw a frightened secretary and a phone bill - about $ 25,000. This is just for one night. And if the operator did not turn off their SIP-account and the account, as expected, was discharged at the beginning of next month?
I don’t know about the future fate of this admin, but I suspect that it is bleak.
My opinion is that you should not shine out port 5060 “outside” if you do not have a permanent qualified administrator who controls the situation with the detection and patching of holes in the system, as well as clearly understanding the result of your actions.
But if you don’t open the SIP port outwards, how do mobile clients and remote offices work with a central IP PBX? One option is to use a VPN. In addition to providing telephony, the same tunnel can be used to connect networks of remote offices. Although the option that I describe below has a rather low bandwidth - 8-9 Mbit / s. But if this is enough for you, then please use.
“Live”, already working scheme, for some reason, I will not describe. I'll tell you on an example, assembled on the table, a small stand. As a VPN protocol, OpenVPN is used.
Network layout:

IP PBX is implemented by Add-On Asterisk based on D-Link DNS-325 . How Add-On is installed and configured I will not tell, I already wrote about it, for example here: http://habrahabr.ru/post/172927/ and http://habrahabr.ru/post/183888/
The only BUT - in the last post, Add-On with Asterisk 1.6 is recommended, so there were some flaws in Add-On with 1.8. Today, 1.8 problems have been resolved, so you can safely put http://dlink.vtverdohleb.org.ua/Add-On/current.php?package=Asterisk18&model=DNS-325
On it (D-Link DNS-325) install Add-On OpenVPN .
D-Link DES-1210-28P switches have the PoE (IEEE 802.3af) function, i.e. can power D-Link DPH-150SE IP devices over twisted pair. This is convenient because there is no need to occupy an additional outlet at the installation site of the IP device, and most importantly, as a rule, all the server hardware is “sitting” on the UPS, including switches. Those. even if there is a power failure in the building, telephony will work.
On the branch side, the D-Link DSR-250N router is used. Why is he - the entire D-Link DSR-XXXX series supports OpenVPN client / server ( only _WW firmware ).
If you put a VPN router from the office side, with IPSec support, it is more convenient to raise a tunnel between two routers on IPSec. But in this description I applied OpenVPN, since there is no possibility to submit ETTH to the office, and the customer refused to install 2 devices (DSL + DFL / DSR).
Installing Add-On'a OpenVPN in the image and likeness of Add-On Asterisk. To configure OpenVPN still need to install Add-On sshd
After installing and running sshd, go to it by ssh-client and first of all we change the root user password! As a ssh client on Windows, PuTTY is most often used.
')


The first call is the login “root”, the password does not ask. After executing the “passwd” command and entering a new password, all subsequent visits, except for the “login” request, will be requested to “Password”.
Those who use Far Manager will probably find it more convenient to use Midnight Commander for further actions.
Just install and start. After, go through ssh and run "mc".

Go to the directory "/ mnt / HD / HD_a2 / Nas_Prog / OpenVPN / genkey" and edit the "F4" file "vars". If "F4" does not work, try "Alt + 4".


The string “export KEY_SIZE = 384” is the size of the encryption key. 384 is the minimum size. For the "branch of the Pentagon," you can put 2048;) Excerpt from vars: "Increase this to 2048 if you are paranoid."
“Export CA_EXPIRE = 3650” and “export KEY_EXPIRE = 3650” - after how many days the certificate goes out and you need to generate a new one, you can reduce it.
Further
enter your details.
“F2” or “Alt + 2” - save changes, 2 times “Esc” - exit.
We generate certificates and keys. Press "Ctrl + O" and in the command line run
This is where the questions begin. Confirm Enter'om proposed data or enter new ones.
Sure to! Here and below - the “Common Name” field should not be empty. In this case, enter, for example, “server”.

Further
The same questions, in the Common Name also enter the "server". "A challenge password" is ignored - Enter. “Sign the certificate?” Check that you have entered and press “Y”. “1 out of 1 certificate requests certified, commit?” Is also “Y”.

Further
Now we generate customer certificates. Each certificate must have a unique name! Multiple users under one certificate will not be able to work. Run
Etc. as many as expected customers. If not enough - in the future it will be possible to generate more. "Common Name" for "build-key client1" enter "client1", etc.

The keys are ready, they are in the “keys” folder. Copy them to “/ mnt / HD / HD_a2 / Nas_Prog / OpenVPN / etc /” with the removal of old ones.
The client will need 3 files to work: ca.crt, clientX.crt and clientX.key, where X is the client's sequence number. Create in the Ball Volume_1 (for ssh this is / mnt / HD / HD_a2 /) directory, for example openvpn_keys, and copy the certificates with the keys there. From the command line it is like this:
After the certificates are copied to a place accessible only to you (your screw, flash drive, etc.), delete the / Volume_1 / openvpn_key directory!
Now go to the folder “/ mnt / HD / HD_a2 / Nas_Prog / OpenVPN / etc /” and edit “server.conf”. You can change variables, but if you have not worked with OpenVPN before, leave everything unchanged except:
1. if you still change the size of the DH-key, change the dh384.pem file name in your server.conf to your own, for example, the 2048 key will be dh2048.pem
2. In the default config there are lines
They imply that the client will be forcibly routed to route 10.1.1.0/24, 192.168.17.0/24 and 172.17.17.0/24 networks to the tunnel, and not to the Internet. The network 10.8.0.0/24 issued to the tunnel interfaces is also forcibly wrapped in the tunnel. In our example, “10.1.1.0/24, 192.168.17.0/24” is an additional example, only 172.17.17.0/24 is really needed.
3. There are more lines
192.168.101.0/24 is a branch network. When you run OpenVPN on the server, the route to this network is automatically routed to the tunnel. In the / etc / openvpn / ccd directory there is an example file for a client with client1 certificate. This file describes all client networks, in this case only 192.168.101.0/24. If there is no such file, the tunnel will rise, the data will go, but the server will kill all packets in which the source IP is not registered in client1. Those. confusing the keys and networks, you also get not working tunnels. In the log, this will be seen as “MULTI: bad source address from client [192.168.101.XXX], packet dropped”
4. For mobile clients that have an openvpn client installed, / etc / openvpn / ccd / clientX need not be created, they will have addresses from 10.8.0.0/24, i.e. the server will accept them "as native"
5. you can uncomment if you want all the traffic of the branch to wrap in the tunnel
6. cipher uncomment the one you want to apply. The default is BF-CBC.
7. comp-lzo can be uncommented if clients support data compression in a tunnel. But the DSR-250N does not support it, so in this example comp-lzo is turned off.
8. client-to-client to uncomment if exchange between "branches" is required. Here we need to push the “correct” networks, but this is already the topic of IP routing in general, so I will not dwell on this in detail
Restart the OpenVPN server:
Log defaults to /var/tmp/openvpn.log. In realtime, you can watch it from the command line like this:
Exit view - Ctrl + C
Server setup is complete. Now let's proceed to setting up the router, in this case D-Link DSL-2750.
First, you need to accept the request to raise the tunnel and transmit it to the DNS-325. The setting is described here http://dlink.ru/ru/faq/246/1156.html , I will not repeat. Those. you need the “external port” 1194 protocol “udp / tcp” to forward to the “internal port” 1194, “internal IP” 172.17.17.150
Secondly, in the “Advanced / Routing” it is necessary to add networks that will be routed to the tunnel, in this case only 10.8.0.0/24 and 192.168.101.0/24

And the network 10.8.0.0/24 is similar.
With part "office" all. Now we set up the client. DSR with “_RU” firmware do not have OpenVPN support. Need to change in WW. You can take it at tsd.dlink.com.tw
Starting with firmware 1.08, it seems that all DSRs work with OpenVPN is quite normal, at 1.05 only older models.
And so, we transfer to the client certificates and key or do it ourselves.
Go to the "Setup / VPN Setings / OpenVPN / Openvpn Authentication" and pour in the previously generated certificates and client key.

Status = Yes - means certificates and keys are accepted. Now go to “Setup / VPN Setings / OpenVPN / OpenVPN Configuration” and enter the data of the “office”

Click Save Settings. Just a couple of seconds. comp 192.168.101.3 will start pinging 172.17.17.254
If you look at openvpn-status.log, you will see who is currently connected and which user is active. From the command line this
Phones D-Link DPH-150SE are configured quite simply, there is an instruction in Russian
True, this is the previous version of the device, but the setting is identical:
Registrar Server Domain in this case, specify the IP address of the DNS-325 - 172.17.17.150
Outbound Proxy Domain is not used, leaving empty.

Display Name - The name displayed on the display of the called party.
SIP User Name - SIP phone number (SIP ID, login)
Authentication User Name - Username for logging into the SIP server
Authentication Password - Password for registration on the SIP server
An example of setting up a VoIP gateway , where Proxy Server (also known as a SIP server) is 172.17.17.150, User Name & Authorization Name is the extension number, Password is the subscriber password, respectively.
I, for example, got 3 numbers and registered one of the “office”, the second from the “branch”

From the command line, run

The show peers sip command shows which extensions are registered and from which IP addresses.
“Office” devices and gateways are better to register to IP 172.17.17.150, and “branch offices” to 10.8.0.1 (the same DNS-325 is the IP address of the tunnel interface).
At this point we will consider the configuration of telephony "office" and "branch" completed.
I will give an example of a mobile user on my Android phone.
The first step is to install from the Market "OpenVPN for Android"
Fill the phone ca.crt, clien2.crt and client2.key. Launch OpenVPN for Android. Click the "+" in the lower left corner. Create a configuration. Go to the section "Basic"

In the section Authorization / Encryption “Encryption Algorithm” you can leave it blank, you can clearly indicate “BF-CBC”
Go back to the first page, click on the created configuration and see the OpenVPN connection logs.

Now install the SIP client. I use Zoiper IAX SIP VOIP Softphone (small, nothing superfluous, I did not notice any glitches)
Click Save. If the registration was successful - the green mark is on, if not - the red “!”.


Of course, this is not enough, you need, for example, to include restrictions on switches, allowing only DNS phones and gateways to access DNS-325 on the udp / 5060 port. An exception can only be mobile users. Scripts for tracking attacks by logs and blocking the attacker's IP (like fail2ban), etc. Well, this is the topic of deep security, about this somehow in the next article.
Here is one of the latest cases: In a small organization, the novice admin decided to study the more unfamiliar VoIP technologies and for this he started a user with the login “test” and guess what password? ;)
The system has been working for more than one year, the external protection has been debugged, the server port 5060 is lit "out". But those who set up and set up the system did not include protection against a weak password for some reason. It was necessary to see the face of the director of this organization, when, having come to work in the morning, he saw a frightened secretary and a phone bill - about $ 25,000. This is just for one night. And if the operator did not turn off their SIP-account and the account, as expected, was discharged at the beginning of next month?
I don’t know about the future fate of this admin, but I suspect that it is bleak.
My opinion is that you should not shine out port 5060 “outside” if you do not have a permanent qualified administrator who controls the situation with the detection and patching of holes in the system, as well as clearly understanding the result of your actions.
But if you don’t open the SIP port outwards, how do mobile clients and remote offices work with a central IP PBX? One option is to use a VPN. In addition to providing telephony, the same tunnel can be used to connect networks of remote offices. Although the option that I describe below has a rather low bandwidth - 8-9 Mbit / s. But if this is enough for you, then please use.
“Live”, already working scheme, for some reason, I will not describe. I'll tell you on an example, assembled on the table, a small stand. As a VPN protocol, OpenVPN is used.
Network layout:
IP PBX is implemented by Add-On Asterisk based on D-Link DNS-325 . How Add-On is installed and configured I will not tell, I already wrote about it, for example here: http://habrahabr.ru/post/172927/ and http://habrahabr.ru/post/183888/
The only BUT - in the last post, Add-On with Asterisk 1.6 is recommended, so there were some flaws in Add-On with 1.8. Today, 1.8 problems have been resolved, so you can safely put http://dlink.vtverdohleb.org.ua/Add-On/current.php?package=Asterisk18&model=DNS-325
On it (D-Link DNS-325) install Add-On OpenVPN .
D-Link DES-1210-28P switches have the PoE (IEEE 802.3af) function, i.e. can power D-Link DPH-150SE IP devices over twisted pair. This is convenient because there is no need to occupy an additional outlet at the installation site of the IP device, and most importantly, as a rule, all the server hardware is “sitting” on the UPS, including switches. Those. even if there is a power failure in the building, telephony will work.
On the branch side, the D-Link DSR-250N router is used. Why is he - the entire D-Link DSR-XXXX series supports OpenVPN client / server ( only _WW firmware ).
If you put a VPN router from the office side, with IPSec support, it is more convenient to raise a tunnel between two routers on IPSec. But in this description I applied OpenVPN, since there is no possibility to submit ETTH to the office, and the customer refused to install 2 devices (DSL + DFL / DSR).
Installing Add-On'a OpenVPN in the image and likeness of Add-On Asterisk. To configure OpenVPN still need to install Add-On sshd
After installing and running sshd, go to it by ssh-client and first of all we change the root user password! As a ssh client on Windows, PuTTY is most often used.
')
The first call is the login “root”, the password does not ask. After executing the “passwd” command and entering a new password, all subsequent visits, except for the “login” request, will be requested to “Password”.
Those who use Far Manager will probably find it more convenient to use Midnight Commander for further actions.
Just install and start. After, go through ssh and run "mc".
Go to the directory "/ mnt / HD / HD_a2 / Nas_Prog / OpenVPN / genkey" and edit the "F4" file "vars". If "F4" does not work, try "Alt + 4".
The string “export KEY_SIZE = 384” is the size of the encryption key. 384 is the minimum size. For the "branch of the Pentagon," you can put 2048;) Excerpt from vars: "Increase this to 2048 if you are paranoid."
“Export CA_EXPIRE = 3650” and “export KEY_EXPIRE = 3650” - after how many days the certificate goes out and you need to generate a new one, you can reduce it.
Further
export KEY_COUNTRY = "UA"
export KEY_PROVINCE = "KV"
export KEY_CITY = "Kiev"
export KEY_ORG = "D-Link"
export KEY_EMAIL = "ua@dlink.ru"
export KEY_CN = changeme
export KEY_NAME = changeme
export KEY_OU = changeme
enter your details.
“F2” or “Alt + 2” - save changes, 2 times “Esc” - exit.
We generate certificates and keys. Press "Ctrl + O" and in the command line run
source ./vars
./clean-all
./build-ca
This is where the questions begin. Confirm Enter'om proposed data or enter new ones.
Sure to! Here and below - the “Common Name” field should not be empty. In this case, enter, for example, “server”.
Further
./build-key-server server
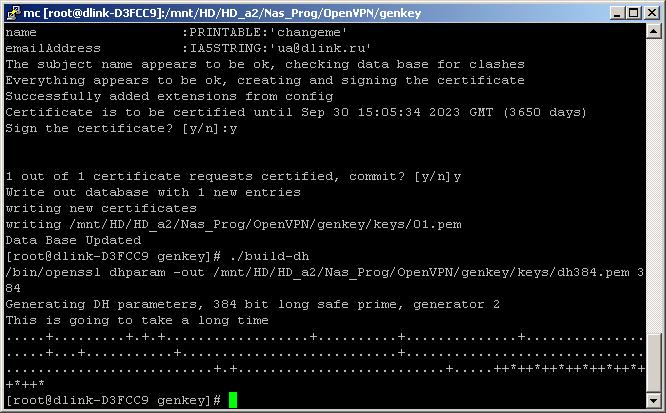
The same questions, in the Common Name also enter the "server". "A challenge password" is ignored - Enter. “Sign the certificate?” Check that you have entered and press “Y”. “1 out of 1 certificate requests certified, commit?” Is also “Y”.
Further
./build-dh
Now we generate customer certificates. Each certificate must have a unique name! Multiple users under one certificate will not be able to work. Run
./build-key client1
./build-key client2
./build-key client3
...
Etc. as many as expected customers. If not enough - in the future it will be possible to generate more. "Common Name" for "build-key client1" enter "client1", etc.
The keys are ready, they are in the “keys” folder. Copy them to “/ mnt / HD / HD_a2 / Nas_Prog / OpenVPN / etc /” with the removal of old ones.
The client will need 3 files to work: ca.crt, clientX.crt and clientX.key, where X is the client's sequence number. Create in the Ball Volume_1 (for ssh this is / mnt / HD / HD_a2 /) directory, for example openvpn_keys, and copy the certificates with the keys there. From the command line it is like this:
cp /mnt/HD/HD_a2/Nas_Prog/OpenVPN/genkey/keys/ca.crt / mnt / HD / HD_a2 / openvpn_key /
cp /mnt/HD/HD_a2/Nas_Prog/OpenVPN/genkey/keys/client*.crt / mnt / HD / HD_a2 / openvpn_key /
cp /mnt/HD/HD_a2/Nas_Prog/OpenVPN/genkey/keys/client*.key / mnt / HD / HD_a2 / openvpn_key /
chmod -R a + rw / mnt / HD / HD_a2 / openvpn_key
After the certificates are copied to a place accessible only to you (your screw, flash drive, etc.), delete the / Volume_1 / openvpn_key directory!
Now go to the folder “/ mnt / HD / HD_a2 / Nas_Prog / OpenVPN / etc /” and edit “server.conf”. You can change variables, but if you have not worked with OpenVPN before, leave everything unchanged except:
1. if you still change the size of the DH-key, change the dh384.pem file name in your server.conf to your own, for example, the 2048 key will be dh2048.pem
2. In the default config there are lines
push "route 10.1.1.0 255.255.255.0"
push "route 192.168.17.0 255.255.255.0"
push "route 172.17.17.0 255.255.255.0"
They imply that the client will be forcibly routed to route 10.1.1.0/24, 192.168.17.0/24 and 172.17.17.0/24 networks to the tunnel, and not to the Internet. The network 10.8.0.0/24 issued to the tunnel interfaces is also forcibly wrapped in the tunnel. In our example, “10.1.1.0/24, 192.168.17.0/24” is an additional example, only 172.17.17.0/24 is really needed.
3. There are more lines
client-config-dir / etc / openvpn / ccd
route 192.168.101.0 255.255.255.0
192.168.101.0/24 is a branch network. When you run OpenVPN on the server, the route to this network is automatically routed to the tunnel. In the / etc / openvpn / ccd directory there is an example file for a client with client1 certificate. This file describes all client networks, in this case only 192.168.101.0/24. If there is no such file, the tunnel will rise, the data will go, but the server will kill all packets in which the source IP is not registered in client1. Those. confusing the keys and networks, you also get not working tunnels. In the log, this will be seen as “MULTI: bad source address from client [192.168.101.XXX], packet dropped”
4. For mobile clients that have an openvpn client installed, / etc / openvpn / ccd / clientX need not be created, they will have addresses from 10.8.0.0/24, i.e. the server will accept them "as native"
5. you can uncomment if you want all the traffic of the branch to wrap in the tunnel
push "redirect-gateway def1 bypass-dhcp"
6. cipher uncomment the one you want to apply. The default is BF-CBC.
7. comp-lzo can be uncommented if clients support data compression in a tunnel. But the DSR-250N does not support it, so in this example comp-lzo is turned off.
8. client-to-client to uncomment if exchange between "branches" is required. Here we need to push the “correct” networks, but this is already the topic of IP routing in general, so I will not dwell on this in detail
Restart the OpenVPN server:
/mnt/HD/HD_a2/Nas_Prog/OpenVPN/stop.sh
/mnt/HD/HD_a2/Nas_Prog/OpenVPN/start.sh / mnt / HD / HD_a2 / Nas_Prog / OpenVPN / mnt / HD / HD_a2 / Nas_Prog / OpenVPN
Log defaults to /var/tmp/openvpn.log. In realtime, you can watch it from the command line like this:
tail -f /var/tmp/openvpn.log
Exit view - Ctrl + C
Server setup is complete. Now let's proceed to setting up the router, in this case D-Link DSL-2750.
First, you need to accept the request to raise the tunnel and transmit it to the DNS-325. The setting is described here http://dlink.ru/ru/faq/246/1156.html , I will not repeat. Those. you need the “external port” 1194 protocol “udp / tcp” to forward to the “internal port” 1194, “internal IP” 172.17.17.150
Secondly, in the “Advanced / Routing” it is necessary to add networks that will be routed to the tunnel, in this case only 10.8.0.0/24 and 192.168.101.0/24
Add this:
Destination Network 192.168.101.0
Destination network mask 255.255.255.0
Gateway 172.17.17.150
Metric 1
Through the auto interface
And the network 10.8.0.0/24 is similar.
With part "office" all. Now we set up the client. DSR with “_RU” firmware do not have OpenVPN support. Need to change in WW. You can take it at tsd.dlink.com.tw
Starting with firmware 1.08, it seems that all DSRs work with OpenVPN is quite normal, at 1.05 only older models.
And so, we transfer to the client certificates and key or do it ourselves.
Go to the "Setup / VPN Setings / OpenVPN / Openvpn Authentication" and pour in the previously generated certificates and client key.
Status = Yes - means certificates and keys are accepted. Now go to “Setup / VPN Setings / OpenVPN / OpenVPN Configuration” and enter the data of the “office”
Click Save Settings. Just a couple of seconds. comp 192.168.101.3 will start pinging 172.17.17.254
If you look at openvpn-status.log, you will see who is currently connected and which user is active. From the command line this
cat /var/tmp/openvpn-status.log
OpenVPN CLIENT LIST
Updated, Thu Oct 3 13:14:22 2013
Common Name, Real Address, Bytes Received, Bytes Sent, Connected Since
client1,192.168.50.254: 1194,11521,8119, Thu Oct 3 13:11:37 2013
ROUTING TABLE
Virtual Address, Common Name, Real Address, Last Ref
10.8.0.6, client1, 192.168.50.254:1194,Thu Oct 3 13:14:19 2013
192.168.101.0/24,client1, 192.168.50.254:1194,Thu Oct 3 13:11:38 2013
192.168.101.100C, client1, 192.168.50.254:1194, Thu Oct 3 13:13:40 2013
GLOBAL STATS
Max bcast / mcast queue length, 0
END
Phones D-Link DPH-150SE are configured quite simply, there is an instruction in Russian
True, this is the previous version of the device, but the setting is identical:
Registrar Server Domain in this case, specify the IP address of the DNS-325 - 172.17.17.150
Outbound Proxy Domain is not used, leaving empty.
Display Name - The name displayed on the display of the called party.
SIP User Name - SIP phone number (SIP ID, login)
Authentication User Name - Username for logging into the SIP server
Authentication Password - Password for registration on the SIP server
An example of setting up a VoIP gateway , where Proxy Server (also known as a SIP server) is 172.17.17.150, User Name & Authorization Name is the extension number, Password is the subscriber password, respectively.
I, for example, got 3 numbers and registered one of the “office”, the second from the “branch”
From the command line, run
asterisk -r
The show peers sip command shows which extensions are registered and from which IP addresses.
“Office” devices and gateways are better to register to IP 172.17.17.150, and “branch offices” to 10.8.0.1 (the same DNS-325 is the IP address of the tunnel interface).
At this point we will consider the configuration of telephony "office" and "branch" completed.
I will give an example of a mobile user on my Android phone.
The first step is to install from the Market "OpenVPN for Android"
Fill the phone ca.crt, clien2.crt and client2.key. Launch OpenVPN for Android. Click the "+" in the lower left corner. Create a configuration. Go to the section "Basic"
Server address: 192.168.20.254 (according to the scheme at the beginning - this is WAN_IP)
Server port: 1194
Protocol: UDP
LZO compression: disabled
Type: Login / Password + Certificates
CA certificate: ca.crt
Client certificate: client2.crt
Client certificate key: client2.key
Username / password: (not important, enter anything)
In the section Authorization / Encryption “Encryption Algorithm” you can leave it blank, you can clearly indicate “BF-CBC”
Go back to the first page, click on the created configuration and see the OpenVPN connection logs.
Now install the SIP client. I use Zoiper IAX SIP VOIP Softphone (small, nothing superfluous, I did not notice any glitches)
Host: 10.8.0.1 (the interface address of the other side of the tunnel, on it is Asterisk)
Username: 6000 (SIP Phone Number)
Password: 6000 (Password for registration on the SIP server)
Authentication User: 6000 (Username for logging into the SIP server)
Click Save. If the registration was successful - the green mark is on, if not - the red “!”.
Of course, this is not enough, you need, for example, to include restrictions on switches, allowing only DNS phones and gateways to access DNS-325 on the udp / 5060 port. An exception can only be mobile users. Scripts for tracking attacks by logs and blocking the attacker's IP (like fail2ban), etc. Well, this is the topic of deep security, about this somehow in the next article.
Source: https://habr.com/ru/post/196268/
All Articles