An animation of ListView elements in Android
Good day to the day, habrazhiteli.
Today I want to share with you the secrets of animation of the elements of the ListView list in Android.
Usually, when creating a ListView, we use the appropriate adapter inherited from the BaseAdapter class. I will not go into details here, you can read about the construction of list elements here .
Today we will make the list items appear not “suddenly”, but rather to animate their appearance on the screen.
')
To begin, create a new Android Application Project project, I called it "AnimatedListViewSample". When creating a project, I do not create a default activity yet, we will add it later.
The next step we need is a helper library, which we download from GitHub, by tiling the ListViewAnimations project to the local computer with the command
Now we need to specify ListViewAnimations as a library on which our project “AnimatedListViewSample” depends. To do this, open the properties of our project, select the item “Android” in the list on the left, scroll the right panel down to the section “Library”. After clicking Add, select the AnimatedListViewLibrary library from the list.

So, our project is ready to create an activity.
To begin with we will create the simple activit inheriting ListViewActivity.
The easiest way to do this is using the object creation wizard in Eclipse: File -> New -> Other ...
Select “Android Object” from the list of objects, then select Blank Activity.
Do not forget to select the Launcher Activity checkbox so that the wizard will register the generated activit in the manifest, otherwise you will have to prescribe manually. As a result, we will have a class ActivityMain and an xml file with a description of the location of the user interface elements (in common layout) activity_main.xml
Remove unnecessary from the layout, there should be an empty screen. After editing, your activity_main.xml should look like this:
Now we need to replace our base activity class with ListActivity and fill our ListView with data.
Let's create a simple adapter consisting of just one TextView element using the standard layout:
I put the adapter code right inside the MainActivity class.
It remains to tell our ListView to use an instance of our adapter.
Add a line:
The MainActivity.java code now looks like this:
You can run our application. Before starting, make sure that AndroidManifest contains our activit with the necessary attributes:
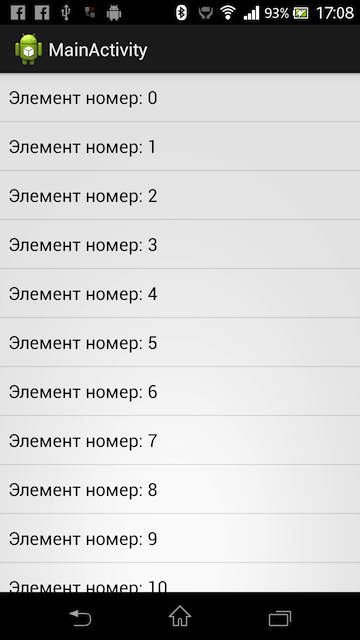
After running on the device, you’ll get a list like this
It remains quite a bit to remake our ListView in such a way as to animate the appearance of list items. The ListViewAnimations library has the following adapters in its arsenal:
- SwingBottomInAnimationAdapter.java
- SwingLeftInAnimationAdapter.java
- SwingRightInAnimationAdapter.java
- AlphaInAnimationAdapter.java
I liked the BottomInAnimationAdapter the most when the list items appear below and move up to their position.
I will remake the onCreate method to use animation. To do this, I need to create an instance of the SwingBottomInAnimationAdapter class and specify it as an adapter for my ListView.
Modify your code and run the project on the device or in the emulator. Handsomely?
Download the project here as a repository or here as an archive.
Today I want to share with you the secrets of animation of the elements of the ListView list in Android.
Usually, when creating a ListView, we use the appropriate adapter inherited from the BaseAdapter class. I will not go into details here, you can read about the construction of list elements here .
Today we will make the list items appear not “suddenly”, but rather to animate their appearance on the screen.
')
To begin, create a new Android Application Project project, I called it "AnimatedListViewSample". When creating a project, I do not create a default activity yet, we will add it later.
The next step we need is a helper library, which we download from GitHub, by tiling the ListViewAnimations project to the local computer with the command
git clone github.com/nhaarman/ListViewAnimations.git git clone github.com/nhaarman/ListViewAnimations.git or by downloading and unpacking the archive in the Eclipse workspace. After cloning, you must import the LiastViewAnimations project library into your development environment. In eclipse, this is done through the menu FIle -> Import -> Existing Android Code Into Workplace and specify the path to the lib subfolder of the freshly packed project.Now we need to specify ListViewAnimations as a library on which our project “AnimatedListViewSample” depends. To do this, open the properties of our project, select the item “Android” in the list on the left, scroll the right panel down to the section “Library”. After clicking Add, select the AnimatedListViewLibrary library from the list.
So, our project is ready to create an activity.
To begin with we will create the simple activit inheriting ListViewActivity.
The easiest way to do this is using the object creation wizard in Eclipse: File -> New -> Other ...
Select “Android Object” from the list of objects, then select Blank Activity.
Do not forget to select the Launcher Activity checkbox so that the wizard will register the generated activit in the manifest, otherwise you will have to prescribe manually. As a result, we will have a class ActivityMain and an xml file with a description of the location of the user interface elements (in common layout) activity_main.xml
package com.example.animatedlistviewsample; import android.os.Bundle; import android.app.Activity; import android.view.Menu; public class MainActivity extends Activity { @Override protected void onCreate(Bundle savedInstanceState) { super.onCreate(savedInstanceState); setContentView(R.layout.activity_main); } @Override public boolean onCreateOptionsMenu(Menu menu) { // Inflate the menu; this adds items to the action bar if it is present. getMenuInflater().inflate(R.menu.main, menu); return true; } } Remove unnecessary from the layout, there should be an empty screen. After editing, your activity_main.xml should look like this:
<RelativeLayout xmlns:android="http://schemas.android.com/apk/res/android" xmlns:tools="http://schemas.android.com/tools" android:layout_width="match_parent" android:layout_height="match_parent" android:paddingBottom="@dimen/activity_vertical_margin" android:paddingLeft="@dimen/activity_horizontal_margin" android:paddingRight="@dimen/activity_horizontal_margin" android:paddingTop="@dimen/activity_vertical_margin" tools:context=".MainActivity" > </RelativeLayout> Now we need to replace our base activity class with ListActivity and fill our ListView with data.
Let's create a simple adapter consisting of just one TextView element using the standard layout:
private class MyBaseAdapter extends BaseAdapter { @Override public int getCount() { return 100; } @Override public String getItem(int position) { return String.format(" : %d", position); } @Override public long getItemId(int position) { return position; } @Override public View getView(int position, View convertView, ViewGroup parent) { if(convertView == null) { convertView = LayoutInflater.from(getBaseContext()).inflate(android.R.layout.list_content, parent, false); } ((TextView)convertView.findViewById(android.R.id.text1)).setText(getItem(position)); return convertView; } } I put the adapter code right inside the MainActivity class.
It remains to tell our ListView to use an instance of our adapter.
Add a line:
getListView().setAdapter(new MyBaseAdapter()); in the onCreate method immediately after calling the onCrate supertype method.The MainActivity.java code now looks like this:
package com.example.animatedlistviewsample; import android.os.Bundle; import android.app.Activity; import android.app.ListActivity; import android.view.LayoutInflater; import android.view.Menu; import android.view.View; import android.view.ViewGroup; import android.widget.BaseAdapter; import android.widget.TextView; public class MainActivity extends ListActivity { @Override protected void onCreate(Bundle savedInstanceState) { super.onCreate(savedInstanceState); getListView().setAdapter(new MyBaseAdapter()); } private class MyBaseAdapter extends BaseAdapter { @Override public int getCount() { return 100; } @Override public String getItem(int position) { return String.format(" : %d", position); } @Override public long getItemId(int position) { return position; } @Override public View getView(int position, View convertView, ViewGroup parent) { if(convertView == null) { convertView = LayoutInflater.from(getBaseContext()).inflate(android.R.layout.simple_list_item_1, parent, false); } ((TextView)convertView.findViewById(android.R.id.text1)).setText(getItem(position)); return convertView; } } } You can run our application. Before starting, make sure that AndroidManifest contains our activit with the necessary attributes:
<activity android:name="com.example.animatedlistviewsample.MainActivity" android:label="@string/title_activity_main" > <intent-filter> <category android:name="android.intent.category.LAUNCHER"/> <action android:name="android.intent.action.MAIN"/> </intent-filter> </activity> After running on the device, you’ll get a list like this
It remains quite a bit to remake our ListView in such a way as to animate the appearance of list items. The ListViewAnimations library has the following adapters in its arsenal:
- SwingBottomInAnimationAdapter.java
- SwingLeftInAnimationAdapter.java
- SwingRightInAnimationAdapter.java
- AlphaInAnimationAdapter.java
I liked the BottomInAnimationAdapter the most when the list items appear below and move up to their position.
I will remake the onCreate method to use animation. To do this, I need to create an instance of the SwingBottomInAnimationAdapter class and specify it as an adapter for my ListView.
protected void onCreate(Bundle savedInstanceState) { super.onCreate(savedInstanceState); SwingBottomInAnimationAdapter swingBottomInAdapter = new SwingBottomInAnimationAdapter(new MyBaseAdapter()); swingBottomInAdapter.setAbsListView(getListView()); getListView().setAdapter(swingBottomInAdapter); } swingBottomInAdapter.setAbsListView(getListView()); absolutely necessary for the correct operation of the SwingBottomInAnimationAdapter.Modify your code and run the project on the device or in the emulator. Handsomely?
Download the project here as a repository or here as an archive.
Source: https://habr.com/ru/post/196246/
All Articles