Game Boy Original: Review, Disassembly, Features
While we were content with the game where the wolf catches eggs, on the neatly sloped console of Nintendo Game & Watch, the Japanese were already striding by leaps and bounds, and back in 1989, the portable game console, the new generation Game Boy, was born. Unlike Russia and the CIS countries, where it was unpopular because of its high cost (and, apparently, the problems of its cloning by pirates), but in the USA, Japan, England and other countries, it was superpopular. Game Boy and Game Boy Color consoles have sold about 118 million units! A well-known Tetris game was sold for this console with a circulation of 30 million cartridges! For comparison, copies of the Battlefield 3 game sold around 15 million units. What was the huge popularity of the Game Boy? Everything is very simple. Nintendo did not make the most technologically advanced platform, on the contrary, the bet was placed on accessibility and simplicity. And simplicity in it was not only for users, but also for developers. The device was based on a simplified and modified Zilog Z80 processor, there were 2 memory modules of 64Kbps and ... that's all. On the Game Boy board you can count exactly 4 chips and practically no more surface-mounted elements. If you are wondering what the internal structure of the Game Boy Original is, you have a direct route under the cat.
Let's start with the technical specifications.
')
CPU:
DMG-CPU B (simplified Z80)
8-bit data bus width
The width of the bus address 16 bit
Clock frequency 4,19 MHz
Maximum power consumption 0.7W
Video Processor:
Address space 8 KB
8-bit data bus width
Screen size 160x144 (4 gradations)
Memory
8 kb ram
Video memory 8 KB
256 byte ROM
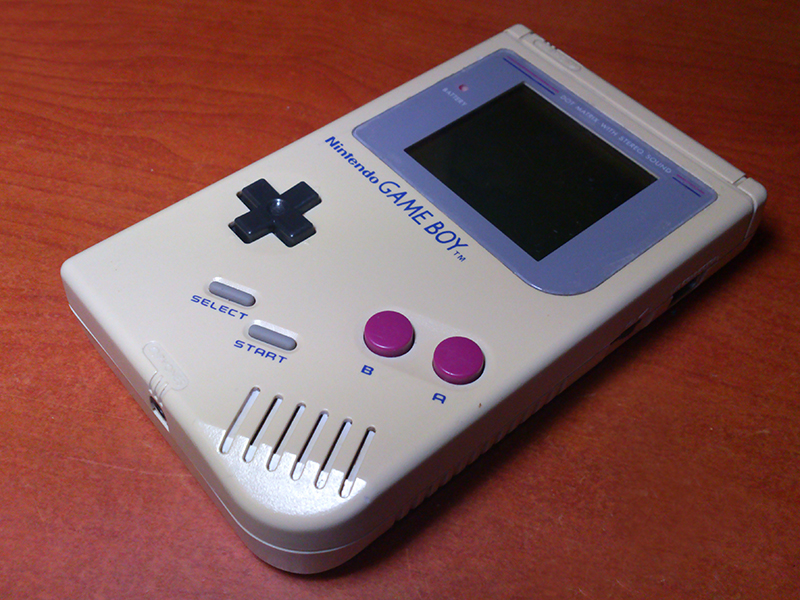
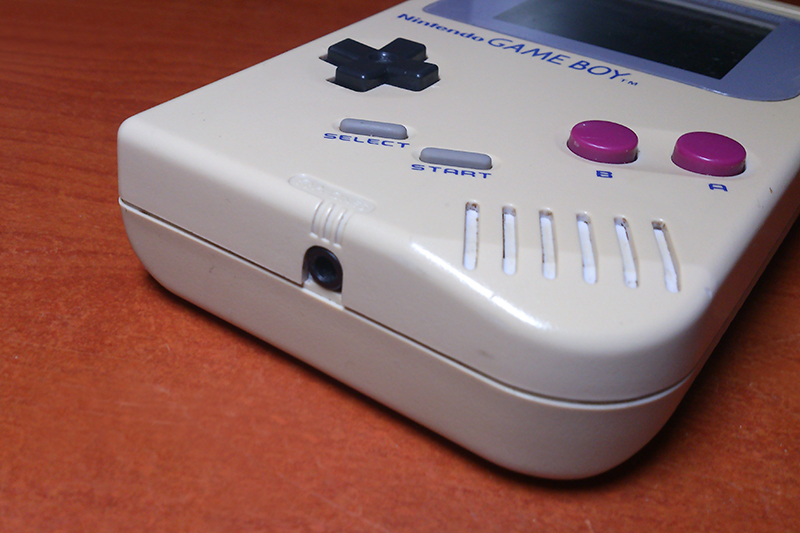
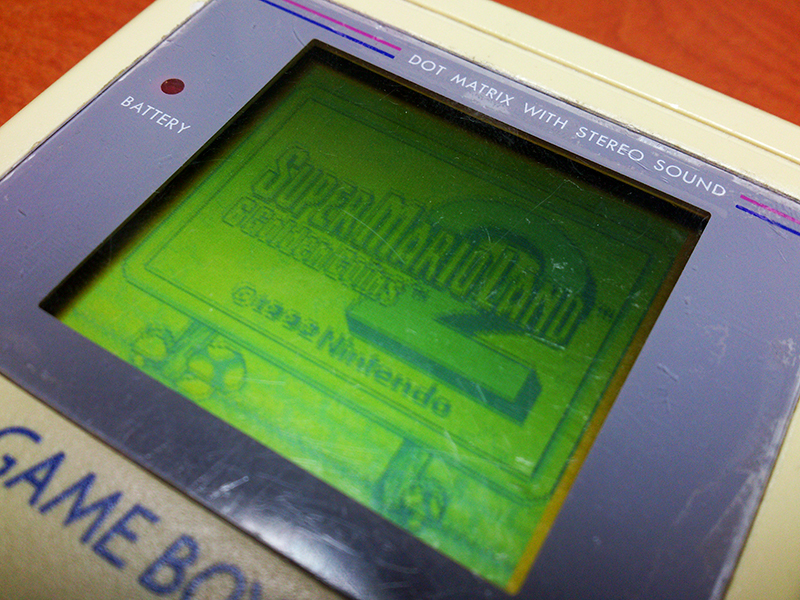
Well, now, in order not to torment you for a long time, let's proceed to a small external review, and then disassembling the device. And so, on the front panel we have: a cross, 4 buttons, a screen and a charge indicator. The latter is arranged in the opinion of the current man in the street a little unusual. The dimmer the light, the lower the battery charge. GB stops working approximately when it is almost not burning. This scheme allowed us to get rid of a separate charge control microcircuit.
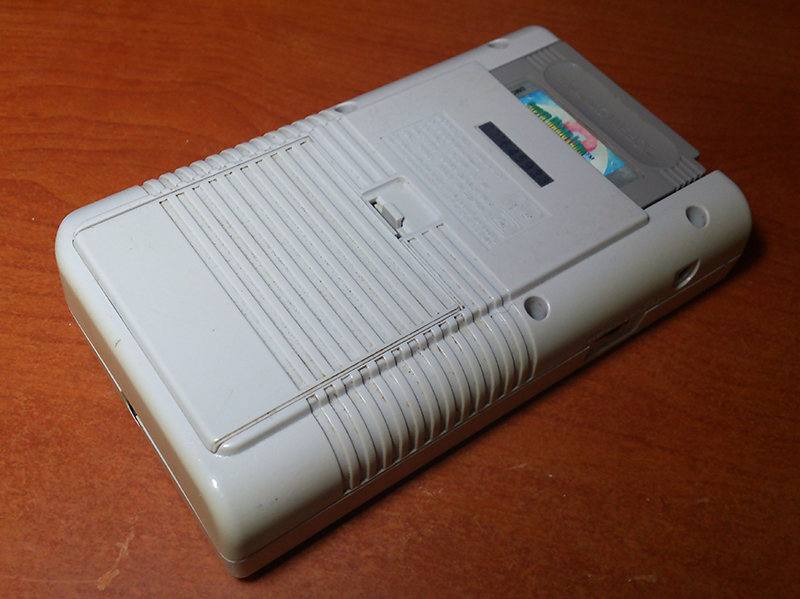
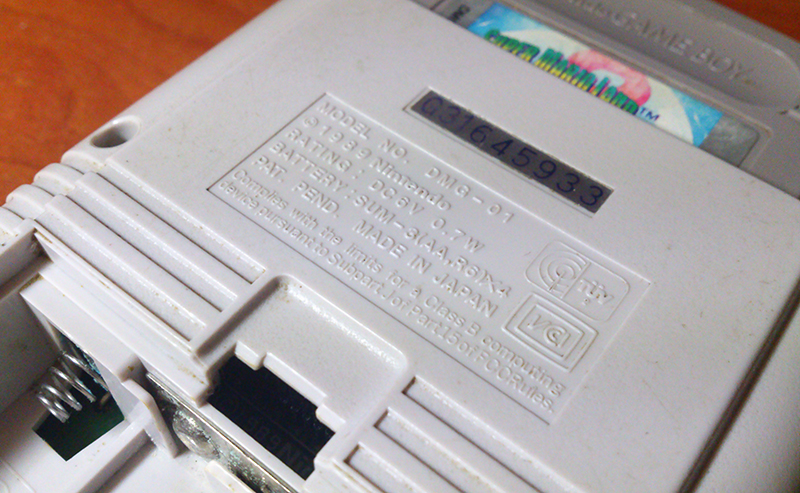
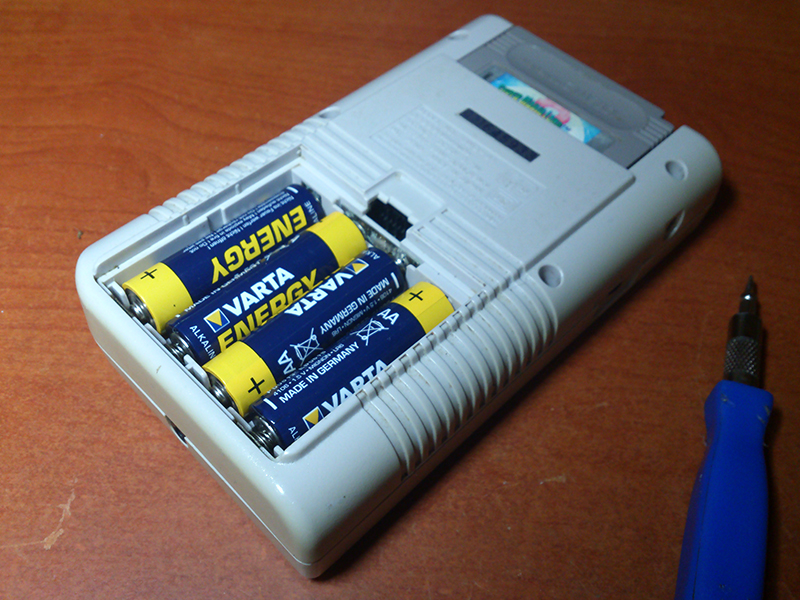
Behind nothing particularly interesting. Battery cover, which hides 4xAA batteries. Their charge is enough for 10-15 hours of play. Just above is information about the manufacturer. If you look into the hole, then the company logo is also visible on the board.
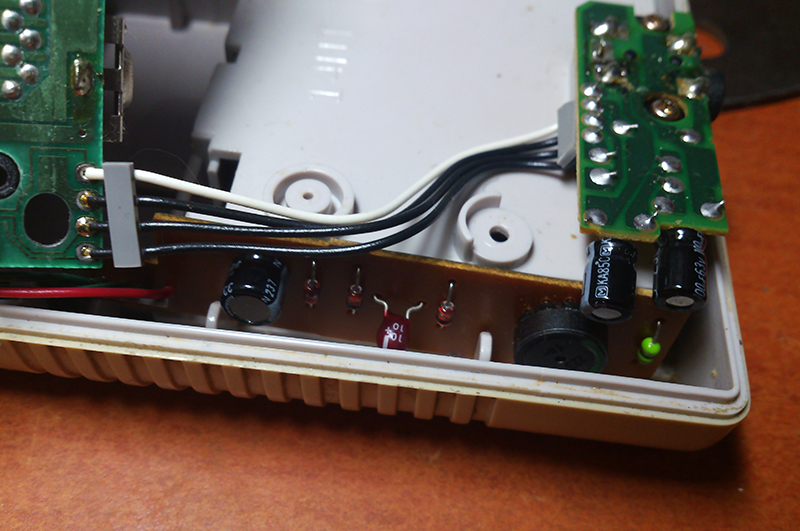
Below is a standard 3.5mm headphone jack. And here lies one more of the Game Boy success factors. The sound of the console produces a stereo mode and very good quality. There is not a very loud but not wheezing speaker.
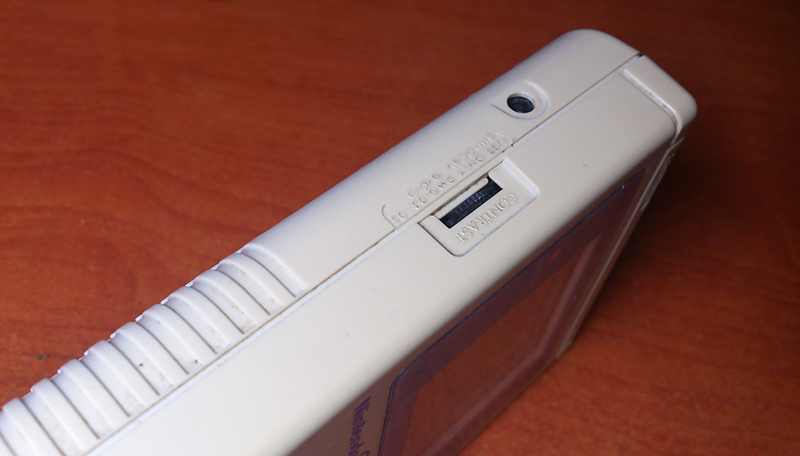
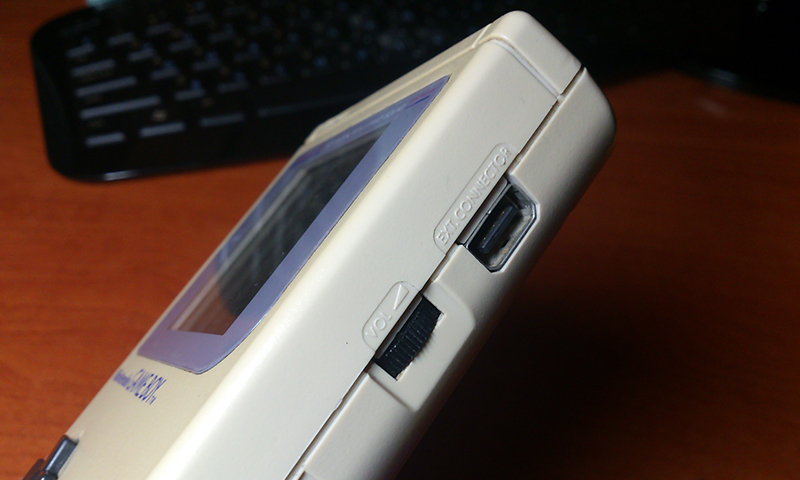
On the left is the contrast control and input for external power supply (6 volts). On the right is the volume control and serial link port. Link port allowed to connect up to 4 consoles together and play favorite games in co-op. Also, various devices designed for the Game Boy were connected to it. For example, a black and white printer allows you to print screenshots of the screen.
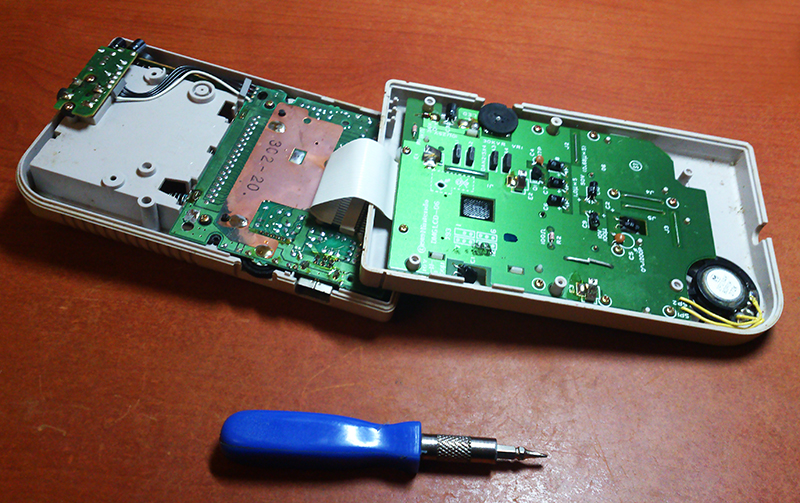
Start disassembling? Of course! For this we need a screwdriver with three teeth. Cross does not fit. The company applies such screws to this day.
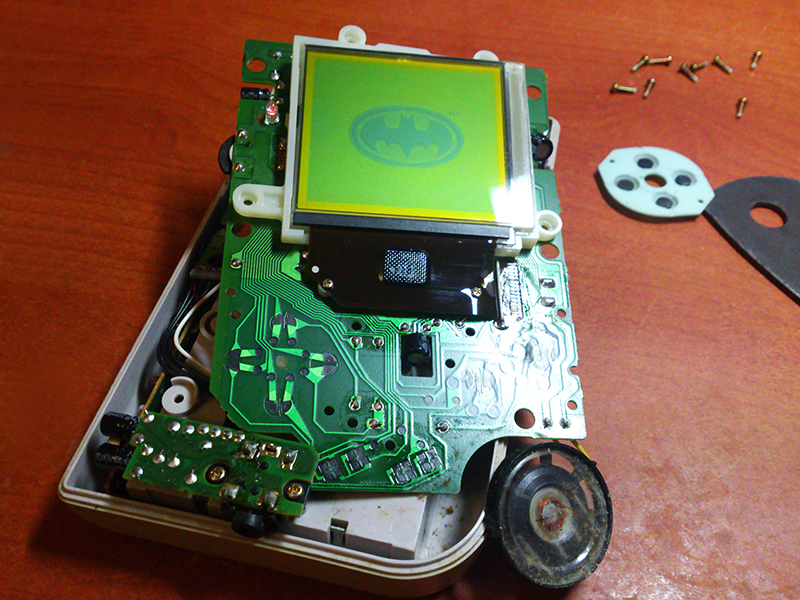
We open the case and two boards open to our eyes. Immediately catch the eye of large capacitors and resistors. As I said, virtually no surface mounting. From the SMD elements there are only microcircuits and a loop connector. On the side of the board is a transformer. Yes, it is a transformer, at 18 volts, it is needed for the display to work.
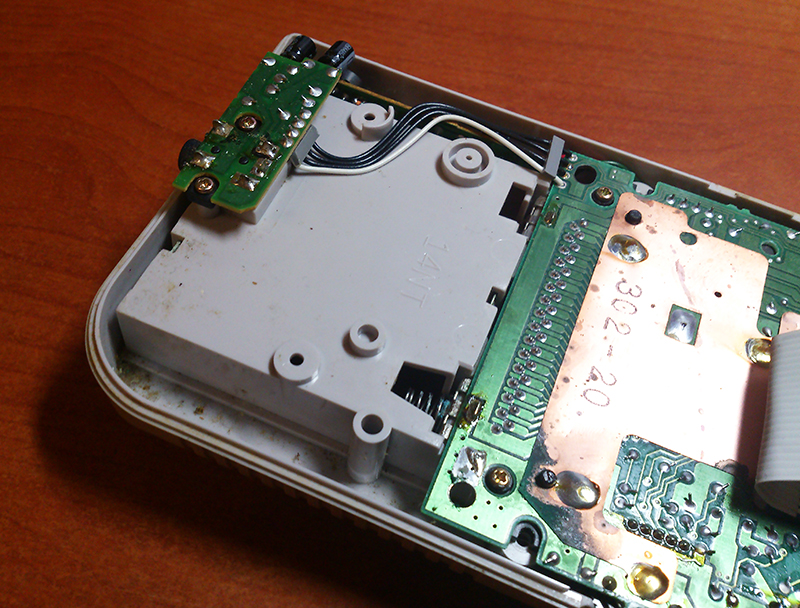
Unscrew the board with the LCD display from the case.
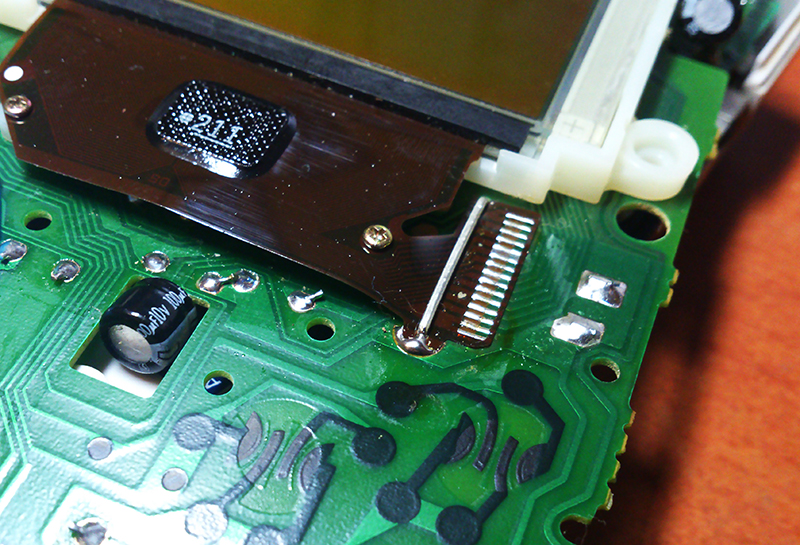
I was struck by the mount loop. It is tightly pressed with a metal bracket to the board and, in addition, is screwed to the display frame with screws. Everything is done to last.
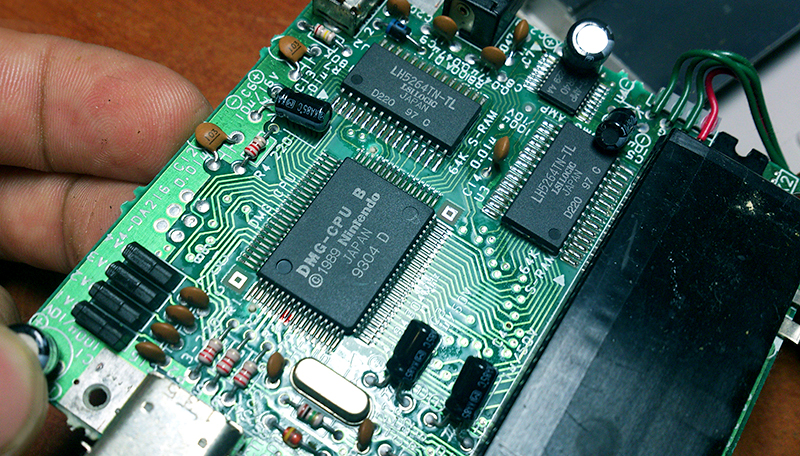
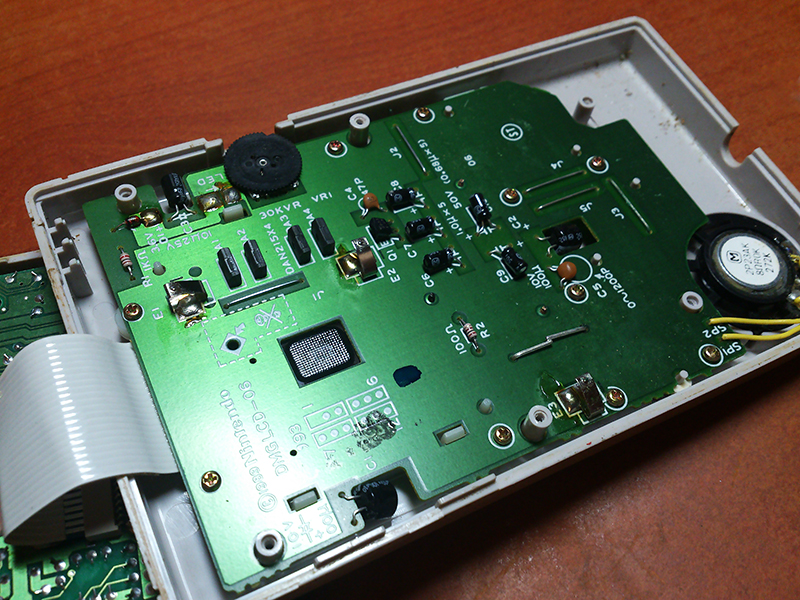
Unscrew the second board. On it is the processor itself, memory modules, audio amplifier and piping.
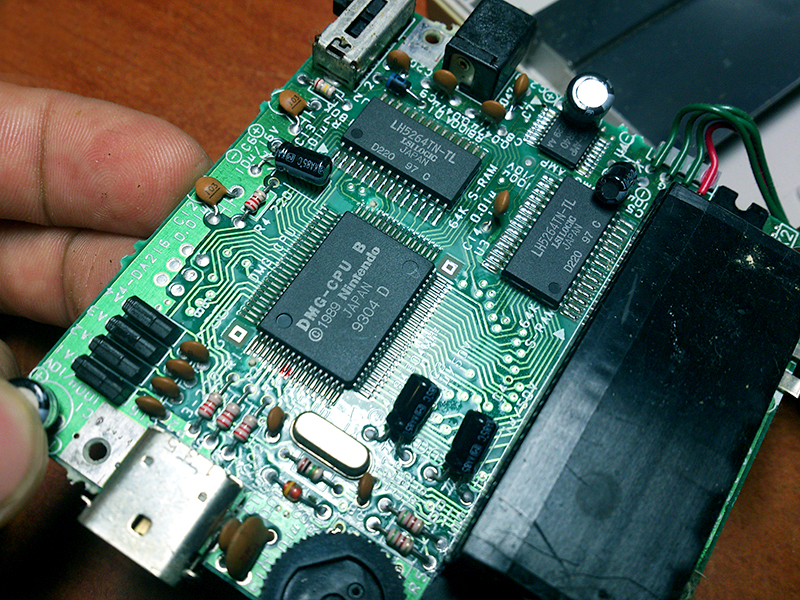
In total in Game Boy it is possible to count 6 chips! Of these, 4 we see in the photo above, two more are on the LCD display cable. The heart of the console is the DMG-CPU processor B. As I said, this is a simplified version of the Zilog Z80, which differs from the original in a reduced instruction set and a smaller number of internal registers. On the chip is also a video processor and a sound processor. For CPU and GPU, 8 KB of RAM is available. Memory modules are signed on the 64K S-RAM board. To the left is the sound amplifier "AMP".
Now let's take a look at the device cartridges.
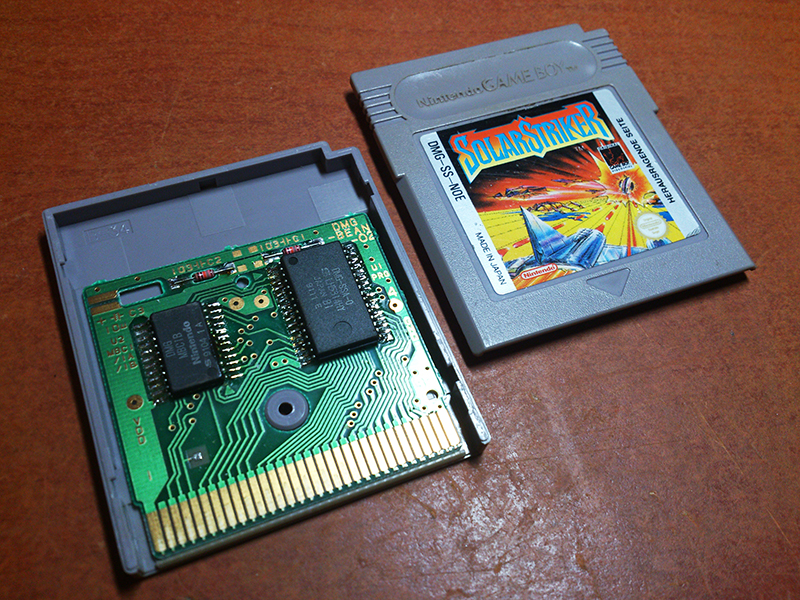
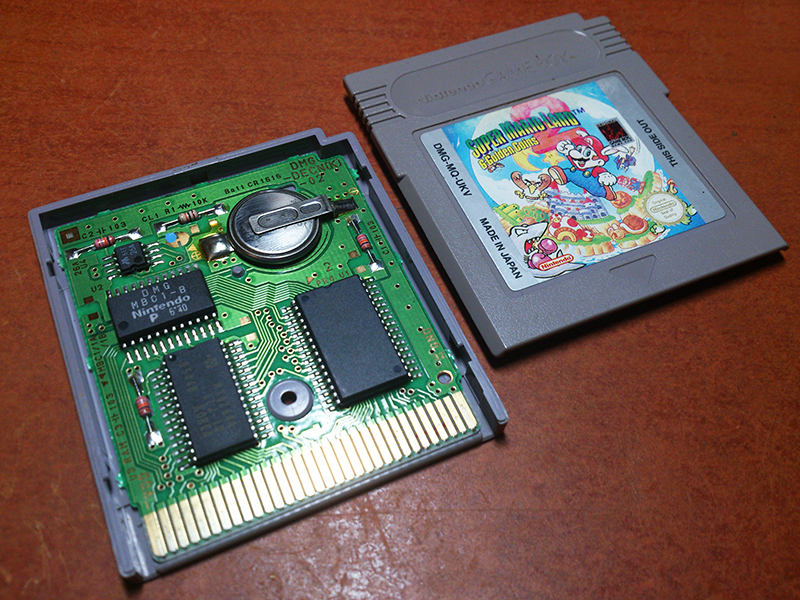
The maximum amount of ROM in the cartridge could be 1.5 MB (96 banks 16Kb each) and 128 KB RAM (16 banks 2 KB each) In the first photo we see the DMB module representing the programmable address decoder, its presence on the board is mandatory if the volume of the ROM ROM exceeds 32Kb. This is due to the inability of the CPU to address more than 64K of data. On the second photo, the board contains a RAM module with a battery that allows you to save data. Its addressing also occurs via DMB.
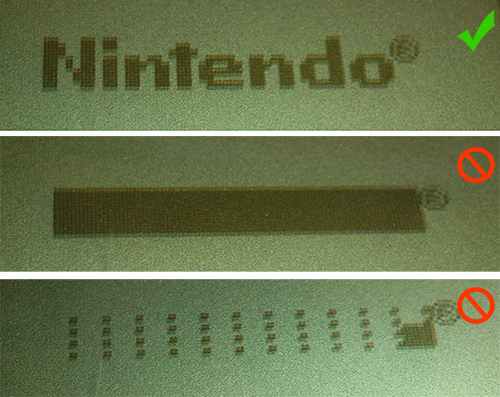
And now the question. Why Game Boy ROM 256 bytes? It contained the initial startup program, the same animation with a falling Nintendo logo and only two notes of sound at the end. The inscription Nindendo itself was read out at start-up from the cartridge ROM, and if the cartridge was “unreadable” at start-up one could see artifacts or just a black square. And already in the first seconds to understand what to blow up. Interestingly, the letter r was read from the ROM as those 2 notes. When you turn on the Game Boy without a cartridge, you can see a falling rectangle with the letter r at the end and hear two notes when landing, nothing more will happen.
This is where I’ll finish my short description of the Game Boy Original console. Well, if it became interesting for you to delve into the jungle of circuitry and code examples on asm, I recommend to get acquainted with a series of articles here. Do not think for advertising, but I did not find a more detailed Russian-language description.
Thanks for attention! I hope it was interesting.
Let's start with the technical specifications.
')
CPU:
DMG-CPU B (simplified Z80)
8-bit data bus width
The width of the bus address 16 bit
Clock frequency 4,19 MHz
Maximum power consumption 0.7W
Video Processor:
Address space 8 KB
8-bit data bus width
Screen size 160x144 (4 gradations)
Memory
8 kb ram
Video memory 8 KB
256 byte ROM
Well, now, in order not to torment you for a long time, let's proceed to a small external review, and then disassembling the device. And so, on the front panel we have: a cross, 4 buttons, a screen and a charge indicator. The latter is arranged in the opinion of the current man in the street a little unusual. The dimmer the light, the lower the battery charge. GB stops working approximately when it is almost not burning. This scheme allowed us to get rid of a separate charge control microcircuit.
Behind nothing particularly interesting. Battery cover, which hides 4xAA batteries. Their charge is enough for 10-15 hours of play. Just above is information about the manufacturer. If you look into the hole, then the company logo is also visible on the board.
Below is a standard 3.5mm headphone jack. And here lies one more of the Game Boy success factors. The sound of the console produces a stereo mode and very good quality. There is not a very loud but not wheezing speaker.
On the left is the contrast control and input for external power supply (6 volts). On the right is the volume control and serial link port. Link port allowed to connect up to 4 consoles together and play favorite games in co-op. Also, various devices designed for the Game Boy were connected to it. For example, a black and white printer allows you to print screenshots of the screen.
Start disassembling? Of course! For this we need a screwdriver with three teeth. Cross does not fit. The company applies such screws to this day.
We open the case and two boards open to our eyes. Immediately catch the eye of large capacitors and resistors. As I said, virtually no surface mounting. From the SMD elements there are only microcircuits and a loop connector. On the side of the board is a transformer. Yes, it is a transformer, at 18 volts, it is needed for the display to work.
Unscrew the board with the LCD display from the case.
I was struck by the mount loop. It is tightly pressed with a metal bracket to the board and, in addition, is screwed to the display frame with screws. Everything is done to last.
Unscrew the second board. On it is the processor itself, memory modules, audio amplifier and piping.
In total in Game Boy it is possible to count 6 chips! Of these, 4 we see in the photo above, two more are on the LCD display cable. The heart of the console is the DMG-CPU processor B. As I said, this is a simplified version of the Zilog Z80, which differs from the original in a reduced instruction set and a smaller number of internal registers. On the chip is also a video processor and a sound processor. For CPU and GPU, 8 KB of RAM is available. Memory modules are signed on the 64K S-RAM board. To the left is the sound amplifier "AMP".
Now let's take a look at the device cartridges.
The maximum amount of ROM in the cartridge could be 1.5 MB (96 banks 16Kb each) and 128 KB RAM (16 banks 2 KB each) In the first photo we see the DMB module representing the programmable address decoder, its presence on the board is mandatory if the volume of the ROM ROM exceeds 32Kb. This is due to the inability of the CPU to address more than 64K of data. On the second photo, the board contains a RAM module with a battery that allows you to save data. Its addressing also occurs via DMB.
And now the question. Why Game Boy ROM 256 bytes? It contained the initial startup program, the same animation with a falling Nintendo logo and only two notes of sound at the end. The inscription Nindendo itself was read out at start-up from the cartridge ROM, and if the cartridge was “unreadable” at start-up one could see artifacts or just a black square. And already in the first seconds to understand what to blow up. Interestingly, the letter r was read from the ROM as those 2 notes. When you turn on the Game Boy without a cartridge, you can see a falling rectangle with the letter r at the end and hear two notes when landing, nothing more will happen.
This is where I’ll finish my short description of the Game Boy Original console. Well, if it became interesting for you to delve into the jungle of circuitry and code examples on asm, I recommend to get acquainted with a series of articles here. Do not think for advertising, but I did not find a more detailed Russian-language description.
Thanks for attention! I hope it was interesting.
Source: https://habr.com/ru/post/196056/
All Articles