Autonomous monitoring system with a small budget
Under the cut you will not find another story of the appearance of the Build traffic light in the office. Most of the article I will devote to the implementation of the system itself up to the actuator, because the traffic light is just three large light bulbs.
In general, I just got tired of writing boring projects and coursework at the institute, so in summer practice I decided to do something interesting than that.
')
I am a third-year student at the Faculty of Radio Engineering of UrFU, along the way I work as a programmer for Ruby on Rails in one of the largest IT departments in Yekaterinburg - in the web development department of the media holding Abak-Press.
When it was time to do an internship, I decided that I would do it at the place of work. I set myself a goal: to implement a build monitoring system. At work, the idea was approved and proposed to assemble a similar device. Just before that, I read habrahabr.ru/post/169097 , it was she who inspired me to implement the project. So, I got to work.
Of course, in the process I encountered a number of problems.
It turned out that it is impossible to buy a lamp traffic light in our city for reasonable money. I had to capture all my acquaintances, and with great difficulty one copy was found, allegedly badly damaged by the hands of the vandals, from which, in fact, it was written off. In fact, he had damaged one of the visors and one of the fixtures was completely destroyed.
The solution was simple - to fix to the wall, and not to the post, besides epoxy with fiberglass easily restored the broken visor.
At first I thought of doing something simple, for example, MSP430 + Ethernet. However, calculations have shown that the cost of this solution is comparable to the cost of raspberry PI. Of course, I chose a raspberry, it foreshadowed the presence of various whistles in the traffic lights in the future.
ArchLinux was installed on raspberries. It turned out that there are no real clocks in raspberries, so you need to write a script that would go every time you turn on and set the correct time on the device, otherwise https connections refused to work due to the current date - January 1, 1970 - all certificates are invalid.
Next was compiled ruby latest version 2.0.0. The procedure took more than three hours.
Two gems were tested for communication with gpio: WiringPI and PiPiper. On the board of the latest version (rev 2), only PiPiper has earned. By the way, only a user with root rights has access to gpio, it must be kept in mind.
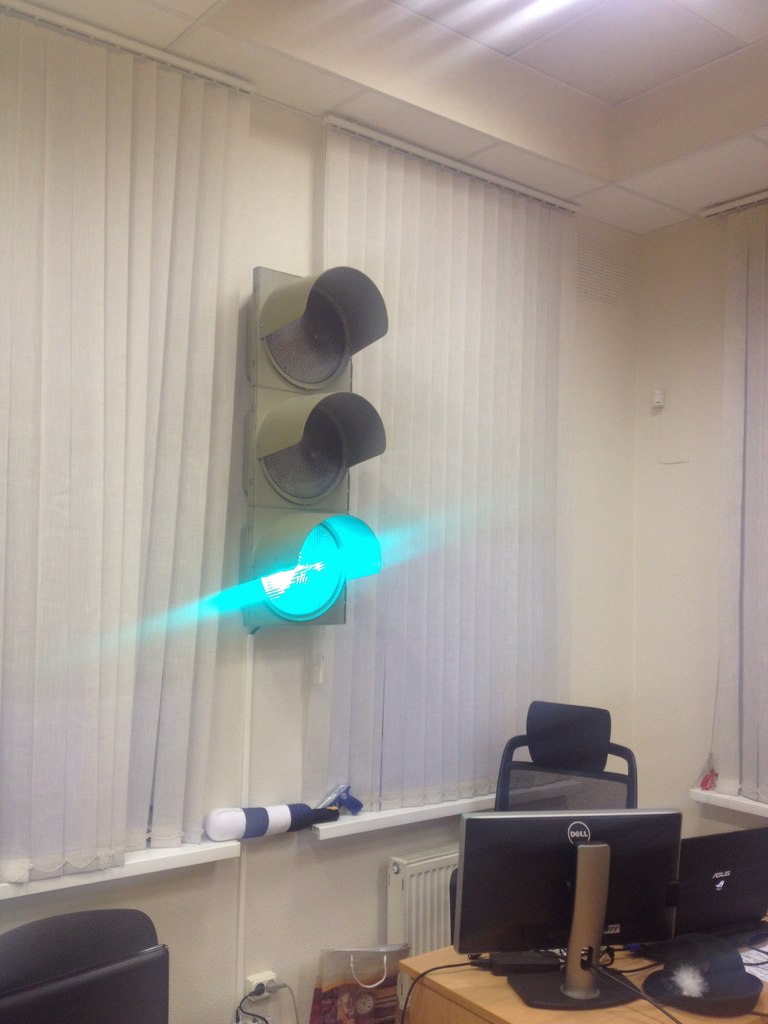
The traffic light works very well from 220V network - it is convenient. About an hour I switched on each lamp of the traffic light alternately and was happy as a child. For reference: the traffic light is LED, but of the old design, that is, it seems to have a lamp light, so I didn’t modify its construction and stick light bulbs into it.
The light from the traffic light is pleasant - almost warm, lamp and only when getting into the focus of the lens of the traffic light there is a little unpleasant feeling of too sharp light, but this problem was solved by the right location of the traffic light.
So, we turn to the main problem of the above. Two solutions were found: a relay and a "non-relay".
Since everything new is interesting to me, and not at all because one of my practice leaders has a summer house on which it is necessary to control a remotely powerful load that is fraught with large currents, the second option was chosen.
After reading easyelectronics.com/upravlenie-moshhnoj-nagruzkoj-peremennogo-toka.html , I implemented a three-channel device with slightly different opto drivers - with good radiators it can hold up to 16A. The traffic light is still not a powerful load - I did without radiators.
On the breadboard, I assembled a working one channel of such a device:

True, it turned out that the circuit was specified to control zero, but I managed a high signal level, so the input contacts had to be swapped.
After an unsuccessful attempt at surface mount, it was decided to make a printed circuit board.
The resulting scheme:
Textolite, ferric chloride was purchased, LUT was studied (laser-iron method of printing boards at home) and from the fifth attempt the image of a printed circuit board was transferred from paper to textolite.
Topology:
After that, having broken a pair of drills by 1 mm, I waited for the morning and drilled the remaining holes on the drill machine at the institute. In the evening of the same day I diluted the ferric chloride and began to poison - only 20 minutes and the board was etched.


The solution, by the way, turned out reusable.
Using acetone, removed the toner layer, and all components were soldered in two hours. In consequence, the fee was covered with a zaponlak.
Since only user with root rights has access to gpio, rvm was compiled according to the wiki.archlinux.org/index.php/RVM instruction. The system architecture is as follows: there is a server to which you can access from the web form and there is a daemon that communicates via gpio with the executive device board. The demon has root rights. Project code can be viewed:
github.com/Aelphy/traffic-light-server
github.com/Aelphy/traffic-light-daemon
In consequence, it is planned to add a column and a full-fledged mode "New Year".
Now the traffic light works in the standard mode - it shows the status of the last build of the project and whether the internal network is working.
Used color codes:
- green - tests passed;
- red - tests dropped;
- yellow - goes build;
- yellow flashing - problems (no internet, not responding).
On this platform, it is possible to very cheaply implement a range of monitoring and maintenance tasks.

In general, I just got tired of writing boring projects and coursework at the institute, so in summer practice I decided to do something interesting than that.
')
Introduction
I am a third-year student at the Faculty of Radio Engineering of UrFU, along the way I work as a programmer for Ruby on Rails in one of the largest IT departments in Yekaterinburg - in the web development department of the media holding Abak-Press.
When it was time to do an internship, I decided that I would do it at the place of work. I set myself a goal: to implement a build monitoring system. At work, the idea was approved and proposed to assemble a similar device. Just before that, I read habrahabr.ru/post/169097 , it was she who inspired me to implement the project. So, I got to work.
Of course, in the process I encountered a number of problems.
Problem 1: Traffic Lights
It turned out that it is impossible to buy a lamp traffic light in our city for reasonable money. I had to capture all my acquaintances, and with great difficulty one copy was found, allegedly badly damaged by the hands of the vandals, from which, in fact, it was written off. In fact, he had damaged one of the visors and one of the fixtures was completely destroyed.
The solution was simple - to fix to the wall, and not to the post, besides epoxy with fiberglass easily restored the broken visor.
"Brains" Traffic Light
At first I thought of doing something simple, for example, MSP430 + Ethernet. However, calculations have shown that the cost of this solution is comparable to the cost of raspberry PI. Of course, I chose a raspberry, it foreshadowed the presence of various whistles in the traffic lights in the future.
ArchLinux was installed on raspberries. It turned out that there are no real clocks in raspberries, so you need to write a script that would go every time you turn on and set the correct time on the device, otherwise https connections refused to work due to the current date - January 1, 1970 - all certificates are invalid.
Next was compiled ruby latest version 2.0.0. The procedure took more than three hours.
Two gems were tested for communication with gpio: WiringPI and PiPiper. On the board of the latest version (rev 2), only PiPiper has earned. By the way, only a user with root rights has access to gpio, it must be kept in mind.
How do having a 3.3 volt raspberry logic control how to turn on traffic lights?
The traffic light works very well from 220V network - it is convenient. About an hour I switched on each lamp of the traffic light alternately and was happy as a child. For reference: the traffic light is LED, but of the old design, that is, it seems to have a lamp light, so I didn’t modify its construction and stick light bulbs into it.
The light from the traffic light is pleasant - almost warm, lamp and only when getting into the focus of the lens of the traffic light there is a little unpleasant feeling of too sharp light, but this problem was solved by the right location of the traffic light.
So, we turn to the main problem of the above. Two solutions were found: a relay and a "non-relay".
Since everything new is interesting to me, and not at all because one of my practice leaders has a summer house on which it is necessary to control a remotely powerful load that is fraught with large currents, the second option was chosen.
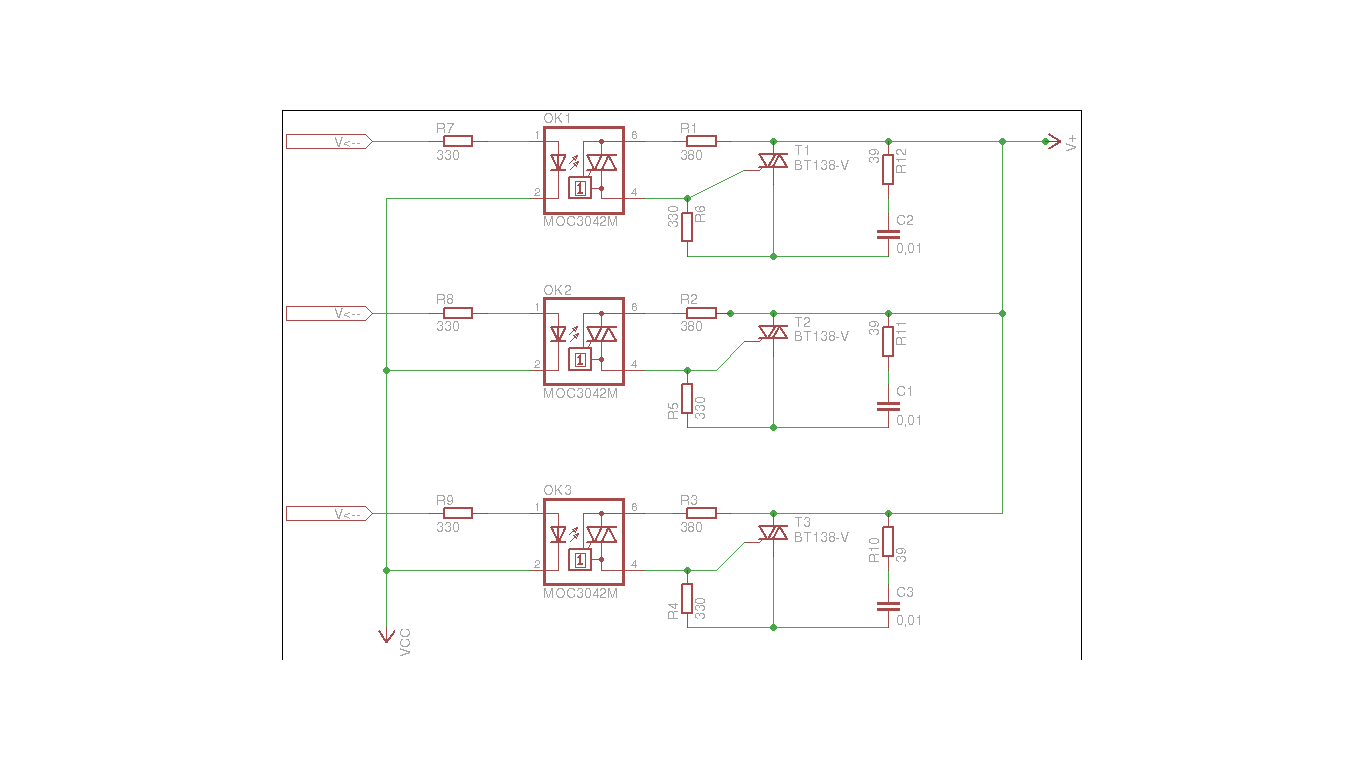
After reading easyelectronics.com/upravlenie-moshhnoj-nagruzkoj-peremennogo-toka.html , I implemented a three-channel device with slightly different opto drivers - with good radiators it can hold up to 16A. The traffic light is still not a powerful load - I did without radiators.
On the breadboard, I assembled a working one channel of such a device:
True, it turned out that the circuit was specified to control zero, but I managed a high signal level, so the input contacts had to be swapped.
Manufacturing control board
After an unsuccessful attempt at surface mount, it was decided to make a printed circuit board.
The resulting scheme:
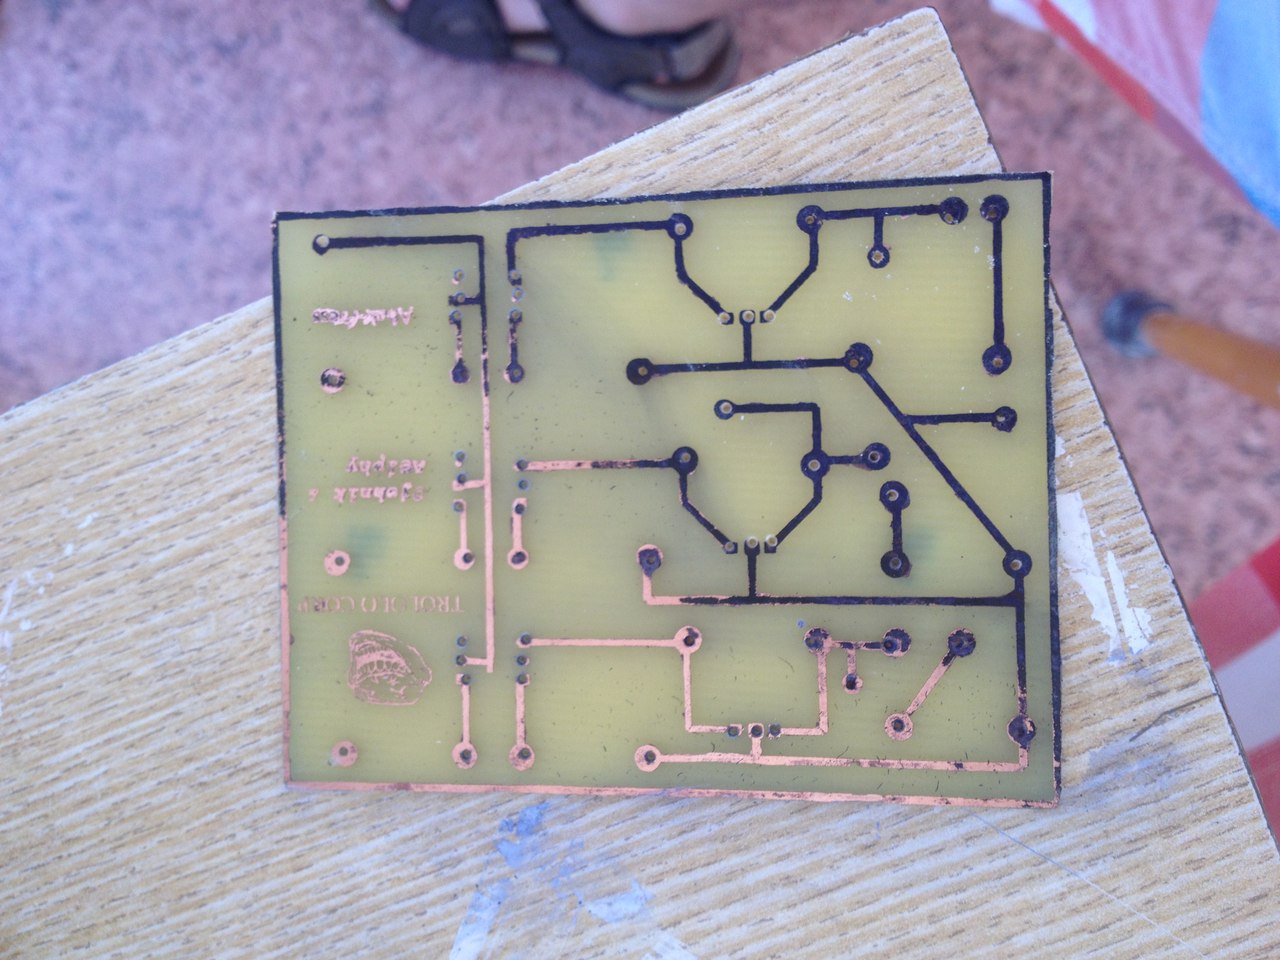
Textolite, ferric chloride was purchased, LUT was studied (laser-iron method of printing boards at home) and from the fifth attempt the image of a printed circuit board was transferred from paper to textolite.
Topology:
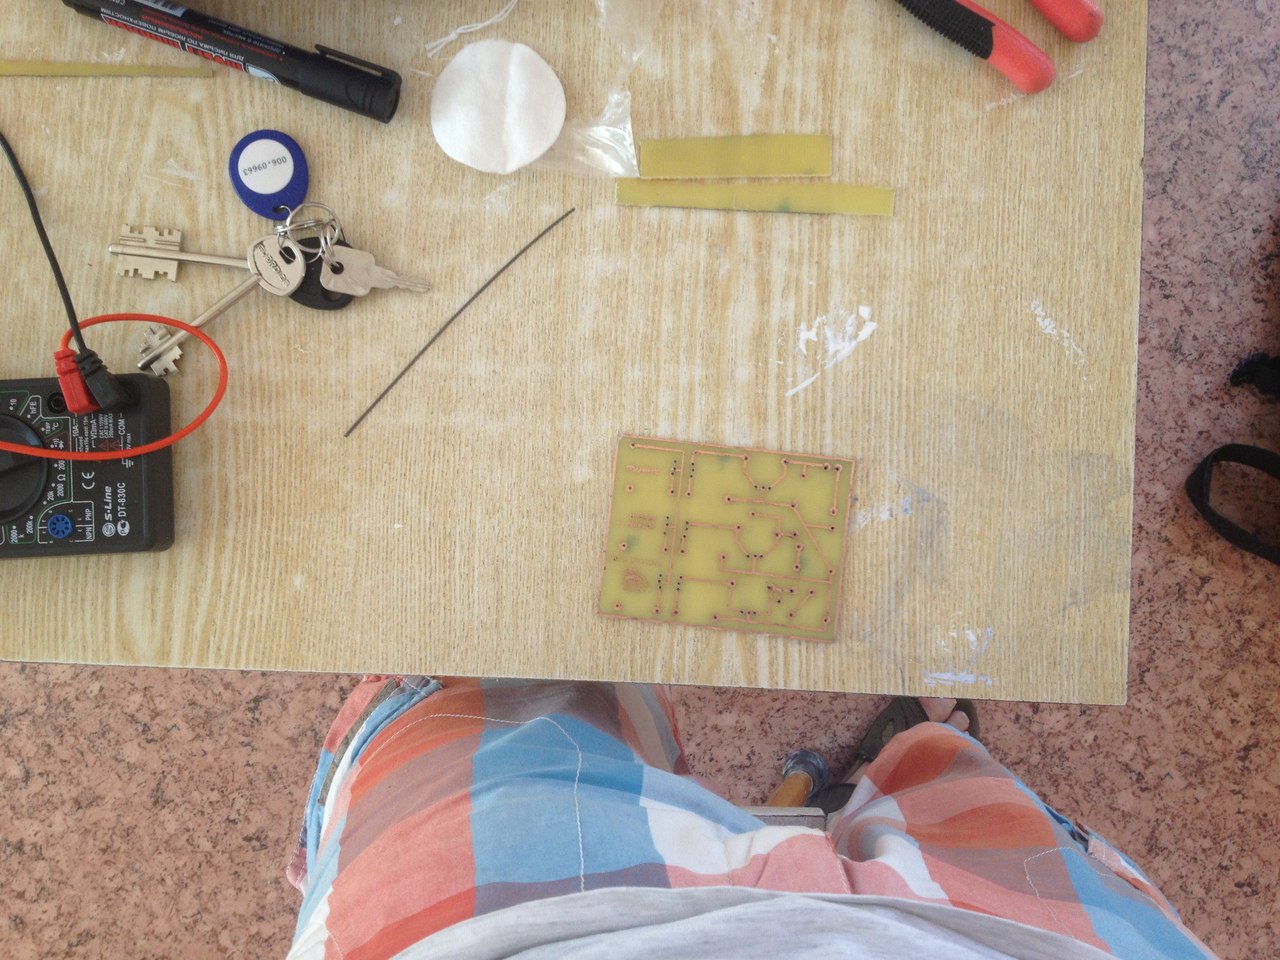
After that, having broken a pair of drills by 1 mm, I waited for the morning and drilled the remaining holes on the drill machine at the institute. In the evening of the same day I diluted the ferric chloride and began to poison - only 20 minutes and the board was etched.
The solution, by the way, turned out reusable.
Using acetone, removed the toner layer, and all components were soldered in two hours. In consequence, the fee was covered with a zaponlak.
Management program
Since only user with root rights has access to gpio, rvm was compiled according to the wiki.archlinux.org/index.php/RVM instruction. The system architecture is as follows: there is a server to which you can access from the web form and there is a daemon that communicates via gpio with the executive device board. The demon has root rights. Project code can be viewed:
github.com/Aelphy/traffic-light-server
github.com/Aelphy/traffic-light-daemon
Conclusion
In consequence, it is planned to add a column and a full-fledged mode "New Year".
Now the traffic light works in the standard mode - it shows the status of the last build of the project and whether the internal network is working.
Used color codes:
- green - tests passed;
- red - tests dropped;
- yellow - goes build;
- yellow flashing - problems (no internet, not responding).
On this platform, it is possible to very cheaply implement a range of monitoring and maintenance tasks.
Source: https://habr.com/ru/post/195594/
All Articles