Running and using OpenWrt in VirtualBox
 In this article I will talk about how to run OpenWrt in the emulator and configure it to work on the network, as well as touch on the use of vi, ssh and scp clients. I consider the main reason for all this action to be the opportunity to touch the firmware with my hands without fear of remaining without the Internet, in case of problems with the router. This article is intended for people who are not familiar with Linux.
Wikipedia suggests that OpenWrt is a Linux-based firmware for home routers. In fact, this is a whole family of firmware. OpenWrt along with DD-Wrt and Gargoyle are available for a huge number of routers on different hardware platforms. The repository is available at downloads.openwrt.org . In addition to the main branch (having several implementations within the platform), called attitude_adjustment, backfire and kamikaze versions are common.
Software installation
First of all, install the VirtualBox emulator if you don’t have it. To be able to execute commands outside the console of the emulator window, you will need an SSH client. For example, Putty . At the same time you will be available to the home system clipboard. For convenient access to the file system of the "router" you need a graphical SCP client. For example, WinSCP for Windows . For Linux, the built-in file manager will suffice. For example, Krusader, Dolphin, Nautilus.
Select firmware
Emulation requires firmware for x86 platform, preferably with Ext2 or Ext4 file system.
Although the official wiki advises to install a version of attitude_adjustment , I had problems with it: it refused to start, reporting kernel panic. So it's easier to stay on one of the two remaining. Choosing the firmware, look in the options for downloading the finished .vdi file.
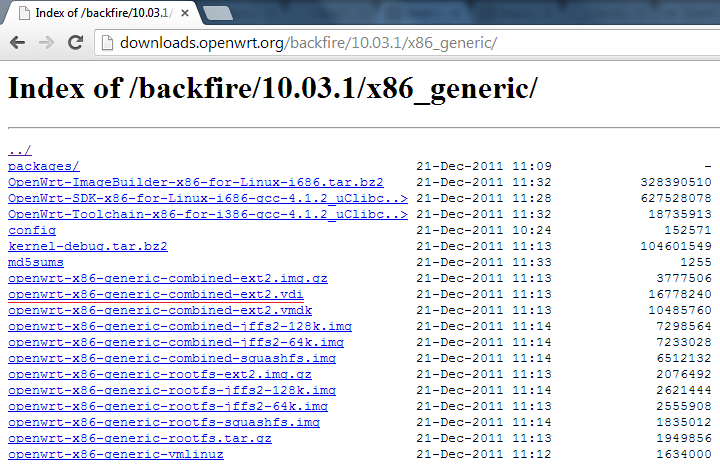
Link for backfire version 10.03.1: http://downloads.openwrt.org/backfire/10.03.1/x86_generic/openwrt-x86-generic-combined-ext2.vdi .
')
If the firmware you are interested in is available only as a raw image (img.gz, image.gz, bin) you will need to use the converter included in the VirtualBox kit. For Windows, save the following text file in the VirtualBox folder (you may need administrator rights) and give it the extension .bat or .cmd:
  "% ~ dp0VBoxManage.exe" convertfromraw --format VDI% 1 "% ~ dpn1.vdi"
 pause
After that, unpack the downloaded firmware image and drag it onto this script. The resulting .vdi image can be connected to a virtual machine.
Configure VirtualBox
Create a new virtual machine. Type - Linux, version - Linux 2.6. Refuse at this stage to connect the drive - this will be done later.
Open the properties of the new virtual machine (the "Configure" button) and go to the Network section. Instead of the NAT mode, select Network Bridge (Bridged) - this will allow access to the virtual machine from other devices on the network. If you do not have a home network (at least a router), leave the NAT and add the second adapter "Virtual Host Adapter".
Then in the COM ports section, be sure to check the box to enable port emulation. Otherwise, OpenWrt will not be able to load.
Finally, in the Media section, add the OpenWrt firmware image to the IDE controller as a hard disk. If devices are connected to the SATA controller, delete them.
Click OK, saving the settings.
In case of difficulty, look at the screenshots


Network configuration
Start the virtual machine. When the download is complete, press Enter. The console will be available.
Screenshot on the download end
First, set the administrator password by entering passwd and a new password in response to the prompt.
By default, OpenWrt creates its own subnet, ignoring the existing ones and gets the address 192.168.1.1 in it. You can try to connect to the virtual machine at this address by setting your computer (network card or virtual host adapter, depending on the VirtualBox settings made) static address on the 192.168.1. * Subnet. But it is more convenient option when the emulated "router" connects to the existing network, gaining access to the Internet and to devices on your network. Using the built-in vi text editor, you can edit configuration files. Type vi / etc / config / network to change network settings. The cursor in vi is controlled by arrows, to delete a line, you can press dd , you can enter edit mode by pressing the i button, return to the command mode by Esc . Bring this file to the following form (change option proto from static to dhcp ):
     # Copyright (C) 2006 OpenWrt.org

 config interface loopback
         option ifname lo
         option proto static
         option ipaddr 127.0.0.1
         option netmask 255.0.0.0

 config interface lan
         option ifname eth0
         option proto dhcp
Then, using Esc, go to command mode and type : wq and Enter to save and exit the editor. To exit without saving, type the command : q! . These settings mean that the emulated "router" will try to get an available ip address. If you do not have a real router and the ability to get more than one address, select the Virtual Host Adapter mode in the VirtualBox network settings.
To apply the new settings, restart the virtual machine or enter /etc/init.d/network restart .
After loading, look up the virtual machine address by typing ifconfig in the inet addr field of eth0:
  root @ OpenWrt: ~ # ifconfig
 eth0 Link encap: Ethernet HWaddr 08: 00: 27: 13: 00: 42
           inet addr: 192.168.1.23 Bcast: 192.168.1.255 Mask: 255.255.255.0
           UP BROADCAST RUNNING MULTICAST MTU: 1500 Metric: 1
           RX packets: 91 errors: 0 dropped: 0 overruns: 0 frame: 0
           TX packets: 65 errors: 0 dropped: 0 overruns: 0 carrier: 0
           collisions: 0 txqueuelen: 1000
           RX bytes: 10016 (9.7 KiB) TX bytes: 7749 (7.5 KiB)

 lo Link encap: Local Loopback
           inet addr: 127.0.0.1 Mask: 255.0.0.0
           UP LOOPBACK RUNNING MTU: 16436 Metric: 1
           RX packets: 48 errors: 0 dropped: 0 overruns: 0 frame: 0
           TX packets: 48 errors: 0 dropped: 0 overruns: 0 carrier: 0
           collisions: 0 txqueuelen: 0
           RX bytes: 3888 (3.7 KiB) TX bytes: 3888 (3.7 KiB)

 root @ OpenWrt: ~ #
Congratulations, OpenWrt is running and accessible over the network. Keep in mind: this address (192.168.1.23 in my case) is temporary and may change after restarting the emulator or after some time (several hours). Start Putty and try to connect to the virtual machine at this address. Login to connect - root, the password you set when you first boot.
File system access
Run WinSCP (or equivalent) and connect to the virtual machine.

You will see the standard two-pane file manager. Now you can edit configuration files in a convenient graphical mode. It is also possible to copy files to the "router" and back. Try to go to the right side of the root ( / ), and then in / etc / config / and run the network .

If desired, make changes and save the result.
Package installation
First, update the list of components available in the repository by entering opkg update , then try to install, for example, openvpn by entering opkg install openvpn . You can check the presence of a component and clarify its name with the opkg list command . You can also install packages without access to the Internet. Using WinSCP, transfer the packages to a writeable directory, such as / tmp / or to a USB flash drive, if available, and enter the command opkg install_path. You can use the Tab button to not type the name completely. For example, download the Russian language pack for LuCI at http://downloads.openwrt.org/backfire/10.03.1/x86_generic/packages/luci-i18n-russian_0.10.0-1_x86.ipk , rewrite it using WinSCP in / tmp / and in the emulator console, terminal, or Putty (see the WinSCP toolbar buttons after Synchronize), type opkg install /tmp/luci-i18n-russian_0.10.0-1-1_x86.ipk
  root @ OpenWrt: ~ # opkg install /tmp/luci-i18n-russian_0.10.0-1_x86.ipk
 Installing luci-i18n-russian (0.10.0-1) to root ...
 Configuring luci-i18n-russian.
 root @ OpenWrt: ~ #
Keep in mind that the architecture of your firmware and the package to be installed must match.
Web interface
Most versions of OpenWrt initially include the LuCI web shell. LuCI stands for Lua Configuration Interface. Navigate to the browser address of your “router” in the browser, enter the password specified at the beginning and you can experiment with LuCI.

Russian translation is available. To install, go to the System - Software section, type the word “russian” in the Filter field, and on the Available packages (russian) tab, install the luci-i18n-russian package. Or, install it using opkg as described above, and then select a language in the System - System - Language and Style - Language section.
Links
OpenWrt repository
OpenWRT Project Wiki
Wikipedia about OpenWrt
Network configuration in OpenWRT
OpenWRT, or What else can you do with your router?
Source: https://habr.com/ru/post/195592/
All Articles