We organize Asterisk IP telephony in the office without learning Linux
In this article I will tell you in steps about IP telephony organization in an office for 15 people using Asterisk in the form of an Askozia assembly, Intel NUC nettop and Linksys and Yealink phones ordered from Ebay, as well as estimate the costs of organizing communication with your telephony server plus I will try to talk about the advantages and disadvantages of this solution.
System requirements for hardware from Asterisk minimum. In principle, any modern platform will be suitable for our task. As such a system, I chose the Intel NUC DCCP847DYE with a Celeron processor and 2 gb memory. The internal SSD drive did not take.

For phones, I turned to Ebay auction, using the query "lot linksys spa" we get the following offers: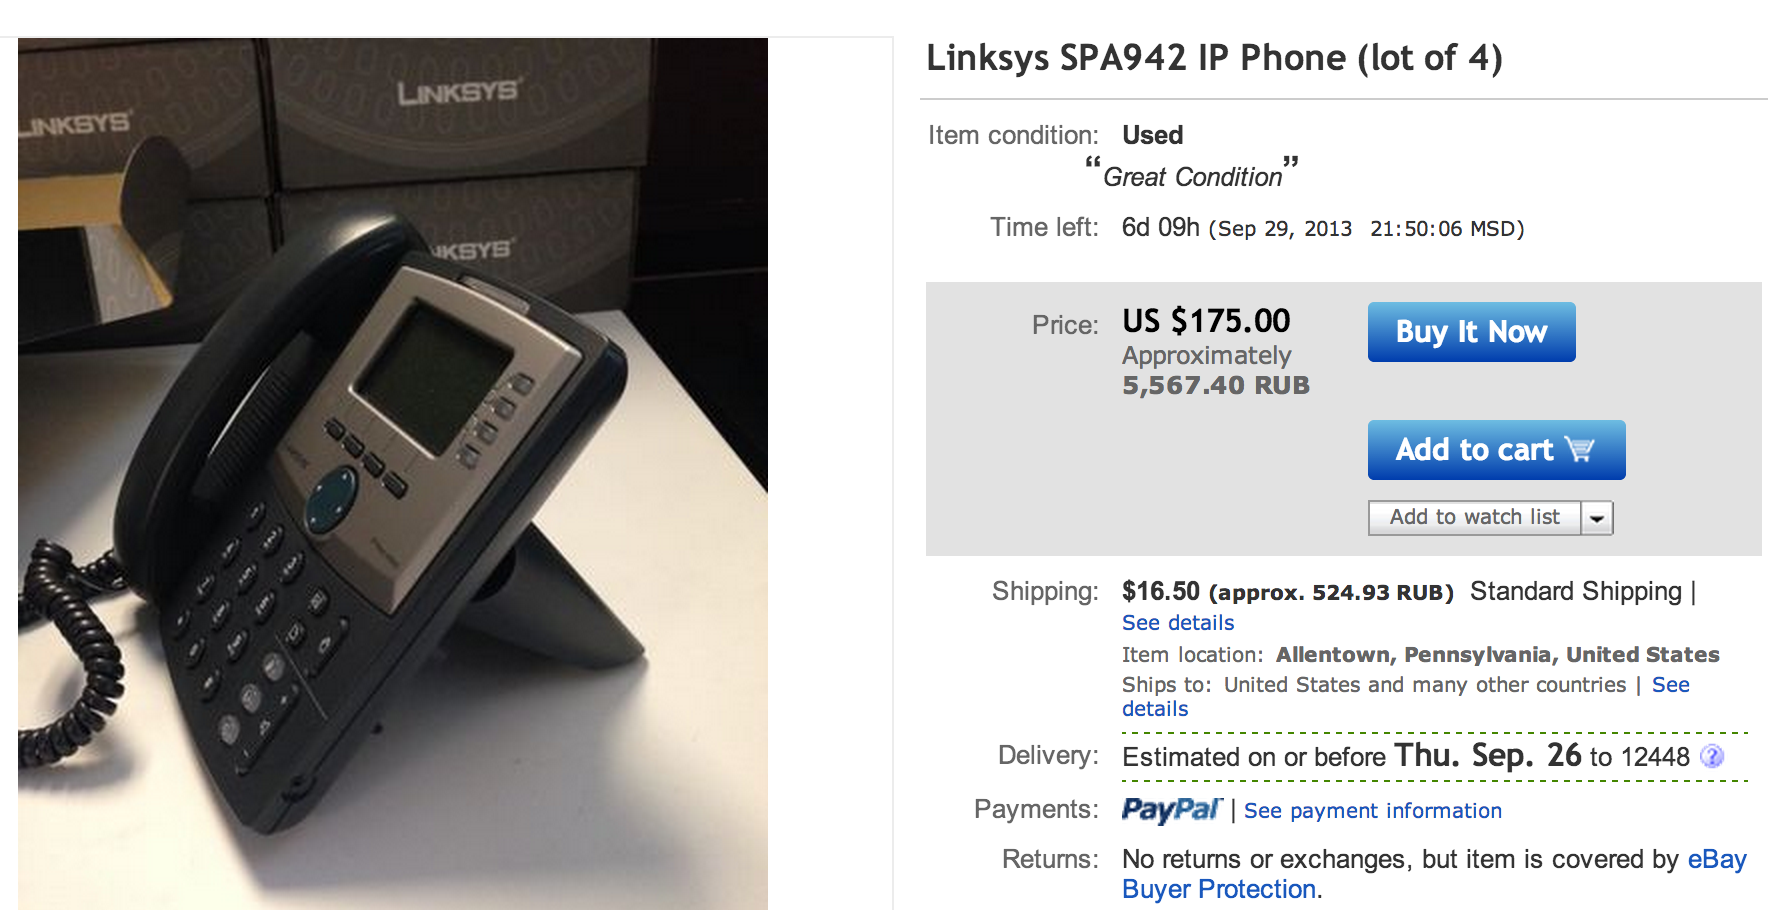
Using a sniper for ebay, mail forwarder and parcels with clothes, I brought a total of about 15 Lynksys, Cisco, Yealink (Cortelco) phones to my office in a few months. On average, 1 phone cost 2300 rubles. I tried to take older models with two ethernet ports, screen backlighting and POE. Well, for Sales managers and technical support specialists took on the same Ebay 6 Plantronics MX500i headsets
Rather convenient thing and quality of communication acceptable for our requirements. We even conduct webinars through it :)
At the time of the organization of IP telephony, I knew little about Asterisk and practically didn’t fumble in Linux, so I chose a ready-made “Asterisk distribution kit on a flash drive” - Askozia
')
As the main supplier, IP traffic was chosen, which was used earlier for several years, by the provider Mango Telecom . For outgoing, Multifon , Zadarma , PCTEL were added . Each of them has its advantages when calling in certain directions.
The phones were simply placed between the computers and the local network, the headsets were plugged into the phones, although they were connected to USB audio, which were useful for conducting webinars via a computer later :)
I will try to tell you about the IP PBX setting in detail, using the installation from scratch, so as not to miss anything important. To do this, I will start everything from the very beginning on the demo system and gradually bring its settings to the state of our workstation.
The image of an IP PBX in a couple of minutes was uploaded to the USB flash drive according to the instructions and plugged into the Intel NUC, in which I chose to boot from USB. The network has a DHCP server, because Askozia immediately received an address, which I replaced with a static one.
Actually, the work in the console is completed on this, and you can go to the web interface at the ip address displayed in the console.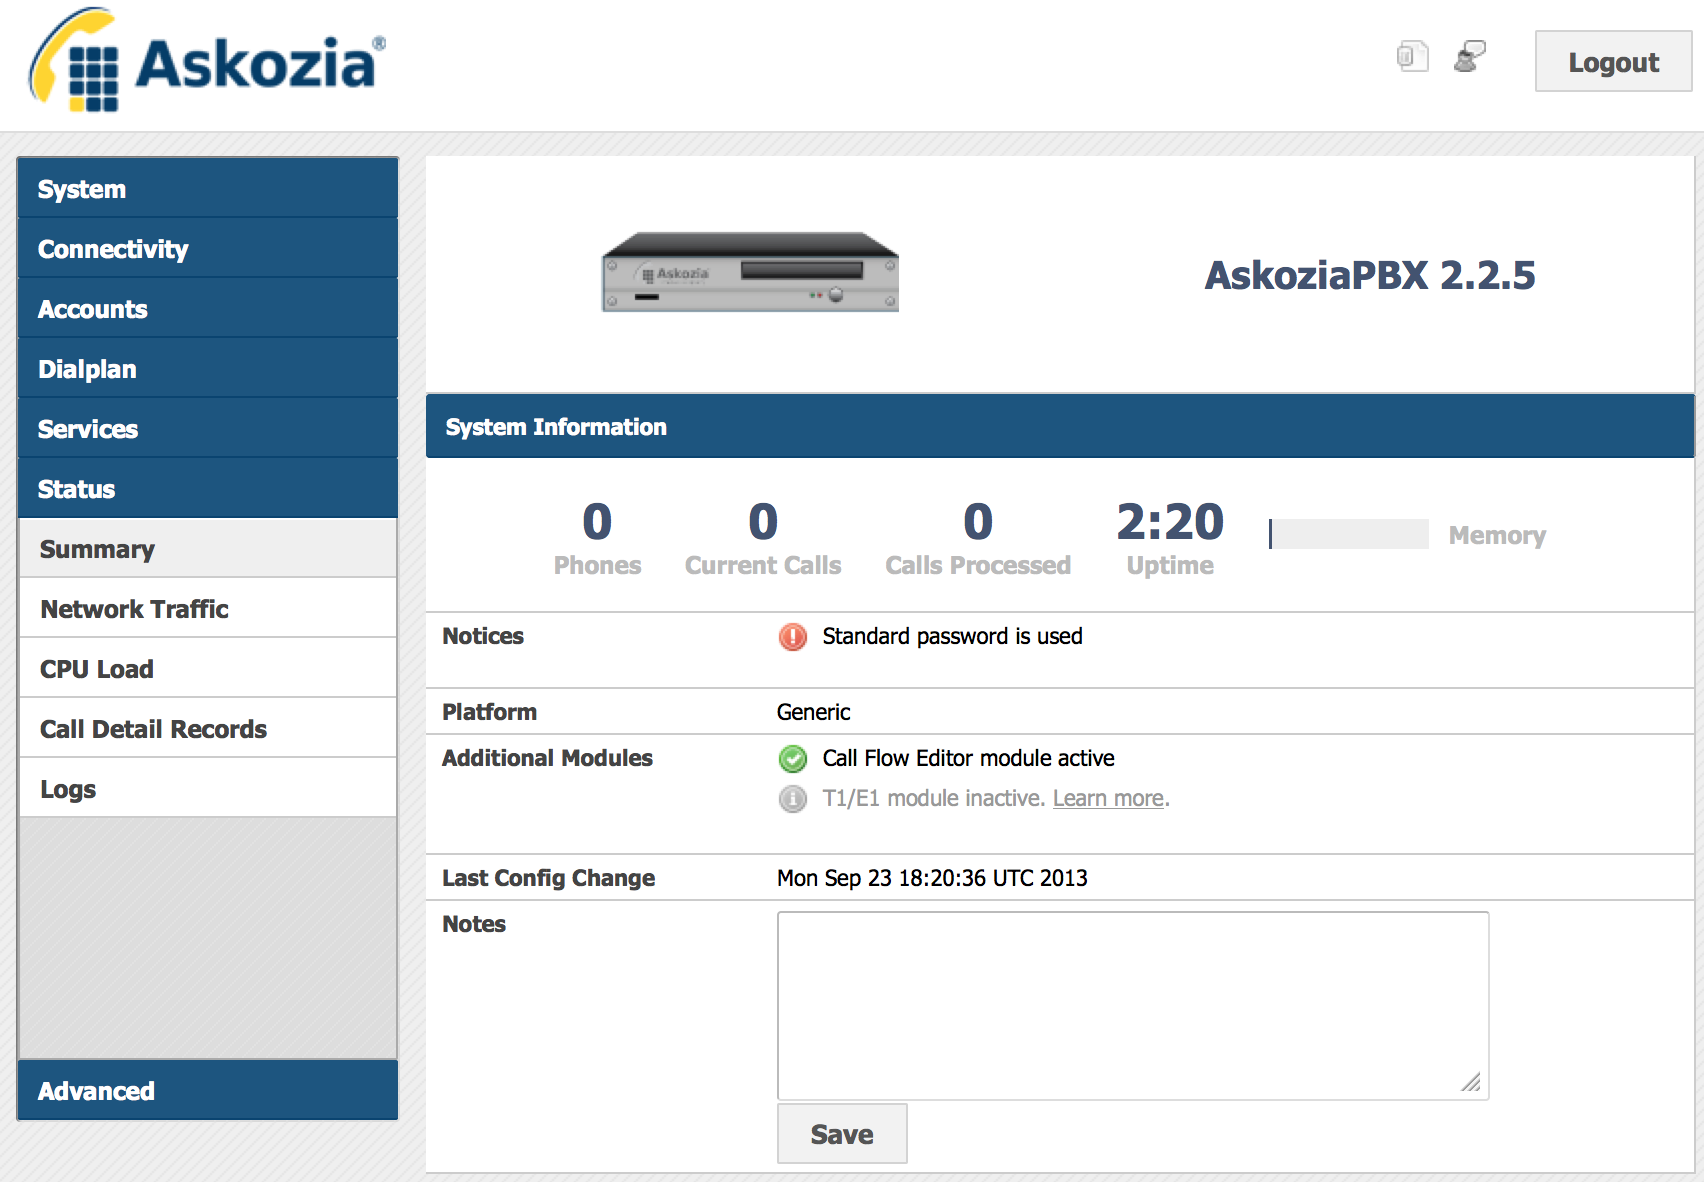
When we first log in, we log in using the default credentials of admin / askozia , go to the licenses tab and enter the keys received for the purchase.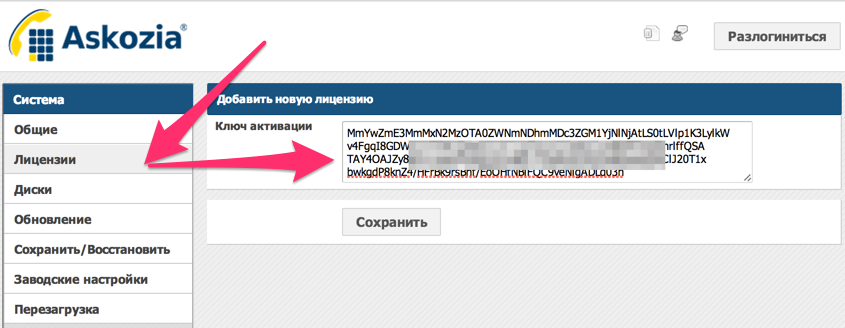
I have 2 keys, because we use an extended version of Askozia with a route editor. Enter them one by one, saving each key. In the general settings, change the password, set the Russian language.


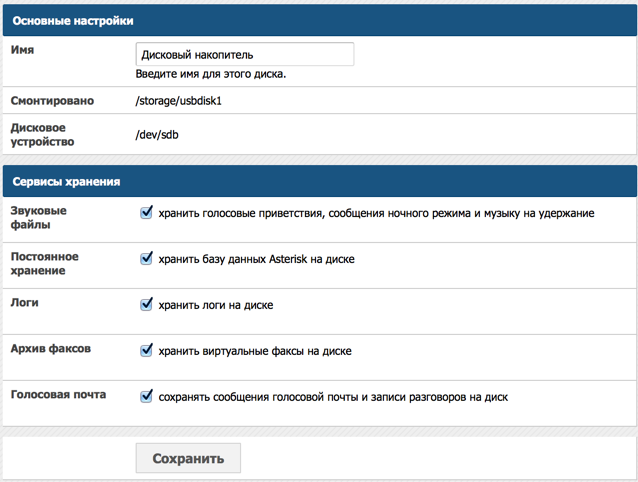
Next, in the settings, we connect an external drive for storing logs, voice mail and call history.
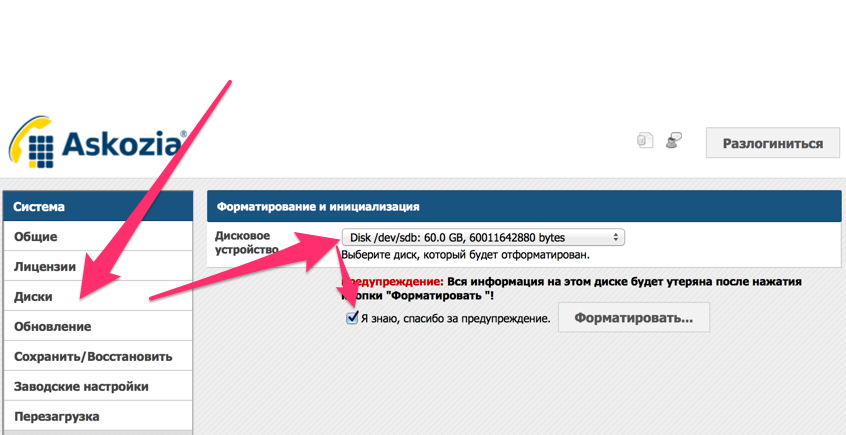
The disk is formatted in FAT, and it can be easily connected to any Windows machine to drop conversations.
Next, go to the configuration of IP phones. In Askozia there is a mechanism for automatically searching and configuring IP phones, there is a TFTP server for firmware and configuration files. Phones before auto-tuning must be reset to factory settings, after which they will be available in the Askozia interface. Of course, you can configure everything manually, to do this, you will need to register a host, login and password in each phone via the web interface.
And the same thing on the phone

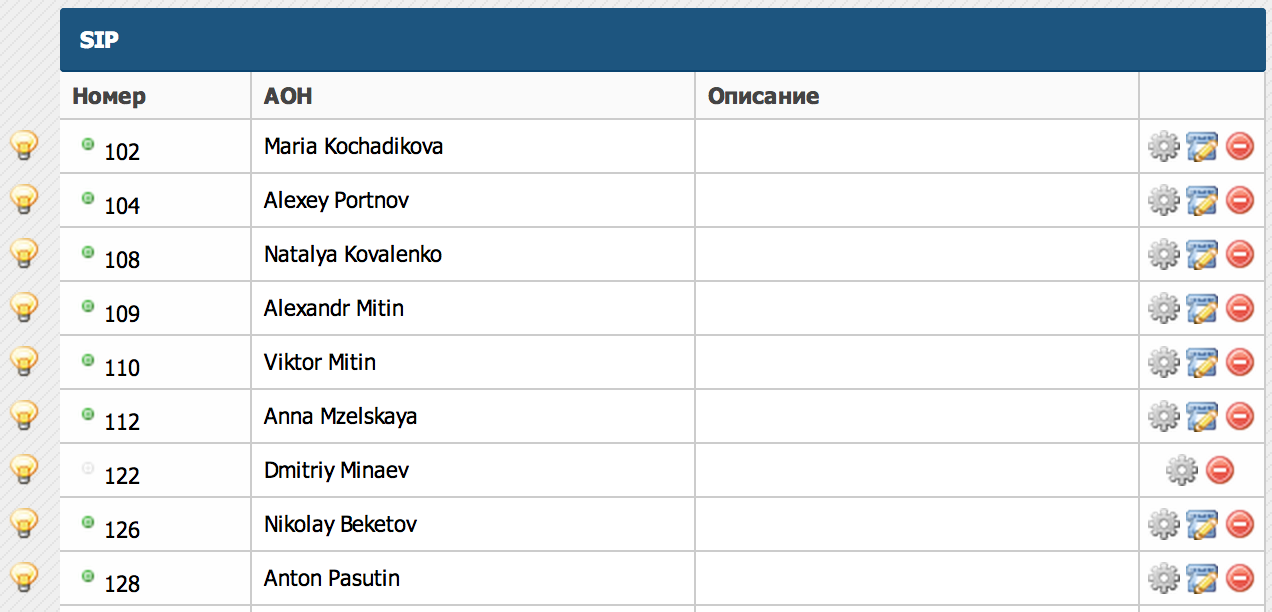
Add accounting for each employee
Next, we proceed to setting up the provider, for which we go to the Settings-Employees menu item in the personal account and add the Askozia employee, for whom we add a new SIP number in the settings.
As a result, we have the following data:

Set up a template for outgoing calls, in fact, we need only 2 countries.

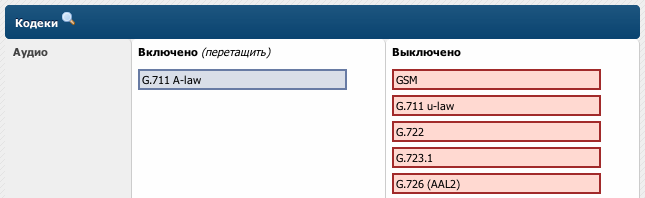
In codecs, only alaw is allowed.
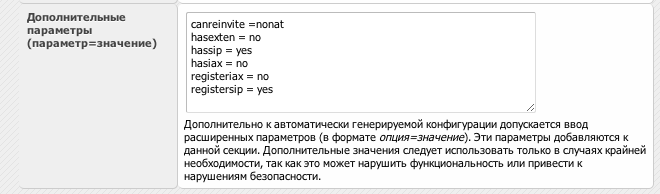
And we configure additional trunk parameters as follows. These parameters are given by Mango in his documentation for connecting to Asterisk.
After that, you can check the work of outgoing calls by dialing the number from any internal phone number in the format 7 (XXX) XXX-XX-XX
In order to make incoming calls, you need to allow them in the properties of the trunk. For example, we want all incoming calls to come to the internal number 0000002.

And in Mango Office’s personal account, we set up forwarding of all calls to our Askozia user.

As an incoming 000002, we use the call route in the form of a voice menu ( you called MIKO, to contact the sales department, press 1 ..., etc. ) How to make voice menus, I described in the last post .
Open the settings of the provider Mango Office, and set the parameters in the appropriate fields on the Additional tab:
As a result, we get a record of all external conversations structured by daddies, where the file name will contain the date, time and destination number of the subscriber.
To construct call routes, voice menus and departments, it is necessary to have employees' mobile phone numbers inside the PBX. To do this, we create them in the external accounting section, register the number and select the provider through which the call will go.
You can also make an external number using a SIP URI, for example, to merge several offices and assign short numbers to colleagues from other offices.
Set up a box for receiving fax messages.
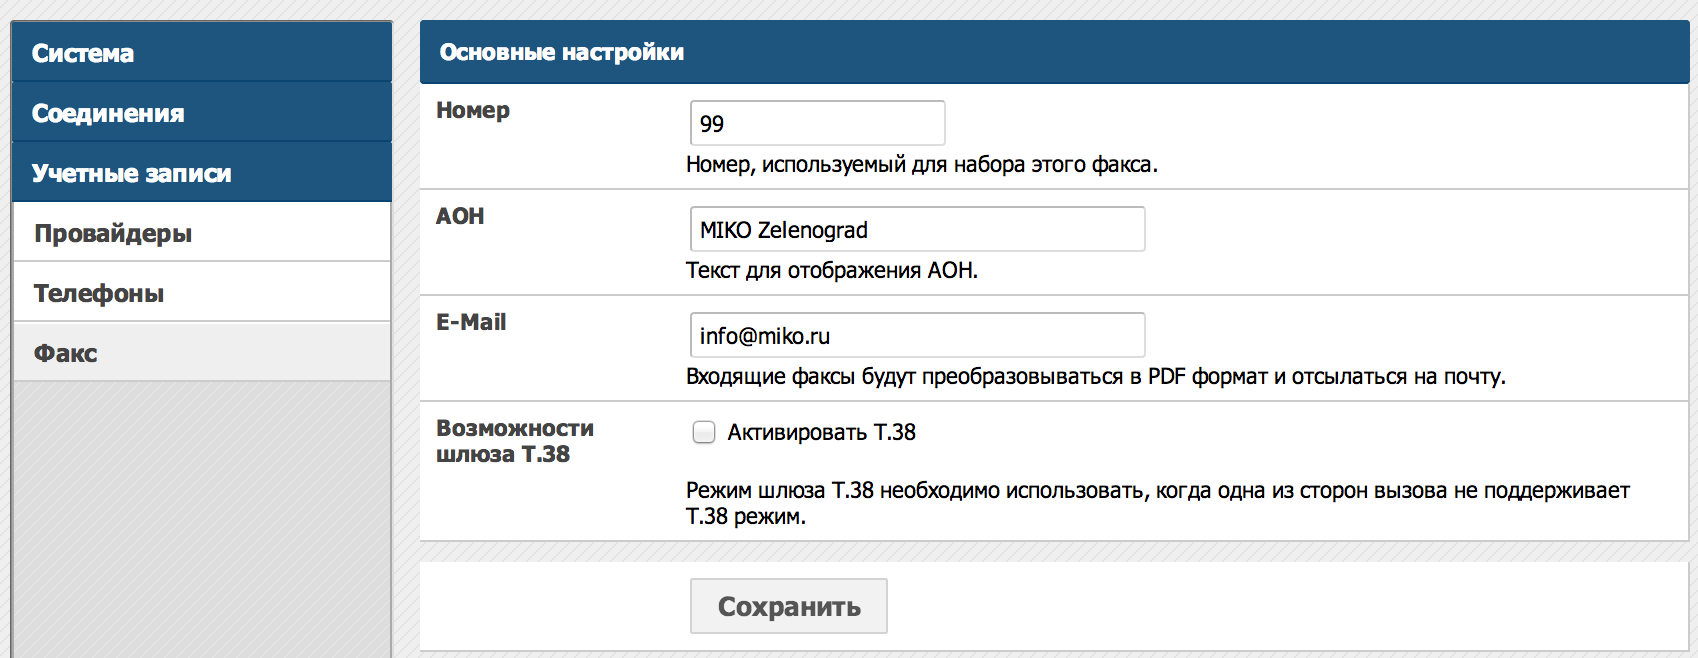
All incoming faxes will be sent to the general email box.
Previously, we used the cloud-based IP ATC from Mango Office, it is convenient and reliable, but it is tightly tied to the tariff and traffic through one provider, dramatically reducing the possibilities for expanding the functionality.
The cost of IP telephony of the office from 15 people "in an adult" amounted to 57,340 rubles .
You can save a significant amount on IP phones, which we tried to do using softphones, inconveniently! Now the company has a single multi-channel number, each employee has a convenient IP phone and headset on the table. We added the integration function with 1C: CRM , connected a call from the site , two-way Skype trunk. Communication costs are optimized by selecting an outbound provider, according to the number pattern. For remote workers via VPN we organize full-fledged workplaces.
Useful links:
Iron
System requirements for hardware from Asterisk minimum. In principle, any modern platform will be suitable for our task. As such a system, I chose the Intel NUC DCCP847DYE with a Celeron processor and 2 gb memory. The internal SSD drive did not take.
For phones, I turned to Ebay auction, using the query "lot linksys spa" we get the following offers:
Using a sniper for ebay, mail forwarder and parcels with clothes, I brought a total of about 15 Lynksys, Cisco, Yealink (Cortelco) phones to my office in a few months. On average, 1 phone cost 2300 rubles. I tried to take older models with two ethernet ports, screen backlighting and POE. Well, for Sales managers and technical support specialists took on the same Ebay 6 Plantronics MX500i headsets
Rather convenient thing and quality of communication acceptable for our requirements. We even conduct webinars through it :)
Soft
At the time of the organization of IP telephony, I knew little about Asterisk and practically didn’t fumble in Linux, so I chose a ready-made “Asterisk distribution kit on a flash drive” - Askozia
')
Multichannel number
As the main supplier, IP traffic was chosen, which was used earlier for several years, by the provider Mango Telecom . For outgoing, Multifon , Zadarma , PCTEL were added . Each of them has its advantages when calling in certain directions.
Installation and Setup
The phones were simply placed between the computers and the local network, the headsets were plugged into the phones, although they were connected to USB audio, which were useful for conducting webinars via a computer later :)
I will try to tell you about the IP PBX setting in detail, using the installation from scratch, so as not to miss anything important. To do this, I will start everything from the very beginning on the demo system and gradually bring its settings to the state of our workstation.
The image of an IP PBX in a couple of minutes was uploaded to the USB flash drive according to the instructions and plugged into the Intel NUC, in which I chose to boot from USB. The network has a DHCP server, because Askozia immediately received an address, which I replaced with a static one.
Actually, the work in the console is completed on this, and you can go to the web interface at the ip address displayed in the console.
When we first log in, we log in using the default credentials of admin / askozia , go to the licenses tab and enter the keys received for the purchase.
I have 2 keys, because we use an extended version of Askozia with a route editor. Enter them one by one, saving each key. In the general settings, change the password, set the Russian language.
Next, in the settings, we connect an external drive for storing logs, voice mail and call history.
The disk is formatted in FAT, and it can be easily connected to any Windows machine to drop conversations.
Setting up IP phones and SIP uchetok
Next, go to the configuration of IP phones. In Askozia there is a mechanism for automatically searching and configuring IP phones, there is a TFTP server for firmware and configuration files. Phones before auto-tuning must be reset to factory settings, after which they will be available in the Askozia interface. Of course, you can configure everything manually, to do this, you will need to register a host, login and password in each phone via the web interface.
And the same thing on the phone
Add accounting for each employee
Provider setting
Next, we proceed to setting up the provider, for which we go to the Settings-Employees menu item in the personal account and add the Askozia employee, for whom we add a new SIP number in the settings.
As a result, we have the following data:
- Login: AskoziaUser123456789
- Password: 6Ir2034 + 9098789987
- Host: mikru.mangosip.ru
- Phone number: +7 (495) 202-02-02
Set up a template for outgoing calls, in fact, we need only 2 countries.
In codecs, only alaw is allowed.
And we configure additional trunk parameters as follows. These parameters are given by Mango in his documentation for connecting to Asterisk.
After that, you can check the work of outgoing calls by dialing the number from any internal phone number in the format 7 (XXX) XXX-XX-XX
In order to make incoming calls, you need to allow them in the properties of the trunk. For example, we want all incoming calls to come to the internal number 0000002.
And in Mango Office’s personal account, we set up forwarding of all calls to our Askozia user.
As an incoming 000002, we use the call route in the form of a voice menu ( you called MIKO, to contact the sales department, press 1 ..., etc. ) How to make voice menus, I described in the last post .
Call recording
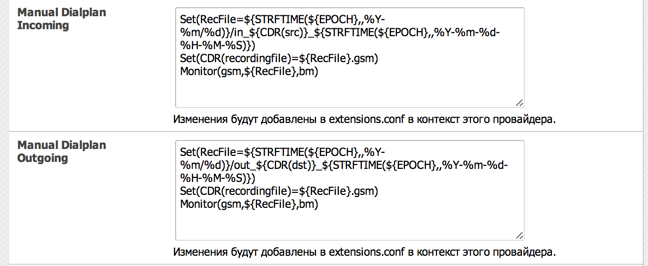
In Askozia, by default, there is only a recording of calls on demand, during a call, press * 1 and the recording begins, and at the end of the conversation, it is sent by email. But it’s not for nothing that we got a large external screw out of the cabinet and connected it to Askozia. Let us solve the problem of recording all external conversations totally. Add a dialplan command to the provider settings.Embed code Incoming conversation
Set(RecFile=${STRFTIME(${EPOCH},,%Y-%m/%d)}/in_${CDR(src)}_${STRFTIME(${EPOCH},,%Y-%m-%d-%H-%M-%S)}) Set(CDR(userfield)=${RecFile}.gsm) Monitor(gsm,${RecFile},bm) Embed code Outgoing conversation
Set(RecFile=${STRFTIME(${EPOCH},,%Y-%m/%d)}/out_${CDR(dst)}_${STRFTIME(${EPOCH},,%Y-%m-%d-%H-%M-%S)}) Set(CDR(userfield)=${RecFile}.gsm) Monitor(gsm,${RecFile},bm) Open the settings of the provider Mango Office, and set the parameters in the appropriate fields on the Additional tab:
As a result, we get a record of all external conversations structured by daddies, where the file name will contain the date, time and destination number of the subscriber.
Mobile Setup
To construct call routes, voice menus and departments, it is necessary to have employees' mobile phone numbers inside the PBX. To do this, we create them in the external accounting section, register the number and select the provider through which the call will go.
You can also make an external number using a SIP URI, for example, to merge several offices and assign short numbers to colleagues from other offices.
Fax machines
Set up a box for receiving fax messages.
All incoming faxes will be sent to the general email box.
Results
Previously, we used the cloud-based IP ATC from Mango Office, it is convenient and reliable, but it is tightly tied to the tariff and traffic through one provider, dramatically reducing the possibilities for expanding the functionality.
- Intel NUC DCCP847DYE platform - 6500 rub.
- Memory stick 2 gb - 850 rub.
- 2 gb flash drive for system - 300 rub.
- External USB screw for recording conversations lay in the closet.
- 15 pcs of IP phones (Lynksys, Cisco, Yealink) - 34,500 rubles.
- 6 pcs Plantronics MX500i - 3500 rubles.
- Askozia PBX with call route editor - 9190 rubles.
- Direct Moscow number in Mango - 2500 rubles connection and 250 rubles. subscriber.
The cost of IP telephony of the office from 15 people "in an adult" amounted to 57,340 rubles .
You can save a significant amount on IP phones, which we tried to do using softphones, inconveniently! Now the company has a single multi-channel number, each employee has a convenient IP phone and headset on the table. We added the integration function with 1C: CRM , connected a call from the site , two-way Skype trunk. Communication costs are optimized by selecting an outbound provider, according to the number pattern. For remote workers via VPN we organize full-fledged workplaces.
Useful links:
- For more information about Askozia, please follow the link.
- Provider Mango Telecom
- Prices for Intel NUC DCCP847DYE
- About the integration of Asterisk and 1C: CRM on habr
Source: https://habr.com/ru/post/194812/
All Articles