We do self-timer for almost any camera
 If anyone does not know, I have a hobby - copters and recently set myself the goal of raising something decent instead of a soap box for photographing from the air. But in the air, the buttons are not pressed, but to sculpt mechanics, to imitate fingers, is overweight and hemorrhoids with proper mechanics. Therefore, without hesitation, I looked at the hole with the words remote on the Panasonic G3 and it’s useful to google what you can do with it. And I got to a wonderful site with pinout of a similar connector for almost all cameras.
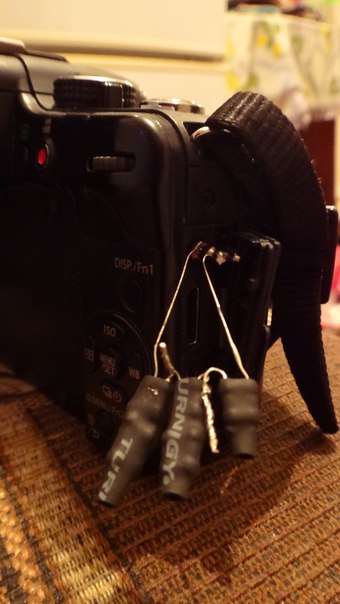
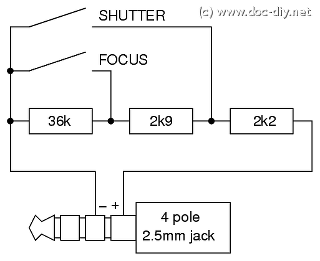
As it turned out, it all comes down to just shorting the contacts, but Panasonic threw care at it, having decided that it seems that everyone is not cool. Therefore, in the photo on the right you can see the terrible assemblies of series-connected resistors, in order to get a little closer to the face value indicated in the picture:
Of course, it was not possible to pick up exactly, but in the end everything worked and it didn’t even have to think about the focus button; when you “press” the shutter button, both of them immediately occur.
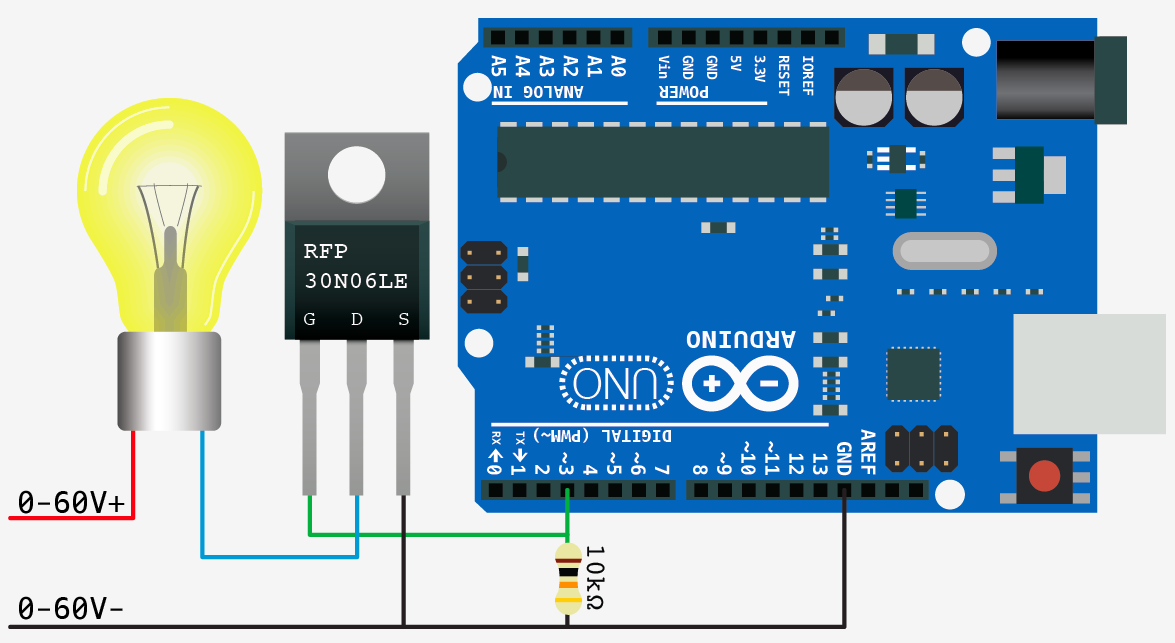
As you remember, I need it to control the camera in the air and, indulging in the wiring closure, I began to look for how to close these wiring through the Arduino. Serving + 5V is at least dangerous, just by short-circuiting the contacts without getting into the circuit, arduinka does not know how. The first thing that came to mind was a regular relay, but knowledgeable people told that there is such a thing - an n-fet, which will do the same, only easier and less by weight. RC modellers know that in any speed controller (ESC) of these fet's just filled up, that's why I finished one of the controls, dropping 3 n-fet at once with marking 4420, which led me to Si4420DY * Single N-Channel Logic Level PowerTrench ® MOSFET, which is exactly what I needed. Then (I’m not a radio amateur, forgive me) I began to look for how to connect this miracle to the Arduino, everything turned out to be very simple, for example, connecting a light bulb:
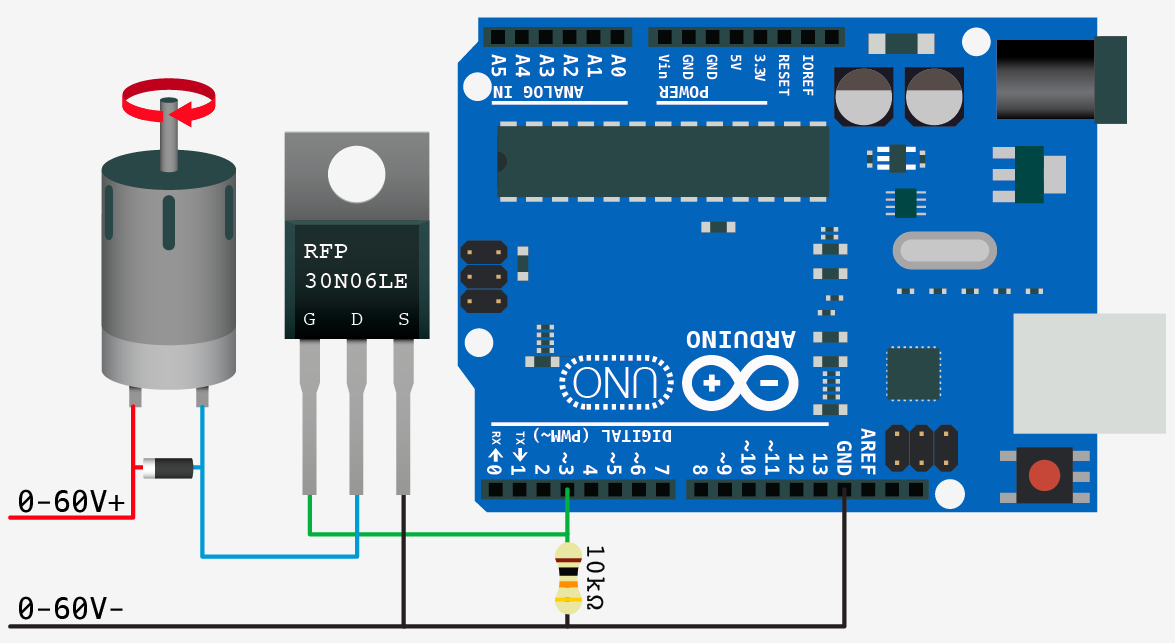
Or a motor:
After thinking and looking at the marking, I concluded that such a connection would work (before soldering, I checked with a knowledgeable person who gave the go-ahead):
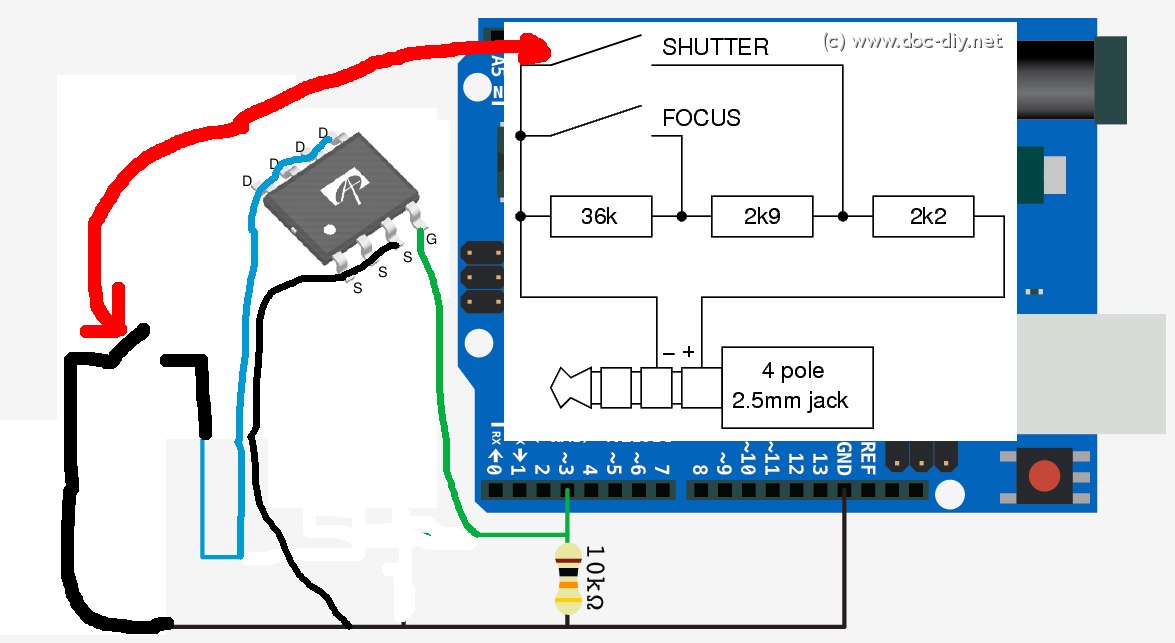
Soldered according to the scheme, filled in a small sketch:
void setup() { pinMode(13, OUTPUT); pinMode(3, OUTPUT); } void loop() { digitalWrite(13, HIGH); // digitalWrite(3, HIGH); // delay(500); // , // ( ) digitalWrite(3, LOW); // digitalWrite(13, LOW); // delay(5000); // 5 } Connect the Arduino to the camera and feed it:
As you can see, it works perfectly and then you can do anything, for example, add a variable resistor or a screen with buttons to change the delay before the descent. Or catch insects and animals crossing the sensor. Or just take pictures and then upload thieves to the Internet . Or make a rotating sample table with automatic photographing and make pseudo-3D models for online stores. Applications are mass and limited only by fantasy and needs.
But I was interested in working with a regular RC receiver. I will not bore the reader with details, and I don’t need it (and I don’t know exactly how this magic works). Therefore, a simple copy-paste project was laid out on github , so that anyone could complement and improve this thing for model aircraft and not only.
What to do if there is no specialized exit
Here it is already more difficult, sometimes the manufacturer leaves such an input for controlling the equipment in a clever proprietary connector, but the simplest and most dangerous option is to solder to the contacts of the shutter button of your camera.
I have dissected Sony tx55 (I also use it on a copter, the video shoots perfectly , it weighs only 100 grams).
An autopsy showed just such a beauty of very small sizes. The tester was able to find out which contacts are responsible for pressing the focus button (half-pressing) and the buttons of the descent itself.

Then the file sharpened a soldering iron and very carefully fitted 3 wires: focus, shutter and gnd (ground / common).

After that, he turned on the camera and tried to close the contacts, it turned out that it was necessary to close everything immediately, i.e. focus and shutter to the ground. For the future connection, the Arduino brought the contacts to the comb:

In terms of aesthetics, this is of course terrible, but the soap box is used exclusively on copters, where such things do not bother anyone at all - the main thing is to be easy and work.
It would be possible to display the zoom buttons (zoom) and connect them through the remaining n-fets. Unfortunately, the button to start the video recording is made as an icon on the screen, where you can’t solder the wires.
The article is confusing, but I hope it will be pleasant and will benefit photographers and not only.
Opponents of the Arduino controllers, I hasten to assure you that at the touch of a button, the matter will not end. And forgive me for such a lame description of the process.
')
Source: https://habr.com/ru/post/193746/
All Articles