Homemade LED illuminator for photo and video
Last winter in our musical group the idea was born - to make a video, or rather a small movie on one of our favorite songs. They invented a good script, our artists (they are the main character and heroine) literally painted every frame - how it should look. Scenes rehearsed. It remained a matter of technology - to wait for the snowfall required by the scenario, and go shoot. Well, actually, the technique. What to shoot - there was no question, two good digital cameras and manual lenses gave an excellent cine picture. Another question is light. Almost all scenes are nocturnal, and the attempt to use the existing light was unsuccessful. Illuminators were needed, and with autonomous power supply, not to search in the middle of the city where to connect.
We tried several rented video illuminators from wedding photographers and realized that there should be much more light - you need to be able to use umbrellas, lenses and the like, and the video light only allowed to highlight the close scene from the camera.
As a result, it was decided to do the illuminators themselves. The technical specification was as follows: the device should replace the halogen illuminator with a 200 W light bulb, consume a minimum of electricity and operate on a twelve-volt battery. The possibility of changing the angle of divergence of the light beam is desirable, and the whole structure should not cost as much as an airplane.
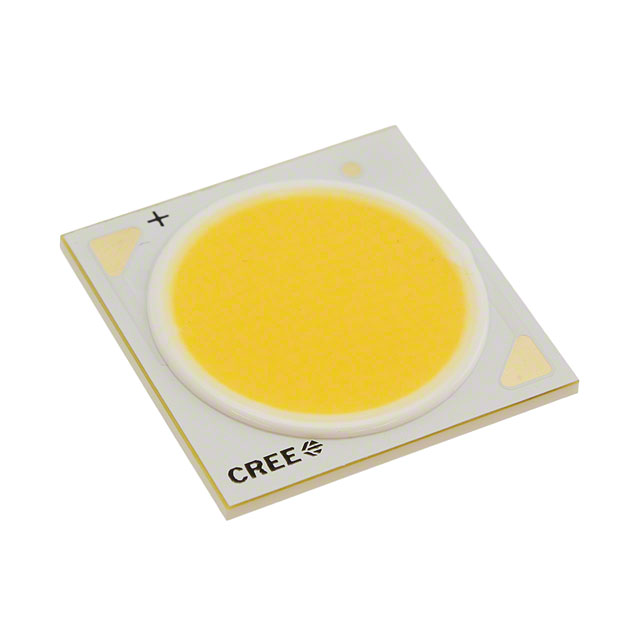
The Cree CXA2530 LED matrix was chosen as the light source. Why precisely she? Firstly, it was on sale. Secondly, Cree provides very detailed documentation for its products, unlike Chinese manufacturers selling "cats in a bag." It is also important and relatively decent color and stability characteristics in time. And under these matrices a great series of Ledil reflectors was found.
To implement the idea, during the next trip to Kiev (the Ukrainian post doesn’t work better than the Russian one) three sets were purchased in the online store beriled.biz, including LEDs themselves, which increase the drivers designed for these matrices and output the stabilized current they need for 1 A at voltages up to 45 V and excellent reflectors Ledil Lenina CN13349_LENINA-W-DL.
What is so great about these reflectors? They consist of two parts - the reflector itself and a plastic ring-flange with two screw holes and a large hole for the matrix, with which the latter is pressed against the radiator. At the same time, the problem is solved - how to fix a ceramic square 24x24 mm on a heat sink without any holes. The reflector joins this ring by means of a bayonet joint, the same for the whole series of reflectors - they are big and small, smooth, stepped, “crumpled” and dull, at different angles and different shapes (including “kososvet”). So you can buy a whole bunch of different reflectors and change them depending on the needs when shooting.
Perhaps the most important thing in any LED luminaire is the cooling system. Heat LEDs emit as a good CPU, the working temperature of them - the lower the better. First, with increasing temperature, efficiency decreases — at one hundred degrees it may fall by one and a half times. Secondly, at high temperature, the LEDs quickly degrade. Therefore, the cooling should be good and for the forty-watt LED assembly it should be something like a CPU cooler. Only a light bulb buzzing with a cooler is a bust, so let the cooling be passive.
Different companies produce a wide range of radiators specifically for LED lighting. There are even specially designed not only for Cree CXA25xx arrays, but also for the reflectors chosen by us - with holes for screws in the right places. We could not find such ones on sale, so we had to be content with a computer cooler. In the nearest computer store, a cooler for an already irrelevant Socket 775 GlacialTech 5066Cu was bought on trial for a sample. The radiator in it is a "sun" - the core, from which the rays of the ribs diverge. The core of the copper core was found - which is important for such a concentrated heat source.
The radiator required a little refinement. Coolers are designed for fan cooling. Even "passive" - work inside the case, which creates air flow. Therefore, their ribs are made frequent - the surface area is larger, and the increased aerodynamic drag is still easily overcome by the fan. For natural convection, these ribs are an insurmountable obstacle, so they do not work at all, the air between them does not penetrate. The way out is to thin these ribs through one. You can break out every other edge, but it is time consuming, easier and better to bend it to the next.
The first experiment with a matrix glued with thermal paste on the radiator showed that it was not enough. The temperature quickly reached a critical and forced to turn off the power. So I had to run to the store again and buy another one. Two radiators were twisted together with thermal paste at the junction - and a check showed that this “sandwich” was already quite enough.
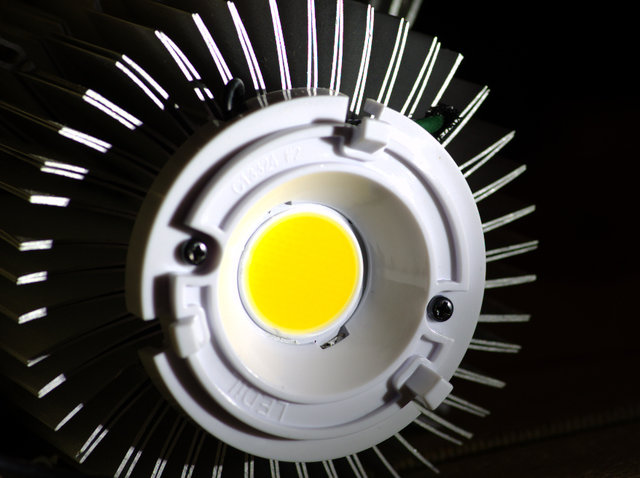
It only remained to install the flange from the reflector in place, screwing it into two screws. I screwed them right between the radiator fins - the attachment strength turned out to be quite sufficient. When you repeat, keep in mind: the matrix is ceramic, fragile. Strong tightening, misalignment and excess thermal paste can easily lead to substrate failure.
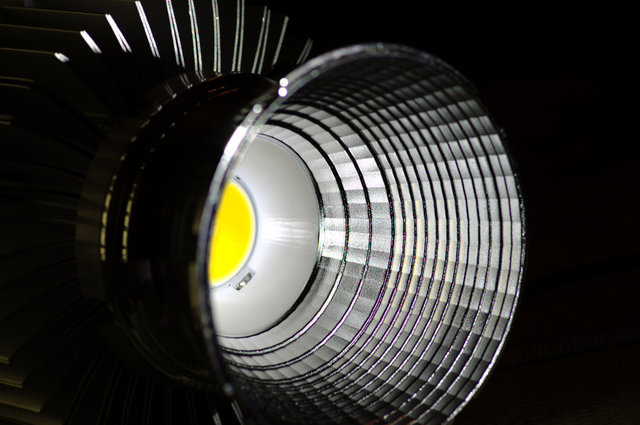
We install a reflector on the flange, and we get an illuminator working in principle. A small part separates one from the worker in the case - the driver, in the form of a board stuck to a thermoscatch on some random piece of the radiator, dangles on the wiring and that looks off. Therefore, we had to shove it into a small plastic box with ears, and provided him with a good radiator cooling from some old motherboard, and to show a little ingenuity to fix this box on the radiator.
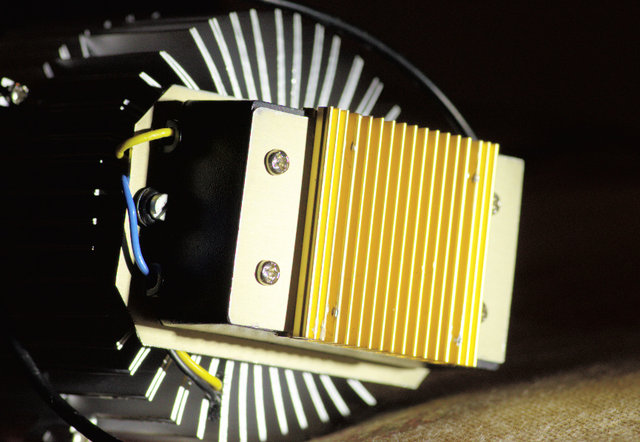
This is what the illuminator assembly looks like:

')
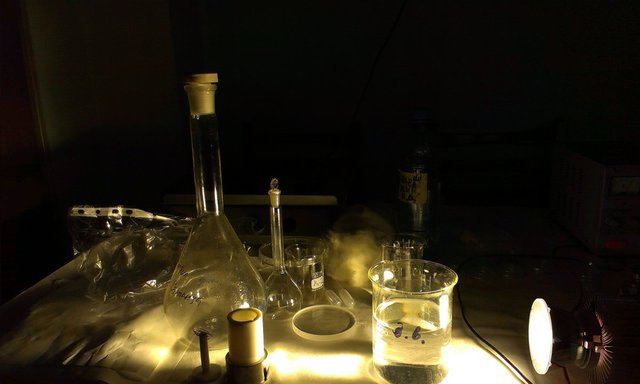
Immediately on the spot with his help we remove the still life in the workplace.
And in conclusion - about the price. All materials pulled about 2000 rubles. The time spent on the assembly (not counting the trip to the store behind the radiators) is about an hour.
We tried several rented video illuminators from wedding photographers and realized that there should be much more light - you need to be able to use umbrellas, lenses and the like, and the video light only allowed to highlight the close scene from the camera.
As a result, it was decided to do the illuminators themselves. The technical specification was as follows: the device should replace the halogen illuminator with a 200 W light bulb, consume a minimum of electricity and operate on a twelve-volt battery. The possibility of changing the angle of divergence of the light beam is desirable, and the whole structure should not cost as much as an airplane.
The Cree CXA2530 LED matrix was chosen as the light source. Why precisely she? Firstly, it was on sale. Secondly, Cree provides very detailed documentation for its products, unlike Chinese manufacturers selling "cats in a bag." It is also important and relatively decent color and stability characteristics in time. And under these matrices a great series of Ledil reflectors was found.
To implement the idea, during the next trip to Kiev (the Ukrainian post doesn’t work better than the Russian one) three sets were purchased in the online store beriled.biz, including LEDs themselves, which increase the drivers designed for these matrices and output the stabilized current they need for 1 A at voltages up to 45 V and excellent reflectors Ledil Lenina CN13349_LENINA-W-DL.
What is so great about these reflectors? They consist of two parts - the reflector itself and a plastic ring-flange with two screw holes and a large hole for the matrix, with which the latter is pressed against the radiator. At the same time, the problem is solved - how to fix a ceramic square 24x24 mm on a heat sink without any holes. The reflector joins this ring by means of a bayonet joint, the same for the whole series of reflectors - they are big and small, smooth, stepped, “crumpled” and dull, at different angles and different shapes (including “kososvet”). So you can buy a whole bunch of different reflectors and change them depending on the needs when shooting.
Perhaps the most important thing in any LED luminaire is the cooling system. Heat LEDs emit as a good CPU, the working temperature of them - the lower the better. First, with increasing temperature, efficiency decreases — at one hundred degrees it may fall by one and a half times. Secondly, at high temperature, the LEDs quickly degrade. Therefore, the cooling should be good and for the forty-watt LED assembly it should be something like a CPU cooler. Only a light bulb buzzing with a cooler is a bust, so let the cooling be passive.
Different companies produce a wide range of radiators specifically for LED lighting. There are even specially designed not only for Cree CXA25xx arrays, but also for the reflectors chosen by us - with holes for screws in the right places. We could not find such ones on sale, so we had to be content with a computer cooler. In the nearest computer store, a cooler for an already irrelevant Socket 775 GlacialTech 5066Cu was bought on trial for a sample. The radiator in it is a "sun" - the core, from which the rays of the ribs diverge. The core of the copper core was found - which is important for such a concentrated heat source.
The radiator required a little refinement. Coolers are designed for fan cooling. Even "passive" - work inside the case, which creates air flow. Therefore, their ribs are made frequent - the surface area is larger, and the increased aerodynamic drag is still easily overcome by the fan. For natural convection, these ribs are an insurmountable obstacle, so they do not work at all, the air between them does not penetrate. The way out is to thin these ribs through one. You can break out every other edge, but it is time consuming, easier and better to bend it to the next.
The first experiment with a matrix glued with thermal paste on the radiator showed that it was not enough. The temperature quickly reached a critical and forced to turn off the power. So I had to run to the store again and buy another one. Two radiators were twisted together with thermal paste at the junction - and a check showed that this “sandwich” was already quite enough.
It only remained to install the flange from the reflector in place, screwing it into two screws. I screwed them right between the radiator fins - the attachment strength turned out to be quite sufficient. When you repeat, keep in mind: the matrix is ceramic, fragile. Strong tightening, misalignment and excess thermal paste can easily lead to substrate failure.
We install a reflector on the flange, and we get an illuminator working in principle. A small part separates one from the worker in the case - the driver, in the form of a board stuck to a thermoscatch on some random piece of the radiator, dangles on the wiring and that looks off. Therefore, we had to shove it into a small plastic box with ears, and provided him with a good radiator cooling from some old motherboard, and to show a little ingenuity to fix this box on the radiator.
This is what the illuminator assembly looks like:
')
Immediately on the spot with his help we remove the still life in the workplace.
And in conclusion - about the price. All materials pulled about 2000 rubles. The time spent on the assembly (not counting the trip to the store behind the radiators) is about an hour.
Source: https://habr.com/ru/post/193644/
All Articles