MarsBoard is a modest RPi clone. Install and configure the system
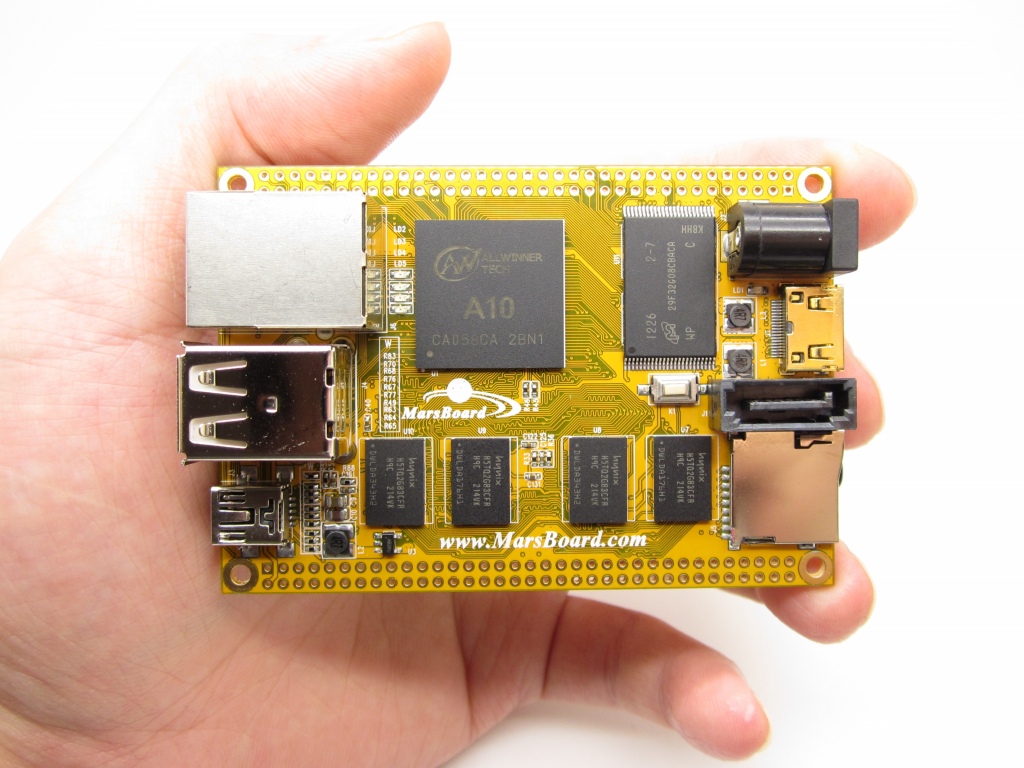
Good day, residents of Habr! Some time after playing with the Raspberry Pi , I got a clone of this board in my hands - the MarsBoard on the Allwinner A10 chip. Specifications can be found here . I was attracted by 4 things - low power consumption (500mA, which is lower than that of the RPi), the presence of a SATA-connector, USB-OTG and embedded NAND-storage. Who is interested - read on.
The kit (finally!) Guessed to put the minimum necessary cables (power, SATA, USB-OTG). Grieve one BUT: HDMI gives out only FullHD video signal, so connecting to a standard 4: 3 monitor will not work - you will see a black screen.
First start
To test the performance, you can run MarsBoard without a memory card, in which case the default NAND Android 4.0.4 ICS with minimal functionality will be loaded.
')
At the time of receiving the board, I did not have an HDMI cable, but I wanted to “poke” right away. So we will configure the system for SSH.
For the initial setup we need:
- Power Adapter Cord. There is a set. The end stuck into the device resembles a charge from a nokia (narrow tube). The other end (USB) can be connected to the USB-output of the computer, the energy is enough.
- microSD-card at 4GB minimum (preferably at 8, for safety). Included.
- Card reader for the computer.
- Ethernet cable. Not included.
First you need to download the system image from the offsite. I chose the image of Lubuntu 12.04 v4 with LXDE, and I will base it on his example. Link to the image - www.haoyuelectronics.com/marsboard/lubuntu-desktop-12.2.04-4-720p-marsboard.img.7z
We will also need the Win32DiskImager utility for Windows to fill the image, for Linux we will use the standard
dd .So, download and unpack the img-file from the archive, connect the microSD through the card reader.
Further:
for windows
- Run Win32DiskImger
- Specify the path to the img-file of the system image and the drive letter with the memory card
- Click "Write"
for linux
- We start the terminal
- Format the USB flash drive:
marsboard@marsboard ~ $ sudo dd if=/dev/zero of=$card - We write an image:
marsboard@marsboard ~ $ sudo dd if=$img of=$card
Where$cardis a flash drive device (for example,/dev/sdc), and$imgis the path to the img file of the system image
We are waiting for the completion of operations. We insert the card into the board and plug it into the network. 4 LEDs should light up next to the processor and 1 next to the HDMI output.
Network Setup
To continue the configuration, we will use a local area connection. We connect the board and router with an Ethernet cable. Next, go to the web interface of the router and see which IP was automatically assigned to our board by the DCHP server. Connect via SSH using this IP.
Login:marsboard
Password:marsboard
I advise you to immediately determine the static IP for the device. To do this, open the file
/etc/network/interfaces and add the following to it: auto eth0 iface eth0 inet static # IP : address 192.168.0.104 # netmask 255.255.255.0 # : gateway 192.168.0.1 I use nano, but it is out of the box in the system, so do not forget to install:
marsboard@marsboard ~ $ sudo apt-get install nano One more thing. For reasons unknown to me, when developing the DNS processing service system, localhost (127.0.0.1) was slipped into the config, which caused
apt-get update and install some packages to fall off. So let's add another Google DNS server: marsboard@marsboard ~ $ sudo echo "nameserver 8.8.8.8" > /etc/resolv.conf Reboot, reconnect by our static IP. Then you can perform the initial setup of the device, according to your spiritual needs, for example, put a VNC server if the HDMI cable never appeared, or disable the graphical shell completely if you only work on the console (Linux, all the same).
UPD1: fixed the configuration of interfaces
Source: https://habr.com/ru/post/193390/
All Articles