On the simple construction of low-cost WIFI bridges
About the choice of media
The topic is a background to a post about setting up a network client on a DOS machine . I will talk about how wireless channels like a bridge can greatly simplify the construction of CSD in industrial premises. Stories from experience in one enterprise. In the topic there will be no secrets of complex settings - on the contrary - the value of examples is that this configuration can be repeated easily and inexpensively.
Attitude to WIFI (namely, about this technology speech) I have a controversial. On the one hand, data transmission without wires allows you to build beautiful networks without installation work on the correct placement of the cable. Many devices - laptops, tablets, phones - are convenient in the absence of wires. Wired networks can not be so quickly scaled: for example, connect a couple of dozen new devices to the network in a minute.
On the other hand, the use of WIFI imposes limitations that are present in wired networks: for efficient use of equipment, it is necessary to choose the right location, while calculating the transmitter power taking into account obstacles and distances to the receiver. The key difference here is a smaller distance to the receiver, where the quality of communication is comparable to the wired connection (tens and hundreds of Mbit / s). When choosing a data transmission medium, it is necessary to find compromises based on goals. We sacrifice price, speed or mobility.
About the first network segment
Conditions
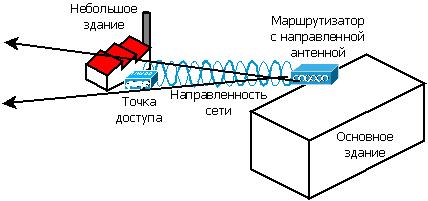
A separate shop is connected to the local network via a radio channel: the ASUS router lies on the window of the main building, and the TP-LINK access point lies on the window of the connected room. There are only four computers in this small building, fast access to the network is not required, there is not much work at the computers. The distance between the windows is 120 m.

The home router has two omnidirectional antennas and provides sufficient signal power to connect in the opposite building. Inefficient use of equipment leads to large packet losses, especially in the fog.
Decision
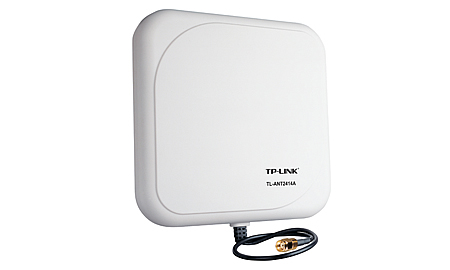
It is rather funny to hear that the quality of communication in the local network of an enterprise depends on the weather, but this is so. It should be noted that in this mode, the shop worked for about a year, then I began to deal with the network. Improvement here was not a priority, so I ordered a cheap unidirectional TP-LINK TL-ANT2414A antenna, which is enough to screw in instead of a standard router antenna, and this was where the work was suspended.
The task moved from the list of important to urgent, when one fine morning the router failed. I had to replace what was in stock from the routers with removable antennas. Found D-LINK DI-824VUP - an excellent router with a brutal appearance. It is configured quite simply, has a bunch of features, including VPN and port forwarding, but this is the topic of another article.
')
Configure the router as a base station
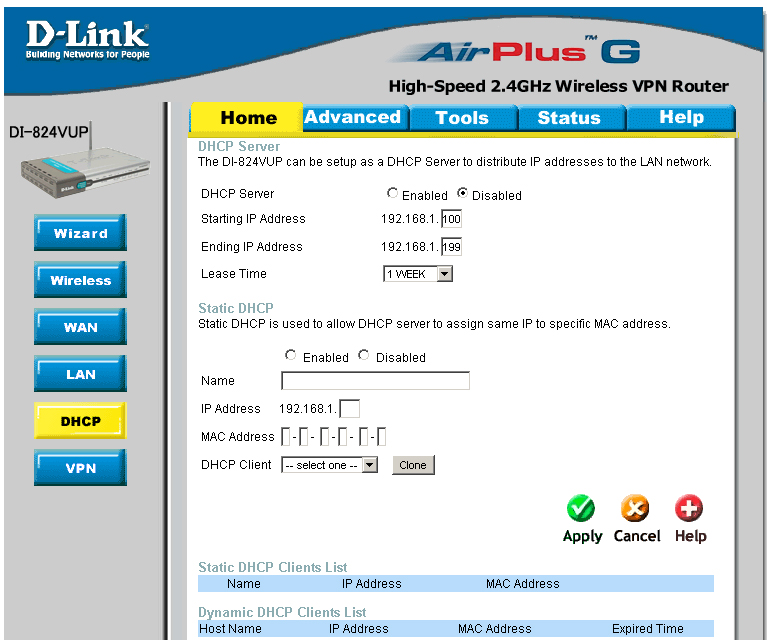
From the main menu on the left I turn on the DHCP button and first of all turn off the distribution of addresses, because Our network already has DHCP.
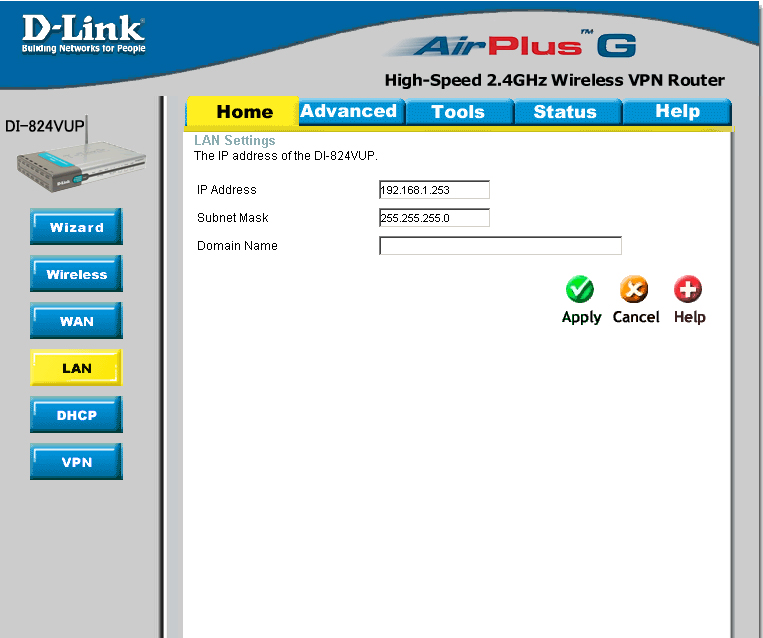
Then go to the network settings and specify the new address of the router.
By clicking the Wireless button, we specify the settings of the wireless network, namely the name, encryption and key.


Then go to the network settings and specify the new address of the router.

By clicking the Wireless button, we specify the settings of the wireless network, namely the name, encryption and key.

Configure the access point as a client
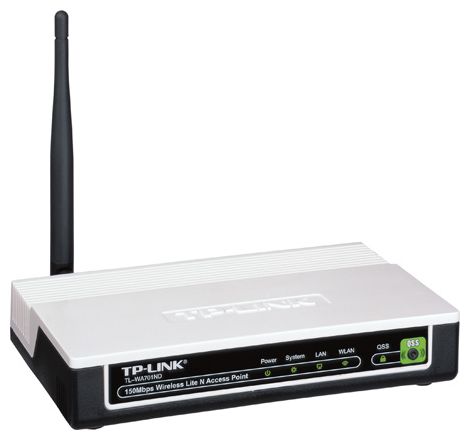
After tuning, I screwed the antenna to the router and secured it in the direction of the shop window. It remains only to configure the TP-LINK TL-WA701ND access point as a WIFI client.
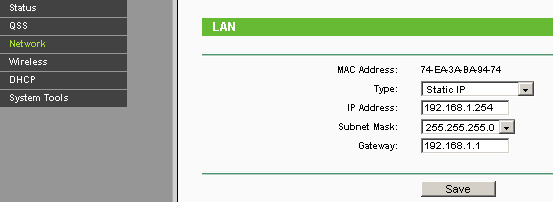
From the AP main menu I go to the network settings via the Network button located on the left panel. Here I specify the ip-address, mask, default gateway.
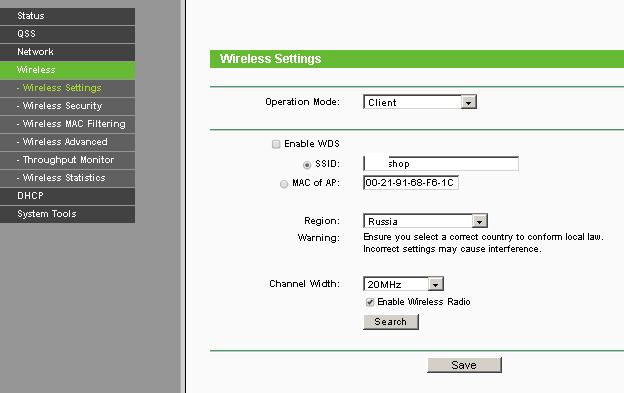
In the Wireless Setings menu, I select the Client mode, indicating the desired network.
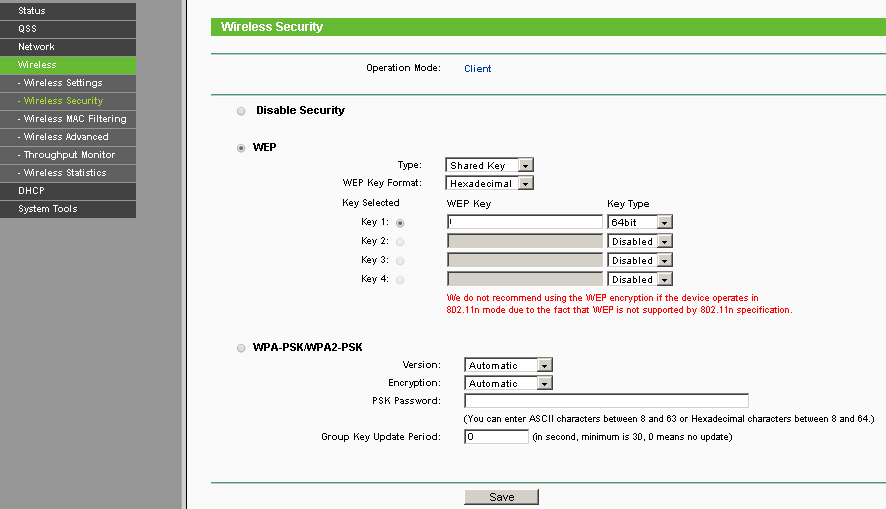
This is where wireless security is configured. You must specify the encryption type and network key.
It is important not to forget to disable the access point's DHCP server, since he is already online.


From the AP main menu I go to the network settings via the Network button located on the left panel. Here I specify the ip-address, mask, default gateway.

In the Wireless Setings menu, I select the Client mode, indicating the desired network.

This is where wireless security is configured. You must specify the encryption type and network key.

It is important not to forget to disable the access point's DHCP server, since he is already online.

Result
According to my pings, after the modification of the network, the packet loss was 70% less. The connection speed on computers in a small building allows you to download files from the Internet and the factory network, as well as work in 1s. In case you need to increase the number of computers in the connected room, or you need more speed, you should lay the fiber optic line.
About the second network segment
Conditions
The local network of the workshop is a production server (Windows server 2003 - DNS, DHCP, VPN, service), WIFI-router Mikrotik RB2011UAS-2HnD-IN and a dozen of WIFI-clients (service consumers).
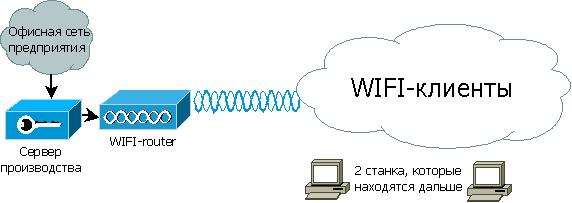
Also there are 2 machines that are farther from the rest of the WIFI router. The signal in that part of the workshop at the height of the machine is much worse, because The review is limited, but a good one is closer to the ceiling. And one of the machines uses the OS MS DOS. The location of the machines is such that laying the cable is difficult - it is required to run the cable around, which is more than the distance to the router directly (about one hundred meters). You also need to organize the cable channel. The distance directly from the router to the pole, which is located next to the machine 63 m, according to the laser line.
It is required to ensure a stable connection of 2 machines, which are located in the far part of the workshop. High connection speed is not required, since The network is needed to receive files smaller than 1 MB.
Decision
Laying the cable through the entire workshop is a thankless task. Moreover, the length could exceed 100 m, which is not very good for Fast Ethernet. A D-LINK DAP-1150 / RU access point and a D-LINK DIR-620 rev A1 router were available. In order to save money and effort, it was decided to connect one of these devices to the workshop router, and lower the patch cord to the machine. This will save on cable, boxes and installation work. And in case of failure, you can return to the idea with the cable, without losing money to buy equipment.

Setting up existing equipment
At first I decided to set up the D-LINK DIR-620 A1 - a router about which it is written so much that everyone can find for themselves several instructions and firmwares. I updated the stock firmware and found instructions that are similar to what I need to configure on the official website.
I do not exclude that I did something wrong, but after several attempts to configure the Client mode on this router using different factory firmware, I tried the DD-WRT firmware. I was not able to achieve a satisfactory connection. I decided to postpone the router and try to configure the D-LINK DAP-1150 \ RU first. There was no such complete instruction for the access point, but the interface is very similar to the original D-LINK DIR-620 A1 interface, in which I have already made settings several times. Thus, the first wireless connection of the bridge type was configured on the D-LINK DAP-1150 \ RU, updated to the latest version of the original firmware, according to the instructions for the D-LINK DIR-620.
Setup is simple and does not take much time.
This is the web interface of the access point. I press the middle button to adjust manually.

Go to the Network section to set the desired IP address and prevent the access point from distributing addresses (because there is already a DHCP server on the network).

Then I go to the WIFI section - the Client tab, where you need to find the desired network, specify the encryption during connection and the network key.
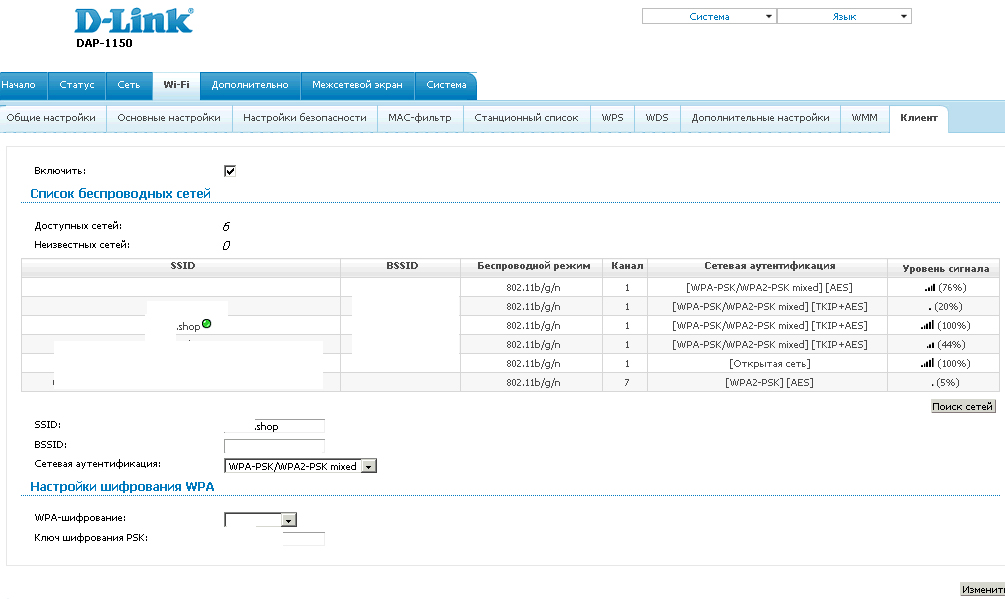

Go to the Network section to set the desired IP address and prevent the access point from distributing addresses (because there is already a DHCP server on the network).

Then I go to the WIFI section - the Client tab, where you need to find the desired network, specify the encryption during connection and the network key.

If you do everything correctly, do not forget to save the configuration, the access point connects to the existing WIFI network as a client. A computer connected to the LAN receives IP from a DHCP server and has access to the workshop network.
Equipment selection
When it came time to connect a second machine to the network, the D-LINK DIR-620 A1 was already used in another network segment (see below). So the question arose about choosing a wireless client.
Considered routers and access points. The selection criterion was the ability to configure as a client in standard firmware. I bought the TL-WR743ND - a low-cost TP-LINK access point that supports several options for connecting to a wireless network in standard firmware.
Installation of the purchased equipment
The access point was easy to install. Particularly pleased with the fact that the operation of the device in fact coincides with what is stated by the manufacturer (which cannot be said about D-LINK home routers). By a simple setup of the access point, which is described on the Internet many times (including in the instructions on the TP-LINK website), we connect the machine to the workshop network. The access point is fixed higher so that it is in direct view of the router to which it is connected.
Result
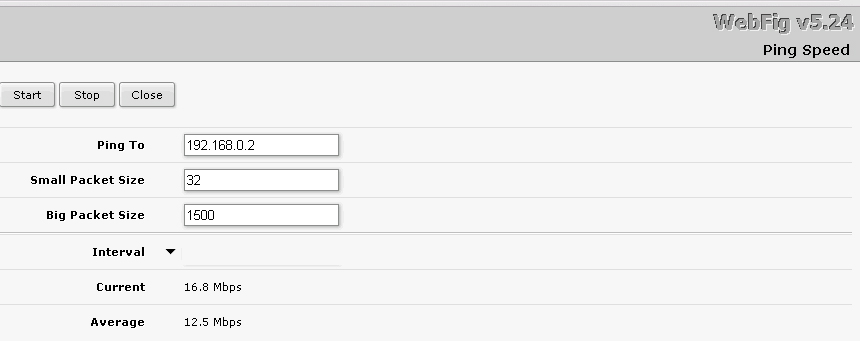
As a result, we have a couple of machines connected to a common network with minimal expenditure of money and installation time. The transmission speed over the radio channel was measured using the utility Mikrotik RB2011UAS-2HnD-IN router, to which all WIFI clients in the workshop are connected. It is enough to download small files to the machine several times per hour.
Expand


About the third network segment
Conditions
The building, which will be discussed, is divided into premises for the production and administrative complex. To the rest of the corporate data network ABK is connected using fiber optic links.
Between the workshops, the network is connected with a twisted pair cable intended for internal installation, four pairs of which are occupied by two telephone lines, and the remaining four are uplink for a small local area network of the production facility. The cable is fixed with knots tied to their supports. According to my calculations, the cable should have already broken, i.e. it is about to break, because Do not use internal cable for connecting buildings.
Scheme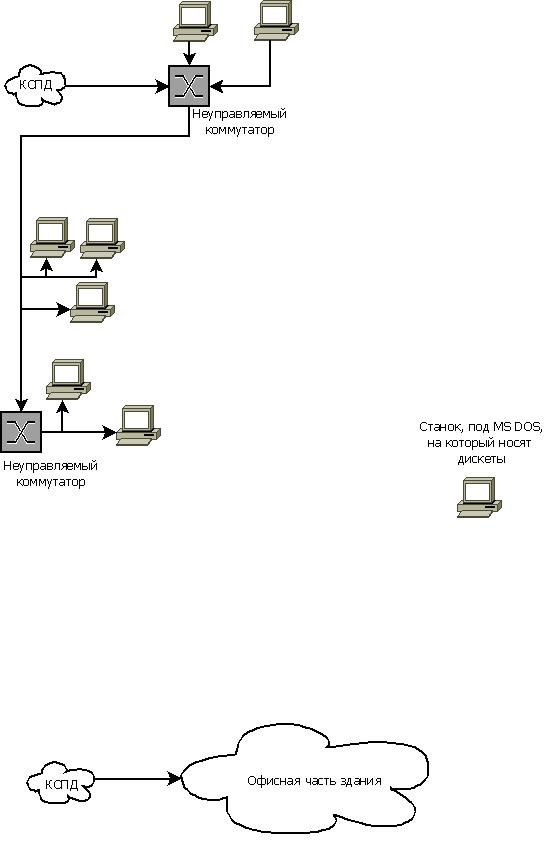

It is necessary to connect a small local network of the workshop with an ABK network; this is easier than making another high-quality connection between the buildings. In addition, it is necessary to connect a machine with MS DOS to which the tasks should be reset to the cash register system. Now on the machine tasks are on floppy disks.
Decision
The location of the means of production in the workshop is such that laying a cable from ABK to the machine and from ABK to one of the switches of the workshop will require much more cable than the line of sight when organizing a wireless bridge (about 120 m and 190 m, respectively). If you use a twisted pair, you need to install a switch, repeater or other data link layer device (an additional point of failure) somewhere in the workshop to maintain the standard for the maximum segment length.
Solution scheme

To reduce installation work to a minimum, I choose the option of organizing a WIFI-bridge, following the example of another workshop. The main WIFI router will be the Mikrotik RB2011UAS-2HnD-IN, and the clients of the D-LINK DIR-620 A1 with ZyXEL Keenetic and TP-LINK TL-WR743ND firmware.
Configure and set up the router as a base station
Separately, I must say that the cable broke a couple of days earlier than I planned to install. It was necessary in the morning to quickly configure the routers, install them in the shop. It all took about two hours. Of course, if I had not prepared the routers, I would have spent much more on installing the cable.
First, I configure the Router OS of the main router. In this example, I do not use many features that can be configured on the Mikrotik router. Perhaps someone would consider its use redundant, but its stability was important to me. For 4 thousand rubles, I did not find any access points or routers that could show the necessary reliability. Although for the money you can buy good home Internet centers ZyXEL, Asus.
Setting up a Mikrotik router as an AP
So, from the main menu I go to the IP-Addresses section . Correcting the default installation settings. Here you can create multiple addresses for the router. For each port, for example.

I save the settings and see this result.
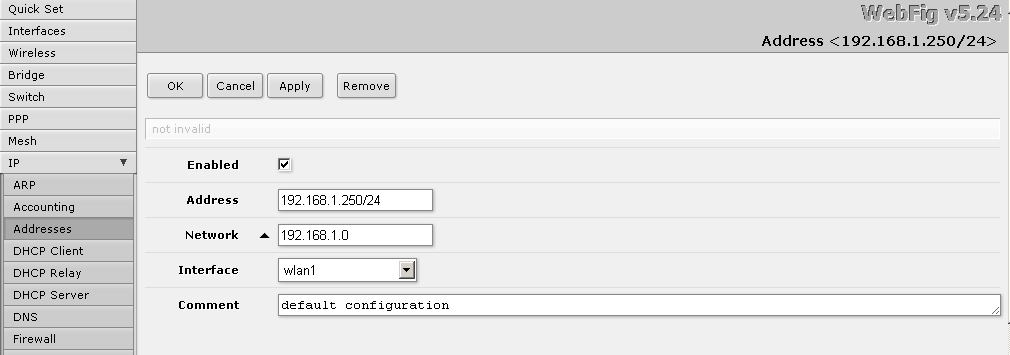
Then, I go to the DHCP Server section, where I delete the record, because in our network the second such server is not required.

To configure WIFI, go to the WIreless section, where we configure the interface.

Enter the SSID values of our network, select the channel and frequency parameters.
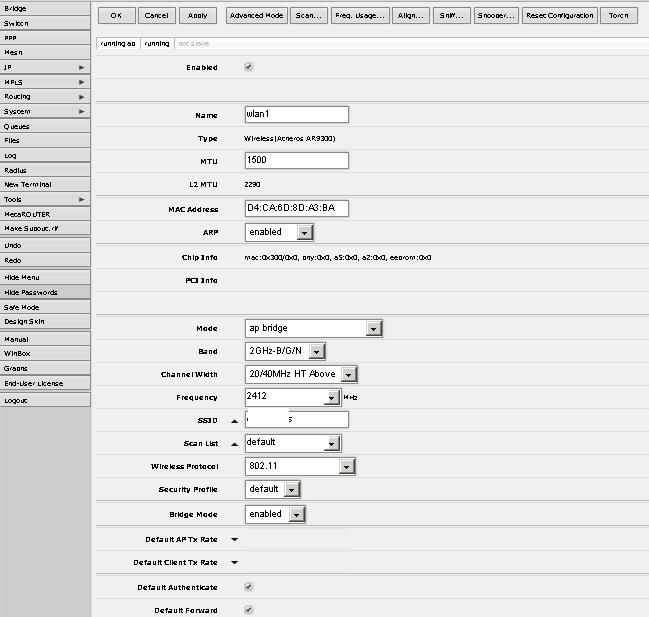
Then we switch to the Security Profiles tab, where we specify the network key and encryption settings.


I save the settings and see this result.

Then, I go to the DHCP Server section, where I delete the record, because in our network the second such server is not required.

To configure WIFI, go to the WIreless section, where we configure the interface.

Enter the SSID values of our network, select the channel and frequency parameters.

Then we switch to the Security Profiles tab, where we specify the network key and encryption settings.

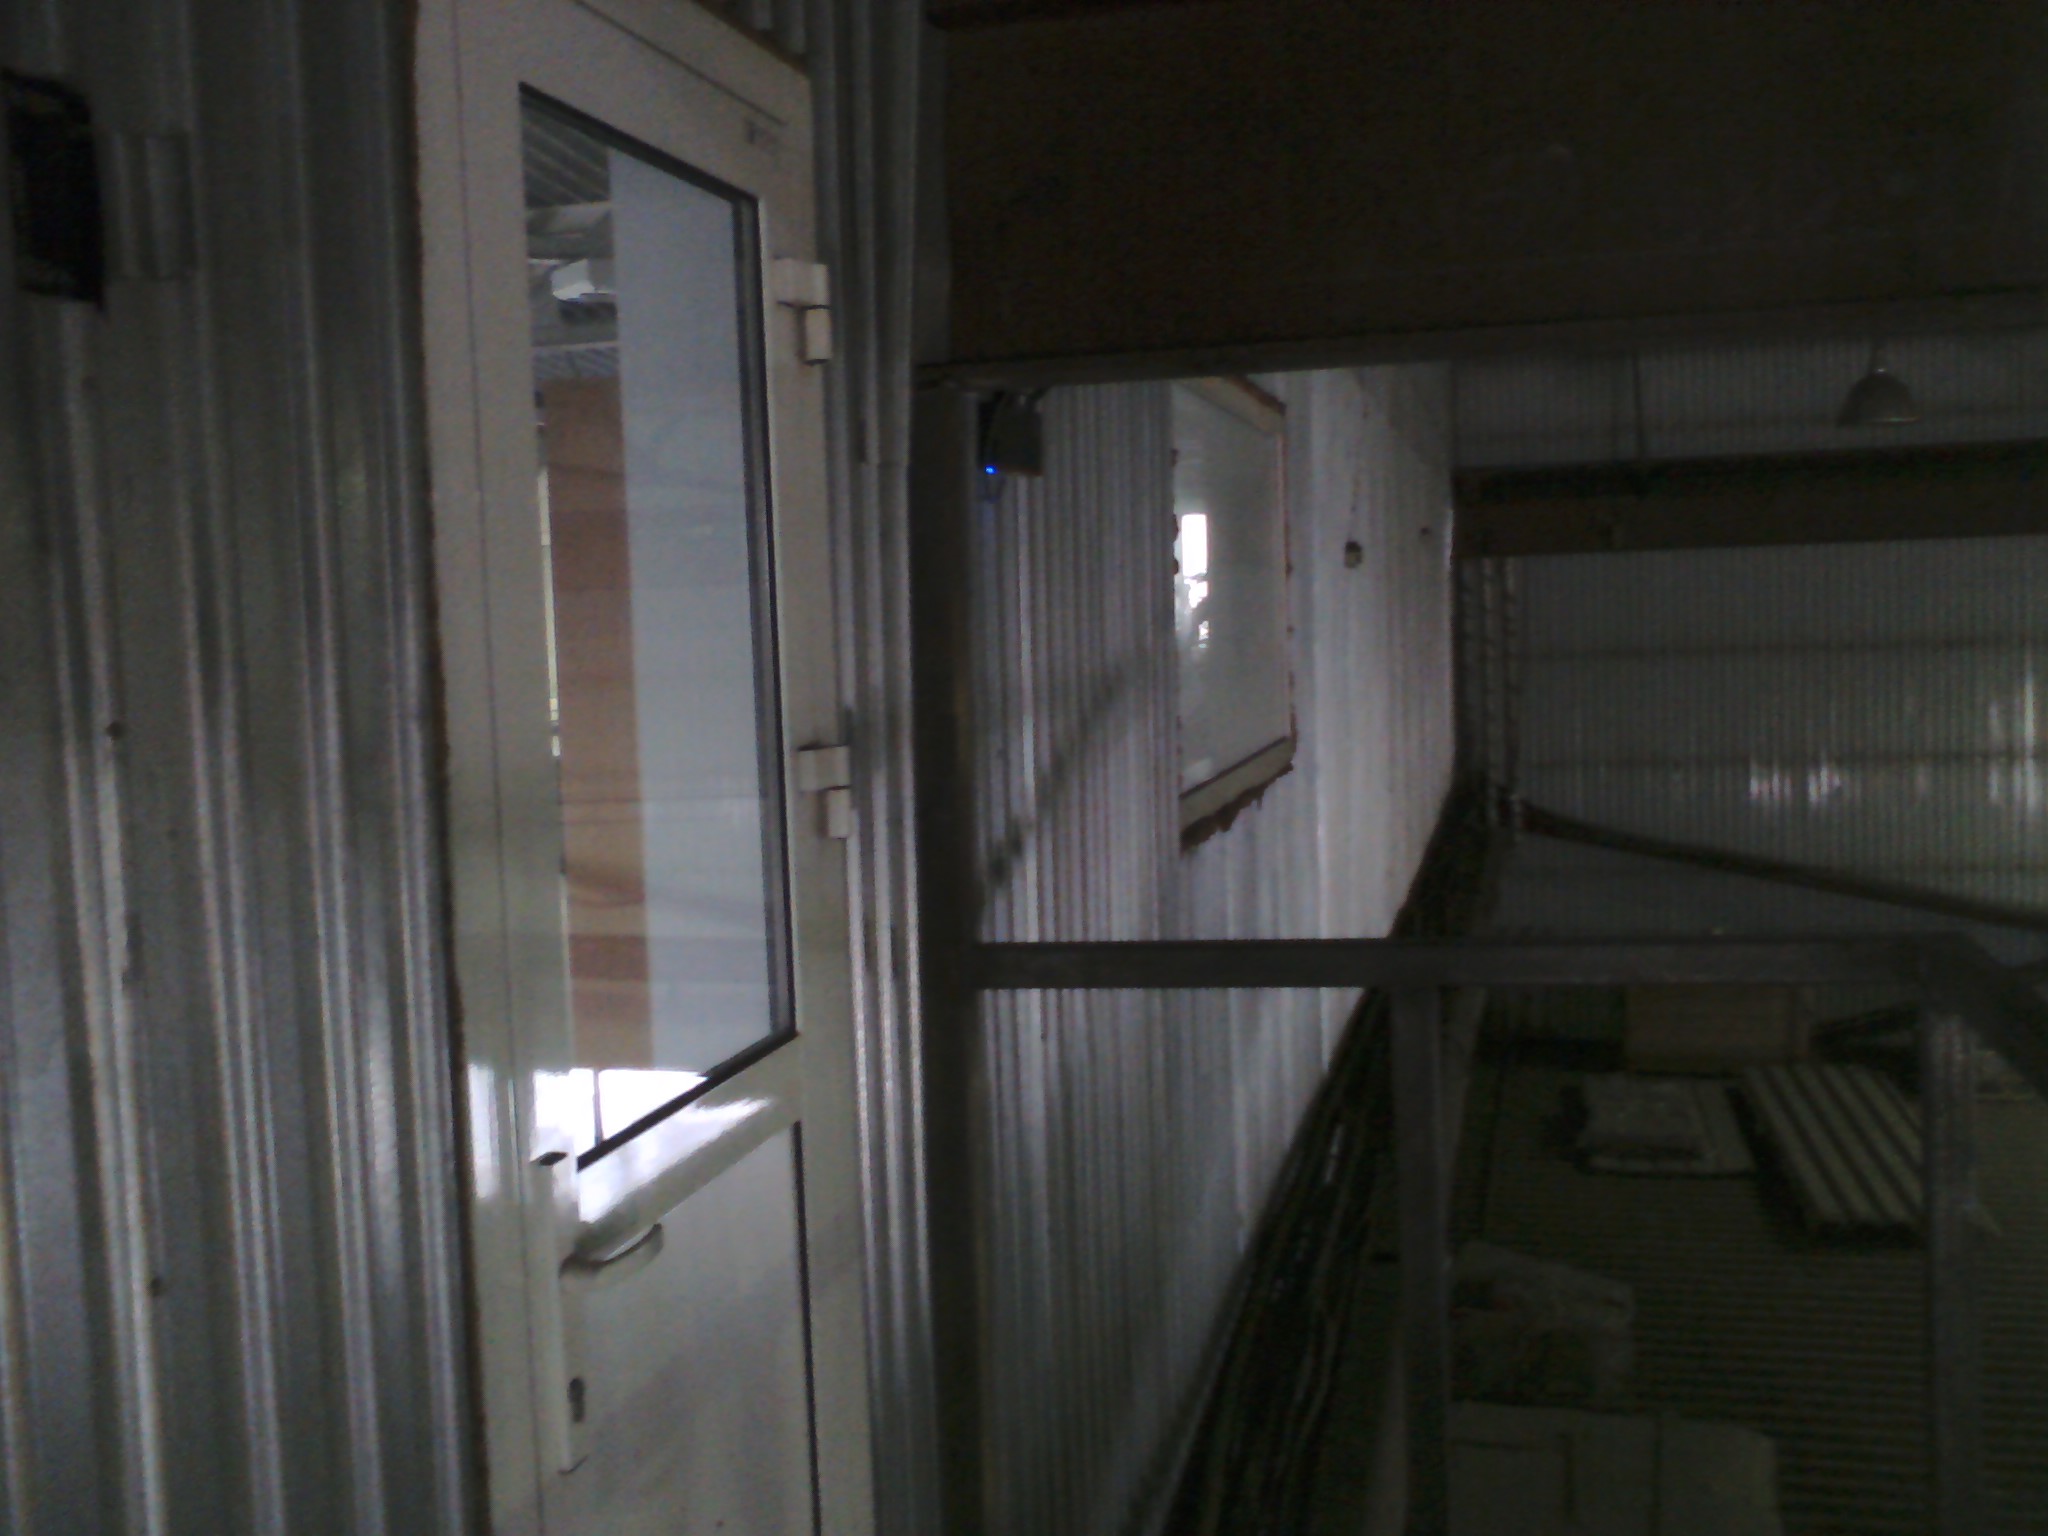
After setting, we fix the router on the wall of the balcony - where direct visibility to the objects we need will be ensured. This will require a network cable, thrown from the nearest switch and electricity. The room is dark, so the display of the router is clearly visible. This was useful for diagnostics six months after installation, when power was lost on the floor. The lack of indication was visible from afar.
Ugly photos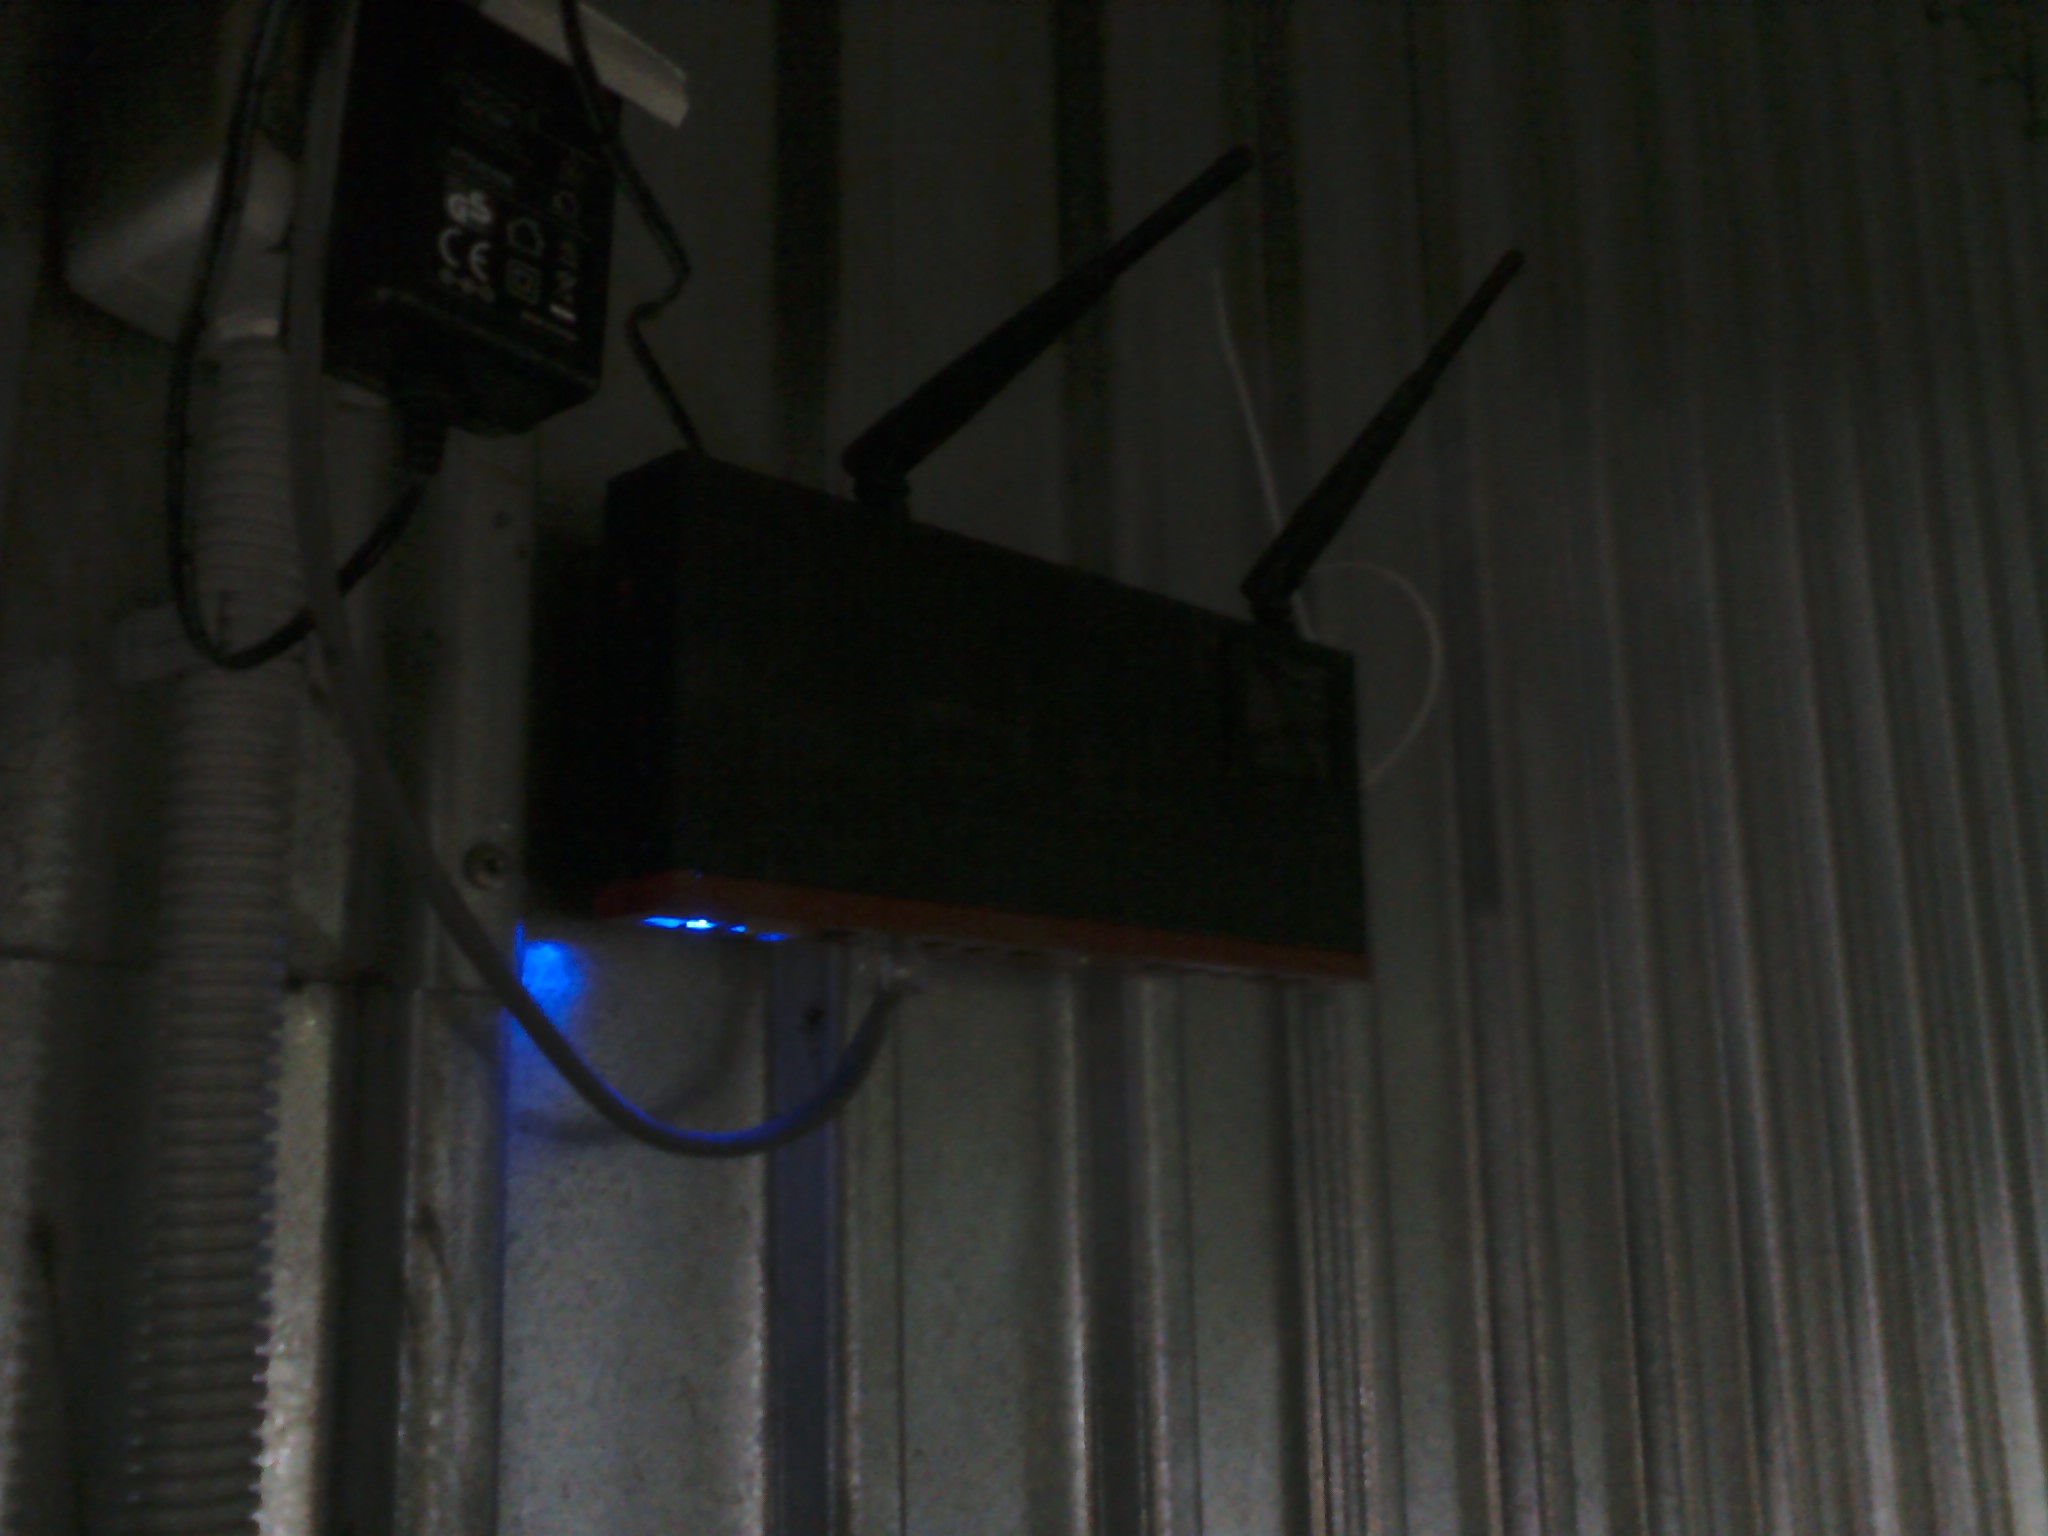


Configure the router as a client
WIFI-router D-LINK DIR-620 A1, which I could not configure with standard firmware and DD-WRT firmware, Open-WRT of various modifications (I think someone could), I requested in ZyXEL Keenetic using the instructions and files from the site deadc0de.ru. Just yesterday, I noticed that the site is not available. Very sorry. I downloaded the web pages from the Google cache.
Here is the instruction by deadc0de, which I used:
Firmware from web-interface DIR-620:
Go to the settings page (by default 192.168.0.1);
Choose System -> Software Update (System -> Firmware upgrade);
Click "Browse ...", select the firmware file dir-620-to - ***. Fwz;
Click "Update" (Update) and wait for the end of the firmware process;
Go to the web-interface of the router and make further settings.
But the link to the file. I managed to flash it simply and successfully, thanks to deadc0de. Keenetic is much more convenient than D-link in customization, I think.
Customization
To configure the router as a client, from the main menu, go to the System - Operating Mode section. Here I chose the wireless WIFI bridge mode.

Then go to the section Home Network - Networking , where I specify the ip-address and disable the DHCP server.

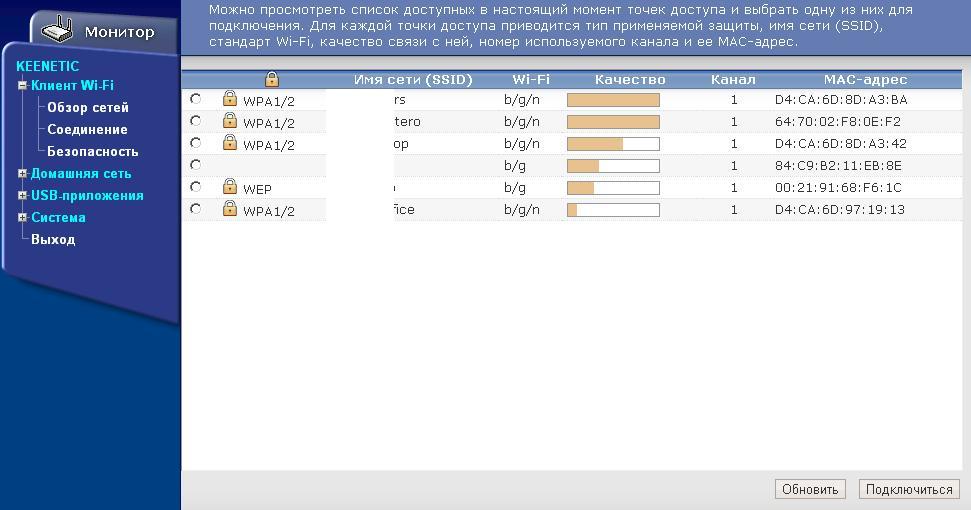
Getting down to setting up WIFI. In the WIFI Client - Networks section, you can view the signal strength of the nearest wireless networks, select the desired one.
In the window that opens, you can configure the connection settings.

In the Security section , I specify the network key and encryption. After that, the WIFI client is ready. It remains only to fix it higher in the field of view of the base station.


Then go to the section Home Network - Networking , where I specify the ip-address and disable the DHCP server.

Getting down to setting up WIFI. In the WIFI Client - Networks section, you can view the signal strength of the nearest wireless networks, select the desired one.

In the window that opens, you can configure the connection settings.

In the Security section , I specify the network key and encryption. After that, the WIFI client is ready. It remains only to fix it higher in the field of view of the base station.

Configure the access point as a client
To connect the DOS-machine to the network I used the TP-LINK TL-WR743ND access point, as in the first workshop. Setting up a WIFI client in this case was especially simple, because I set up this AP a second time in a week.
Photo of AP mounted on the wall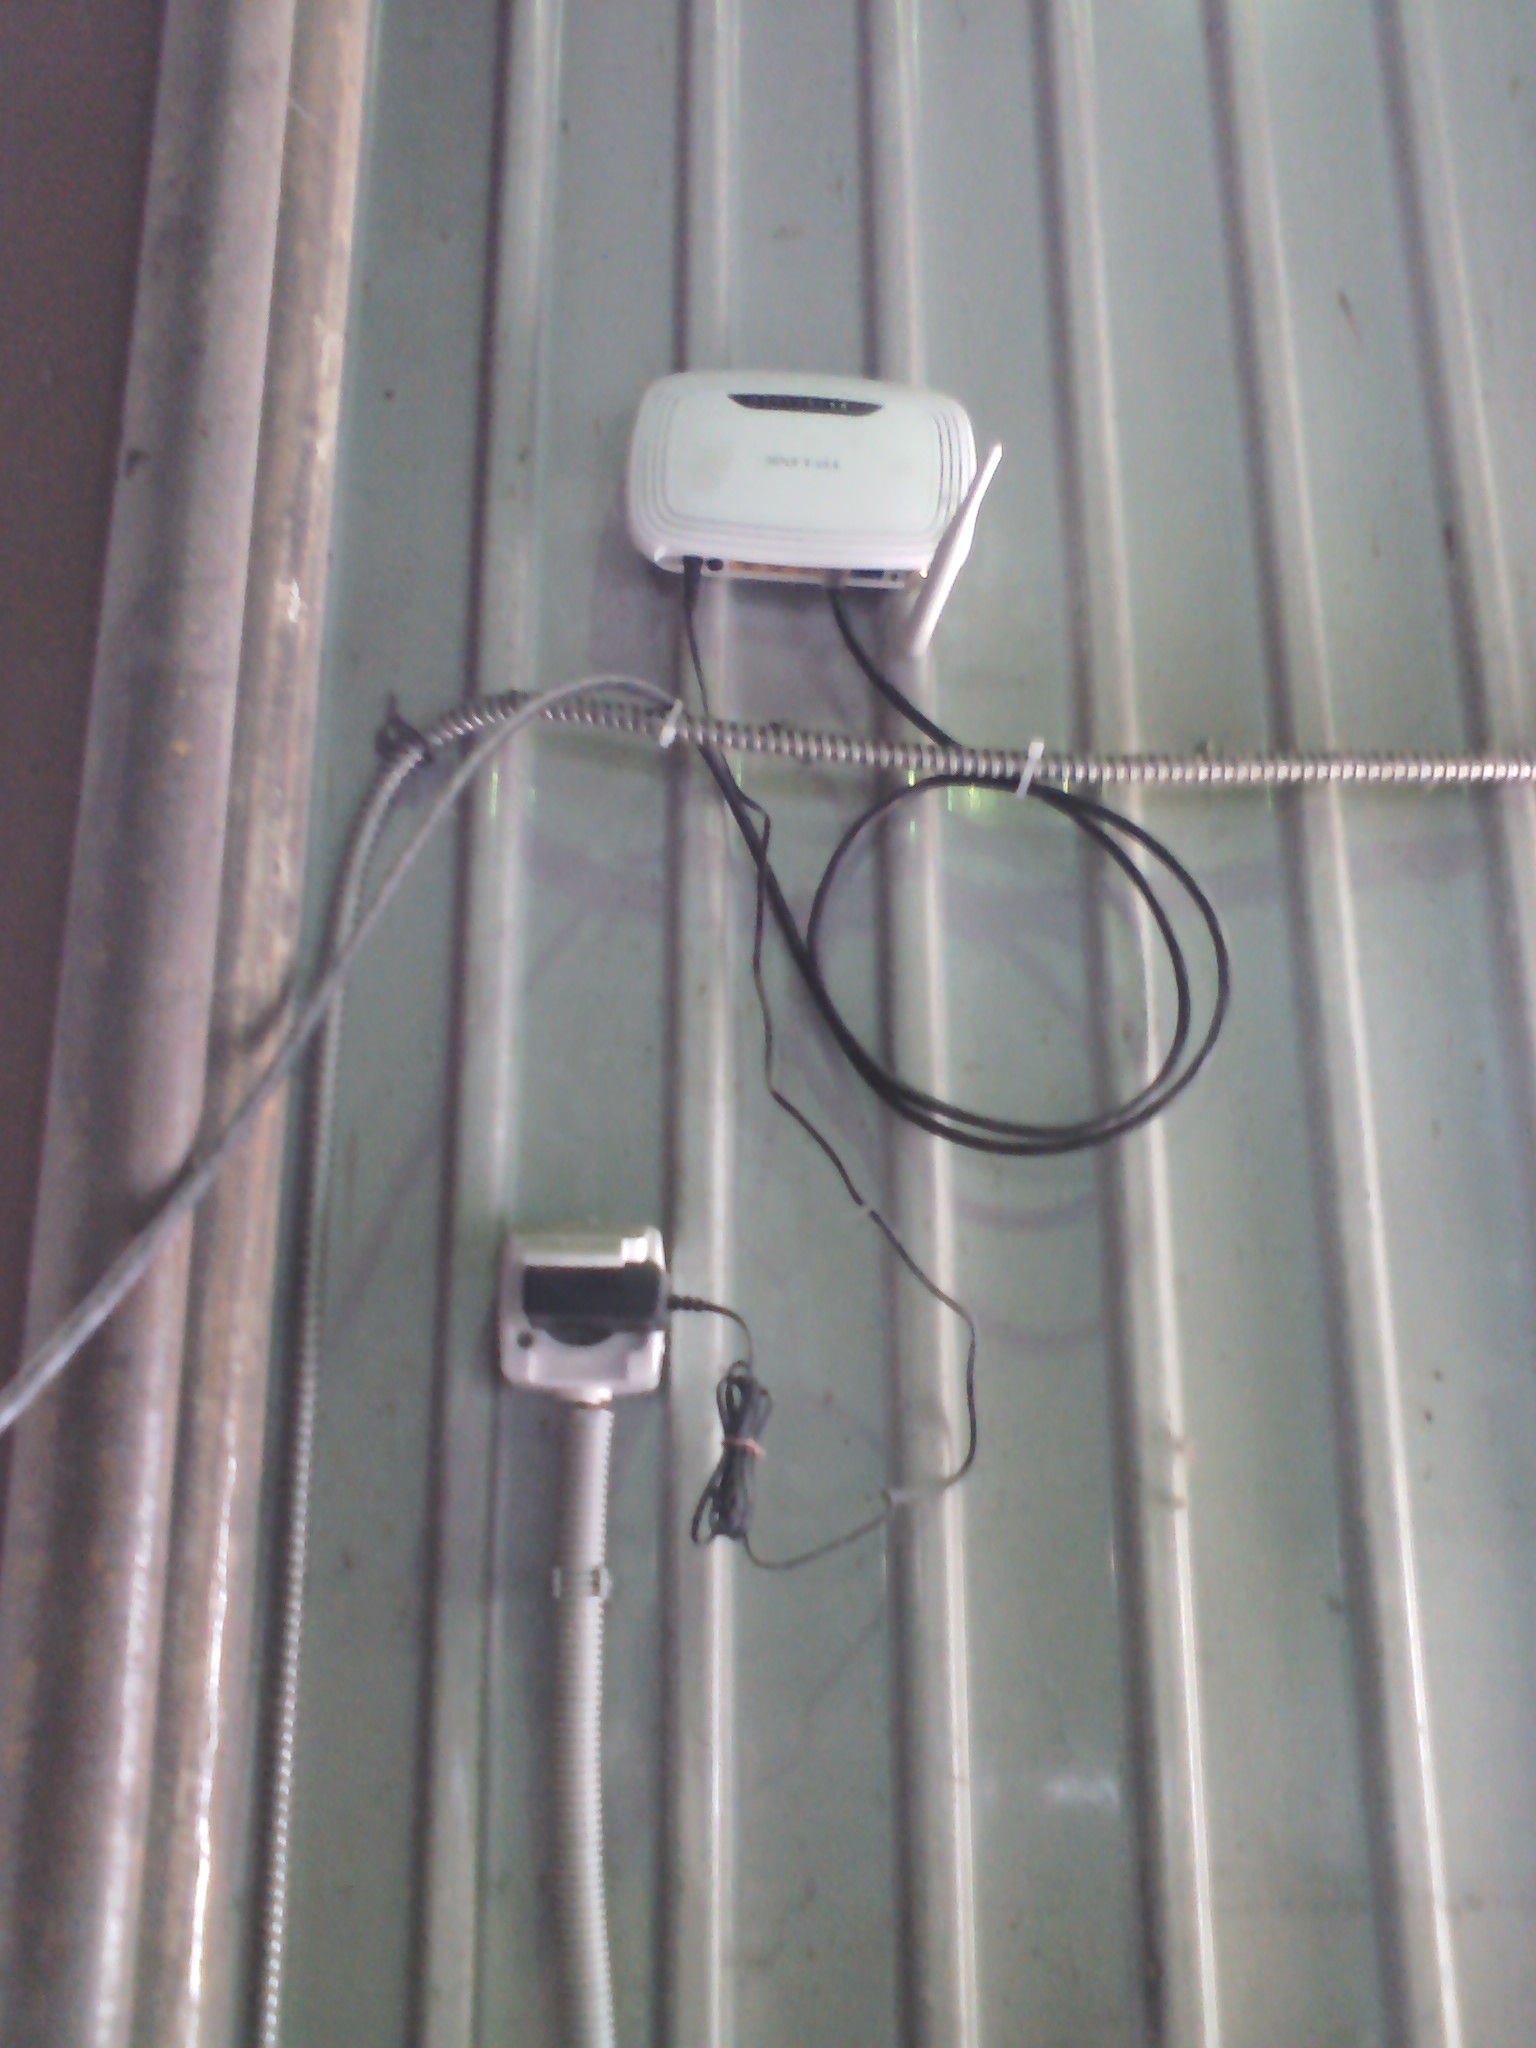

Result
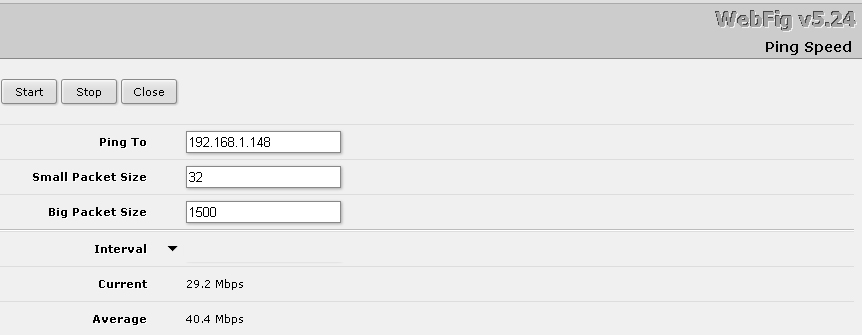
Both wireless bridges were fairly stable, directional antennas were not required. I measured the speed using the built-in utility of the Mikrotik router.
Speed measurement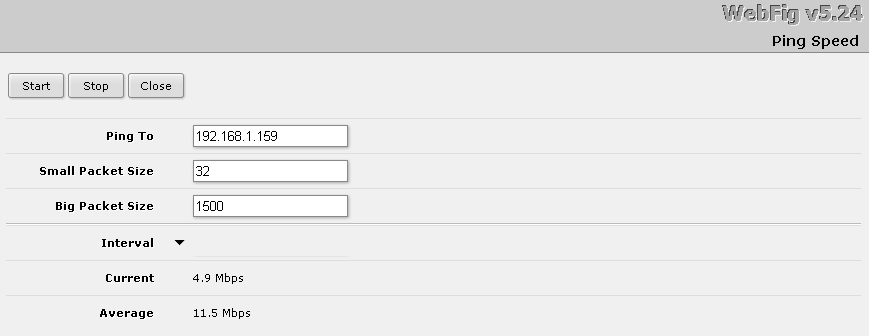


Source: https://habr.com/ru/post/193202/
All Articles