Minn Bitcoin on the Raspberry Pi and BFL 5GH / s miner
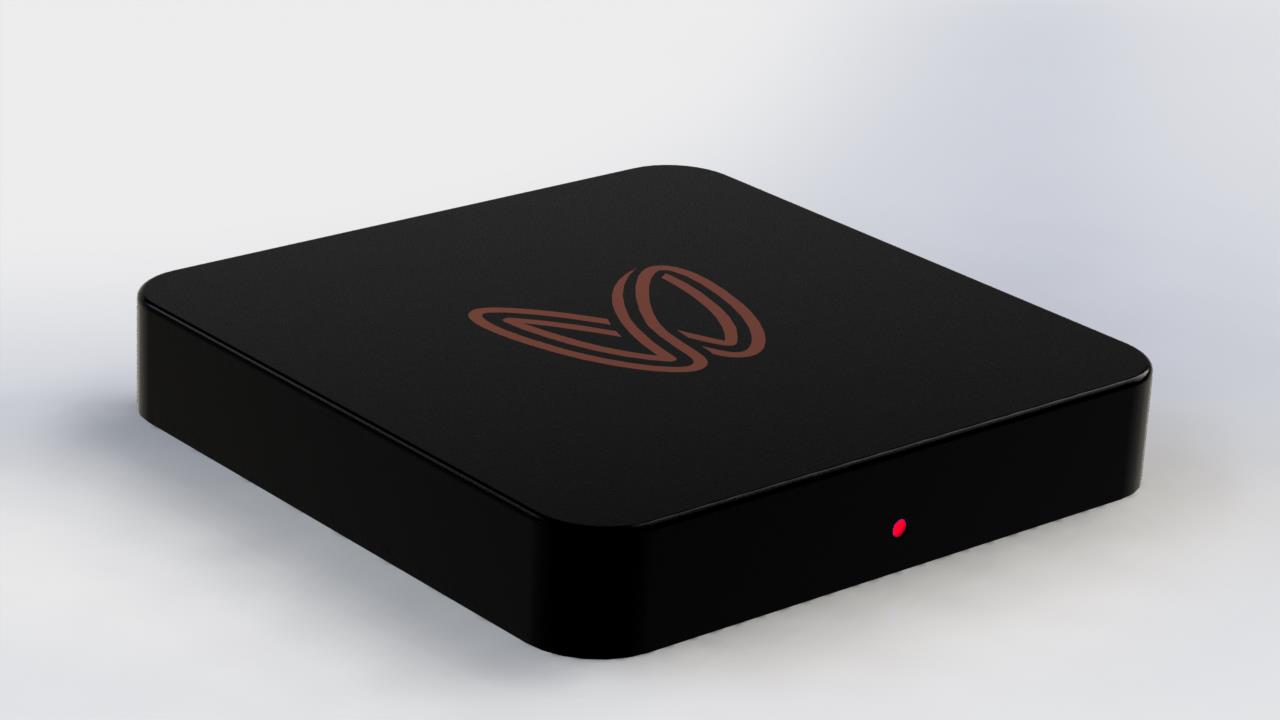
In the photo - Jalapeno, as it should have been originally.
Purchase.
Last November I pre-ordered Jalapeno at Butterfly Labs. They also had several other, more expensive miners, but my choice fell on this one because of the price of $ 150 + $ 38 for delivery to Russia. The characteristics indicated 4.5 GH / s - a huge performance for the money. For example, AMD Radeon 6990, which cost $ 700 at that time, produced only 750 MH / s, and consumed 10 times more electricity (375W vs. 30W). I was promised to send this device in January 2013.
Delivery.
Time passed, but the BFL kept pulling and pulling deadlines. Until March, I regularly checked their site, finding news about delays. Soon I completely forgot about my purchase, until I received a letter of happiness on July 26 with the track. After looking forward to the month, I finally took my device from the post office. Opening the box, I found that the device is different from the photos that were on the site. Miner has become much thicker, but it did not upset me at all. The heavy black box looked more reliable than the flat pancake that was in the photo. It turned out that the piece of iron did not fit into the old case, and it had to be changed. First of all, I climbed the site for the drivers, and, to my surprise, did not find the model I needed on the manufacturer’s website. Instead, it was BitForce 5 GH / s Bitcoin Miner, which apparently did not differ from mine. I did not understand whether Jalapeno was sent to me, but in a new building, or 5 GH / s miner. Or maybe this is the same device? In the documents that came with the parcel, 4.5 GH / s Jalapeno was listed, but in reality the device produced 5 GH / s. But first things first.
The first inclusion.
After downloading EasyMiner from the manufacturer’s website, I decided to put the device into action. I plugged in the power cable and plugged the USB cable into my computer. What was my surprise when my PC did not find the miner in the connected devices and did not react to it at all. For 15 minutes I poked wires, changed computers, but to no avail. I found that 2 LEDs are on my device. A quick search on the Internet gave no result. This device is completely absent any technical documentation. But I found out that the coolers on the device should turn on and make noise when the device is connected to the mains, which did not happen. I asked a question on the BFL forum, but never received an answer. I wrote to the caliper, and after a couple of days I received the answer that the burning LEDs mean a short circuit. I was asked to send the device back to replace it with a new one. I was quite upset. 10 months of waiting! Do you have to wait another 2-3? But the problem was solved by replacing the power supply. I stuck the power supply from the external hard drive, and heard the sweet noise of the fan. The native power unit was at 6 A, while the power supply from the hard drive was only at 1.5 A. The support service strongly advised me not to use my miner with this power supply, but I could not resist. The device started up and my PC immediately saw it. After registering in the mining pool and setting up the software, I proceeded to the most long-awaited - mining.
')
Mining
Productivity really corresponded to the declared. But I soon realized that it was not profitable to drive my main PC 24/7, and I noticed a small white box that was already dusty on my desk. It was the Raspberry Pi model B, which lay idle for a month.
Set in motion Raspberry Pi.
On the Internet, I found 2 guides on using the Raspberry Pi to control ASIC miners from the BFL. The first guide used MinePeon - a Linux distribution created specifically for mining Bitcoin on Raspberry Pi. The second guide used Arch Linux. Below I will briefly present the steps from the latter, which I repeated. Some steps in the first guide were unnecessary (for example, the Internet worked for me immediately after unpacking the image on a USB flash drive), and the author accidentally missed some things.
1) Download the latest version of Arch Linux from here: www.raspberrypi.org/downloads
2) We write the image on the SD card. If you are using Windows, this utility will help you: sourceforge.net/projects/win32diskimager . In the case of Linux or Mac OS X, the image can be written using standard tools.
3) Next, connect the Raspberry Pi to power, monitor and the Internet. I powered it from the USB port of my router, which was quite enough. You can also connect the miner himself at this step. All the guides said that you need to use a USB hub with additional power, but everything works fine for me without it.
4) Turn on the device and enter the login: root, password: root. Change the password with the
passwd command.Synchronize the list of packages:
pacman –Sy and install the ones we need:pacman –S gcc autoconf libtool curl ncurses pkg-config yasm make libusb lynx screen5) Download cgminer:
lynx ck.kolivas.org/apps/cgminer lynx ck.kolivas.org/apps/cgminer or wget ck.kolivas.org/apps/cgminer/3.4/cgminer-3.4.1.tar.bz26) Unpack the archive:
tar -xvf cgminer-3.4.1.tar.bz2 and tar -xvf cgminer-3.4.1.tar.bz2 / installcd cgminer-3.4.1./configure --enable-bflsc && make && make installIt takes about 10 minutes.
7) Check the cgminer.
cgminer -o poolAddress -u username -p passwordThe address of the pool is entered in the format: IP / URL: Port.
8) Write a script to run:
nano -w /etc/startscript.shPaste:
#!/bin/shsleep 1mscreen -S cgminer -d -m /usr/local/bin/cgminer -o poolAddress -u username -p password 2> /root/mining.logsleep 100000dCtrl + O, Enter, Ctrl + X
We set file permissions:
chmod + x /etc/startscript.sh
9) Create a service:
nano -w /etc/systemd/system/mining.servicePaste:
[Unit]Description=MiningDocumentation=man:syslog-ng(8)[Service]ExecStart=/etc/startscript.shStandardOutput=null[Install]WantedBy=multi-user.targetWe remain:
Ctrl + O, Enter, Ctrl + X
We set file permissions:
chmod +x /etc/systemd/system/mining.serviceInclude:
systemctl start miningsystemctl enable mining10) That's it. Mining will start at boot.
11) For SSH access:
pacman -S opensshsystemctl start sshdsystemctl enable sshd.serviceNow you can check the status by typing
screen –r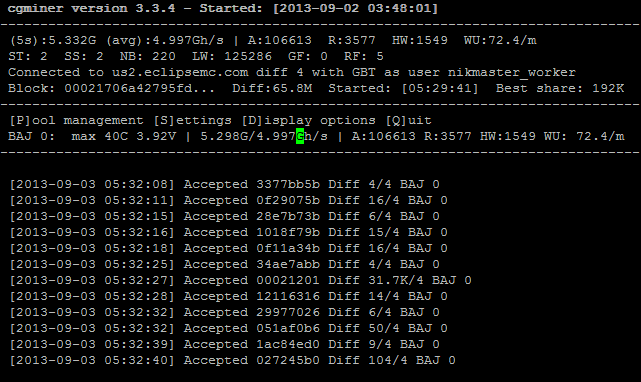
What have we achieved?
Miner works 24/7 without the need to keep a full PC on.
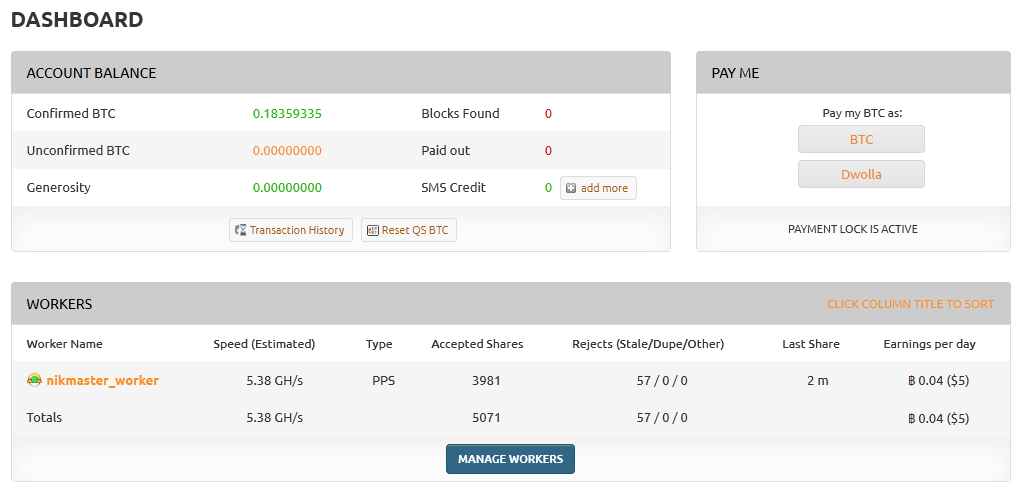
During the day about 0.04 BTC is mined, which is approximately equal to $ 5. Power consumption: 30 W miner + 3.5 W Raspberry Pi * 24 hours = 0.804 kW per day, which is quite good. With the current complexity and price of bitcoin, the cost of the device with delivery pays off in 37-38 days.
UPDATE:
User mr_Flagman suggested that there might be problems when using cgminer with several miners at once. One of the possible solutions to this problem: run cgminer-a for each device with a separate instance for each device with different employees, choosing the device to be used with the help of the --usb 1: * attribute (for example: --usb 1:12 and --usb 1: 9) . More information about this attribute can be found in the documentation for cgminer. (Advanced USB options).
Source: https://habr.com/ru/post/192332/
All Articles